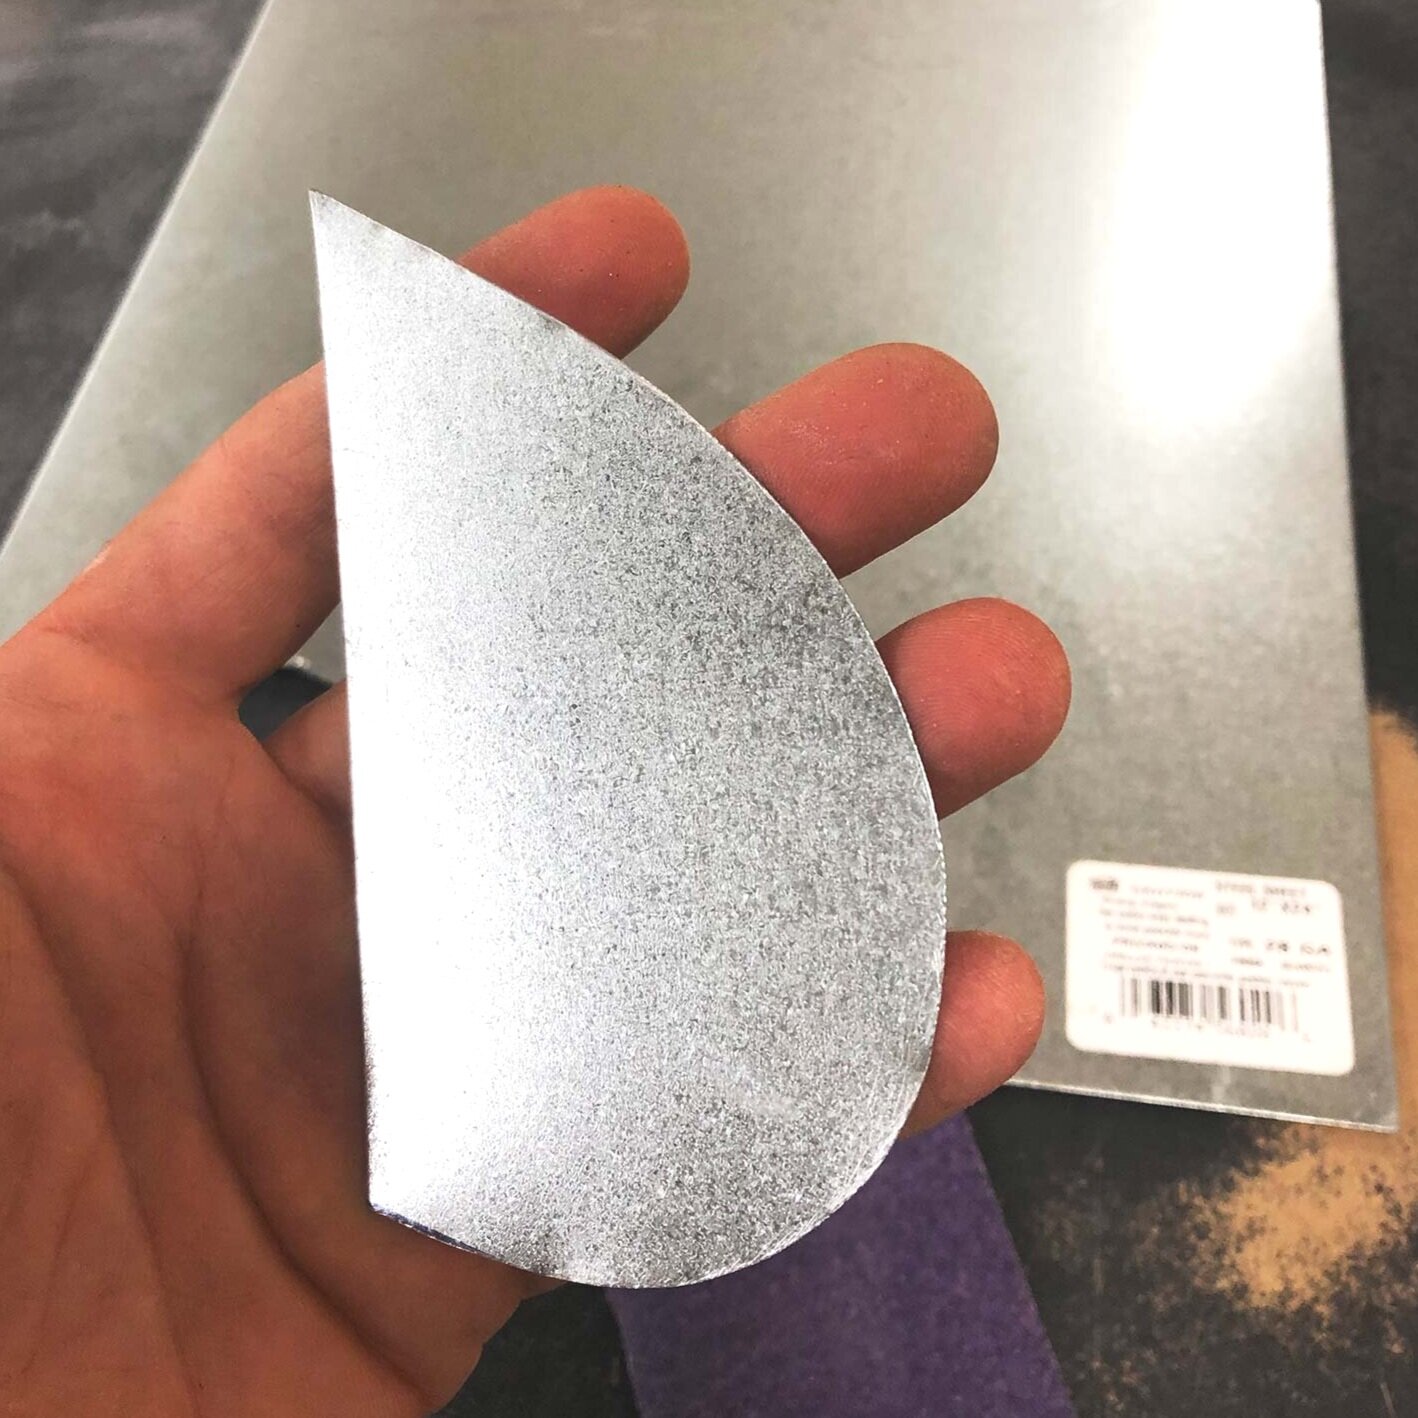
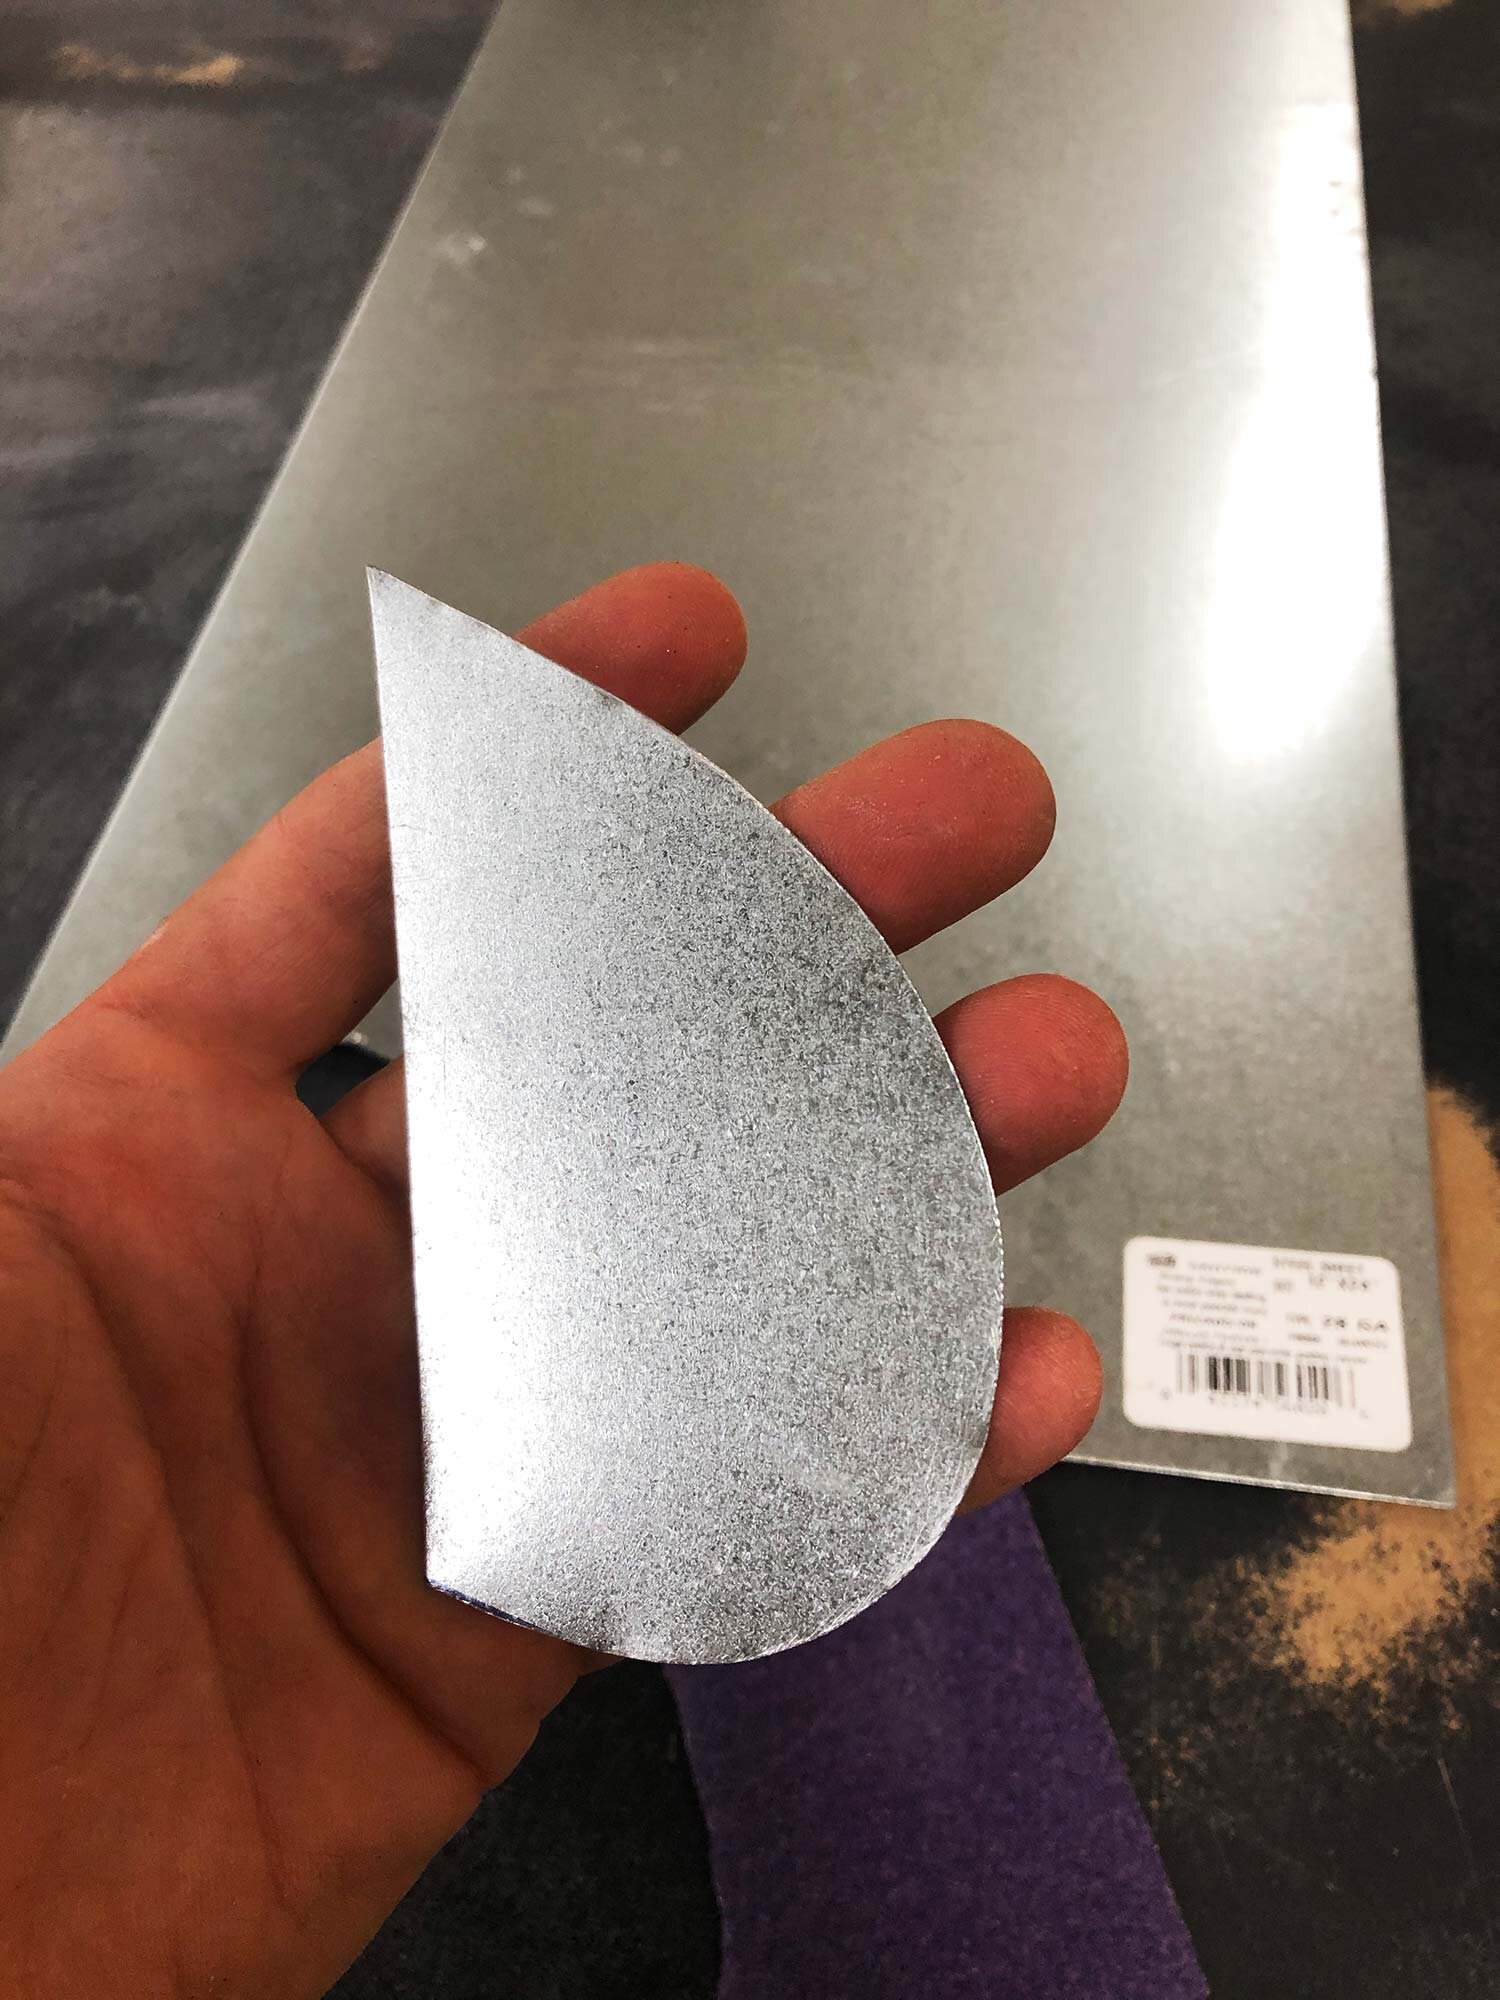
A handmade, metal pottery rib.
Making your own tools is a great way to get exactly what you need, and a metal rib is one of the easiest tools to make. For a DIY metal pottery rib of any shape, all you need is a small sheet of metal and wire snips. My favorite shape is the flat-edged teardrop shape with a point pictured above, but you can make any shape.
To make this DIY metal pottery throwing rib, you will need:
24 or 28 gauge galvanized steel sheet. This thickness has the right mix of hardness and flexibility. You can buy galvanized steel at your local hardware store or click here to shop Amazon for an affordable 12” x 12” sheet.
Metal Snips, such as aviation snips. (Shop aviation snips at Amazon)
Marker, such as a Sharpie
Sandpaper. 3M Pro-Grade sandpaper is my favorite (shop at Amazon)
Rib template, use an old rib or make a cardstock template
The galvanized steel is flexible but harder, resulting in a more useful rib that that which comes with a basic pottery tool kit. (Check out our review of the best beginner pottery tools here.) The galvanized steel also stays relatively rust free, if you keep your tools clean and dry.
These homemade ribs were introduced to me many years ago when I was first studying pottery. I can’t imagine using any other rib to get just the perfect curve in a bowl and the pointed side is super handy for cleaning up the foot or adding a decorative notch. I also use these tools to remove the slip from the outside of pots, and to shape the inside of a bowl. They also make great ribs for hand building. I occasionally use wood or plastic ribs for throwing, but this metal rib is my go-to pottery workhorse.
Make a Metal Rib: Step by Step
Step 1:
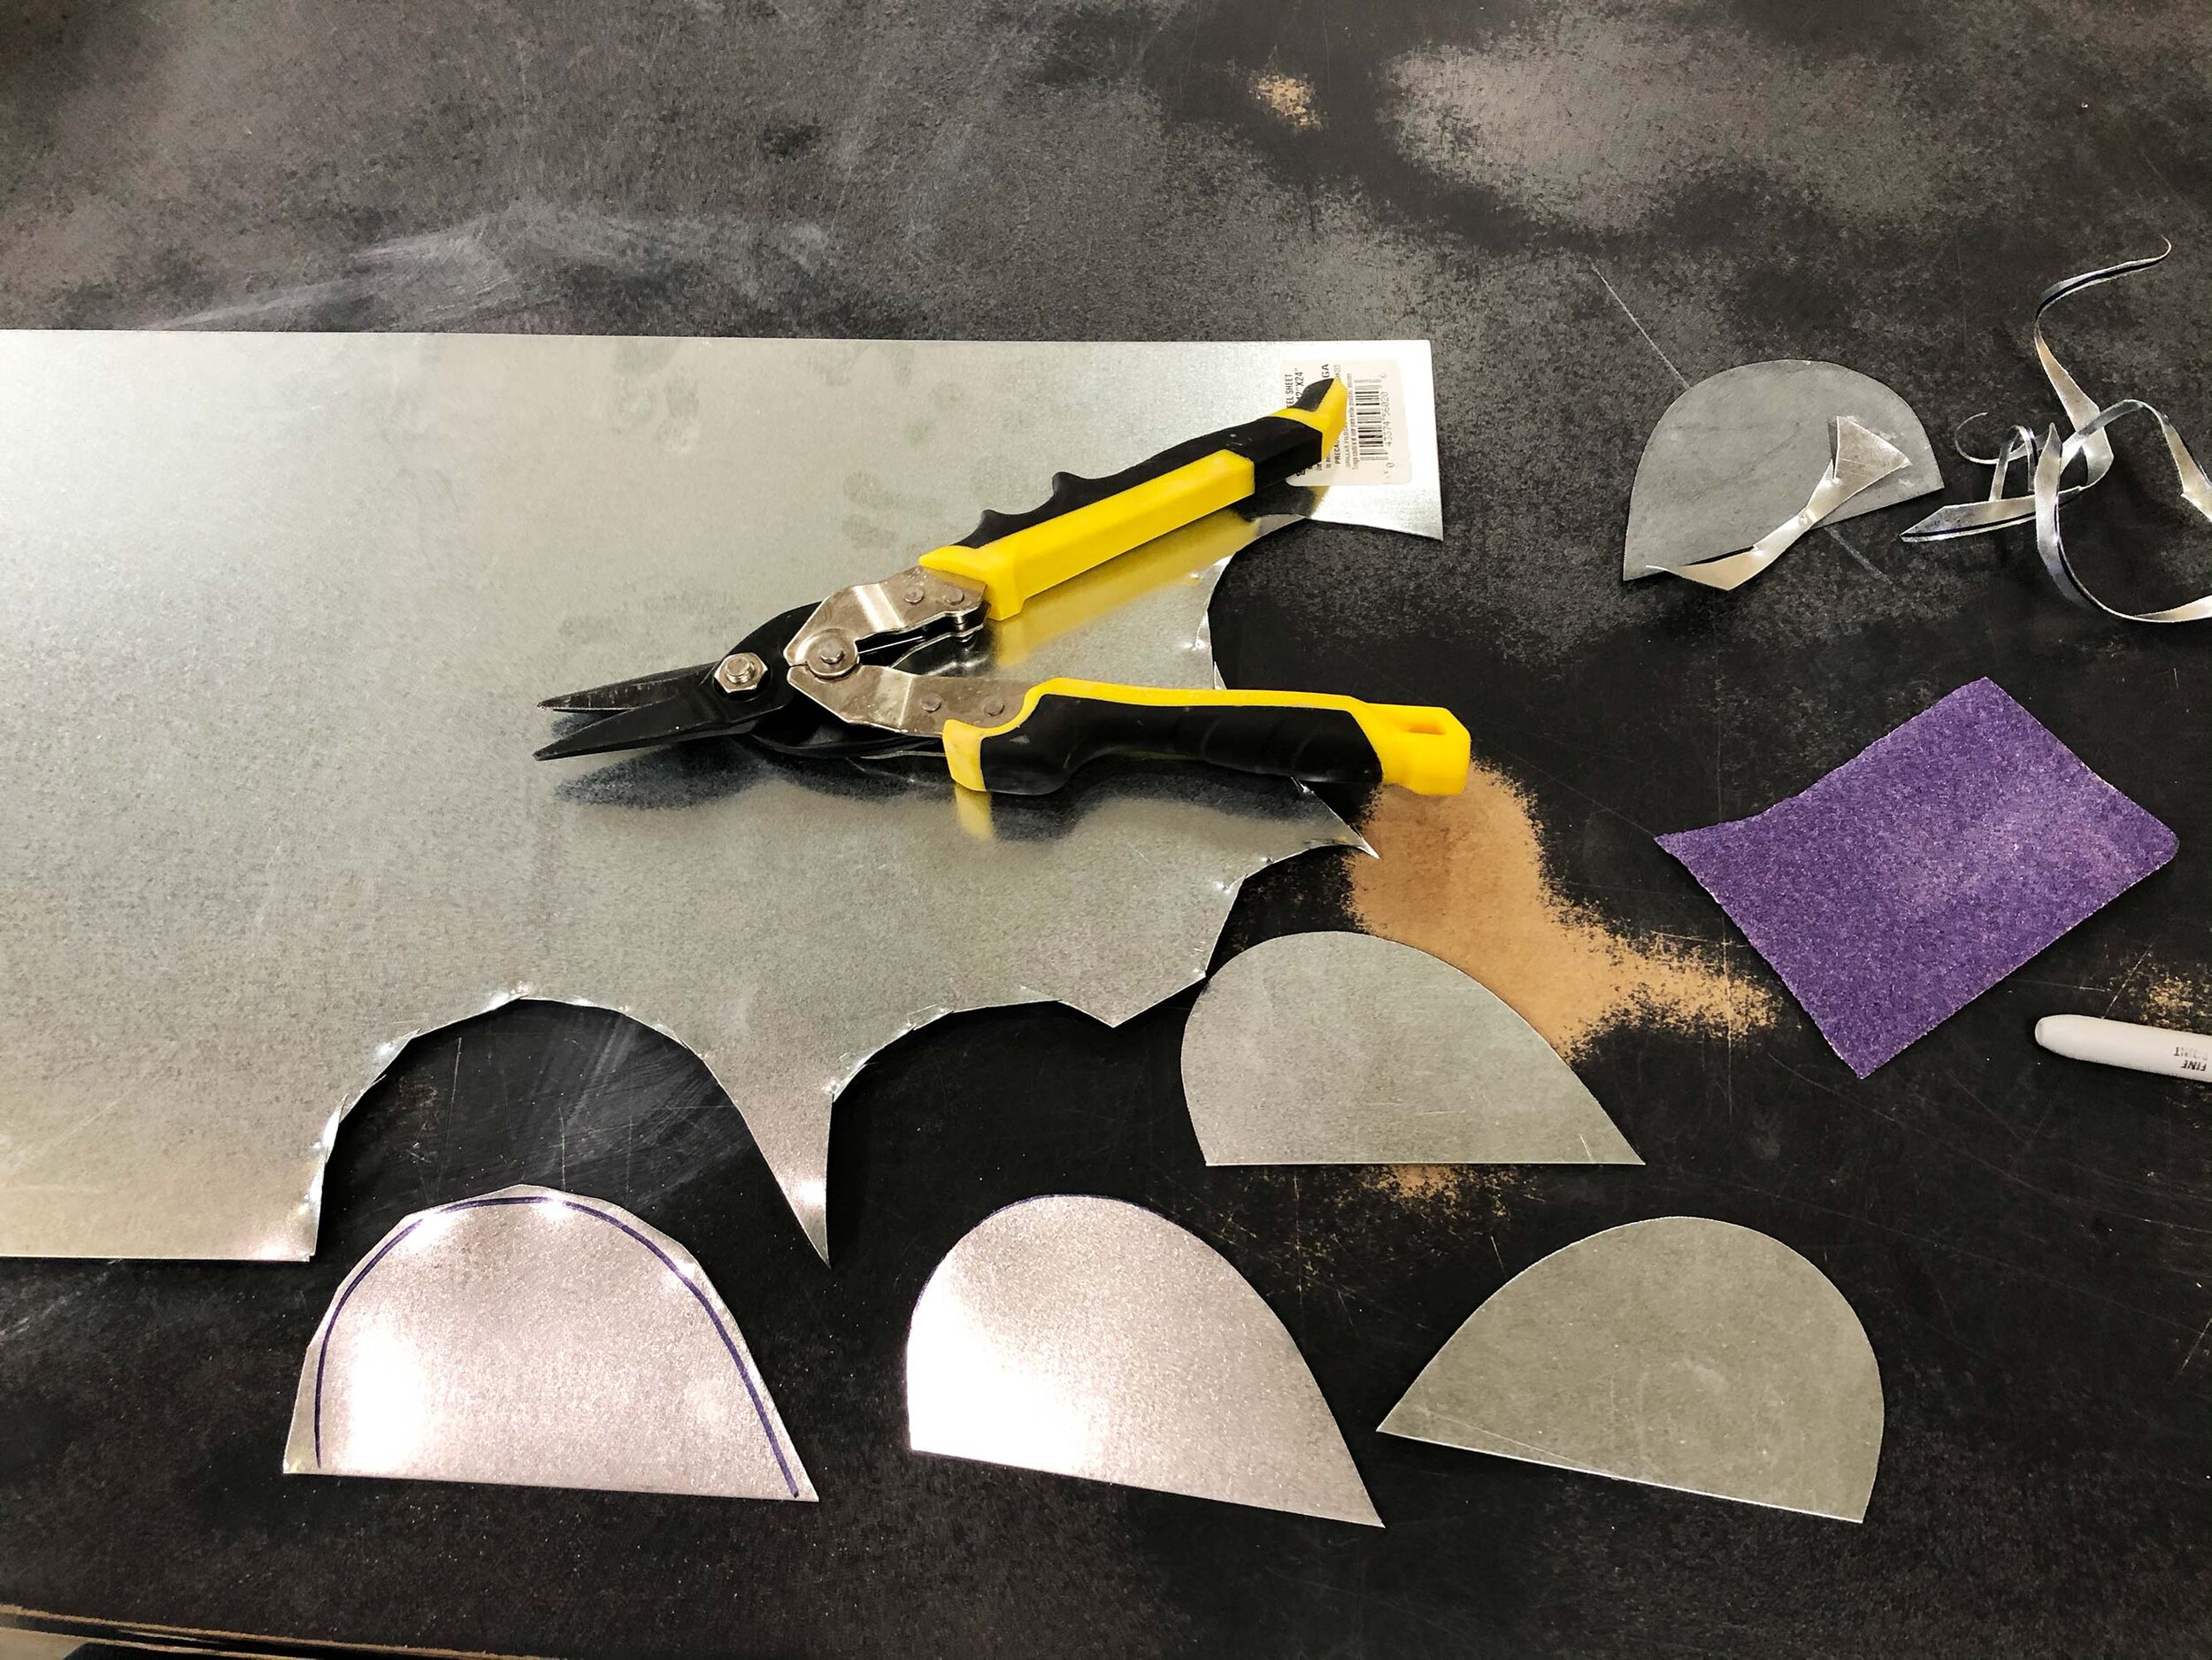
Gather your materials. You’ll need a piece of 24 or 28 gauge galvanized steel, metal snips, a marker, sandpaper and a template. Links to order materials online are above.


Here’s a close up of the label on the metal sheet. It’s a 1 foot x 2 foot, 28 gauge sheet of galvanized steel.
Step 2:
Trace the template outline with your marker.

Step 3:

Make a rough cut of the rib. It’s easier to make the more exact cuts on a second pass with the snips.
Step 4:
Make a second cut to get the exact shape you want. It’s ok to make multiple cuts if you want to alter the shape.

Step 5:
Sand any burrs or rough edges.

Step 6:
Congrats! You have a new rib. Time to throw awesome pots.
Step 7:
Make more ribs! Your friends could all use one. Or make a bunch of different shapes. Small ribs, big ribs, whatever you need.

What’s your favorite rib? Have you ever made your own tools? Leave a comment below.