• >> See all Pottery Wheel Posts
    • Pottery Wheel Buyer's Guide
    • Tabletop Pottery Wheels
    • Pottery Wheel Comparison Chart
    • Best Pottery Wheel Stools
    • Brent Wheels Buyer's Guide
    • Nidec-Shimpo Wheels Buyer's Guide
    • Best Pottery Wheel Bats
    • Best Throwing Sponges
    • Pottery Aprons
    • >> See all Tool Reviews
    • Gift Guide for Potters
    • Best Masks
    • Best Aprons
    • Best Scales
    • Banding Wheels
    • Best HEPA Vacuum
    • Best Wet Polishers
    • Cleanup Tools
    • Sandpaper and Abrasives
    • Best Glaze Mixing Tools and Accessories
    • Handheld Extruder Buyer's Guide
    • Tools for Home and Studio
    • Cut Off Wire
    • Hand Creams for the Studio
    • Best Tools for Pottery Beginners
    • Heavy Duty Cleanup Sponges
    • >> See all Glaze posts
    • Cone 6 Glossy Clear Glaze
    • Cone 6 Milky Clear Glaze
    • Cone 6 Ultramarine Blue
    • Cone 6 Lava Glaze Silicon Carbide Grit Tests
    • Cone 6 Bisque Crackle Slip
    • Cone 6 Pussy Willow and Blueberry Hill glazes
    • Cone 6 Cobalt Blue
    • Cone 6 Kiln Wash
    • Spectrum Underglaze Cone 6 Test Tiles
    • AMACO LUG Underglaze Cone 6 test tiles
    • AMACO Velvet Underglaze cone 6 test tiles
    • Speedball Underglazes Cone 6 Test Tiles
    • >> See all How-To posts
    • Mix a Ceramic Glaze from Scratch
    • How to Reclaim Clay in a Small Studio
    • Make Colorful Pancake Paintings
    • Make a Grinding Disc for Your Wheel
    • Make a Cut Off Wire for Wedging Tables
    • Eliminate Ceramic Slop Bucket Odor
    • Make a Simple Booklet
    • Use and Clean Up Wax Resist
    • Make a Metal Pottery Rib
    • Make a Plastic Pottery Rib
    • >> See all Painting and Drawing
    • Gift Guide for Painters
    • Colored Pencil Buyer's Guide
    • Best Chunky Colored Pencils
    • Best Mixed Media Sketchbook
    • Best Black Paper Sketchbooks and Drawing Pads
    • Best Black Acrylic Gesso
    • >> See all Inspiration posts
    • Georgia O'Keeffe on Making "Ordinary Paintings"
    • John Baldessari on Cheap Art
    • Louise Nevelson on Making Art
    • Matisse on Drawing Trees
    • Plato on the Role of Potters
    • Ceramic Textbooks and Guidebooks
    • Centering by M. C. Richards
    • Shoji Hamada on Making Pots
    • A Potter's Workbook by Clary Illian
    • Roger Herman Ceramics monograph
    • Ben Okri: A Time for New Dreams
    • About
    • Privacy Policy
Menu

The Studio Manager

Street Address
City, State, Zip
Phone Number

Your Custom Text Here

The Studio Manager

  • Pottery Wheels
    • >> See all Pottery Wheel Posts
    • Pottery Wheel Buyer's Guide
    • Tabletop Pottery Wheels
    • Pottery Wheel Comparison Chart
    • Best Pottery Wheel Stools
    • Brent Wheels Buyer's Guide
    • Nidec-Shimpo Wheels Buyer's Guide
    • Best Pottery Wheel Bats
    • Best Throwing Sponges
    • Pottery Aprons
  • Tools
    • >> See all Tool Reviews
    • Gift Guide for Potters
    • Best Masks
    • Best Aprons
    • Best Scales
    • Banding Wheels
    • Best HEPA Vacuum
    • Best Wet Polishers
    • Cleanup Tools
    • Sandpaper and Abrasives
    • Best Glaze Mixing Tools and Accessories
    • Handheld Extruder Buyer's Guide
    • Tools for Home and Studio
    • Cut Off Wire
    • Hand Creams for the Studio
    • Best Tools for Pottery Beginners
    • Heavy Duty Cleanup Sponges
  • Glazes
    • >> See all Glaze posts
    • Cone 6 Glossy Clear Glaze
    • Cone 6 Milky Clear Glaze
    • Cone 6 Ultramarine Blue
    • Cone 6 Lava Glaze Silicon Carbide Grit Tests
    • Cone 6 Bisque Crackle Slip
    • Cone 6 Pussy Willow and Blueberry Hill glazes
    • Cone 6 Cobalt Blue
    • Cone 6 Kiln Wash
    • Spectrum Underglaze Cone 6 Test Tiles
    • AMACO LUG Underglaze Cone 6 test tiles
    • AMACO Velvet Underglaze cone 6 test tiles
    • Speedball Underglazes Cone 6 Test Tiles
  • How To
    • >> See all How-To posts
    • Mix a Ceramic Glaze from Scratch
    • How to Reclaim Clay in a Small Studio
    • Make Colorful Pancake Paintings
    • Make a Grinding Disc for Your Wheel
    • Make a Cut Off Wire for Wedging Tables
    • Eliminate Ceramic Slop Bucket Odor
    • Make a Simple Booklet
    • Use and Clean Up Wax Resist
    • Make a Metal Pottery Rib
    • Make a Plastic Pottery Rib
  • Painting
    • >> See all Painting and Drawing
    • Gift Guide for Painters
    • Colored Pencil Buyer's Guide
    • Best Chunky Colored Pencils
    • Best Mixed Media Sketchbook
    • Best Black Paper Sketchbooks and Drawing Pads
    • Best Black Acrylic Gesso
  • Inspiration
    • >> See all Inspiration posts
    • Georgia O'Keeffe on Making "Ordinary Paintings"
    • John Baldessari on Cheap Art
    • Louise Nevelson on Making Art
    • Matisse on Drawing Trees
    • Plato on the Role of Potters
    • Ceramic Textbooks and Guidebooks
    • Centering by M. C. Richards
    • Shoji Hamada on Making Pots
    • A Potter's Workbook by Clary Illian
    • Roger Herman Ceramics monograph
    • Ben Okri: A Time for New Dreams
  • About
    • About
    • Privacy Policy

Make a Wide Salad Bowl Pottery Tutorial

June 26, 2023 Matt M-H
Pottery salad bowl being smoothed with a red rubber Mudtools rib on the pottery wheel

The salad bowl form being smoothed with a red Mudtools rib at the end of the throwing process, but before being trimmed and glazed.

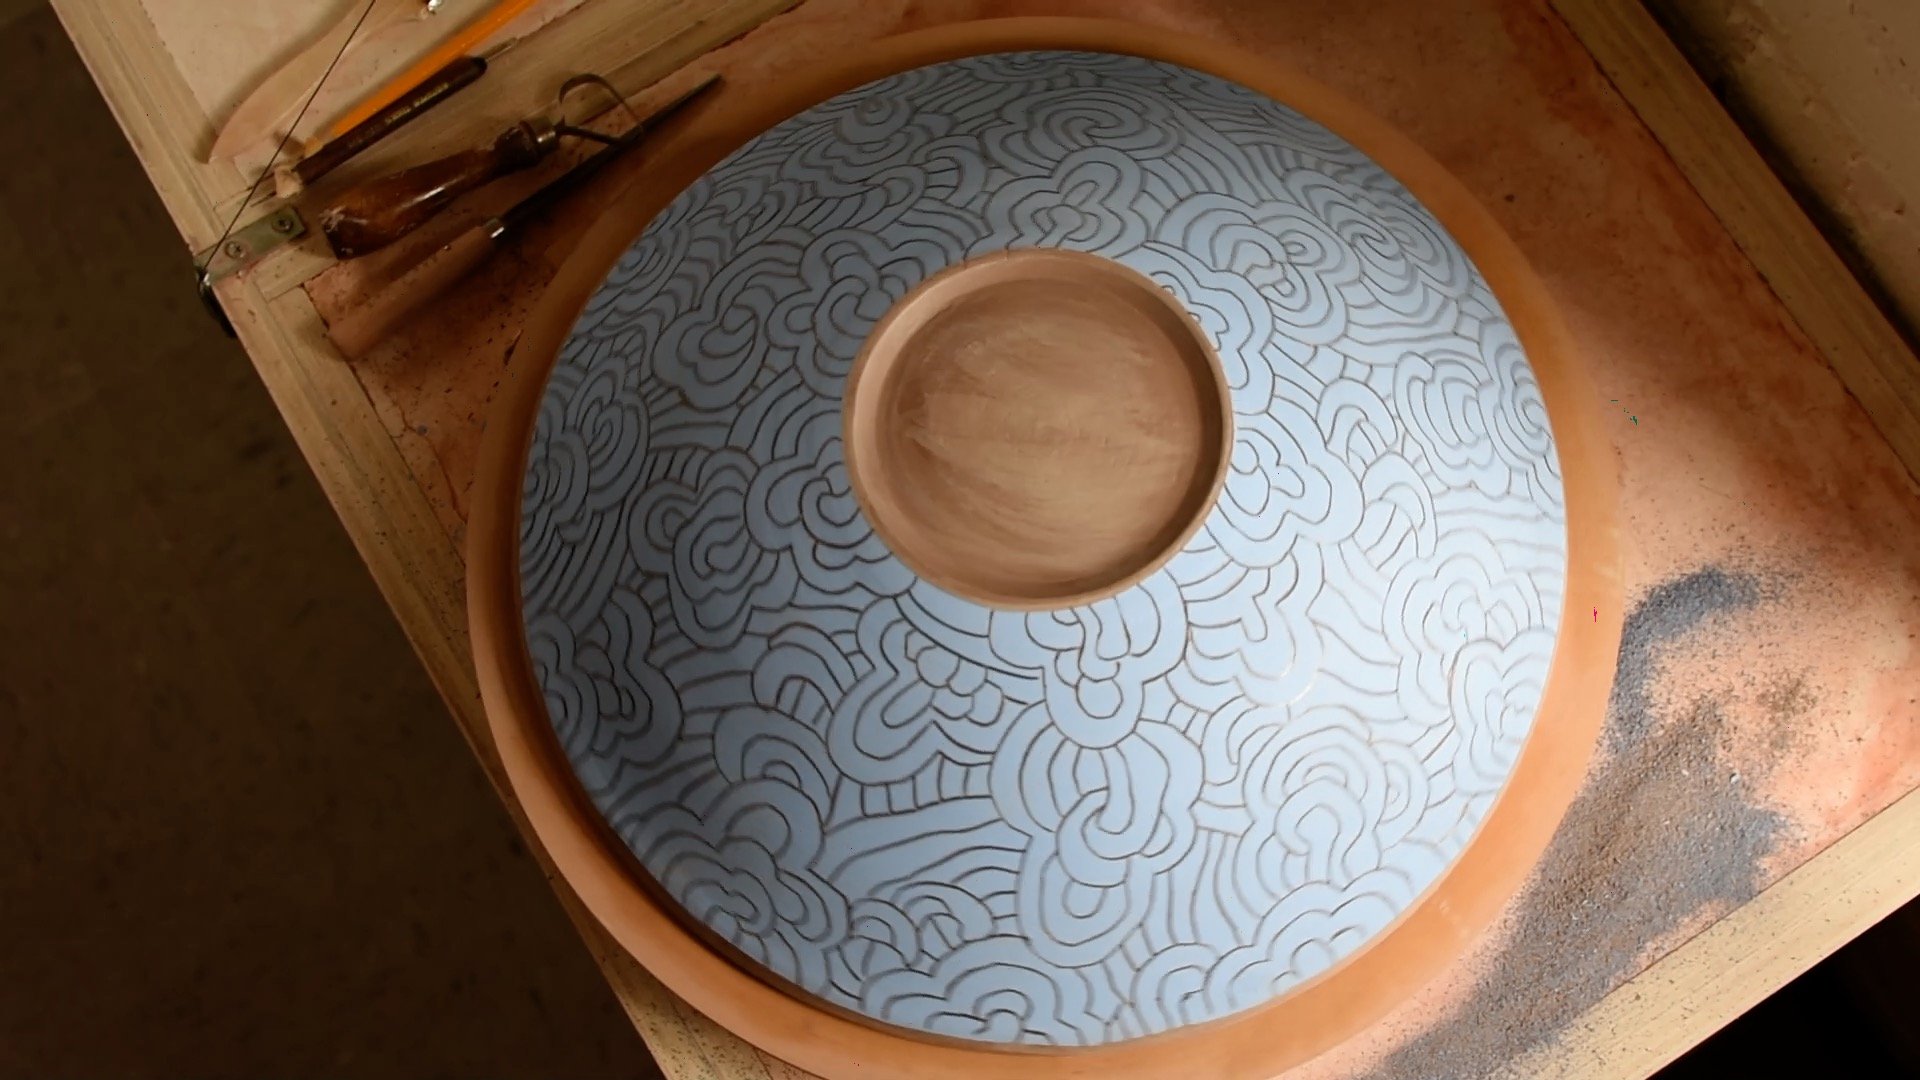
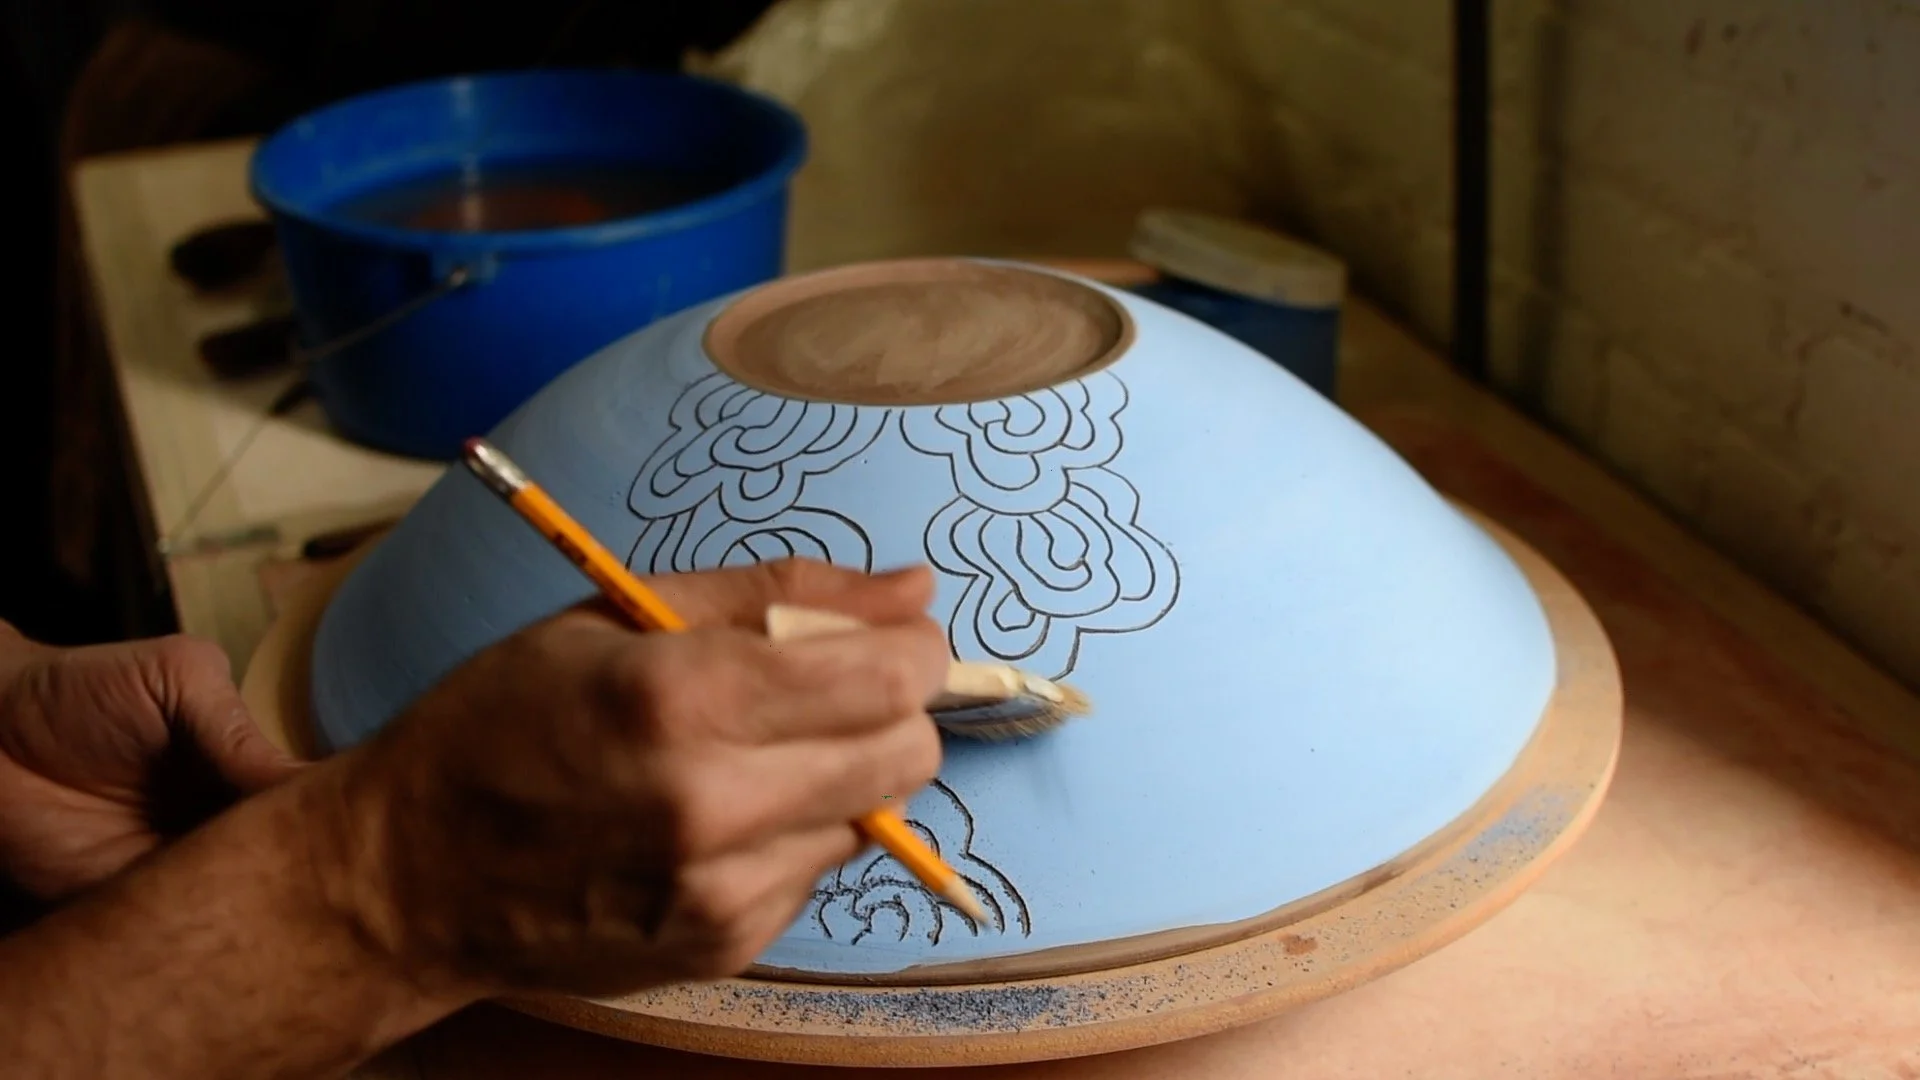
A salad bowl is one of my favorite things to make on the pottery wheel. This tutorial will cover every step of making a salad bowl including centering, opening, pulling the walls, trimming, and glazing.

When making this shape, keep in mind that the key to this form is to make the walls more vertical, around a 45 degree angle when pulling up, and then gradually open and lower the walls in the shaping stage.

Here’s a video of the process and a full tutorial with pictures is below.


Step 1: Center and Open

Two hands centering five pounds of brown clay on the pottery wheel with a black splash pan and a red towel draped over a knee

Beginning to center the clay.

In this tutorial, five pounds of brown speckled clay was used, but this style of bowl could be made in any range of weights and clay bodies.

Two hands pushing a cone of clay forward in the centering process on the pottery wheel also known as wedging on the wheel

Pushing forward and down after bringing up a cone of clay.

Recommended weights for this style:
Small bowl — 2 to 4 pounds
“Normal” serving bowl — 4 to 7 pounds
Large bowl — 8 pounds or more.

Thumb pinching open clay on the pottery wheel

The first opening move.

After wedging, join the clay to the wheel head and begin centering.

I usually bring the clay up into a cone and then push it forward and back down at least three times, until the clay feels even, organized, and workable. This process is called “wedging on the wheel” but you should always wedge your clay before joining on the wheel head too!

Two hands overlapping pinching the clay open in the centering process on the pottery wheel

The second opening “pinch” inwards.

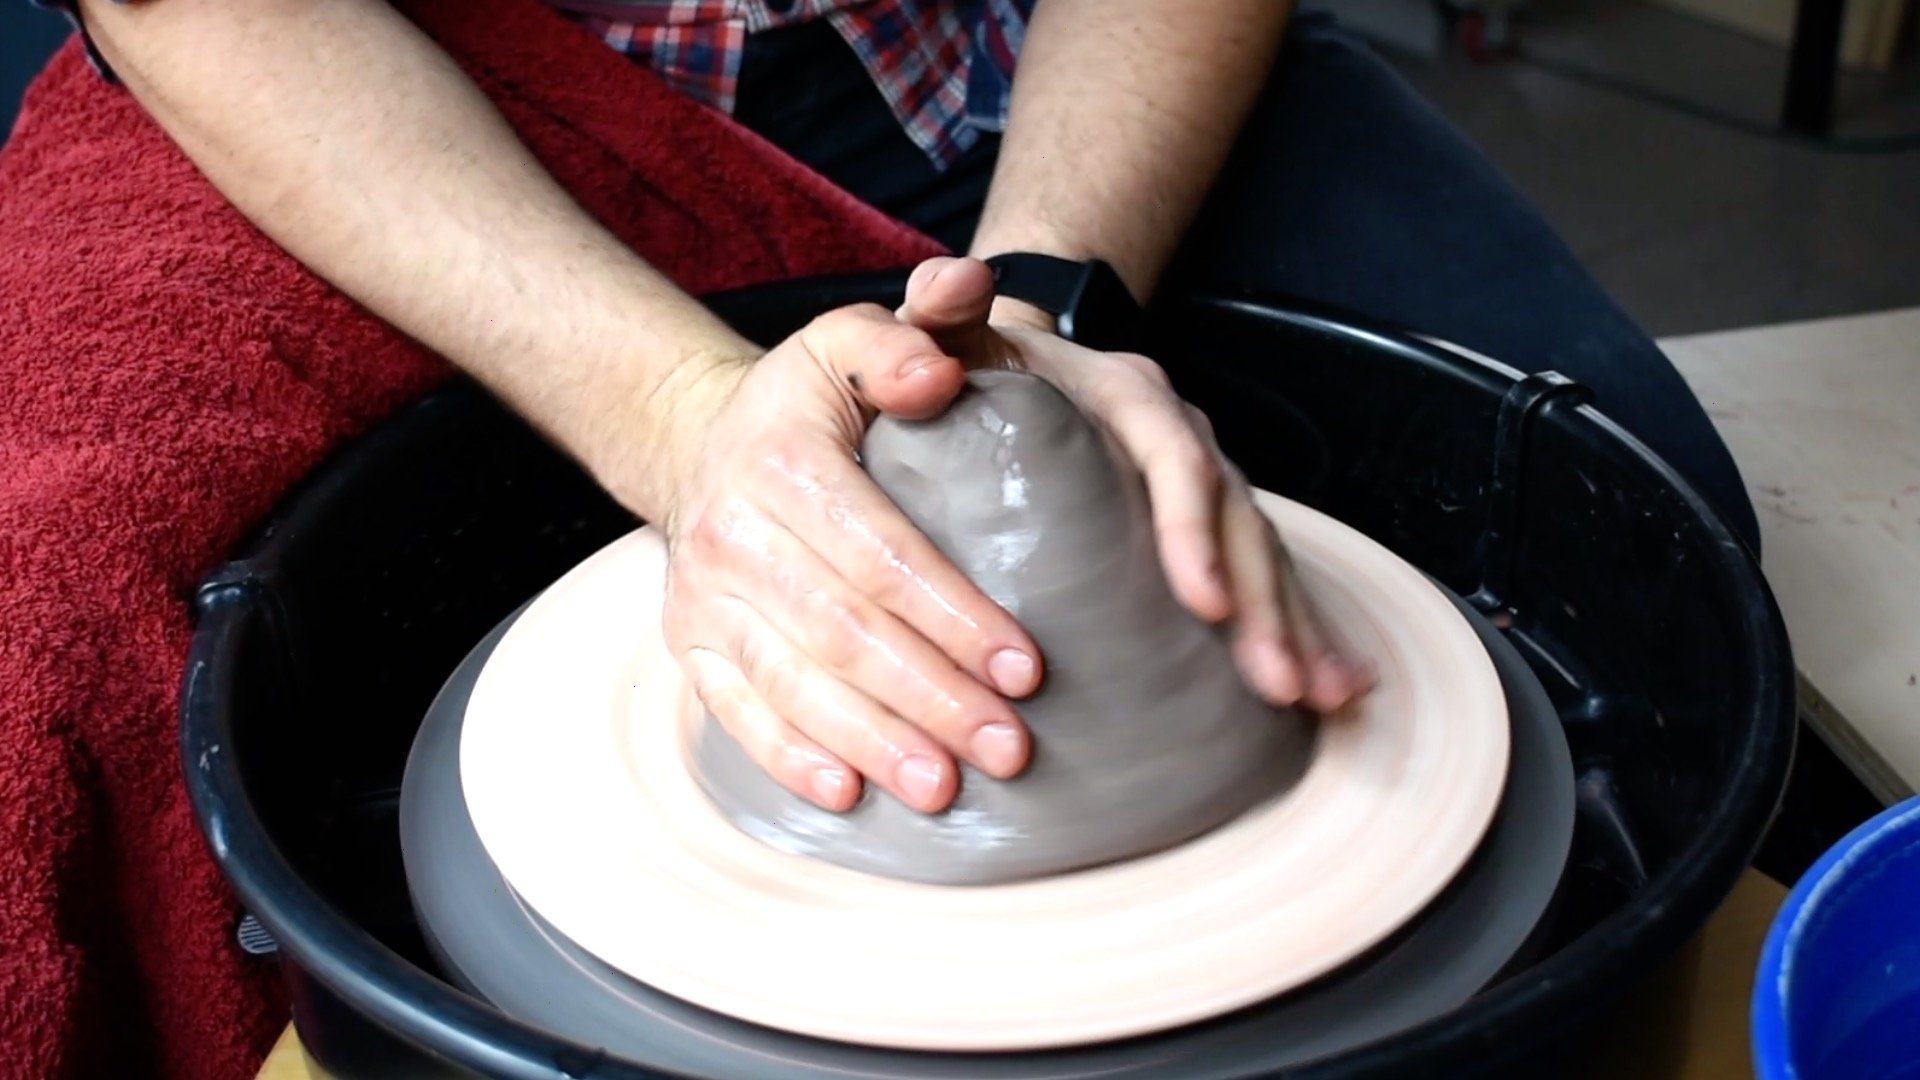
Then, open the mass of clay. I first put my right thumb in and squeeze towards my left hand, then I do a second open where I pinch the clay in towards my torso. As this will be a bowl, it’s best to have a curved bottom rather than the flat bottom you would want for a cylinder.


Step 2: Pull Up and Out

Two hands throwing a bowl on the pottery wheel with the right hand knuckle pressed into the clay to start the first pull to thin and raise the walls of the vessel

The first pull using an index finger wrapped around a thumb in a semi-fist position.

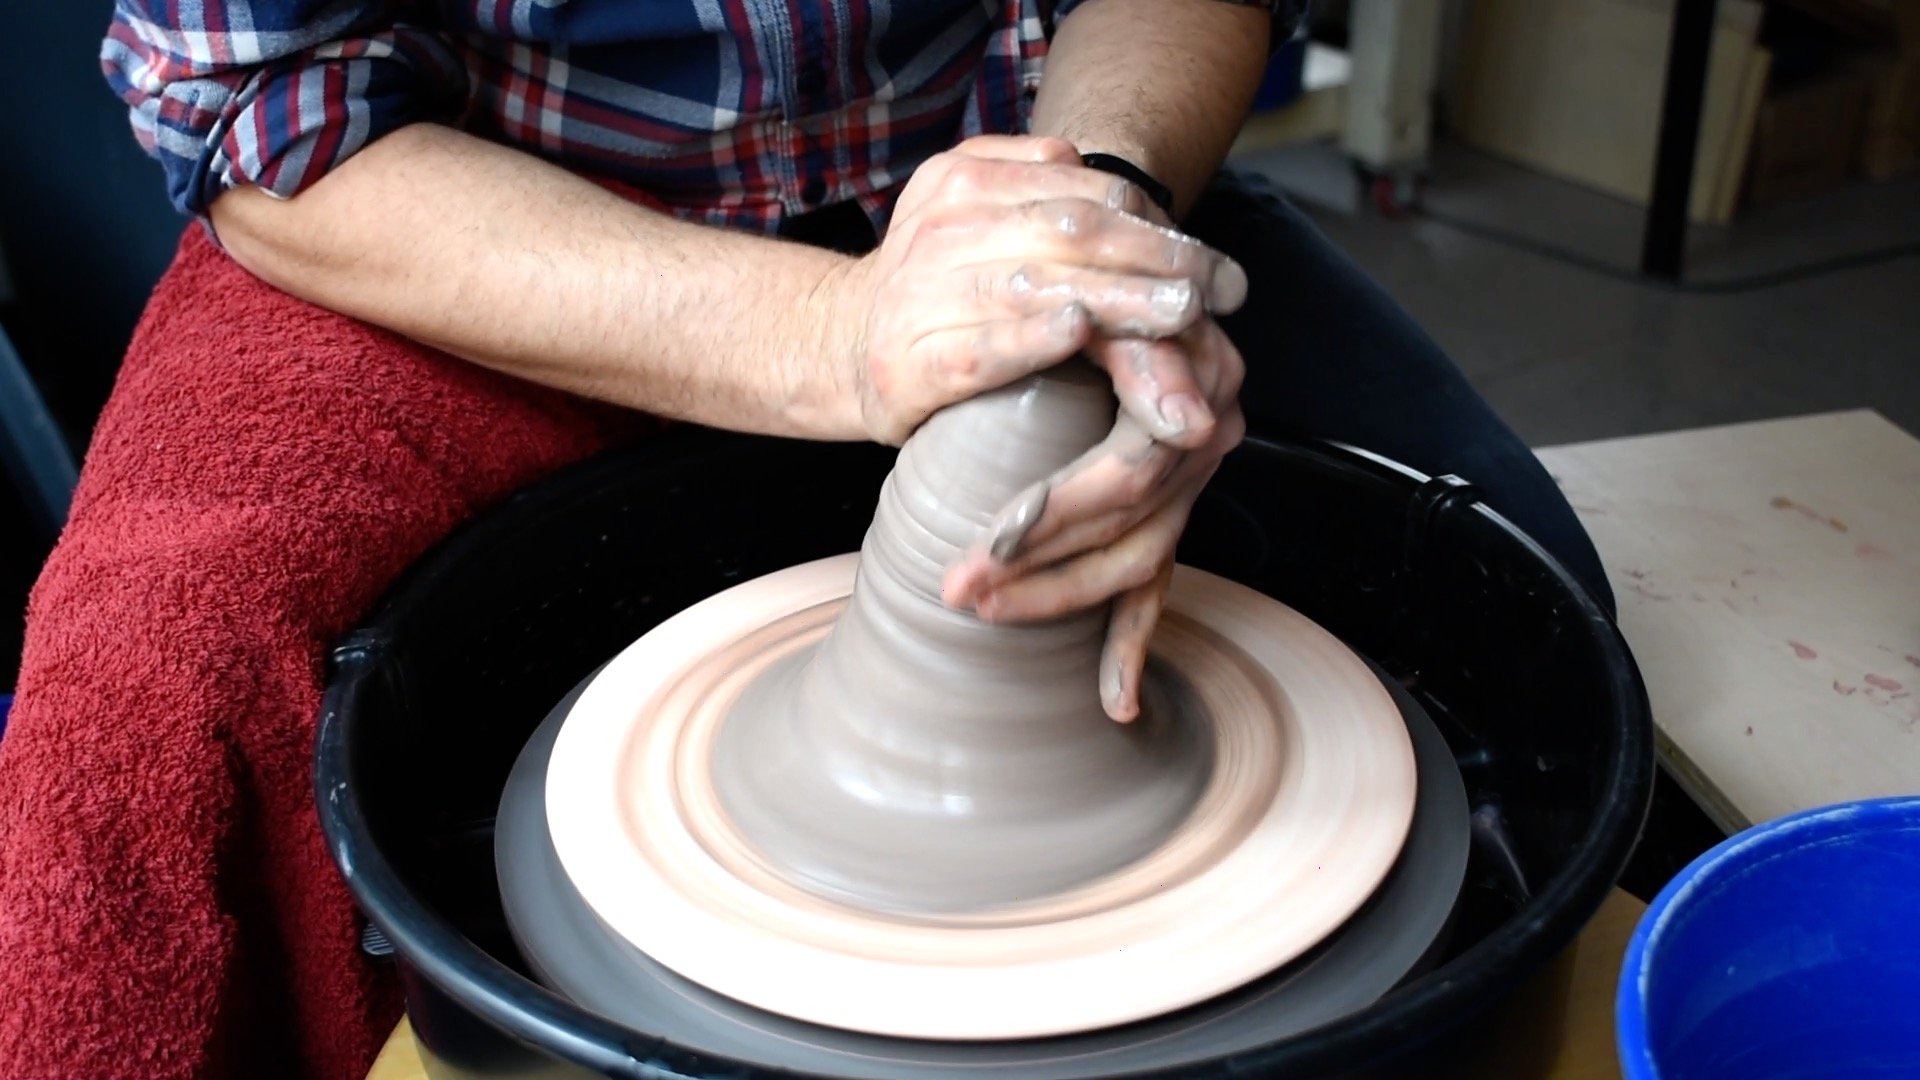
After centering and opening the clay, the next step is to pull the clay.

For my first pull, I use the knuckle / side of my index finger with my hand in a fist position. I find this to be stronger and results in less strain on my wrist.

The index finger on the right hand compressing the rim of a bowl being thrown on the pottery wheel.

Remember to ompress the rim after each pull.

Usually, I will make a bowl like this in three to four pulls, but do as many pulls as you need without overly softening the clay. After each pull, it’s important to compress the rim. Also, focus on bring the clay up more than out. In the next step, the bowl will be lowered and widened using a rib.


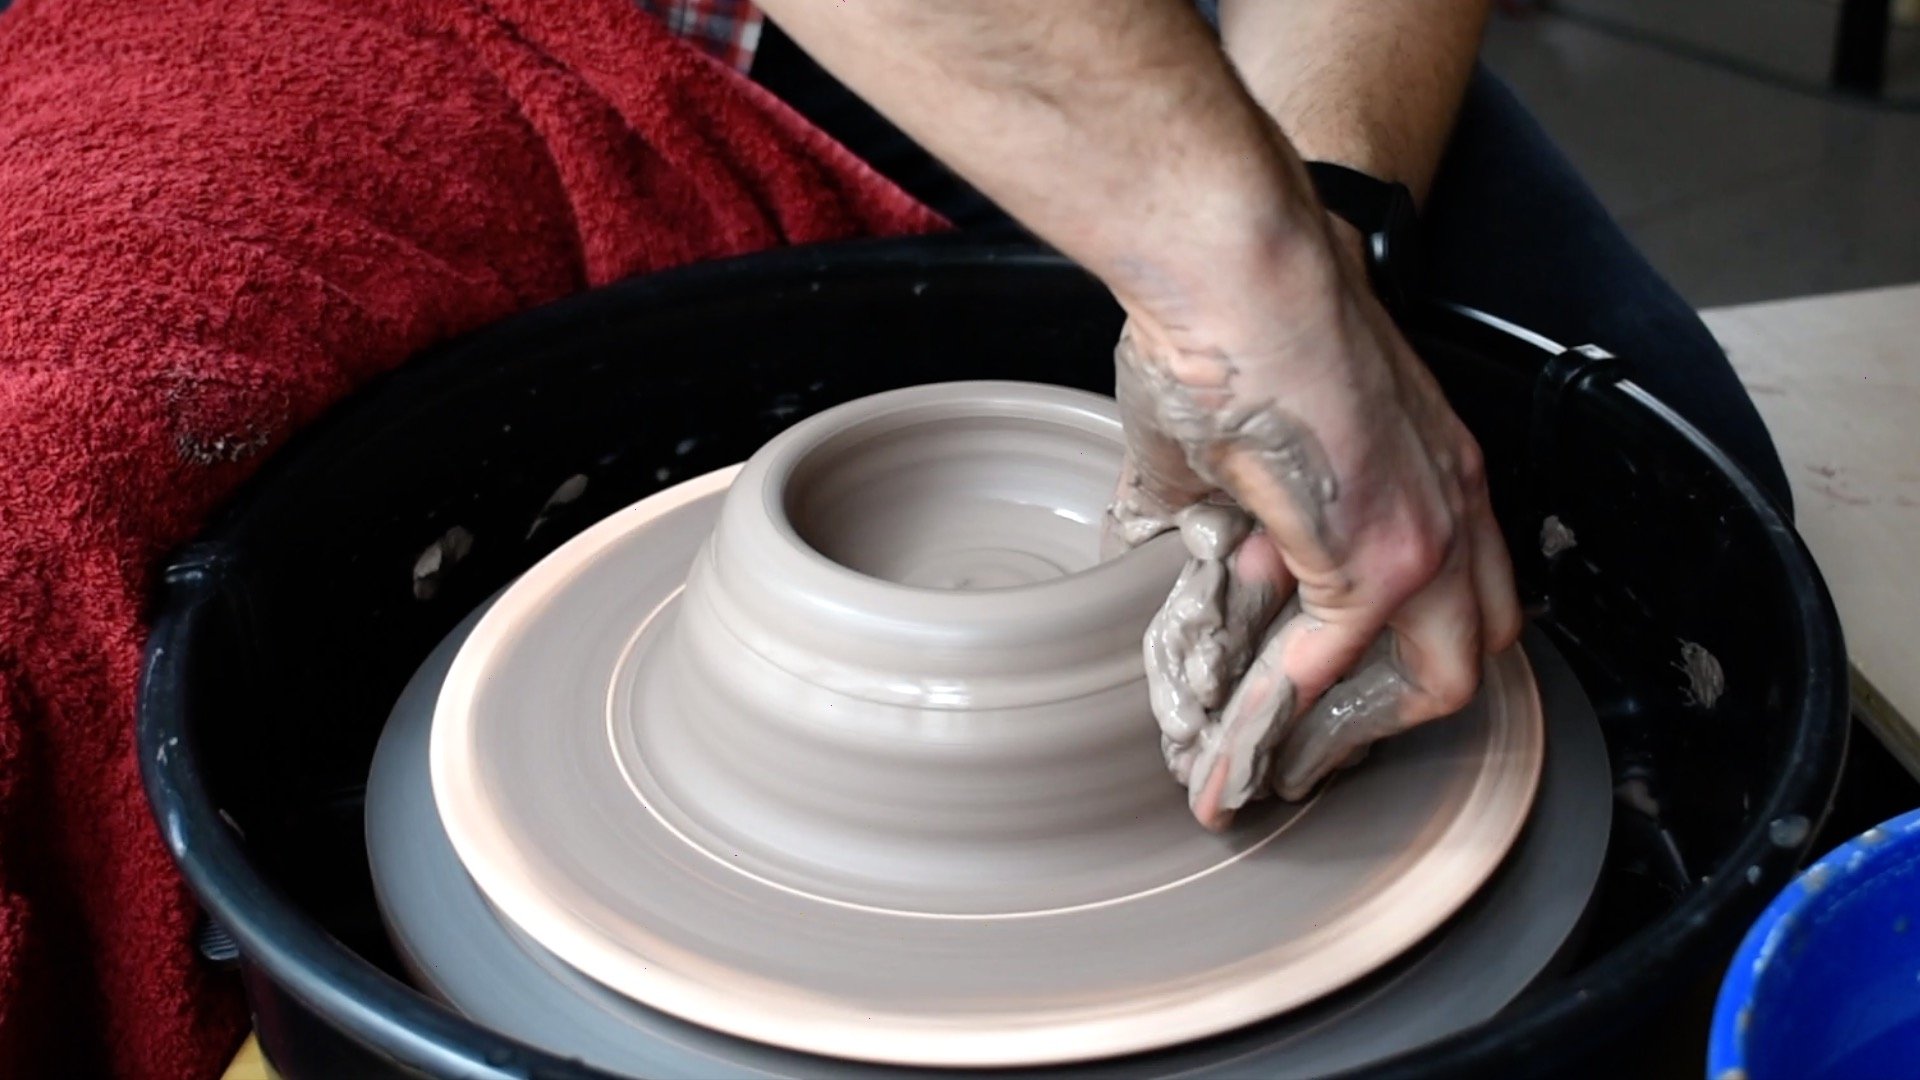
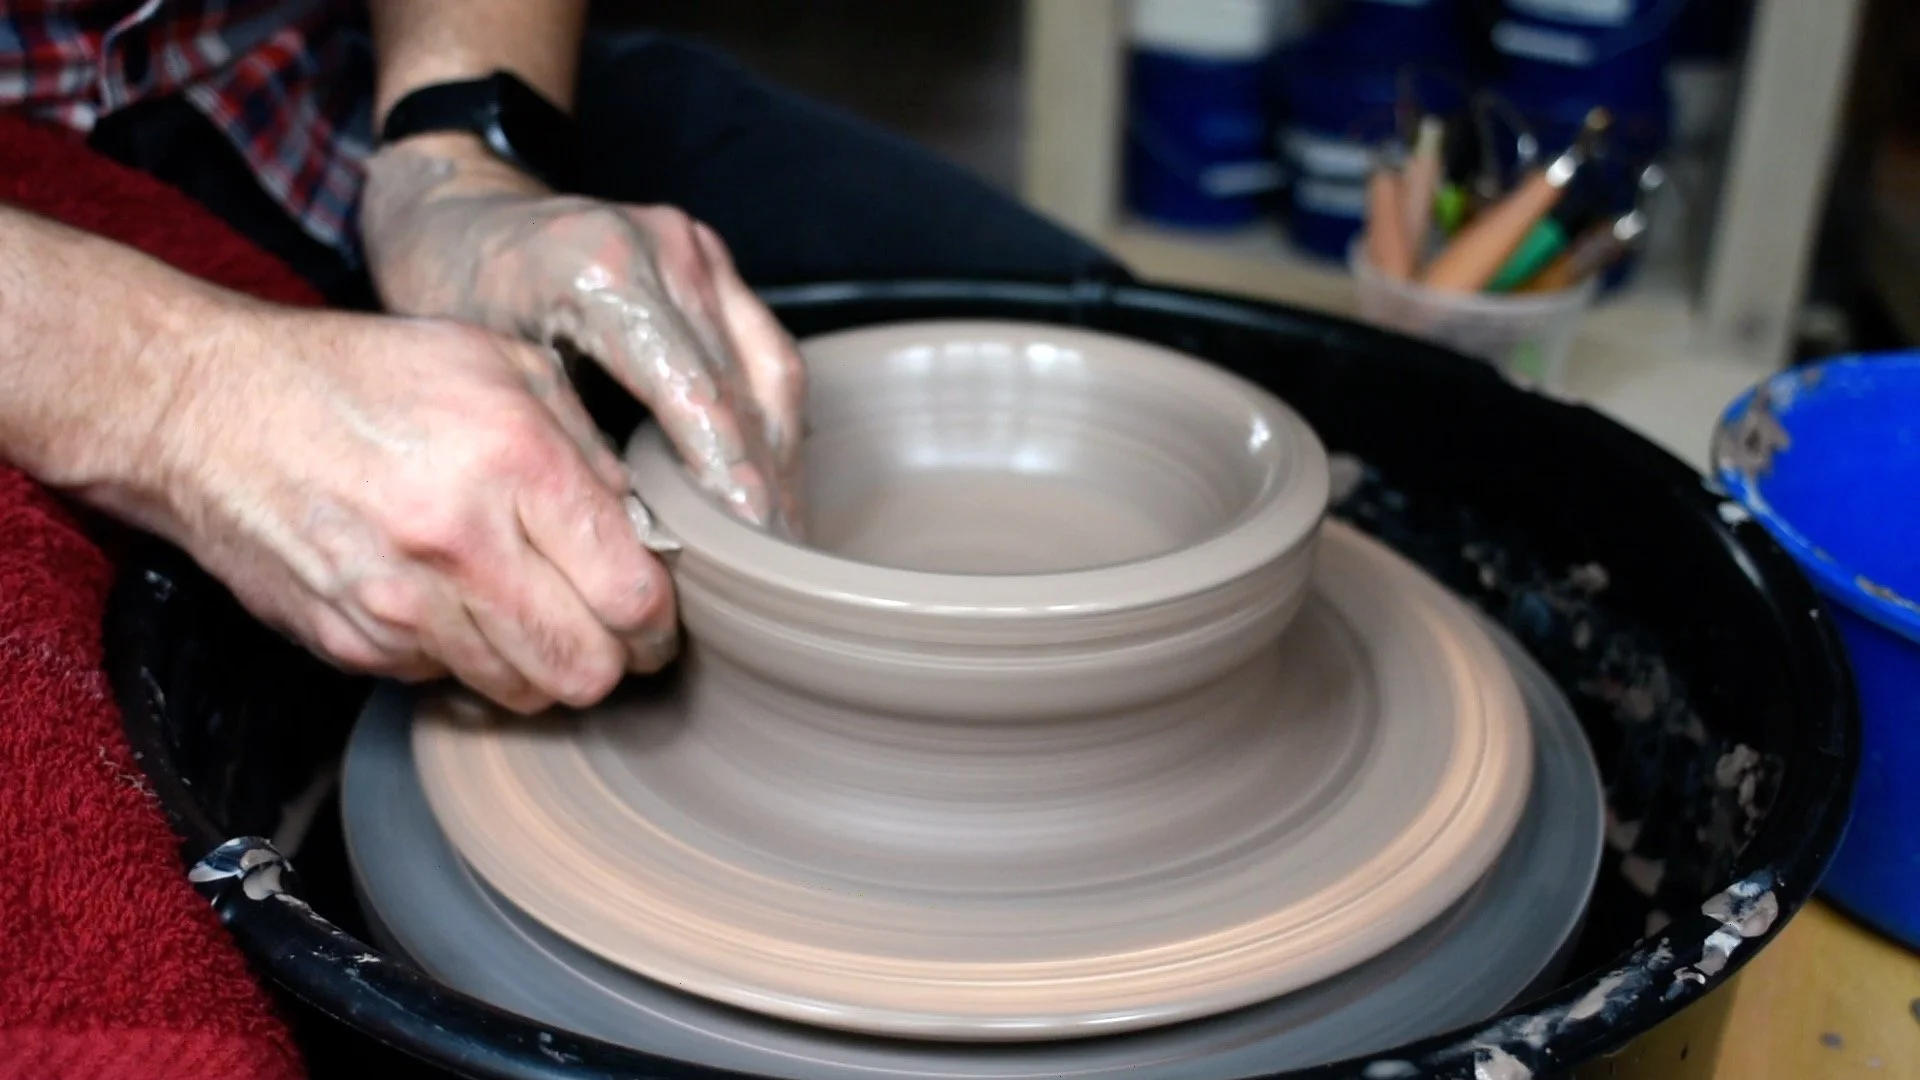
Step 3: Opening, Shaping, and Lowering the Walls

Beginning to shape and lower the walls with a large rib.

After pulling the walls up and somewhat out, the next step is to shape and lower the walls. You may be happy with a more upright shape, and those can be great bowls! But these photos show how a large rib can be used to gently shape and lower the walls of the bowl into an almost platter-like form.

A large metal rib being used to open and shape the walls of a salad bowl on the pottery wheel

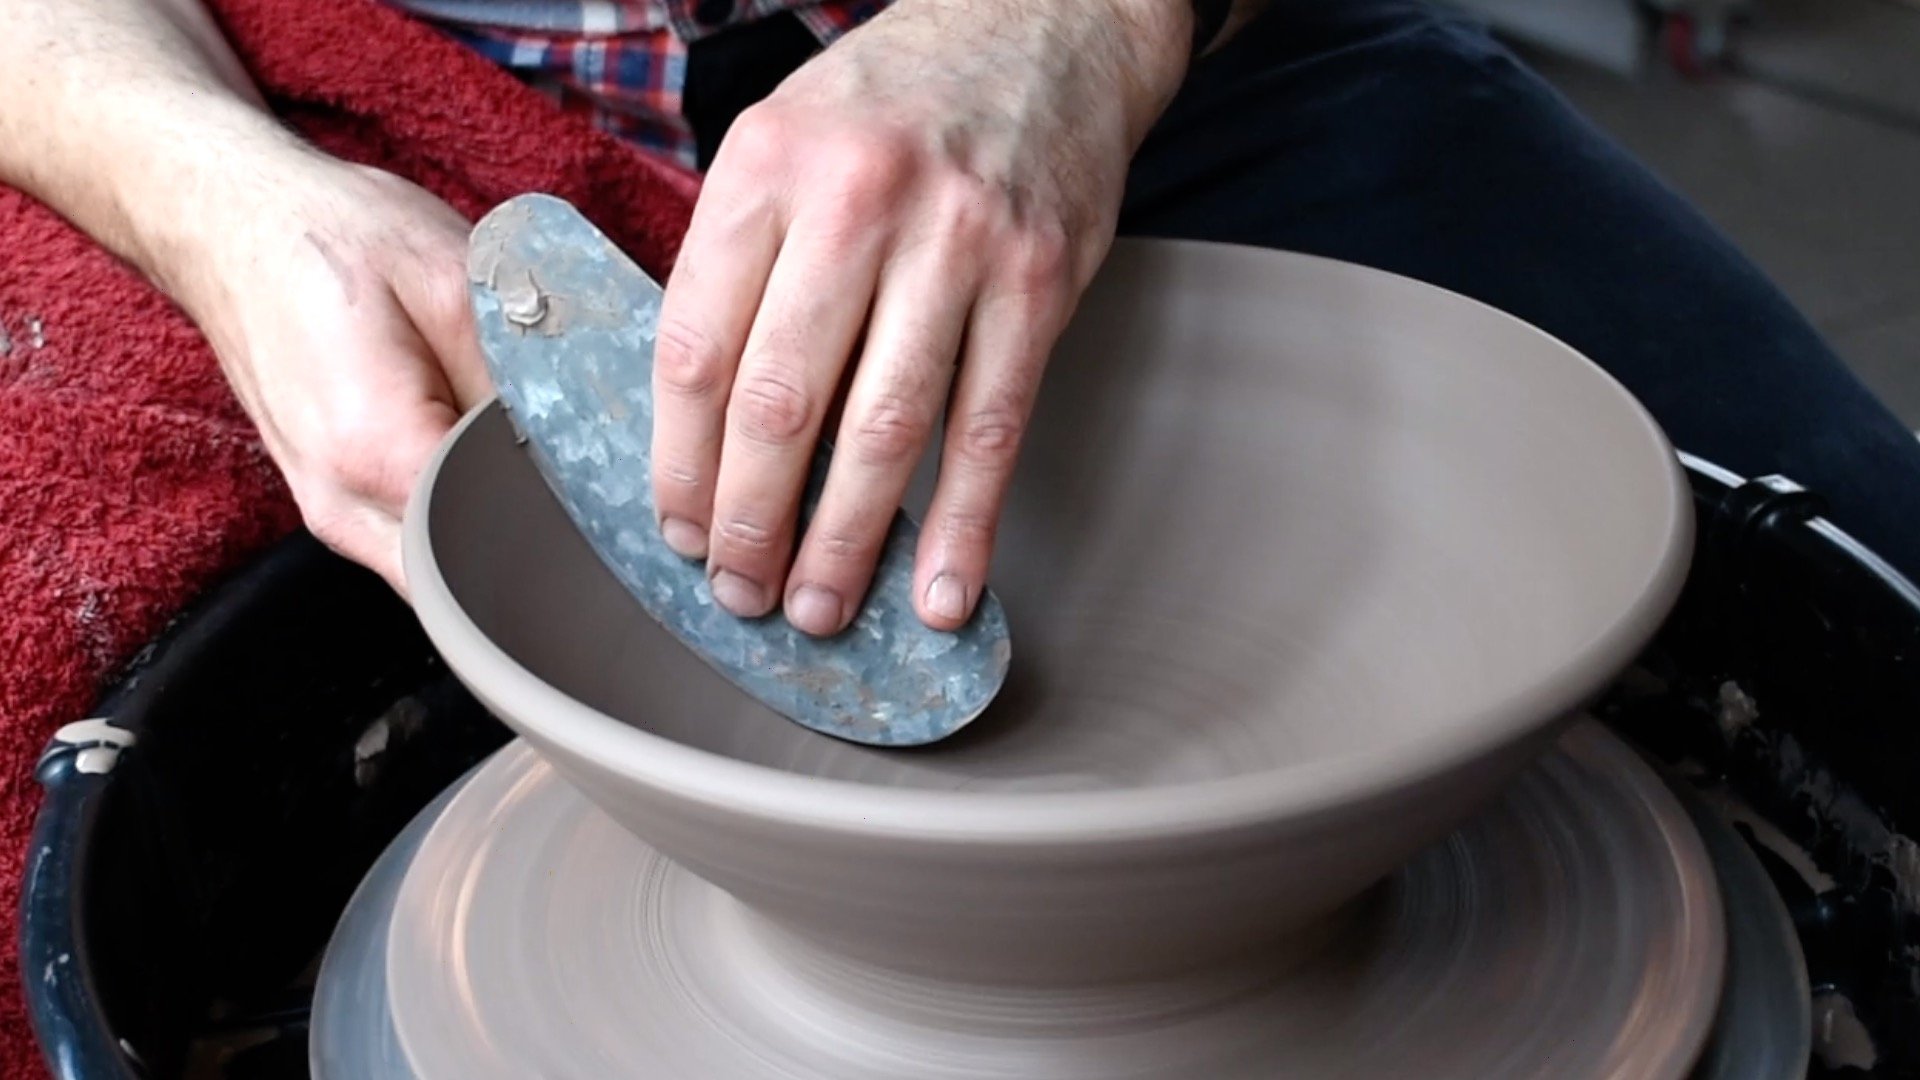
The second pass with the rib, bringing the walls even lower.

You should not be adding any water in this stage and as you are removing slip and starting to dry the bowl a bit, you can be somewhat adventurous in shaping the walls.

A large metal rib being pressed into a clay bowl form on the pottery wheel to turn a bowl into almost a platter like shape

You can make numerous passes to really get the wall the shape that you want. You may need to find or make a rib that is your desired profile for the inside of a bowl.

The best tool for this is a large rib made out of metal, wood, or plastic. In this tutorial, I’m using a homemade metal rib that you can make following this tutorial.

A red plastic rib being used to smooth and shape a bowl on the pottery wheel

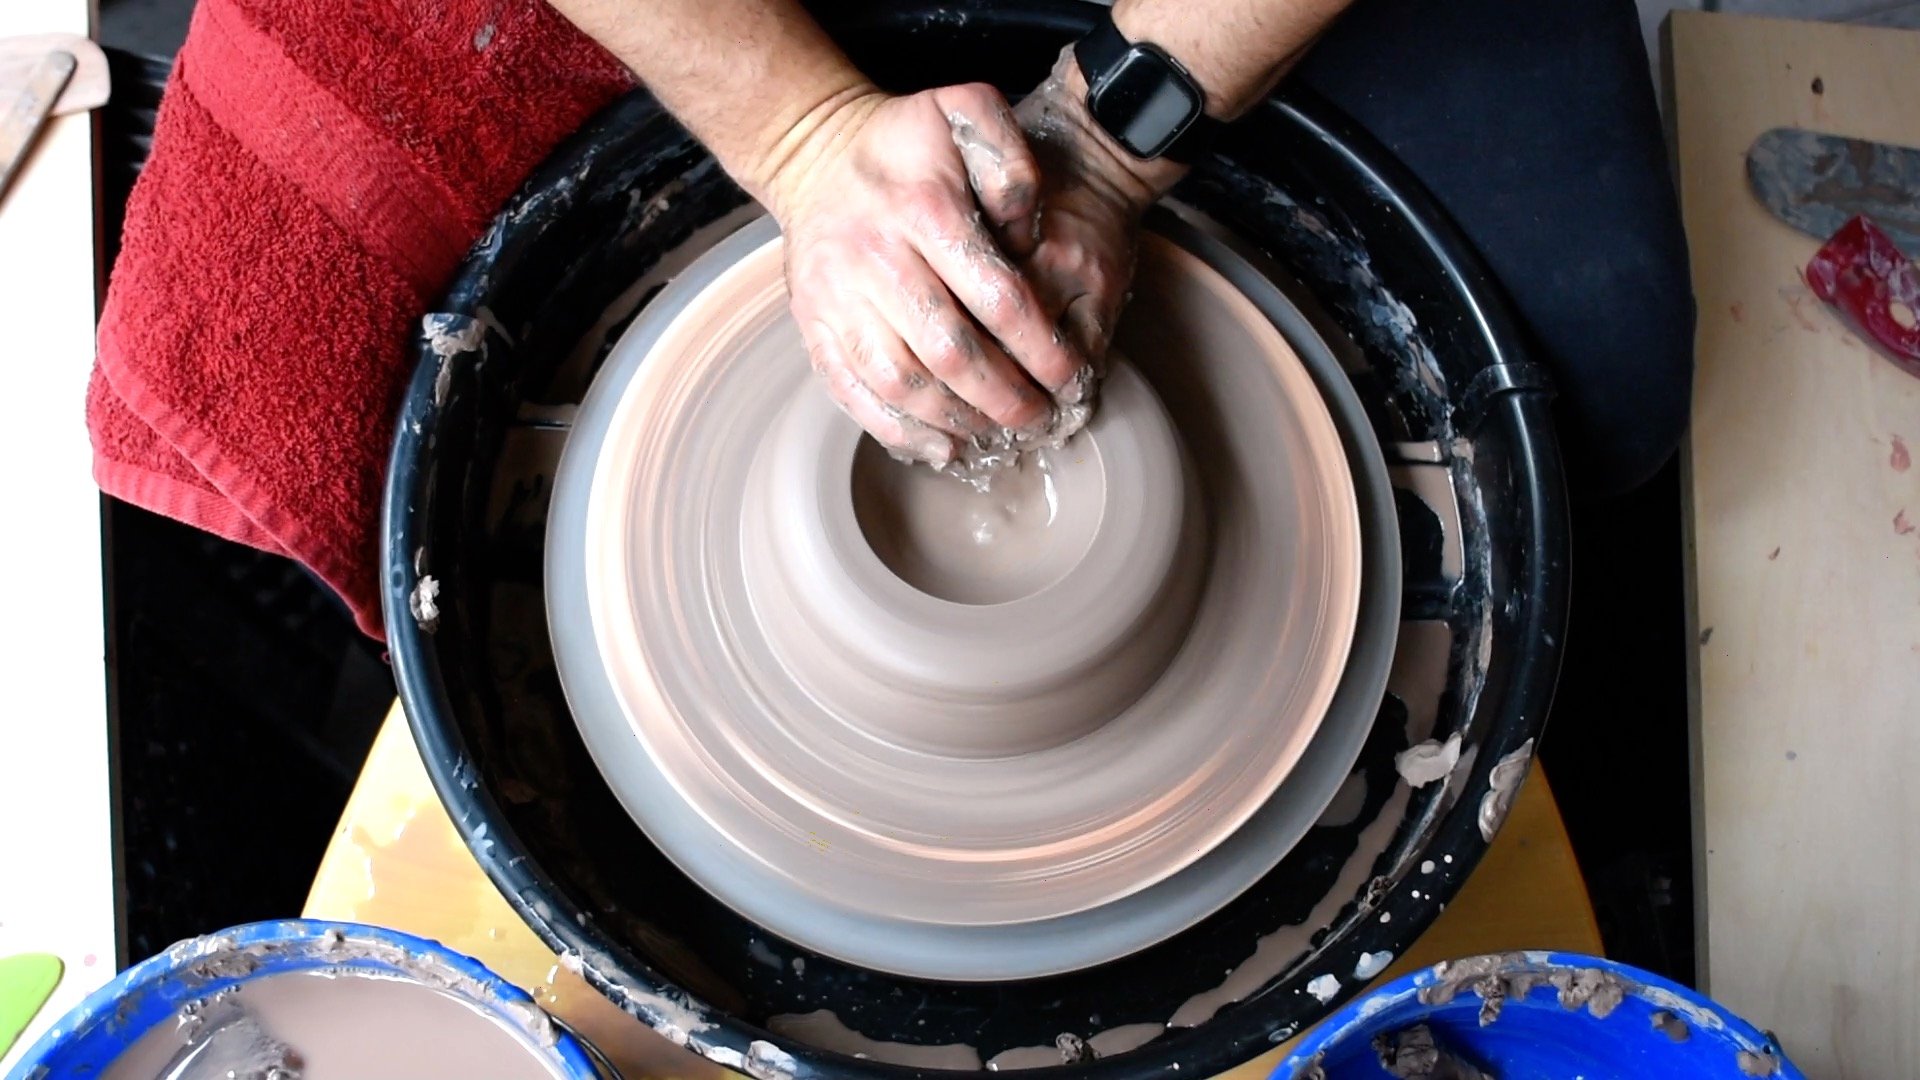
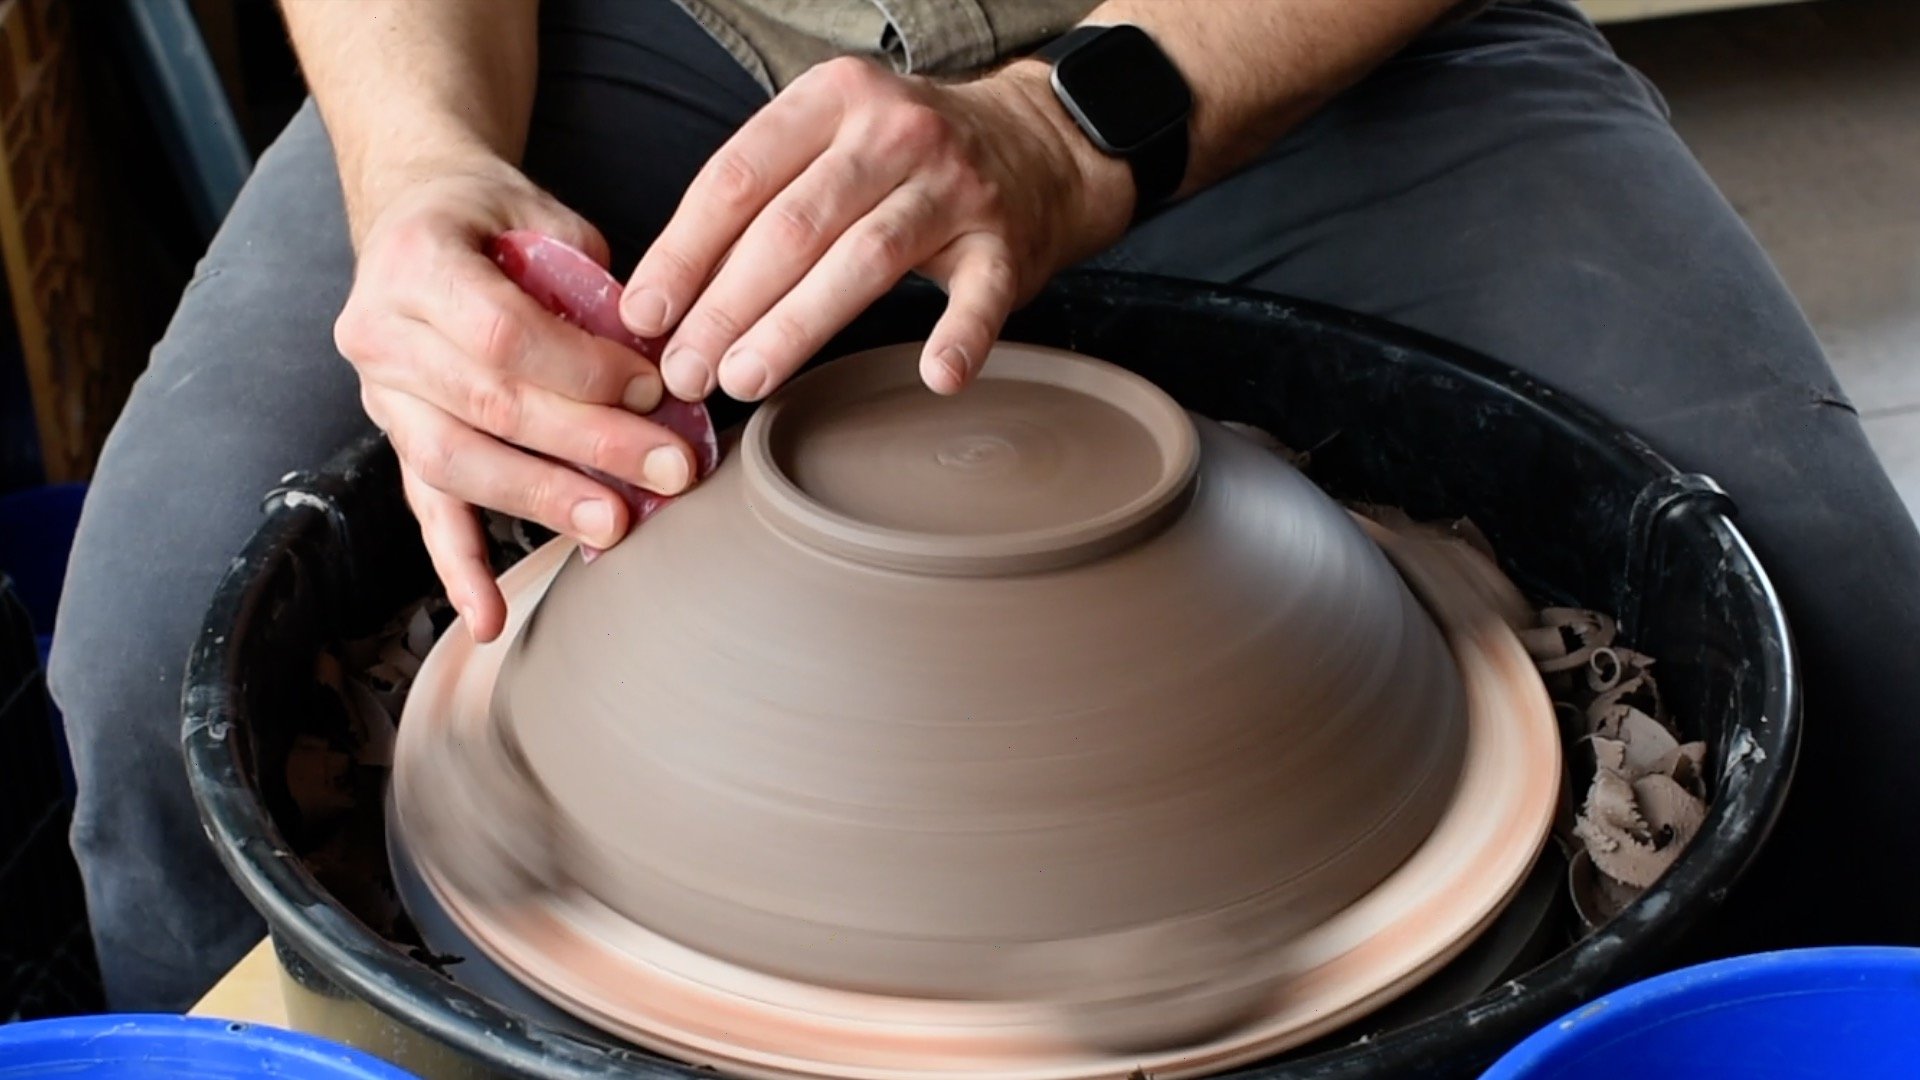
The final step is to smooth the inside and remove any throwing marks.

The final step is to really smooth and refine the inside of the bowl (We’ll deal with the outside in the trimming stage.) For this, I use a red Mudtools brand rib, but you can use any flexible rib to compress and smooth the inside of the bowl.

Shop Mudtools rib at Amazon

If you want to watch the centering, opening, pulling, and shaping process in one continuous shot, here’s a video of just that:


Step 4: Trimming

Attaching the leather-hard bowl to a bat for trimming.

Trimming is the time to take care of the bottom of the bottom of the bowl.

First, center the upside down bowl and then anchor it in place with at least 4 lugs of clay.

A hand holding a loop tool beginning to trim the foot ring on a salad bowl being made on the pottery wheel with the other hand holding the bowl steady

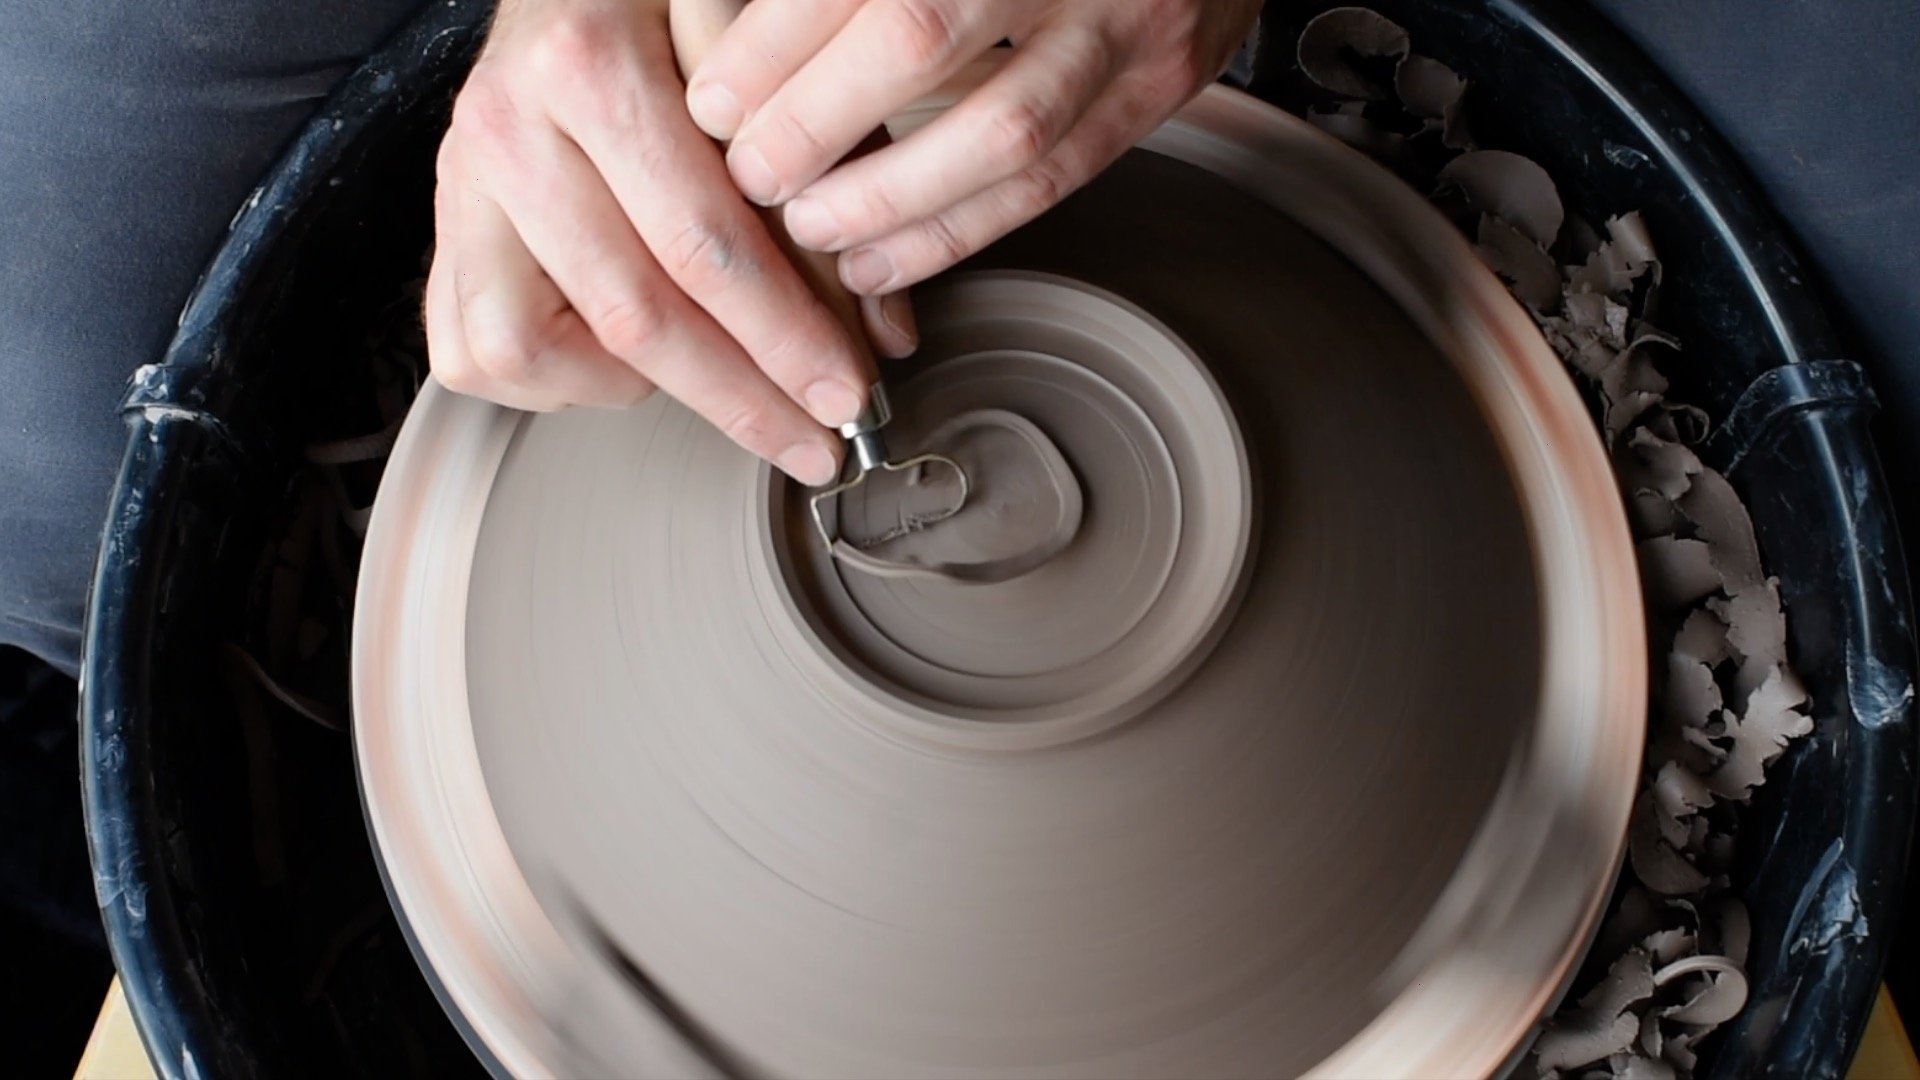
Establishing the foot ring.

Next, lightly trim the outside of the foot ring, until you are at the outside diameter that you want. Then, make a shallow cut to establish the inside of the foot ring.

An avocado-shaped loop tool being used to trim the foot of a salad bowl being made on the pottery wheel

Trimming inside the foot ring.

After you have established your foot ring, you can trim clay from the inside of the foot ring. A few taps or gentle “pushes” will help you figure out if the clay is still stiff and therefore a bit too thick. Or, if it has a slight give when you push on it, you have trimmed enough.

The index finger of a left hand tapping the center of a pottery bowl being made on the wheel to test the thickness of the clay while trimming

Testing if the piece has any “give” to see if enough clay has been removed or not.

After trimming the inside of your foot ring, turn your attention to the outside walls. I usually start with a large loop tool and then switch to a detail tool to finish everything.

Beginning to trim the walls of a bowl after trimming the foot ring with a large loop tool

Trimming the walls of the bowl.

To complete the trimming process, lightly smooth the piece with a sponge, and then finish with a flexible rib to remove any trimming marks.

When you are done trimming, cover the bowl with plastic so it will dry slowly. Bowls and wide forms are especially prone to S-cracks that can be caused by uneven drying.

 
Using a detail loop tool to trim the foot ring of a salad bowl on the pottery wheel

Final detail trimming with a small, detail loop tool.

 
Light clean up with a sponge of a freshly trimmed clay bowl being made on the pottery wheel

Lightly cleaning / compressing with a damp sponge.

 
Two hands using a soft red rib to smooth the outside walls of a bowl being made on the pottery wheel

Using a rib to smooth out the bowl and remove any trimming marks.

 
A recently thrown and trimmed pottery bowl covered in plastic so that it will dry slowly and not crack or warp.

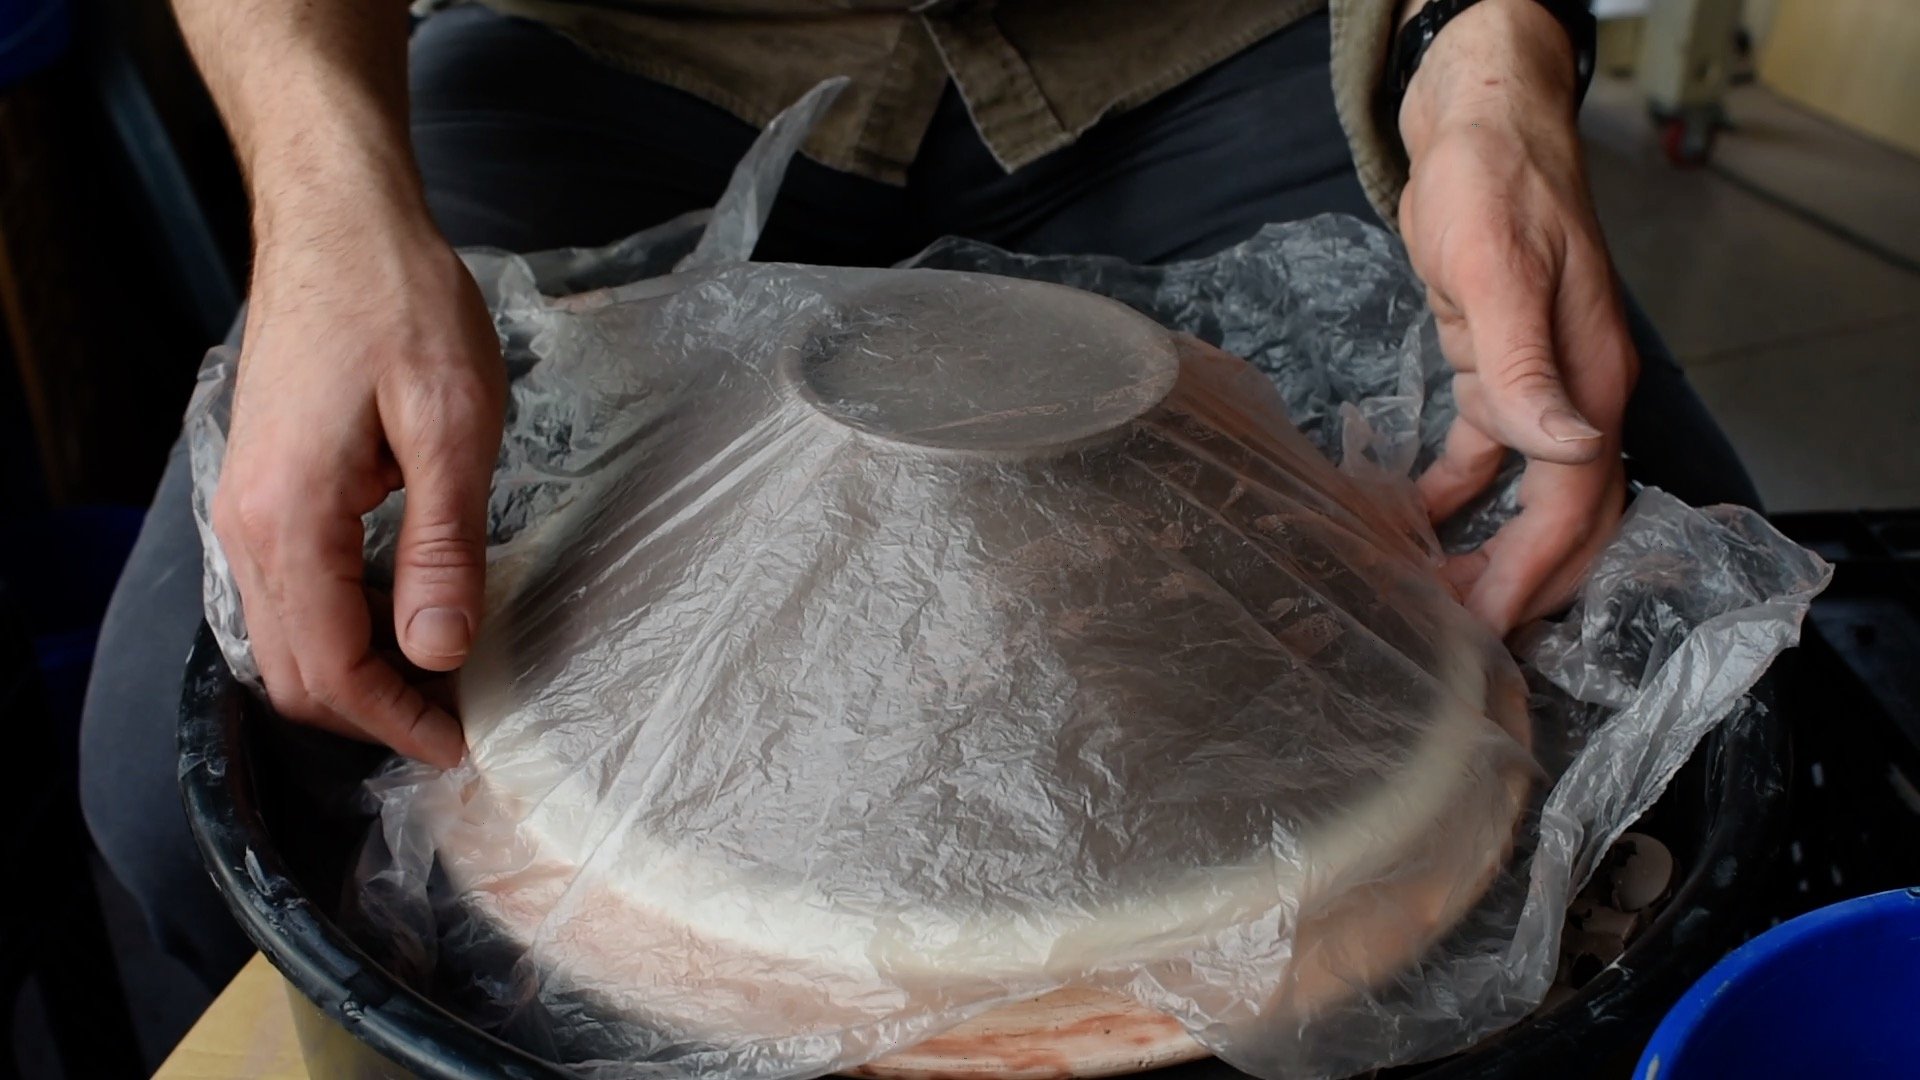
Covering the bowl with plastic wrap for slow drying.


Step 5: Glazing

A hand holding a measuring cup and pouring a white glaze on the inside of a bisque fired salad bowl

Pouring glaze on the inside of the bowl.

After the bisque firing, it’s time for glazing. This bowl was finished in a matte white glaze and because it was made with a speckled clay, the black speckles from the granular manganese add to the glaze.

A hand holding a measuring cup pouring a glaze on the outside of a bisque fired salad bowl

Pouring glaze on the outside of the bowl.

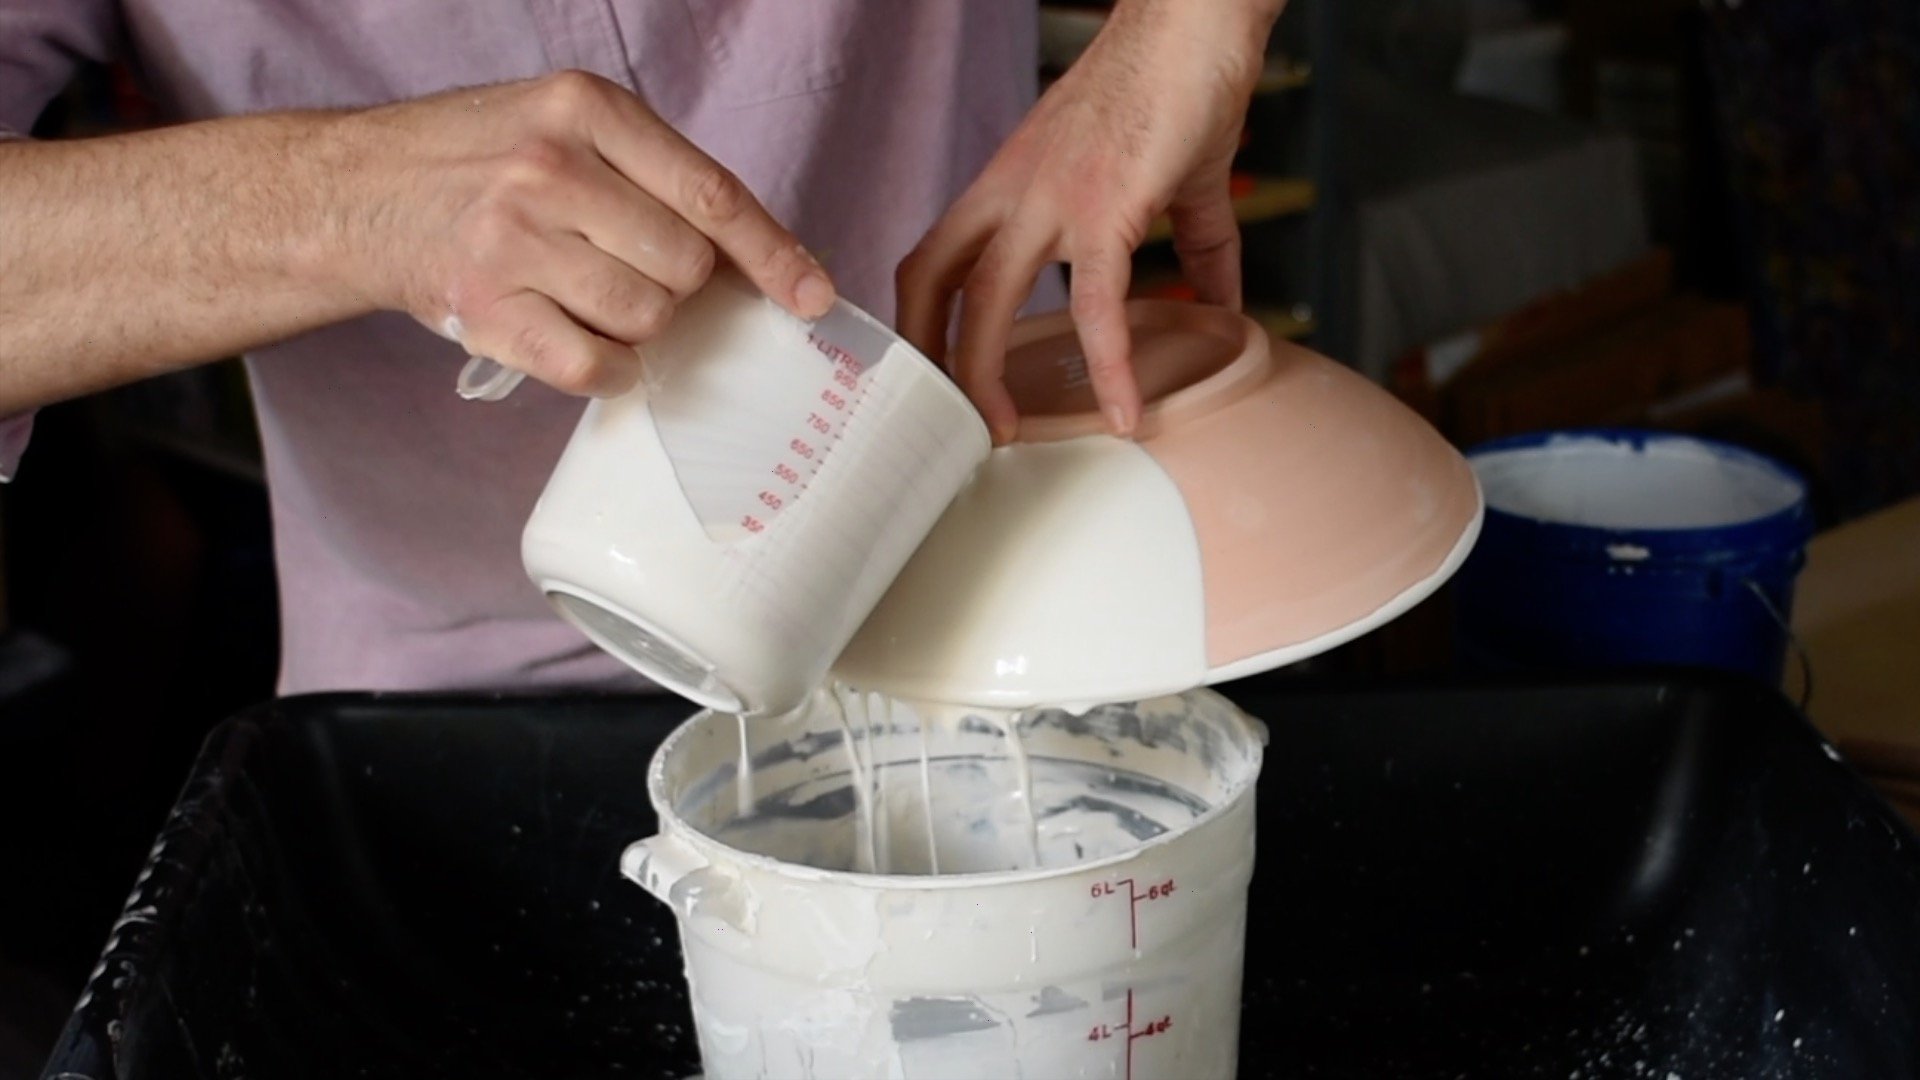
To glaze a pot, first clean it with a wrung-out, damp sponge to remove any dust or debris.

Then, you can paint, dip, or pour glaze. For this bowl, I poured the glaze, first on the inside, then on the outside.

Using a sponge to wipe and clean up the foot ring of a salad bowl after applying the glaze

Cleaning the foot ring with a sponge.

After applying the glaze, use a sponge to clean the footring and you are ready to glaze fire.


All done! After glaze firing, it’s time to enjoy your bowl. There’s nothing better than eating off of hand made bowls and plates!

A wide salad bowl with a white glaze and black speckles  being held by two hands after the glaze firing

You might also enjoy:

Best Loop Tools for Trimming Pottery

How To Make a Metal Pottery Rib

Make a Wide Rim Bowl tutorial

Sgraffito Decoration on a Large Bowl tutorial

Make a Slab Plate on the Pottery Wheel tutorial

Make a “Phil Mug” pottery tutorial

View all How To posts

In How To Tags bowl, salad bowl, pottery tutorial
Comment

Sgraffito Decoration on a Large Bowl — pottery tutorial

February 7, 2023 Matt M-H

The finished sgraffito decoration on the bottom of a large bowl.

Sgraffito is a technique of carving through a contrasting clay or slip to reveal the clay body below. It’s a fun way to get a very bold decoration on your ceramics.

This tutorial will cover how to apply the slip, carve through, and clean up. Keep scrolling for step-by-step instructions.

Tools Needed
> A banding wheel or turntable is very helpful
> Slip or Underglaze and a brush
> Carving tool, such as a pencil or a sgraffito tool
> Dry brush for clean up

You can also watch a video of this process here:

Sgraffito On A Large Bowl Tutorial

Step 1: Lightly Clean the Working Surface

Cleaning the surface of a leather hard bowl.

In this tutorial, the demonstration piece is a large salad bowl on the dry side of the leather hard stage—almost bone dry. To prep the surface, a wrung-out sponge is used to lightly clean the surface. This extra water will also help the underglaze stick.


Step 2: Apply the Slip or Underglaze

Applying first coat of underglaze.

The key to sgraffito is to pick a slip or underglaze that will contrast with your clay body. In this example, slightly watered-down Velvet Underglaze medium blue is being applied to a speckled buff stoneware.

Applying the second coat of underglaze.

To get an opaque, solid covering of underglaze, 3 to 4 coats is applied. Be sure to allow the coats to dry between each application.


Applying the final coat.


Step 2.5: Let the Underglaze or Slip Dry

This step doesn’t take long, but do let your slip or underglaze dry before you begin carving.


Step 3: Carve Your Design

Carve your design.

Using your sgraffito tool, begin to carve through the stop layer, exposing the clay body below. It can be helpful to practice your design as a drawing before you begin carving.


Clean your carving as you go.

As you are carving, little bits will stick up on the side of the carved lines. If you are working at a dry leather hard stage (as opposed to the more damp side of leather hard), you should be able to easily clean these bits as you work just by using a dry brush.

If the clay bits won’t brush off, wait and complete your carving later. Or, you can make your carving and brush off the bits when the pot is bone dry.


Step 4: Clean Up and Finishing

Finished carving, but before cleaning.

After carving, you may want to clean up any edges at the top and bottom of your carving.

In this example, the foot area is cleaned with a fettling knife, and the rim area is cleaned with a loop too. Use whatever makes sense for your piece.

Cleaning the foot.

Cleaning the rim.


All Done

The finished bowl with sgraffito decoration.

After cleaning, you are all done and ready to bisque fire. Generally, sgraffito looks best if left raw or covered in a thin application of clear glaze, but testing will determine what is best in your kiln.

Good luck with this technique and have fun.

Do you have a favorite sgraffito tool or technique? Let us know in the comments.

You might also enjoy:

Turn a clay slab into a plate tutorial

Amaco Velvet Underglaze Test Tiles

Best Banding Wheels for Ceramics


In How To Tags sgraffito, Underglaze, pottery tutorial, salad bowl
Comment


ABOUT: The Studio Manager is dedicated to sharing the best tips, ideas, and equipment guides for a ceramic, sculpture, painting, or any art studio. Thanks for reading.

For updates and other links, follow on Facebook


POPULAR POSTS
> Pottery Wheel Buyer’s Guide
> Gift Guide for Potters
> Best Dust Masks for Pottery Studios
> Best Cone 6 Glossy Clear Glaze
> Best Aprons for Pottery and Art
> Best Pottery Wheel Stools
> Make a Metal Pottery Rib


Evolution of Pottery t shirt

Evolution of Pottery shirt. Shop at Society 6


POPULAR TOOL REVIEWS
> Pottery Wheel Buyer’s Guide
> Best Pottery Aprons
> Tabletop Wheel Buyer’s Guide
> Best Banding Wheels
> Glaze Mixing Tools and Accessories
> Best Scales for Ceramic Studios


Cat throwing pots on a pottery wheel black and white apron

Pottery Cat apron. Shop at Redbubble.


RECENT POSTS

Featured
aIMG_4951.jpg
Mar 30, 2025
The Best Small, Portable Slab Rollers for Ceramic Studios
Mar 30, 2025
Mar 30, 2025
Best Pottery Wheel Stools
Mar 14, 2025
Best Pottery Wheel Stools
Mar 14, 2025
Mar 14, 2025
The Best Aprons for Pottery, Ceramics, and Art Studios
Mar 13, 2025
The Best Aprons for Pottery, Ceramics, and Art Studios
Mar 13, 2025
Mar 13, 2025
Low Fire Clear Test 1.jpg
Mar 5, 2025
Testing Low Fire Clear Glaze Recipes G1916Q and Duncan 1001 Clear
Mar 5, 2025
Mar 5, 2025
aIMG_2973.jpg
Mar 1, 2025
Best Bats for the Pottery Wheel
Mar 1, 2025
Mar 1, 2025
weighing clay.jpg
Mar 1, 2025
Clay weight for throwing — in ounces and grams
Mar 1, 2025
Mar 1, 2025
The Best Cone 6 Glossy Clear Glaze Recipe
Feb 28, 2025
The Best Cone 6 Glossy Clear Glaze Recipe
Feb 28, 2025
Feb 28, 2025
melted cones.jpg
Feb 28, 2025
Orton Pyrometric Cone Chart in Fahrenheit and Celsius
Feb 28, 2025
Feb 28, 2025
The Best Cut Off Wire for Ceramic Wedging Tables
Feb 27, 2025
The Best Cut Off Wire for Ceramic Wedging Tables
Feb 27, 2025
Feb 27, 2025
Shimpo banding wheel 2.jpg
Feb 27, 2025
The Best Banding Wheels for Pottery and Ceramics
Feb 27, 2025
Feb 27, 2025
Best Masks for Silica Dust in Pottery and Ceramic Studios — updated for 2025
Feb 26, 2025
Best Masks for Silica Dust in Pottery and Ceramic Studios — updated for 2025
Feb 26, 2025
Feb 26, 2025
The Best Scales for Ceramic Studios and Workshops 2025
Feb 23, 2025
The Best Scales for Ceramic Studios and Workshops 2025
Feb 23, 2025
Feb 23, 2025
Alec Soth Sister Corita Rules.jpg
Feb 22, 2025
Alex Soth on Being Goofy, Following Your Ideas, and How Advice is Meaningless
Feb 22, 2025
Feb 22, 2025
Low fire majolica 1.jpg
Feb 18, 2025
Cone 04 Low Fire Majolica Glaze Tests with Oxide Washes
Feb 18, 2025
Feb 18, 2025
Cone 6 white glaze test tiles.jpg
Feb 17, 2025
Cone 6 Midrange White Glaze – modified VC Soft Satin Glossy 1
Feb 17, 2025
Feb 17, 2025

The Studio Manager recommended books at bookshop.org
> Ceramic Technique
> Ceramic Ideas and Inspiration
> Books about Making Art


Kintsugi heart t shirt

Shop Kintsugi Heart T-shirt at Society6


Potter Flames T shirt

Flaming Potter shirt. Shop at Redbubble.


RECENT POSTS
aIMG_4951.jpg
Mar 30, 2025
The Best Small, Portable Slab Rollers for Ceramic Studios
Mar 30, 2025
Mar 30, 2025
Best Pottery Wheel Stools
Mar 14, 2025
Best Pottery Wheel Stools
Mar 14, 2025
Mar 14, 2025
The Best Aprons for Pottery, Ceramics, and Art Studios
Mar 13, 2025
The Best Aprons for Pottery, Ceramics, and Art Studios
Mar 13, 2025
Mar 13, 2025
Low Fire Clear Test 1.jpg
Mar 5, 2025
Testing Low Fire Clear Glaze Recipes G1916Q and Duncan 1001 Clear
Mar 5, 2025
Mar 5, 2025
aIMG_2973.jpg
Mar 1, 2025
Best Bats for the Pottery Wheel
Mar 1, 2025
Mar 1, 2025
weighing clay.jpg
Mar 1, 2025
Clay weight for throwing — in ounces and grams
Mar 1, 2025
Mar 1, 2025
The Best Cone 6 Glossy Clear Glaze Recipe
Feb 28, 2025
The Best Cone 6 Glossy Clear Glaze Recipe
Feb 28, 2025
Feb 28, 2025
melted cones.jpg
Feb 28, 2025
Orton Pyrometric Cone Chart in Fahrenheit and Celsius
Feb 28, 2025
Feb 28, 2025
The Best Cut Off Wire for Ceramic Wedging Tables
Feb 27, 2025
The Best Cut Off Wire for Ceramic Wedging Tables
Feb 27, 2025
Feb 27, 2025
Shimpo banding wheel 2.jpg
Feb 27, 2025
The Best Banding Wheels for Pottery and Ceramics
Feb 27, 2025
Feb 27, 2025
Best Masks for Silica Dust in Pottery and Ceramic Studios — updated for 2025
Feb 26, 2025
Best Masks for Silica Dust in Pottery and Ceramic Studios — updated for 2025
Feb 26, 2025
Feb 26, 2025
The Best Scales for Ceramic Studios and Workshops 2025
Feb 23, 2025
The Best Scales for Ceramic Studios and Workshops 2025
Feb 23, 2025
Feb 23, 2025
Alec Soth Sister Corita Rules.jpg
Feb 22, 2025
Alex Soth on Being Goofy, Following Your Ideas, and How Advice is Meaningless
Feb 22, 2025
Feb 22, 2025
Low fire majolica 1.jpg
Feb 18, 2025
Cone 04 Low Fire Majolica Glaze Tests with Oxide Washes
Feb 18, 2025
Feb 18, 2025
Cone 6 white glaze test tiles.jpg
Feb 17, 2025
Cone 6 Midrange White Glaze – modified VC Soft Satin Glossy 1
Feb 17, 2025
Feb 17, 2025
VL-Whisper.jpg
Feb 8, 2025
2025 Pottery Wheel Buyer's Guide — The Best Wheels For All Studios
Feb 8, 2025
Feb 8, 2025
shimpo-vl-whisper-wheel.jpg
Feb 7, 2025
Pottery Wheel Comparison Chart 2025
Feb 7, 2025
Feb 7, 2025
vl-whisper.jpeg
Jan 30, 2025
Nidec-Shimpo Pottery Wheels Buyers Guide 2025
Jan 30, 2025
Jan 30, 2025
C_wheel_PATH_2012.jpeg
Jan 29, 2025
Brent Pottery Wheels Buyers Guide 2025
Jan 29, 2025
Jan 29, 2025
The Slip image 4.jpg
Jan 29, 2025
Ellsworth Kelly on Drawing Plants and Nature as “The Ultimate Artist”
Jan 29, 2025
Jan 29, 2025
Agnes Martin 1.jpg
Jan 28, 2025
Agnes Martin on “Perfection That Transcends What You See”
Jan 28, 2025
Jan 28, 2025
Jan 17, 2025
Lithium Carbonate for Ceramic Glazes Price Tracker
Jan 17, 2025
Jan 17, 2025
Complete Guide to Low Fire Glaze.jpg
Nov 26, 2024
10 Best New Pottery and Ceramic Books for 2024
Nov 26, 2024
Nov 26, 2024
Arthur Sze cover.jpg
Nov 1, 2024
Two Poems by Arthur Sze
Nov 1, 2024
Nov 1, 2024
My Passport Ultra 1.jpg
Sep 30, 2024
Review: Western Digital My Passport Ultra 5 TB HDD External Hard Drive
Sep 30, 2024
Sep 30, 2024
MSF KR 3.jpg
Sep 27, 2024
Magdalena Suarez Frimkess: The Finest Disregard catalogue
Sep 27, 2024
Sep 27, 2024
aIMG_4484.jpg
Sep 19, 2024
The DIY Ceramics Degree
Sep 19, 2024
Sep 19, 2024
nigerian pottery 1.jpg
Mar 17, 2024
Nigerian Pottery by Sylvia Leith-Ross Book Review
Mar 17, 2024
Mar 17, 2024
kilnwadding_12.jpg
Feb 17, 2024
Kiln Wadding Recipe with Tutorial
Feb 17, 2024
Feb 17, 2024
kurosawa2.jpg
Nov 26, 2023
Akira Kurosawa on Why He Stopped Painting and Entered the Film Industry
Nov 26, 2023
Nov 26, 2023

WHAT IS THESTUDIOMANAGER.COM?
This site is devoted to sharing tips, tricks, recipes, and equipment that will help you in an art studio.

HOW DO YOU MAKE RECOMMENDATIONS?
In the studio, we are endlessly experimenting with equipment, techniques and ways of making. This site is dedicated to sharing that first-hand information, including products, ideas, and methods that will help you in the studio.

WHO ARE YOU?
This site is written by an artist with more than 20 years of experience running academic, community, and professional studios. For more, please visit the about page.

PRIVACY POLICY
This site uses cookies to track if you click on a link via affiliate networks with Amazon, and Blick via CJ Affiliate, and you can opt out of this tracking. For more information, visit the Disclosures and Privacy Policy for this site.

HOW CAN I SUPPORT THIS SITE?
We love comments and suggestions, and are constantly updating the site based on feedback and information that we receive. This site is also supported by affiliate networks, including Amazon, and Blick via CJ Affiliate.

WHY SHOULD I TRUST YOU?
This site is dedicated to sharing information in the clearest way we know how. We never accept payment from product manufacturers. Our revenue is from affiliate networks, such as Amazon and CJ Affiliate. This means that when we recommend a product and link to it, if you click and buy it and keep it, we will get a small percentage of the revenue at no cost to you. Our incentive is to share the best possible information, about a product or in a how-to guide, so that you will visit again.


Copyright © 2019-2025 TheStudioManager.com