• >> See all Pottery Wheel Posts
    • Pottery Wheel Buyer's Guide
    • Tabletop Pottery Wheels
    • Pottery Wheel Comparison Chart
    • Best Pottery Wheel Stools
    • Brent Wheels Buyer's Guide
    • Nidec-Shimpo Wheels Buyer's Guide
    • Best Pottery Wheel Bats
    • Best Throwing Sponges
    • Pottery Aprons
    • >> See all Tool Reviews
    • Gift Guide for Potters
    • Best Masks
    • Best Aprons
    • Best Scales
    • Banding Wheels
    • Best HEPA Vacuum
    • Best Wet Polishers
    • Cleanup Tools
    • Sandpaper and Abrasives
    • Best Glaze Mixing Tools and Accessories
    • Handheld Extruder Buyer's Guide
    • Tools for Home and Studio
    • Cut Off Wire
    • Hand Creams for the Studio
    • Best Tools for Pottery Beginners
    • Heavy Duty Cleanup Sponges
    • >> See all Glaze posts
    • Cone 6 Glossy Clear Glaze
    • Cone 6 Milky Clear Glaze
    • Cone 6 Ultramarine Blue
    • Cone 6 Lava Glaze Silicon Carbide Grit Tests
    • Cone 6 Bisque Crackle Slip
    • Cone 6 Pussy Willow and Blueberry Hill glazes
    • Cone 6 Cobalt Blue
    • Cone 6 Kiln Wash
    • Spectrum Underglaze Cone 6 Test Tiles
    • AMACO LUG Underglaze Cone 6 test tiles
    • AMACO Velvet Underglaze cone 6 test tiles
    • Speedball Underglazes Cone 6 Test Tiles
    • >> See all How-To posts
    • Mix a Ceramic Glaze from Scratch
    • How to Reclaim Clay in a Small Studio
    • Make Colorful Pancake Paintings
    • Make a Grinding Disc for Your Wheel
    • Make a Cut Off Wire for Wedging Tables
    • Eliminate Ceramic Slop Bucket Odor
    • Make a Simple Booklet
    • Use and Clean Up Wax Resist
    • Make a Metal Pottery Rib
    • Make a Plastic Pottery Rib
    • >> See all Painting and Drawing
    • Gift Guide for Painters
    • Colored Pencil Buyer's Guide
    • Best Chunky Colored Pencils
    • Best Mixed Media Sketchbook
    • Best Black Paper Sketchbooks and Drawing Pads
    • Best Black Acrylic Gesso
    • >> See all Inspiration posts
    • Georgia O'Keeffe on Making "Ordinary Paintings"
    • John Baldessari on Cheap Art
    • Louise Nevelson on Making Art
    • Matisse on Drawing Trees
    • Plato on the Role of Potters
    • Ceramic Textbooks and Guidebooks
    • Centering by M. C. Richards
    • Shoji Hamada on Making Pots
    • A Potter's Workbook by Clary Illian
    • Roger Herman Ceramics monograph
    • Ben Okri: A Time for New Dreams
    • About
    • Privacy Policy
Menu

The Studio Manager

Street Address
City, State, Zip
Phone Number

Your Custom Text Here

The Studio Manager

  • Pottery Wheels
    • >> See all Pottery Wheel Posts
    • Pottery Wheel Buyer's Guide
    • Tabletop Pottery Wheels
    • Pottery Wheel Comparison Chart
    • Best Pottery Wheel Stools
    • Brent Wheels Buyer's Guide
    • Nidec-Shimpo Wheels Buyer's Guide
    • Best Pottery Wheel Bats
    • Best Throwing Sponges
    • Pottery Aprons
  • Tools
    • >> See all Tool Reviews
    • Gift Guide for Potters
    • Best Masks
    • Best Aprons
    • Best Scales
    • Banding Wheels
    • Best HEPA Vacuum
    • Best Wet Polishers
    • Cleanup Tools
    • Sandpaper and Abrasives
    • Best Glaze Mixing Tools and Accessories
    • Handheld Extruder Buyer's Guide
    • Tools for Home and Studio
    • Cut Off Wire
    • Hand Creams for the Studio
    • Best Tools for Pottery Beginners
    • Heavy Duty Cleanup Sponges
  • Glazes
    • >> See all Glaze posts
    • Cone 6 Glossy Clear Glaze
    • Cone 6 Milky Clear Glaze
    • Cone 6 Ultramarine Blue
    • Cone 6 Lava Glaze Silicon Carbide Grit Tests
    • Cone 6 Bisque Crackle Slip
    • Cone 6 Pussy Willow and Blueberry Hill glazes
    • Cone 6 Cobalt Blue
    • Cone 6 Kiln Wash
    • Spectrum Underglaze Cone 6 Test Tiles
    • AMACO LUG Underglaze Cone 6 test tiles
    • AMACO Velvet Underglaze cone 6 test tiles
    • Speedball Underglazes Cone 6 Test Tiles
  • How To
    • >> See all How-To posts
    • Mix a Ceramic Glaze from Scratch
    • How to Reclaim Clay in a Small Studio
    • Make Colorful Pancake Paintings
    • Make a Grinding Disc for Your Wheel
    • Make a Cut Off Wire for Wedging Tables
    • Eliminate Ceramic Slop Bucket Odor
    • Make a Simple Booklet
    • Use and Clean Up Wax Resist
    • Make a Metal Pottery Rib
    • Make a Plastic Pottery Rib
  • Painting
    • >> See all Painting and Drawing
    • Gift Guide for Painters
    • Colored Pencil Buyer's Guide
    • Best Chunky Colored Pencils
    • Best Mixed Media Sketchbook
    • Best Black Paper Sketchbooks and Drawing Pads
    • Best Black Acrylic Gesso
  • Inspiration
    • >> See all Inspiration posts
    • Georgia O'Keeffe on Making "Ordinary Paintings"
    • John Baldessari on Cheap Art
    • Louise Nevelson on Making Art
    • Matisse on Drawing Trees
    • Plato on the Role of Potters
    • Ceramic Textbooks and Guidebooks
    • Centering by M. C. Richards
    • Shoji Hamada on Making Pots
    • A Potter's Workbook by Clary Illian
    • Roger Herman Ceramics monograph
    • Ben Okri: A Time for New Dreams
  • About
    • About
    • Privacy Policy

Kiln Wadding Recipe with Tutorial

February 17, 2024 Matt M-H

Freshly made kiln wadding using the recipe and tutorial in this post.

Kiln wadding is very useful for loading kilns, and this all-purpose recipe and tutorial shows you how to make it. This recipe includes the weight of water needed, so you get the consistency just right and can use the wadding right away.

Wadding has a variety of uses, such as making kiln shelves even, lifting pots off shelves, or to space lids in a glaze firing. Wadding can be used in any type of firing, including electric, gas, soda, or wood firings. If you are doing soda or salt firings, you may need a slightly different mix but this recipe is what I use in my studio for mid-range electric firings, and it’s the same recipe that I have used in the past in high-temperature gas firings.

The key for wadding is that it dries out quickly, and doesn’t stick to your kiln shelves or ceramic wares. Making it out of kaolin and highly refractory alumina oxide accomplishes these tasks.

This wadding recipe also includes the water needed. It can be very easy to add too much water when mixing wadding, and this recipe gets the consistency just right for wadding that can be used immediately.

Here’s the recipe:

All-Purpose Kiln Wadding Recipe

Ingredient Percentage 1000g batch
Kaolin 50 500g
Alumina Oxide 50 500g
Mix in
Water 25 250g

Super simple, right? Just an even amount of two ingredients and then 25% water by total weight of the dry materials. Before testing and using this weight of water, I would estimate and always added too much water. Then, I would have to dry out the wadding before using. Note that this may seem like too little water at first, but it does work.

In my experience, about 1000g of dry materials will fill a large, 32oz sized deli or yogurt container. If you don’t use wadding frequently, you can make a smaller batch or also keep it in a plastic bag inside a container. It’s also ok to add water from time to time to maintain your wadding in a workable state.

For more info, check out the tutorial below with pictures.


How to Mix Kiln Wadding Tutorial

This tutorial shows how to mix the above recipe, to end up with wadding that you can use immediately. This tutorial shows how to mix 500g of dry materials, which ends up with enough wadding to fill a 16 oz plastic container. 1000g of dry material will usually fill up a 32oz deli or yogurt container.

Before starting, be sure to gather your scale, materials, water, and put on a good quality dust mask or respirator. (Read our guide to respirators here)
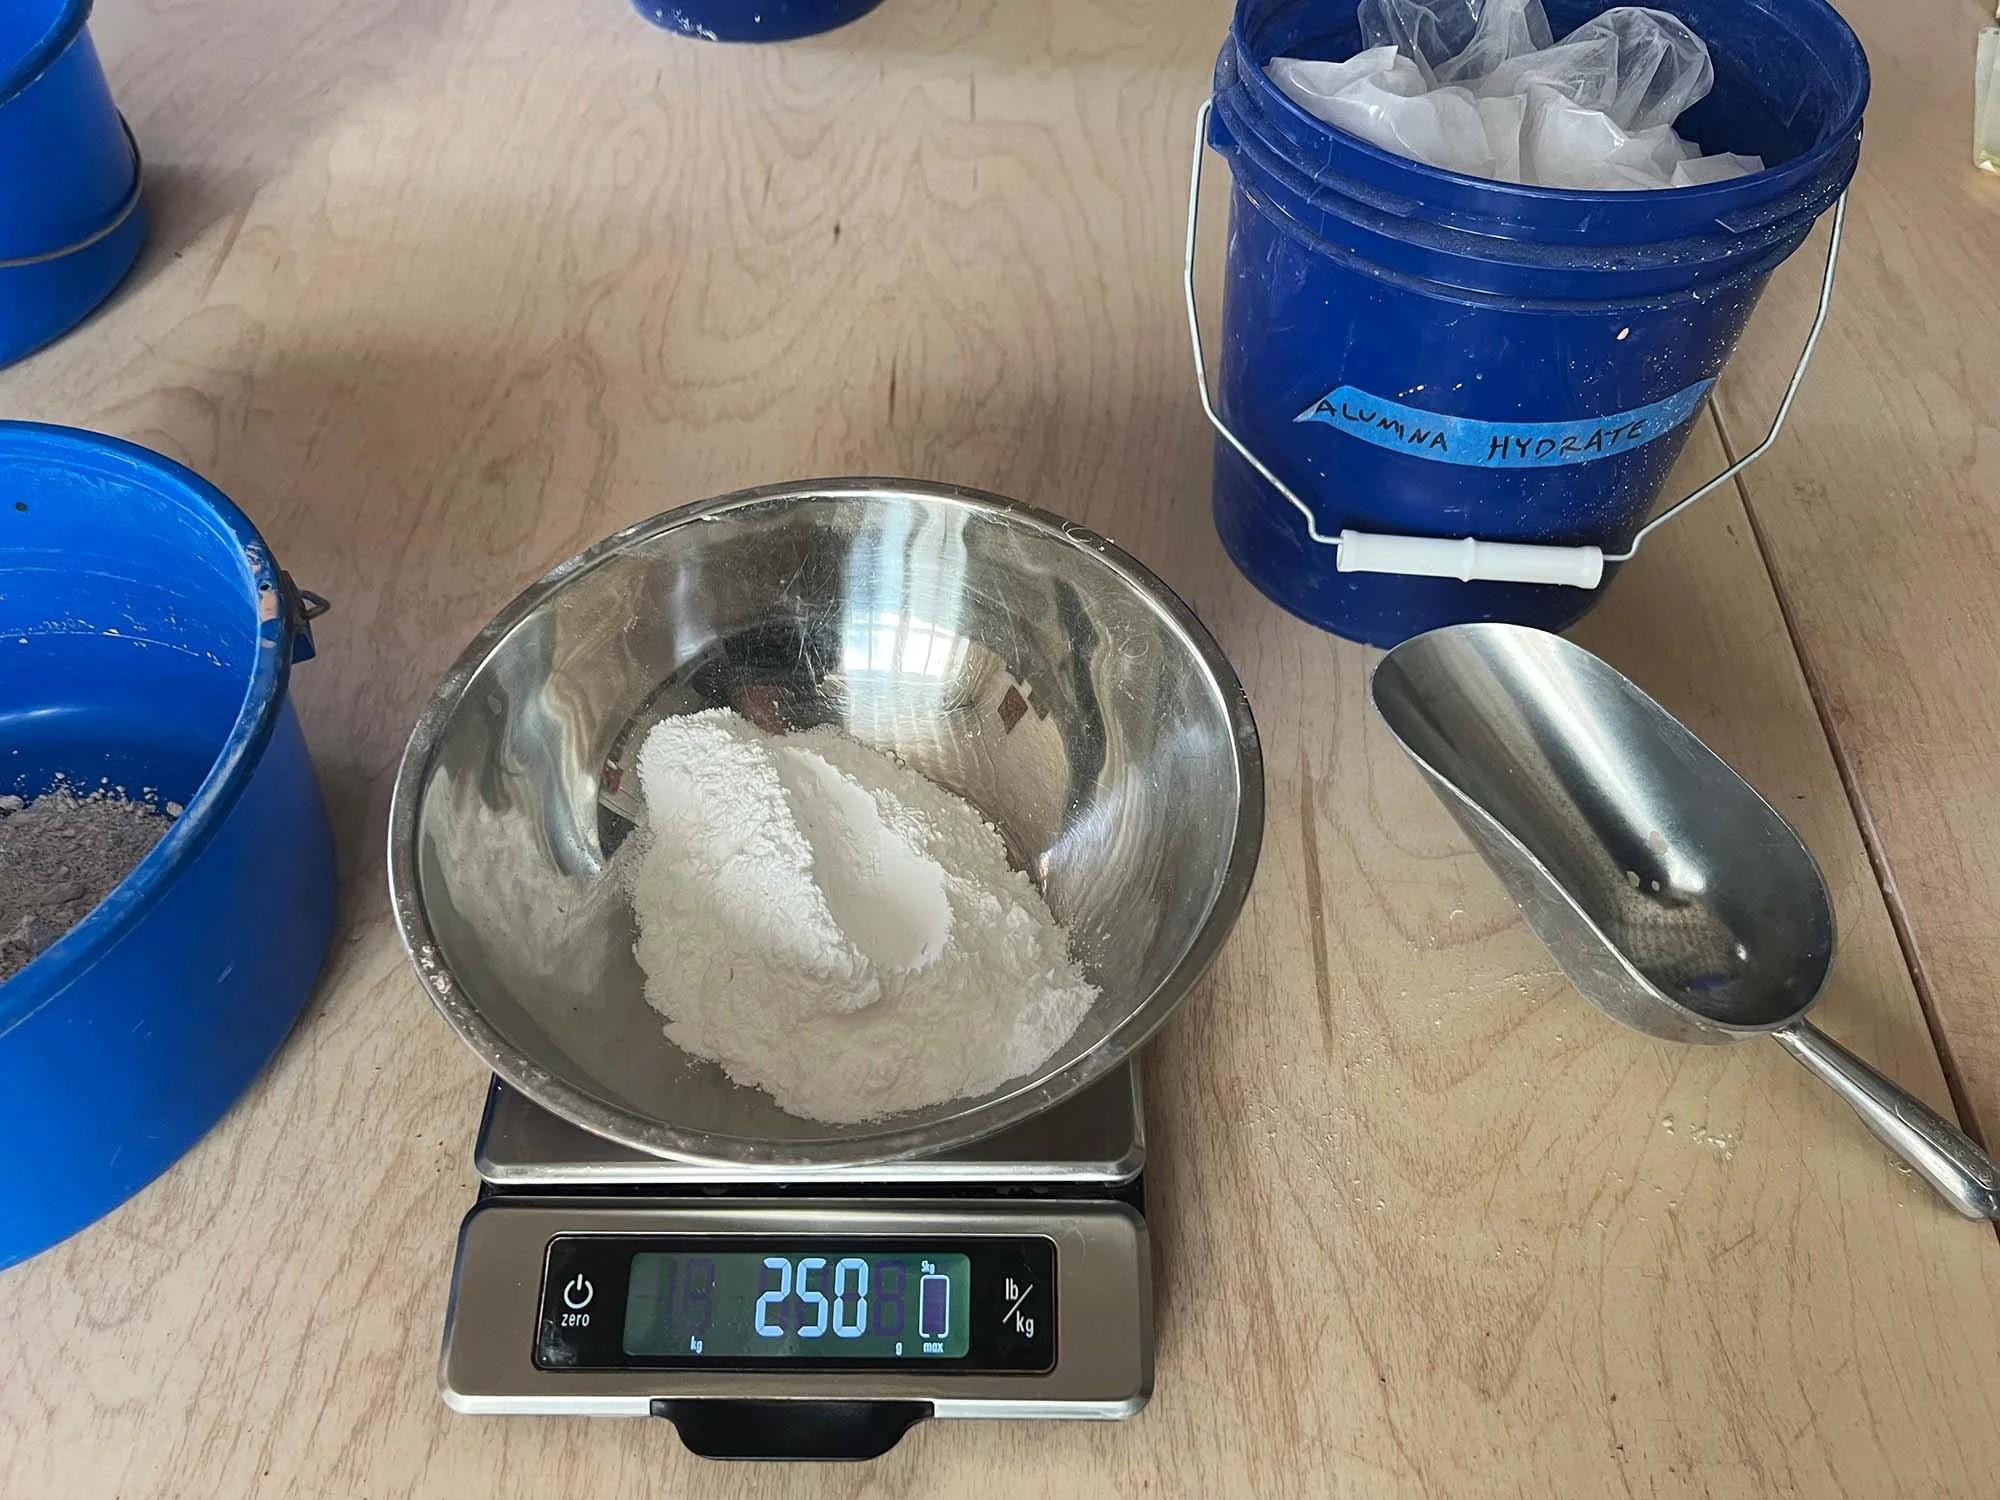
Step 1

250 grams of kaolin clay weighed in a metal bowl sitting on a scale

Kaolin being weighed.

In this tutorial, 500 grams of total dry material will be mixed.

To start, weigh 250g kaolin. EPK was used in this recipe, but you can use any kaolin.

Place kaolin in a bucket for mixing, such as a wide Big Mouth Bucket as pictured below.
(Shop bucket at Home Depot | Shop at Amazon)


Step 2

250 grams of alumina oxide being weighed in a metal bowl on a scale

Weigh 250g alumina oxide, and then add it to your mixing bowl.


Step 3

Equal amounts of kaolin clay and alumina oxide added to a wide, blue Big Mouth Plastic Bucket

Kaolin and alumina oxide added to a bucket.

Mix the dry ingredients. It is important to do this before adding water, so that the materials are evenly dispersed.

Kiln wadding ingredients kaolin clay and alumina oxide evenly mixed in a wide blue plastic bucket

The kiln wadding ingredients after mixing. The metal scoop was used to stir the ingredients.

A wide bucket, such as the 5qt Big Mouth Bucket, are great for this process.

Shop Bucket at Home Depot
Shop Bucket at Amazon

Step 4

Water being weighed in a metal bowl on a scale on a wooden workbench

Weigh the water. For 500 grams of dry material, 125g of water is needed.

It may not seem like enough but it will be!


Step 5

Water being poured out of a metal bowl into a plastic bucket with kiln wadding ingredients

Adding water to the dry materials.

Add the water to the dry materials, and mix. This wadding will be crumbly, but that’s ok.

Usually, I add dry materials into a bucket with the water, but for wadding it is ok to mix it either wet into dry, or dry into wet.

Mixing kiln wadding with a plastic scraper in a blue plastic bucket

The mix will be crumbly at first.

Mixed kiln wadding in a blue plastic bucket

With a bit more mixing, all the dry material starts to hydrate.


Step 6

Kiln wadding before being wedged together

Kiln wadding after mixing but before wedging.

The next step is to move the mixed material to a wedging table. It will be a bit crumbly. Then, wedge until fully mixed.

When all the materials are wet and your wadding seems usable, you are done.

A wedged ball of kiln wadding on a wedging table

Kiln wadding after wedging. Ready to use or put into a storage container.

Place your wadding in a plastic container. You can also line the container with a bag, to keep it wet.


Step 7

500 grams of dry material will result in kiln wadding that uses about half of a 32 oz yogurt container.

Your wadding is now ready to use or store.

Your wadding is now ready to use. Be sure to label your container.


Conclusion

This post has covered how to mix and make kiln wadding. The key is to just add 25% of water by weight to the dry materials, so that you end up with a useful wadding right away.

What wadding recipe do you use? Let us know in the comments.

You may also enjoy:

Best Scales for Ceramic Studios

Best Glaze Mixing Tools and Accessories

Best Aprons

Gift Guide for Potters


In Glazes, Kilns and Firing Tags wadding, kiln wadding, pottery tutorial
3 Comments

Pinch Pot Vase With a Lid — Pottery Tutorial

September 22, 2023 Matt M-H

Two pinch pots, as shown at left, are joined and turned into a vase in this tutorial.

Pinch pots are a classic beginning project in ceramics, but this tutorial shows how to take them a step further by combining two pots into a vase with a simple lid. For this project you will need clay, simple ceramic tools, glaze, and underglaze.

The complete tutorial is below or check out this video of the same process.


Step 1: Make 2 Pinch Pots

Starting with a small ball of clay, stick your thumb in the center and then pinch the walls to an equal thickness.

As you are making the pinch pots, try to keep the walls an even thickness and keep the rim flat.

To help even out the rims, which we will be joining in the next step, you can turn the pinch pot upside down and tap it against your work surface.

After your first pinch pot, make a second. Try to keep the diameter of the two pinch pots roughly the same.


Step 2: Join the Pinch Pots

After making the two pinch pots, it’s time to join them. Make sure the rims somewhat match up, but it’s ok if your pinch pots are varied shapes. Spherical, egg shaped, cylindrical—all will make a nice vase.

To join the pinch pots, first score with a serrated rib or fork, paint on joining slip, and then press the two pinch pots together.

Not pictured here, but it’s great to take a rib or other tool to really smooth the joint of the two pinch pots


Step 3: Add a Foot Ring

This vase benefits from a small foot ring. To make one, first roll a thin coil and form it into a circle.

Then, score, slip and press the foot ring to the base.

A wooden modeling tool can help join and clean up the foot ring.


Step 4: Cut and Shape the Lid

Now that you have a footed vessel, it’s time to make the lid.

Start by cutting the opening in the top.

Using the circle of clay you just cut out, you can pinch it a bit wider than the hole you just made. Add a curve or keep it flat.


Step 5: Add a Bumper and Knob to the Lid

To help the lid stay in place, make a small ring with a coil of clay, and join it to the underside of the lid. This will help it sit and stay in place.

You can also add a small knob to the lid, as shown in the picture.

When you have finished this step, you can let the piece dry, and then bisque fire it.


Step 6: Glazing

For this example, I glazed the lid with just underglaze by painting on 3 coats of an orange underglaze. I like to have a contrast between matte and glossy, but you can do whatever you want with your piece.

Using a clay shredder to clean up the outside rim.

For the vase, I layered two glazes to get the drippy blue and white effect. The first glaze was a white crawl glaze, which I poured inside the vase and painted on the outside. I applied a few layers to get it extra thick. Then, I painted a blue glaze on top of the blue crawl glaze.

Excess glaze was wiped away from the mouth of the vase, but I fired the vase and the lid separately.


All done!

Here’s the final results, a small lidded vase with an orange lid and drippy, blue and white glaze on red stoneware.

There are so many variations that you can do on this, and if you try it, you will find your own way to make a lidded vase. Have fun.


You might also enjoy:

Make a Pasta Plate from a Slab pottery tutorial

Sgraffito Decoration on a Large Bowl tutorial

Make a Slab Plate on the Pottery Wheel tutorial

Make a “Phil Mug” pottery tutorial

View all How To posts

In How To Tags pottery tutorial, pottery, pinch pot
Comment

Press-molded Pasta Bowl from a Clay Slab — Pottery Tutorial

September 21, 2023 Matt M-H

Pressing a slab into a woven wood salad bowl is a fun and easy way to make a plate, bowl, or pasta plate.

Using a woven wood salad bowl as a pottery slump mold is a great way to easily make plates, bowls, or pasta plates. This tutorial will cover how to use this technique, including rolling out the slab, cutting, and shaping the pasta plate

For this process, you will need a wooden salad bowl. A plaster form will also work, but do not use plastic or metal bowls as clay will stick to them. This tutorial uses a 14-inch wide wooden bowl which costs around $15, but you can do this technique with any size or shape wooden bowl.

You will also need a canvas or slab mat, and a large rolling pin (or a slab roller).

Shop 14" Wooden Salad Bowl at Amazon
Shop Solid Maple Rolling Pin at Blick
Shop Slab Mat at Blick

Here’s a video of the process and a full tutorial with pictures is below.


Step 1: Make a Slab

Pounding the wedged clay to begin making a slab.

To make a slab, either use a slab roller and roll out a slab about 3/8 of an inch thick, or roll it by hand as shown here.

To roll a slab by hand, I first start by pounding or punching the wedged clay down on a canvas mat. A double layer of yardsticks is already set up to be ready to roll.

Pounding the clay roughly into a circle.

As I continue pounding it down using the bottom of a fist, I try to work the clay into a roughly circular shape.

Next, I throw the clay from the side at an angle, to stretch and thin the slab even more.

Throwing the slab at an angle to thin and stretch it.

When the clay is about an inch thick, then I will start rolling. I will first roll it evenly with the double layer of yardsticks. Then, to get the slab thinner, I will take away one yardstick on each side and roll the slab again until it is even.

Rolling the slab with a large rolling pin.


Step 2: Cut Slab Using Bowl as Template

Using the woven wood salad bowl as a template to cut a circle of clay.

After preparing your slab, invert the bowl and use it as a template to cut a circular slab. I cut right along the edge of the bowl, but you could cut it bigger if you want to make a taller bowl.


Step 3: Flip Slab and Shape Into the Mold

Preparing to flip the slab and bowl using the canvas.

After cutting your circular slab and removing excess clay, fold up the canvas on top of the bowl and use the canvas to help flip the slab and bowl right side up.

If done correctly, the slab should sit on top of the bowl or begin to drop in to the bowl. It may be a little bit uneven, but this is ok because you are going to cut off extra clay later.

Using the canvas to flip the slab into the bowl.

After flipping the slab, press it gently into the bowl form. You can use a sponge to aid in this process, or even tap the bowl against the table so that the slab drops in against the sides.

Gently forming the slab into the bowl shape. Don’t press too hard or you will make a bunch of fingerprint marks.

To tap the slab into place, hold both sides of the bowl and tap it against the table a few times. The slab will drop in and take on the shape of the wooden bowl.


Step 4: Refine and Smooth

After your slab is in, you can use a sponge or a rib to smooth the inside, make sure everything is even, and make any adjustments to the slab.

Smoothing the inside of the bowl with a sponge.


Step 5: Cut Off Excess Clay and Smooth Rim

Cut off excess clay with a clay knife.

After smoothing and organizing the inside of the bowl, you can cut off excess clay and clean the rim. For a plate, cut close to the base. For a pasta plate, leave about an inch for the wall. For a shallow bowl, leave about 2 inches for the wall. But it’s totally up to you! Make a shape that looks good to you.

Cleaning the rim.

After cutting off the extra clay, clean and smooth the rim with a sponge.


Step 6: Dry Overnight, then Flip Bowl Out of Mold

Flipping the pasta plate out of the wooden bowl.

After drying a few hours or overnight (you can leave it uncovered) you should be able to flip the pasta plate out of the woven wood bowl. Take care! Leather hard and bone dry ware can be fragile.

Using a clay shredder to clean up the outside rim.

Smoothing the rim and removing tool marks.

Then, you can further refine the rim by using a clay shredder tool, a loop tool, or a rib.

After shaping the rim, it’s a good idea to smooth the rim with a damp sponge. But don’t work it so much that you “sand” away the finest particles. Just try to smooth it out.


All done!

The pasta plate immediately after being removed from the kiln.

After cleaning the bowl, you can let it dry fully, bisque fire, and then glaze.

This pasta plate was glazed in a satin white glaze.


Tutorial Recap

If you need a wooden bowl for this process, here are links to a single bowl ($15) or a 4 pack of the 14” bowls. These bowls are actually about 13.5 inches wide, but work great for making a plate that is around 11 to 11.5 inches wide.

You may also need a canvas, slab mat, and large rolling pin. I prefer a solid maple rolling pin.

Shop 14" Wooden Bowl at Amazon
Shop Slab Mat at Blick
Shop 4 Pack of 14" Wooden Bowls at Amazon
Shop Rolling Pin at Blick

You might also enjoy:

Best Small Slab Rollers for Personal Studios

Best Loop Tools for Trimming Pottery

How To Make a Metal Pottery Rib

Make a Wide Rim Bowl tutorial

Sgraffito Decoration on a Large Bowl tutorial

Make a Slab Plate on the Pottery Wheel tutorial

Make a “Phil Mug” pottery tutorial

View all How To posts

In How To Tags pottery tutorial, pottery, pasta bowl, slab pottery, slab
Comment

Turn a Bottle into an Oval Flask — Pottery Tutorial

September 20, 2023 Matt M-H

Adding a base to a wheel-thrown bottle that has been altered and shaped into an oval flask.

Turning a bottle into an oval flask is a fun way to modify and personalize your pottery. This tutorial will cover every step of modifying a round bottle to make an oval vessel on the pottery wheel.

Here’s a video of the process and a full tutorial with pictures is below.


Step 1: Center and Open

Beginning to center the wedged clay.

In this tutorial, four pounds of red stoneware clay was used, but you can vary the amounts based on the size of flask you want to make.

Remember that you will be cutting the form off the base, and then re-attaching a slab base in the new oval shape.

Opening the clay to throw a cylindrical form.

After wedging, join the clay to the wheel head and begin centering. Then, open the mass of clay and organize the clay into a base and walls.

For a bottle, you want a flat bottom, about 1/2 inch from the wheel head. But we will be cutting this off the bottom so the thickness of your base is not of great concern at this point, but you still want the walls to be even.

Pull the walls as high and thin as you can, but keep a good amount of clay at the top as the next step will be collaring in to make the neck.


Step 2: Collar In to Make the Bottle Neck and Mouth

Begin collaring by using wet hands and slowly move the clay in.

After pulling the walls, beging to collar in the top to make the shoulders, neck, and mouth of the pot. This should be done slowly with multiple passes.

Bring the clay in to the desired width of your neck. You will be able to make adjustments later too.

Before putting the finishing touches on the neck and mouth, I clean up the walls as shown in the next step.


Step 3: Cleaning the Walls and Shaping

Removing excess clay from the lower half of the form.

After collaring in the top, I like to do a quick step where I remove some excess clay from the base of the walls. You may throw perfectly thin, but I usually need this trimming to get rid of extra clay on the bottom half. I use a large trimming tool to remove clay.

Shaping the shoulder and neck with a rib.

Then, I use a rib to refine the shape of the neck and shoulder. This will also remove slip, making our next step easier.


Step 4: Removing the Base and Pressing Into an Oval

After throwing and shaping your round bottle, use a needle tool to cut the form from the base. Pick the bottle up and set it aside. Place a rolled-out slab on your work area and return the bottle form. Then, with equal pressure from both sides, press the bottle into an oval form.

Cut the bottle off from the base.

Place a slab in your work area, the press the bottle into an oval shape.


Step 5: Adding a Slab Base and Cleaning Up

Join the oval form to the slab base.

When you have your bottle top and base shaped just how you want them, score both sides, add slip and join.

It can be helpful to press the slab base up into the wall by running a wooden tool underneath the slab.

Then, cut off excess clay and smooth the base and wall together.

Pressing the base up into the wall with a wooden tool.

Cleaning up the base after removing excess clay.

Smoothing the walls.

Trimming the walls of the bowl.


All done! After cleaning up, it’s time to let your oval flask dry and get it bisque fired. The wide sides of this form can provide a great canvas for decoration. Good luck!

You might also enjoy:

Best Loop Tools for Trimming Pottery

How To Make a Metal Pottery Rib

Make a Wide Rim Bowl tutorial

Sgraffito Decoration on a Large Bowl tutorial

Make a Slab Plate on the Pottery Wheel tutorial

Make a “Phil Mug” pottery tutorial

View all How To posts

In How To Tags pottery tutorial, flask, bottle, oval flask, pottery
Comment

Make a Wide Salad Bowl Pottery Tutorial

June 26, 2023 Matt M-H
Pottery salad bowl being smoothed with a red rubber Mudtools rib on the pottery wheel

The salad bowl form being smoothed with a red Mudtools rib at the end of the throwing process, but before being trimmed and glazed.

A salad bowl is one of my favorite things to make on the pottery wheel. This tutorial will cover every step of making a salad bowl including centering, opening, pulling the walls, trimming, and glazing.

When making this shape, keep in mind that the key to this form is to make the walls more vertical, around a 45 degree angle when pulling up, and then gradually open and lower the walls in the shaping stage.

Here’s a video of the process and a full tutorial with pictures is below.


Step 1: Center and Open

Two hands centering five pounds of brown clay on the pottery wheel with a black splash pan and a red towel draped over a knee

Beginning to center the clay.

In this tutorial, five pounds of brown speckled clay was used, but this style of bowl could be made in any range of weights and clay bodies.

Two hands pushing a cone of clay forward in the centering process on the pottery wheel also known as wedging on the wheel

Pushing forward and down after bringing up a cone of clay.

Recommended weights for this style:
Small bowl — 2 to 4 pounds
“Normal” serving bowl — 4 to 7 pounds
Large bowl — 8 pounds or more.

Thumb pinching open clay on the pottery wheel

The first opening move.

After wedging, join the clay to the wheel head and begin centering.

I usually bring the clay up into a cone and then push it forward and back down at least three times, until the clay feels even, organized, and workable. This process is called “wedging on the wheel” but you should always wedge your clay before joining on the wheel head too!

Two hands overlapping pinching the clay open in the centering process on the pottery wheel

The second opening “pinch” inwards.

Then, open the mass of clay. I first put my right thumb in and squeeze towards my left hand, then I do a second open where I pinch the clay in towards my torso. As this will be a bowl, it’s best to have a curved bottom rather than the flat bottom you would want for a cylinder.


Step 2: Pull Up and Out

Two hands throwing a bowl on the pottery wheel with the right hand knuckle pressed into the clay to start the first pull to thin and raise the walls of the vessel

The first pull using an index finger wrapped around a thumb in a semi-fist position.

After centering and opening the clay, the next step is to pull the clay.

For my first pull, I use the knuckle / side of my index finger with my hand in a fist position. I find this to be stronger and results in less strain on my wrist.

The index finger on the right hand compressing the rim of a bowl being thrown on the pottery wheel.

Remember to ompress the rim after each pull.

Usually, I will make a bowl like this in three to four pulls, but do as many pulls as you need without overly softening the clay. After each pull, it’s important to compress the rim. Also, focus on bring the clay up more than out. In the next step, the bowl will be lowered and widened using a rib.


Step 3: Opening, Shaping, and Lowering the Walls

Beginning to shape and lower the walls with a large rib.

After pulling the walls up and somewhat out, the next step is to shape and lower the walls. You may be happy with a more upright shape, and those can be great bowls! But these photos show how a large rib can be used to gently shape and lower the walls of the bowl into an almost platter-like form.

A large metal rib being used to open and shape the walls of a salad bowl on the pottery wheel

The second pass with the rib, bringing the walls even lower.

You should not be adding any water in this stage and as you are removing slip and starting to dry the bowl a bit, you can be somewhat adventurous in shaping the walls.

A large metal rib being pressed into a clay bowl form on the pottery wheel to turn a bowl into almost a platter like shape

You can make numerous passes to really get the wall the shape that you want. You may need to find or make a rib that is your desired profile for the inside of a bowl.

The best tool for this is a large rib made out of metal, wood, or plastic. In this tutorial, I’m using a homemade metal rib that you can make following this tutorial.

A red plastic rib being used to smooth and shape a bowl on the pottery wheel

The final step is to smooth the inside and remove any throwing marks.

The final step is to really smooth and refine the inside of the bowl (We’ll deal with the outside in the trimming stage.) For this, I use a red Mudtools brand rib, but you can use any flexible rib to compress and smooth the inside of the bowl.

Shop Mudtools rib at Amazon

If you want to watch the centering, opening, pulling, and shaping process in one continuous shot, here’s a video of just that:


Step 4: Trimming

Attaching the leather-hard bowl to a bat for trimming.

Trimming is the time to take care of the bottom of the bottom of the bowl.

First, center the upside down bowl and then anchor it in place with at least 4 lugs of clay.

A hand holding a loop tool beginning to trim the foot ring on a salad bowl being made on the pottery wheel with the other hand holding the bowl steady

Establishing the foot ring.

Next, lightly trim the outside of the foot ring, until you are at the outside diameter that you want. Then, make a shallow cut to establish the inside of the foot ring.

An avocado-shaped loop tool being used to trim the foot of a salad bowl being made on the pottery wheel

Trimming inside the foot ring.

After you have established your foot ring, you can trim clay from the inside of the foot ring. A few taps or gentle “pushes” will help you figure out if the clay is still stiff and therefore a bit too thick. Or, if it has a slight give when you push on it, you have trimmed enough.

The index finger of a left hand tapping the center of a pottery bowl being made on the wheel to test the thickness of the clay while trimming

Testing if the piece has any “give” to see if enough clay has been removed or not.

After trimming the inside of your foot ring, turn your attention to the outside walls. I usually start with a large loop tool and then switch to a detail tool to finish everything.

Beginning to trim the walls of a bowl after trimming the foot ring with a large loop tool

Trimming the walls of the bowl.

To complete the trimming process, lightly smooth the piece with a sponge, and then finish with a flexible rib to remove any trimming marks.

When you are done trimming, cover the bowl with plastic so it will dry slowly. Bowls and wide forms are especially prone to S-cracks that can be caused by uneven drying.

 
Using a detail loop tool to trim the foot ring of a salad bowl on the pottery wheel

Final detail trimming with a small, detail loop tool.

 
Light clean up with a sponge of a freshly trimmed clay bowl being made on the pottery wheel

Lightly cleaning / compressing with a damp sponge.

 
Two hands using a soft red rib to smooth the outside walls of a bowl being made on the pottery wheel

Using a rib to smooth out the bowl and remove any trimming marks.

 
A recently thrown and trimmed pottery bowl covered in plastic so that it will dry slowly and not crack or warp.

Covering the bowl with plastic wrap for slow drying.


Step 5: Glazing

A hand holding a measuring cup and pouring a white glaze on the inside of a bisque fired salad bowl

Pouring glaze on the inside of the bowl.

After the bisque firing, it’s time for glazing. This bowl was finished in a matte white glaze and because it was made with a speckled clay, the black speckles from the granular manganese add to the glaze.

A hand holding a measuring cup pouring a glaze on the outside of a bisque fired salad bowl

Pouring glaze on the outside of the bowl.

To glaze a pot, first clean it with a wrung-out, damp sponge to remove any dust or debris.

Then, you can paint, dip, or pour glaze. For this bowl, I poured the glaze, first on the inside, then on the outside.

Using a sponge to wipe and clean up the foot ring of a salad bowl after applying the glaze

Cleaning the foot ring with a sponge.

After applying the glaze, use a sponge to clean the footring and you are ready to glaze fire.


All done! After glaze firing, it’s time to enjoy your bowl. There’s nothing better than eating off of hand made bowls and plates!

A wide salad bowl with a white glaze and black speckles  being held by two hands after the glaze firing

You might also enjoy:

Best Loop Tools for Trimming Pottery

How To Make a Metal Pottery Rib

Make a Wide Rim Bowl tutorial

Sgraffito Decoration on a Large Bowl tutorial

Make a Slab Plate on the Pottery Wheel tutorial

Make a “Phil Mug” pottery tutorial

View all How To posts

In How To Tags bowl, salad bowl, pottery tutorial
Comment

Make a Pineapple Vase — pottery tutorial inspired by Shozo Michikawa

March 25, 2023 Matt M-H

The finished Pineapple Vase.

A Pineapple Vase is a very distinctive style of wheelthrown pottery invented by Japanese potter Shozo Michikawa. You can find Michikawa’s work in galleries and museums worldwide, and there are a number of online videos of Michikawa demonstrating this technique and others.

For this tutorial, I made my own version of the Pineapple Vase, and at the end of the video, I show how I alter it to make it more my own.

The main way to approach this technique is to make a narrow cylinder with a thick wall, around 1 inch or about 2 cm thick. Then, score and alter the sides of the cylinder. Finally, you open the cylinder with one hand, stretching out the decoration into a helix pattern as you open and widen the vase. It’s really fun and worth trying. Check out this video, or keep scrolling for a complete tutorial with pictures.

If you would like to learn more about Shozo Michikawa, check out this catalog of his ceramic art at Amazon.


Make a Pineapple Vase Pottery Tutorial

Step 1: Center, open, and pull

Wedge, center, open, and pull the walls up.

To get started, wedge and center around 8 to 10 lbs of clay. Open and pull the walls. Be sure to keep the walls as thick as possible, around 1 inch thick.


Step 2: Collar In

Collaring in.

After raising your walls, collar the cylinder in to make it as narrow as possible.

The more narrow your cylinder, the more the pattern will “travel” when you open it up.


Step 3: Clean Slip From Sides

Removing slip from the cylinder.

After collaring in your cylinder, remove any slip from the outside with a rib. This will help you get a crisp design.


Step 4: Add Design

Adding the horizontal design.

After creating your narrow cylinder and removing slip, it’s time to add your design. Using an angled tool — a sharp metal tool is best — add horizontal lines. If desired, you can undercut these a bit.

Step 5: Cut Vertical Lines

Lightly score vertical lines.

Next, use a needle tool to lightly score vertical lines from top to bottom. Unlike what is shown in this image, keave the rim unscored, or you may have to recompress and join the rim back together.


Step 6: Open

Opening the cylinder.

After adding your horizontal design and vertical scoring, work your hand back in to the cylinder and begin to open up. If you can do this with very little water, it’s best, as the added friction will help you twist the design into a helix pattern.

Step 7: Clean Up and Done!

Cleaning the base

After opening your vessel, the next step is to lightly remove material from the base, cut off, and dry.

Congratulations! You’ve mastered a new technique.

Cutting off the bat with a wire tool.

Done!


You might also enjoy:

Make a Wide Rim Bowl tutorial

Sgraffito Decoration on a Large Bowl tutorial

Make a Slab Plate on the Pottery Wheel tutorial

Make a “Phil Mug” pottery tutorial

How To Make a Metal Pottery Rib

View all How To posts

 
In How To Tags pottery tutorial, pineapple vase, shozo michikawa
Comment

Make a "Phil" Mug — pottery tutorial

February 25, 2023 Matt M-H
Pottery mug wheelthrown and altered inspired by potter Phil Cornelius

The finished “Phil” mug, a quick and fun style of making a mug on the pottery wheel.

This is a style of handmade mug I learned many years ago from Phil Cornelius at Pasadena City College in Pasadena, California. Phil was a great potter and artist, and his demos often involved small moves that really highlight the handmade quality of pottery made on the wheel. (One of his popular demos was making a teapot in 5 minutes.)

For this style of mug, which I’m calling the Phil Mug, you throw a cylinder with about one pound of clay and after cleaning it up, give it a slight pull to take it off center. Then cut it off the wheel head, attach a handle, and it is ready for decorating and firing.

The complete steps are below, and here is a video of the entire process:


Making a “Phil” Mug Pottery Tutorial

Step 1: Wedge and Center

One hand beginning to center speckled buff clay on a pottery wheel in a cone shape

Start with one pound of clay. Attach it to the bat or wheelhead, and center.

 
two hands centering one pound of clay on a pottery wheel with a cone of clay


Step 2: Open and Throw a Cylinder

two hands pulling the walls up of a 1 lb ball of clay on the pottery wheel

Pull the walls.

After getting your clay centered and organized, open the clay and create a flat bottom. It can help to compress the bottom with a wooden rib.

As this mug will be slightly off center, generally the plan is no trimming later. So you want to take care to make your bottom even and about the thickness that you want it.

After getting your bottom set, pull the walls up.


Step 3: Clean Up

Shape and clean the walls with a metal rib.

With this style of mug, it’s important to remove all the slip. After you finish your pulls, use a metal rib to shape and clean up the cylinder.


After finishing the walls, use a wooden knife to remove excess clay at the bottom of the cylinder. You can also give the bottom a small bevel.

 
cleaning the base of a cylinder on the pottery wheel with a wooden tool

Remove excess clay from the bottom of the cylinder with a wooden knife.


Step 4: Give the Cylinder a Small Pull

pulling the side of 1 pound mug to make it slightly off center, a technique and style inspired by potter Phil Cornelius

Giving the cup a small pull

After throwing and cleaning up your cylinder, leave it attached to the wheelhead. Then, with clean dry hands, give the cylinder a little pull to take it slightly off center.

This is your chance to personalize and really make this process work for the style you want. And if the rim is a bit off center, that’s ok. You can easily work it back into a circle as it is drying.


Step 5: Cut Off

Cutting a 1 pound cylindrical mug off the bat to make a wheel thrown pottery mug

Cut off the cup with one pass of the wire.

After shaping your cup, cut it off the wheel head. Then, you can either leave it on the bat or move it to a board. Because it is a small vessel, I usually just move it to a board.


Step 6: Make and Attach Handle

Flattening the coil.

Next, it’s time to make and attach a handle. I usually do this right away after making the cup. You can do any style—pulled, extruded, etc—but for this style of mug I usually make a quick coil handle.

Cut into a handle shape.

To make this handle roll out a coil about 1/2 inch thick. Then, slowly tap it downwards on a clean work surface. This is similar to a whip motion, but I think of it as guiding the coil down to flatten it out. Alternate the sides of the coil as you flatten it. Within 3 or 4 taps, you will probably have a nice flattened coil. If these instructions are confusing, be sure to watch the video to see it happen live.

Adding a flattened coil handle to 1 pound pottery mug to make an off center mug inspired by potter Phil Cornelius

Attach the handle.

After making the handle, cut it into the shape that works for you, score the coil and mug, and join with a bit of slip or water. Join the top first, then the bottom.

If your mug goes a bit off center in this process, that’s fine. The fun part with this style of mug is just being loose and letting the clay find the way it wants to be.


Step 7: Clean Up and Done

The finished Phil Mug.

After attaching the handle, the rim may need a bit of an adjustment or clean up. You can also make adjustments as the mug becomes leather hard.

That’s it! The Phil Mug, inspired by Phil Cornelius, who was a long-time professor of ceramics at Pasadena City College in Pasadena, California. Enjoy trying out this style.

Here’s the ASMR version of this process with just ambient studio sounds:


You might also enjoy:

Making a Wide Rim Bowl tutorial

Sgraffito Decoration on a Large Bowl tutorial

Make a Slab Plate on the Pottery Wheel tutorial

How To Make a Metal Pottery Rib

View all How To posts


In How To Tags pottery tutorial, Videos, Phil Cornelius
Comment

Making a Wide Rim Bowl — pottery tutorial

February 11, 2023 Matt M-H

Putting the finishing touches on the throwing process.

The finished wide rim bowls from this tutorial.

A wide rim bowl is a great project for the pottery wheel, and it’s so fun to use for soup or pasta at home. This tutorial includes images, texts, and videos, so that you can learn how to make them.

What you’ll need:

  • A pottery wheel and absorbent bats such as Hydrobats

  • Basic pottery tools including a sponge, rounded ribs, wooden knife, and cut-off wire

Complete tutorial below, but here’s a video of this entire process including making and glazing:


Making a Wide Rim Bowl pottery tutorial

Step 1: Wedge and Center

Centering the clay on the wheel.

Start with soft clay and weigh 3 lbs, 12 oz. Then wedge until the clay is homogenized. I usually count to 75 while wedging. Then attach to the wheel head and center.

If your clay is not very soft, try adding a small amount of water to the bag a day or two before you use it.

After centering, open your clay. Be sure to leave enough clay on the bottom so that you can trim a foot.


Step 2: Finish Opening and Begin Shaping

Starting to shape the rim with a rib.

After opening the clay and pulling the walls up, it’s time to switch to shaping the bowl.

For this process, I always clean my hands. You have much more control with dry hands and dry tools.

Further shaping of the rim.

To start, I first apply the rib to the rim and start shaping that. Then I return to the middle of the pot and refine the inside bowl shape. Finally, I’ll pay special attention to the transition point between the bowl and rim, and make sure the rim is well compressed.


Shaping the inside of the bowl from the center to the rim.


Step 3: Finish Shaping and Clean Up

Check to make sure the rim is compressed.

After getting the shape of the rim and inside of your pot just right, you’ll want to clean up the bottom of your bat with a wooden knife or rib. Then, I double check that the rim is compressed, and I’ll remove the whole bat from the wheel.

If I have time, I’ll let the pot dry for an hour or two, then cover with plastic. Because I use absorbent bats, within a day or two, the bowl will just pop off the bat and be leather hard. Now it’s time to trim.

Step 4: Trimming

Begin by setting the outside of the foot.

When your bowl is leather hard, it’s ready to trim. I like to trim on the dry side of leather hard as you will get more crisp lines, and it’s easier to remove small amounts of clay and let the high speed of the wheel and many rotations do the work for you.

Trimming the bottom of the bowl.

I start by trimming to the line that will be the outside of my foot.

Press gently throughout the trimming process to gauge the thickness of your wall. If there is any “flex,” you have trimmed enough in that area.

Then, I created a line that will be the inside of the foot. After that is set, I will start in the bottom center of the pot and do a number of passes from the center to the inside edge of the foot, removing a small amount of clay each time.

As I’m throwing, I will stop and press gently on the clay. If the wall has any “flex” or “give,” it is about 3/8 of an inch thick and where it needs to be. Doing this kind of testing can really get you locked in on trimming your pot to an even thickness.

Cleaning up throwing marks with a sponge.

After trimming, I’ll run a damp sponge over the pot to remove any trimming marks and clean things up. You can also use a soft, flexible rib for this process.

At this stage, you could also choose to carve or decorate your bowl with slip. On this design, the rim is a great area for that, but you could decorate any part of this form.

After trimming, I put my pots on a board upside down and loosely cover with plastic until they are bone dry. Then, the pots are ready to be bisque fired.


Step 5: Glazing

Cleaning the bisque ware with a damp sponge.

After bisque firing, it’s time to glaze your pot.

Start by cleaning the bisque with a damp sponge to remove any dust, but don’t saturate the ware with water! If needed, you can also clean up any bumps or flaws by sanding. Just be sure to remove any sanding dust before glazing.

Pouring on glaze.

Then, you can dip, pour, spray, or brush glaze onto your pot. If I had a large enough bucket for glaze, such as a 10 gallon bucket, I would dip these. But as I have a smaller volume of glaze in my studio, I pour glaze on my pots. While grabbing on to the foot, I rotate the pot and pour glaze evenly over the surface.

After glazing the piece, clean up any drips or flaws and let it air dry. Then it is ready to be glaze fired. In this example, I’m firing to Cone 6 in oxidation in a top-loading electric kiln.


All Done

Unloading the glaze firing.

After the glazing firing, you’re pot is all done! It may need just a quick sanding on the foot ring to make sure it won’t scratch anything.

I love making this shape because the rim offers possibilities for carving and decoration, and the final result stacks nicely and is a great way to showcase food.

Have fun!


You might also enjoy:

Sgraffito Decoration on a Large Bowl tutorial

Make a Slab Plate on the Pottery Wheel tutorial

How To Make a Metal Pottery Rib

View all How To posts


Here’s an ASMR video version of this tutorial with ambient studio sounds:


In How To Tags pottery tutorial, bowls, soup bowl, rim, rib, Videos
Comment

Sgraffito Decoration on a Large Bowl — pottery tutorial

February 7, 2023 Matt M-H

The finished sgraffito decoration on the bottom of a large bowl.

Sgraffito is a technique of carving through a contrasting clay or slip to reveal the clay body below. It’s a fun way to get a very bold decoration on your ceramics.

This tutorial will cover how to apply the slip, carve through, and clean up. Keep scrolling for step-by-step instructions.

Tools Needed
> A banding wheel or turntable is very helpful
> Slip or Underglaze and a brush
> Carving tool, such as a pencil or a sgraffito tool
> Dry brush for clean up

You can also watch a video of this process here:

Sgraffito On A Large Bowl Tutorial

Step 1: Lightly Clean the Working Surface

Cleaning the surface of a leather hard bowl.

In this tutorial, the demonstration piece is a large salad bowl on the dry side of the leather hard stage—almost bone dry. To prep the surface, a wrung-out sponge is used to lightly clean the surface. This extra water will also help the underglaze stick.


Step 2: Apply the Slip or Underglaze

Applying first coat of underglaze.

The key to sgraffito is to pick a slip or underglaze that will contrast with your clay body. In this example, slightly watered-down Velvet Underglaze medium blue is being applied to a speckled buff stoneware.

Applying the second coat of underglaze.

To get an opaque, solid covering of underglaze, 3 to 4 coats is applied. Be sure to allow the coats to dry between each application.


Applying the final coat.


Step 2.5: Let the Underglaze or Slip Dry

This step doesn’t take long, but do let your slip or underglaze dry before you begin carving.


Step 3: Carve Your Design

Carve your design.

Using your sgraffito tool, begin to carve through the stop layer, exposing the clay body below. It can be helpful to practice your design as a drawing before you begin carving.


Clean your carving as you go.

As you are carving, little bits will stick up on the side of the carved lines. If you are working at a dry leather hard stage (as opposed to the more damp side of leather hard), you should be able to easily clean these bits as you work just by using a dry brush.

If the clay bits won’t brush off, wait and complete your carving later. Or, you can make your carving and brush off the bits when the pot is bone dry.


Step 4: Clean Up and Finishing

Finished carving, but before cleaning.

After carving, you may want to clean up any edges at the top and bottom of your carving.

In this example, the foot area is cleaned with a fettling knife, and the rim area is cleaned with a loop too. Use whatever makes sense for your piece.

Cleaning the foot.

Cleaning the rim.


All Done

The finished bowl with sgraffito decoration.

After cleaning, you are all done and ready to bisque fire. Generally, sgraffito looks best if left raw or covered in a thin application of clear glaze, but testing will determine what is best in your kiln.

Good luck with this technique and have fun.

Do you have a favorite sgraffito tool or technique? Let us know in the comments.

You might also enjoy:

Turn a clay slab into a plate tutorial

Amaco Velvet Underglaze Test Tiles

Best Banding Wheels for Ceramics


In How To Tags sgraffito, Underglaze, pottery tutorial, salad bowl
Comment

How to Turn a Slab into a Flat-Bottomed Plate on the Wheel — pottery tutorial

February 5, 2023 Matt M-H
Glazed flat plate with rim and spiral design. White glaze over speckled clay.

Flat bottomed plates made with this technique, after glaze firing.

This tutorial will show you how to turn a slab into a flat-bottomed plate using the pottery wheel. You can also use this method on a banding wheel or turntable. This is a great technique for any skill level, but if you have never made a plate before, this is a fun way to start.

What you will need:

  • Pottery wheel or banding wheel, and a bucket of water

  • Ribs, needle tool, wooden knife, and a sponge

  • Clay

  • Slab Roller or rolling pin

  • Absorbent bats, such as a bat made out of plaster or wood. You could try this technique with a plastic bat, but it will be easier with another material. For a guide to bats, click here.

Here’s a narrated video of this process, or keep scrolling for step-by-step images and description.


Slab Plate Tutorial

Step 1: Roll Out a Slab

Rolling out a slab.

Use a slab roller or rolling pin, and roll out a slab of clay that is about 3/8 of an inch (or about 10 mm) thick.

If you are using a rolling pin, it’s helpful to put down two rulers or spacers so that you make an even slab.


Step 2: Smooth and Cut Slab

Removing canvas texture from the slab with a rib.

After rolling a slab, remove any texture with a rib. This smoothed side will be flipped and become the bottom of your plate.


Cut out the size needed for your bat.

Then, cut a circle of clay that will fit on your bat. In this image, I’m using a 14” plastic bat as a template.


Step 3: Transfer to Wheel and Compress

Transfer slab to wheel. Hold the slab at one end to move.

Pick your slab up at one end and carefully transfer to the bat on your wheel, placing the already smoothed side down.


Clean up and compress the slab lightly.

Then, using a combination of wet sponges and ribs, clean and compress the slab lightly.


Step 4: Cut and Clean Edge

Measure and cut your slab.

The next step is to cut the slab to the desired diameter. In this example, the slab is cut to 12 inches wide. After firing, it will shrink to around 11 inches wide.


Clean up the cut edge with a wet sponge.

After cutting the slab, clean the edge with a wet sponge.


Step 5: Raise the Rim

Using a wooden knife to raise the rim.

The next step is to raise the rim. My preferred tool for this is a wooden knife, and to get the correct angle I have split open the splash pan. (You could probably do this technique without a splash pan as well). While raising the rim, don’t force any crumbs or bits of clay underneath the slab as this will cause problems for your flat bottom.

Compress and organize the rim.

After raising your rim with a wooden knife, go back and raise it more with a wet sponge. The angle of the rim is your choice. At a slight angle, the plates can stack. But you can make any angle from completely flat to a vertical rim.

After raising the rim to your desired angle, compress and finish the rim.


Step 6: Finish Top Side

Finish the plate with a smooth top or spiral design.

After getting your rim set, go back over your plate with a wet sponge to smooth and compress the plate once more, to remove any marks from the making process.

If desired, you can add a spiral design as pictured here. To do that, take a steady finger and slowly move your finger across the pot from the middle to the outer rim. If you think of the plate as a clock, I generally do this move straight across at “3 o’clock.”


Step 7: Trim the Plate

Trim the plate.

After making the plate, remove the entire bat from the wheel head, cover with plastic, and let it dry until leather hard. Usually this is a day or two for me. This is where the absorbent bat is vital, as it will remove water from the bottom of your plate.

When the piece can support itself, flip it upside down on the wheel and trim lightly. You won’t need to trim much, usually just a bit of clay underneath the rim.

After trimming, run a smooth rib over the bottom to close any pores and remove marks from the trimming process.

Then, your plate is ready to sit right side up and dry completely. As flat slabs are prone to warping, I dry these under plastic for a week or two until they are completely bone dry. Then, you can bisque, and glaze fire and you have a beautiful plate.

This is a quick and fun way to make plates that doesn’t involve any centering or compressing. Have you ever made a slab plate? Let us know your method in the comments.

Here’s another video of this process with ambient ASMR-style studio sounds.

You may also enjoy:

Best Bats for the Pottery Wheel

All How To posts from The Studio Manager

Gift Guide for Potters


In How To Tags Slab rollers, slab plate, plate, pottery tutorial
1 Comment


ABOUT: The Studio Manager is dedicated to sharing the best tips, ideas, and equipment guides for a ceramic, sculpture, painting, or any art studio. Thanks for reading.

For updates and other links, follow on Facebook


POPULAR POSTS
> Pottery Wheel Buyer’s Guide
> Gift Guide for Potters
> Best Dust Masks for Pottery Studios
> Best Cone 6 Glossy Clear Glaze
> Best Aprons for Pottery and Art
> Best Pottery Wheel Stools
> Make a Metal Pottery Rib


Evolution of Pottery t shirt

Evolution of Pottery shirt. Shop at Society 6


POPULAR TOOL REVIEWS
> Pottery Wheel Buyer’s Guide
> Best Pottery Aprons
> Tabletop Wheel Buyer’s Guide
> Best Banding Wheels
> Glaze Mixing Tools and Accessories
> Best Scales for Ceramic Studios


Cat throwing pots on a pottery wheel black and white apron

Pottery Cat apron. Shop at Redbubble.


RECENT POSTS

Featured
aIMG_4951.jpg
Mar 30, 2025
The Best Small, Portable Slab Rollers for Ceramic Studios
Mar 30, 2025
Mar 30, 2025
Best Pottery Wheel Stools
Mar 14, 2025
Best Pottery Wheel Stools
Mar 14, 2025
Mar 14, 2025
The Best Aprons for Pottery, Ceramics, and Art Studios
Mar 13, 2025
The Best Aprons for Pottery, Ceramics, and Art Studios
Mar 13, 2025
Mar 13, 2025
Low Fire Clear Test 1.jpg
Mar 5, 2025
Testing Low Fire Clear Glaze Recipes G1916Q and Duncan 1001 Clear
Mar 5, 2025
Mar 5, 2025
aIMG_2973.jpg
Mar 1, 2025
Best Bats for the Pottery Wheel
Mar 1, 2025
Mar 1, 2025
weighing clay.jpg
Mar 1, 2025
Clay weight for throwing — in ounces and grams
Mar 1, 2025
Mar 1, 2025
The Best Cone 6 Glossy Clear Glaze Recipe
Feb 28, 2025
The Best Cone 6 Glossy Clear Glaze Recipe
Feb 28, 2025
Feb 28, 2025
melted cones.jpg
Feb 28, 2025
Orton Pyrometric Cone Chart in Fahrenheit and Celsius
Feb 28, 2025
Feb 28, 2025
The Best Cut Off Wire for Ceramic Wedging Tables
Feb 27, 2025
The Best Cut Off Wire for Ceramic Wedging Tables
Feb 27, 2025
Feb 27, 2025
Shimpo banding wheel 2.jpg
Feb 27, 2025
The Best Banding Wheels for Pottery and Ceramics
Feb 27, 2025
Feb 27, 2025
Best Masks for Silica Dust in Pottery and Ceramic Studios — updated for 2025
Feb 26, 2025
Best Masks for Silica Dust in Pottery and Ceramic Studios — updated for 2025
Feb 26, 2025
Feb 26, 2025
The Best Scales for Ceramic Studios and Workshops 2025
Feb 23, 2025
The Best Scales for Ceramic Studios and Workshops 2025
Feb 23, 2025
Feb 23, 2025
Alec Soth Sister Corita Rules.jpg
Feb 22, 2025
Alex Soth on Being Goofy, Following Your Ideas, and How Advice is Meaningless
Feb 22, 2025
Feb 22, 2025
Low fire majolica 1.jpg
Feb 18, 2025
Cone 04 Low Fire Majolica Glaze Tests with Oxide Washes
Feb 18, 2025
Feb 18, 2025
Cone 6 white glaze test tiles.jpg
Feb 17, 2025
Cone 6 Midrange White Glaze – modified VC Soft Satin Glossy 1
Feb 17, 2025
Feb 17, 2025

The Studio Manager recommended books at bookshop.org
> Ceramic Technique
> Ceramic Ideas and Inspiration
> Books about Making Art


Kintsugi heart t shirt

Shop Kintsugi Heart T-shirt at Society6


Potter Flames T shirt

Flaming Potter shirt. Shop at Redbubble.


RECENT POSTS
aIMG_4951.jpg
Mar 30, 2025
The Best Small, Portable Slab Rollers for Ceramic Studios
Mar 30, 2025
Mar 30, 2025
Best Pottery Wheel Stools
Mar 14, 2025
Best Pottery Wheel Stools
Mar 14, 2025
Mar 14, 2025
The Best Aprons for Pottery, Ceramics, and Art Studios
Mar 13, 2025
The Best Aprons for Pottery, Ceramics, and Art Studios
Mar 13, 2025
Mar 13, 2025
Low Fire Clear Test 1.jpg
Mar 5, 2025
Testing Low Fire Clear Glaze Recipes G1916Q and Duncan 1001 Clear
Mar 5, 2025
Mar 5, 2025
aIMG_2973.jpg
Mar 1, 2025
Best Bats for the Pottery Wheel
Mar 1, 2025
Mar 1, 2025
weighing clay.jpg
Mar 1, 2025
Clay weight for throwing — in ounces and grams
Mar 1, 2025
Mar 1, 2025
The Best Cone 6 Glossy Clear Glaze Recipe
Feb 28, 2025
The Best Cone 6 Glossy Clear Glaze Recipe
Feb 28, 2025
Feb 28, 2025
melted cones.jpg
Feb 28, 2025
Orton Pyrometric Cone Chart in Fahrenheit and Celsius
Feb 28, 2025
Feb 28, 2025
The Best Cut Off Wire for Ceramic Wedging Tables
Feb 27, 2025
The Best Cut Off Wire for Ceramic Wedging Tables
Feb 27, 2025
Feb 27, 2025
Shimpo banding wheel 2.jpg
Feb 27, 2025
The Best Banding Wheels for Pottery and Ceramics
Feb 27, 2025
Feb 27, 2025
Best Masks for Silica Dust in Pottery and Ceramic Studios — updated for 2025
Feb 26, 2025
Best Masks for Silica Dust in Pottery and Ceramic Studios — updated for 2025
Feb 26, 2025
Feb 26, 2025
The Best Scales for Ceramic Studios and Workshops 2025
Feb 23, 2025
The Best Scales for Ceramic Studios and Workshops 2025
Feb 23, 2025
Feb 23, 2025
Alec Soth Sister Corita Rules.jpg
Feb 22, 2025
Alex Soth on Being Goofy, Following Your Ideas, and How Advice is Meaningless
Feb 22, 2025
Feb 22, 2025
Low fire majolica 1.jpg
Feb 18, 2025
Cone 04 Low Fire Majolica Glaze Tests with Oxide Washes
Feb 18, 2025
Feb 18, 2025
Cone 6 white glaze test tiles.jpg
Feb 17, 2025
Cone 6 Midrange White Glaze – modified VC Soft Satin Glossy 1
Feb 17, 2025
Feb 17, 2025
VL-Whisper.jpg
Feb 8, 2025
2025 Pottery Wheel Buyer's Guide — The Best Wheels For All Studios
Feb 8, 2025
Feb 8, 2025
shimpo-vl-whisper-wheel.jpg
Feb 7, 2025
Pottery Wheel Comparison Chart 2025
Feb 7, 2025
Feb 7, 2025
vl-whisper.jpeg
Jan 30, 2025
Nidec-Shimpo Pottery Wheels Buyers Guide 2025
Jan 30, 2025
Jan 30, 2025
C_wheel_PATH_2012.jpeg
Jan 29, 2025
Brent Pottery Wheels Buyers Guide 2025
Jan 29, 2025
Jan 29, 2025
The Slip image 4.jpg
Jan 29, 2025
Ellsworth Kelly on Drawing Plants and Nature as “The Ultimate Artist”
Jan 29, 2025
Jan 29, 2025
Agnes Martin 1.jpg
Jan 28, 2025
Agnes Martin on “Perfection That Transcends What You See”
Jan 28, 2025
Jan 28, 2025
Jan 17, 2025
Lithium Carbonate for Ceramic Glazes Price Tracker
Jan 17, 2025
Jan 17, 2025
Complete Guide to Low Fire Glaze.jpg
Nov 26, 2024
10 Best New Pottery and Ceramic Books for 2024
Nov 26, 2024
Nov 26, 2024
Arthur Sze cover.jpg
Nov 1, 2024
Two Poems by Arthur Sze
Nov 1, 2024
Nov 1, 2024
My Passport Ultra 1.jpg
Sep 30, 2024
Review: Western Digital My Passport Ultra 5 TB HDD External Hard Drive
Sep 30, 2024
Sep 30, 2024
MSF KR 3.jpg
Sep 27, 2024
Magdalena Suarez Frimkess: The Finest Disregard catalogue
Sep 27, 2024
Sep 27, 2024
aIMG_4484.jpg
Sep 19, 2024
The DIY Ceramics Degree
Sep 19, 2024
Sep 19, 2024
nigerian pottery 1.jpg
Mar 17, 2024
Nigerian Pottery by Sylvia Leith-Ross Book Review
Mar 17, 2024
Mar 17, 2024
kilnwadding_12.jpg
Feb 17, 2024
Kiln Wadding Recipe with Tutorial
Feb 17, 2024
Feb 17, 2024
kurosawa2.jpg
Nov 26, 2023
Akira Kurosawa on Why He Stopped Painting and Entered the Film Industry
Nov 26, 2023
Nov 26, 2023

WHAT IS THESTUDIOMANAGER.COM?
This site is devoted to sharing tips, tricks, recipes, and equipment that will help you in an art studio.

HOW DO YOU MAKE RECOMMENDATIONS?
In the studio, we are endlessly experimenting with equipment, techniques and ways of making. This site is dedicated to sharing that first-hand information, including products, ideas, and methods that will help you in the studio.

WHO ARE YOU?
This site is written by an artist with more than 20 years of experience running academic, community, and professional studios. For more, please visit the about page.

PRIVACY POLICY
This site uses cookies to track if you click on a link via affiliate networks with Amazon, and Blick via CJ Affiliate, and you can opt out of this tracking. For more information, visit the Disclosures and Privacy Policy for this site.

HOW CAN I SUPPORT THIS SITE?
We love comments and suggestions, and are constantly updating the site based on feedback and information that we receive. This site is also supported by affiliate networks, including Amazon, and Blick via CJ Affiliate.

WHY SHOULD I TRUST YOU?
This site is dedicated to sharing information in the clearest way we know how. We never accept payment from product manufacturers. Our revenue is from affiliate networks, such as Amazon and CJ Affiliate. This means that when we recommend a product and link to it, if you click and buy it and keep it, we will get a small percentage of the revenue at no cost to you. Our incentive is to share the best possible information, about a product or in a how-to guide, so that you will visit again.


Copyright © 2019-2025 TheStudioManager.com