The Best Way to Eliminate Odor from a Stinky Ceramic Slop or Glaze Bucket

Updated and revised, September 9, 2023

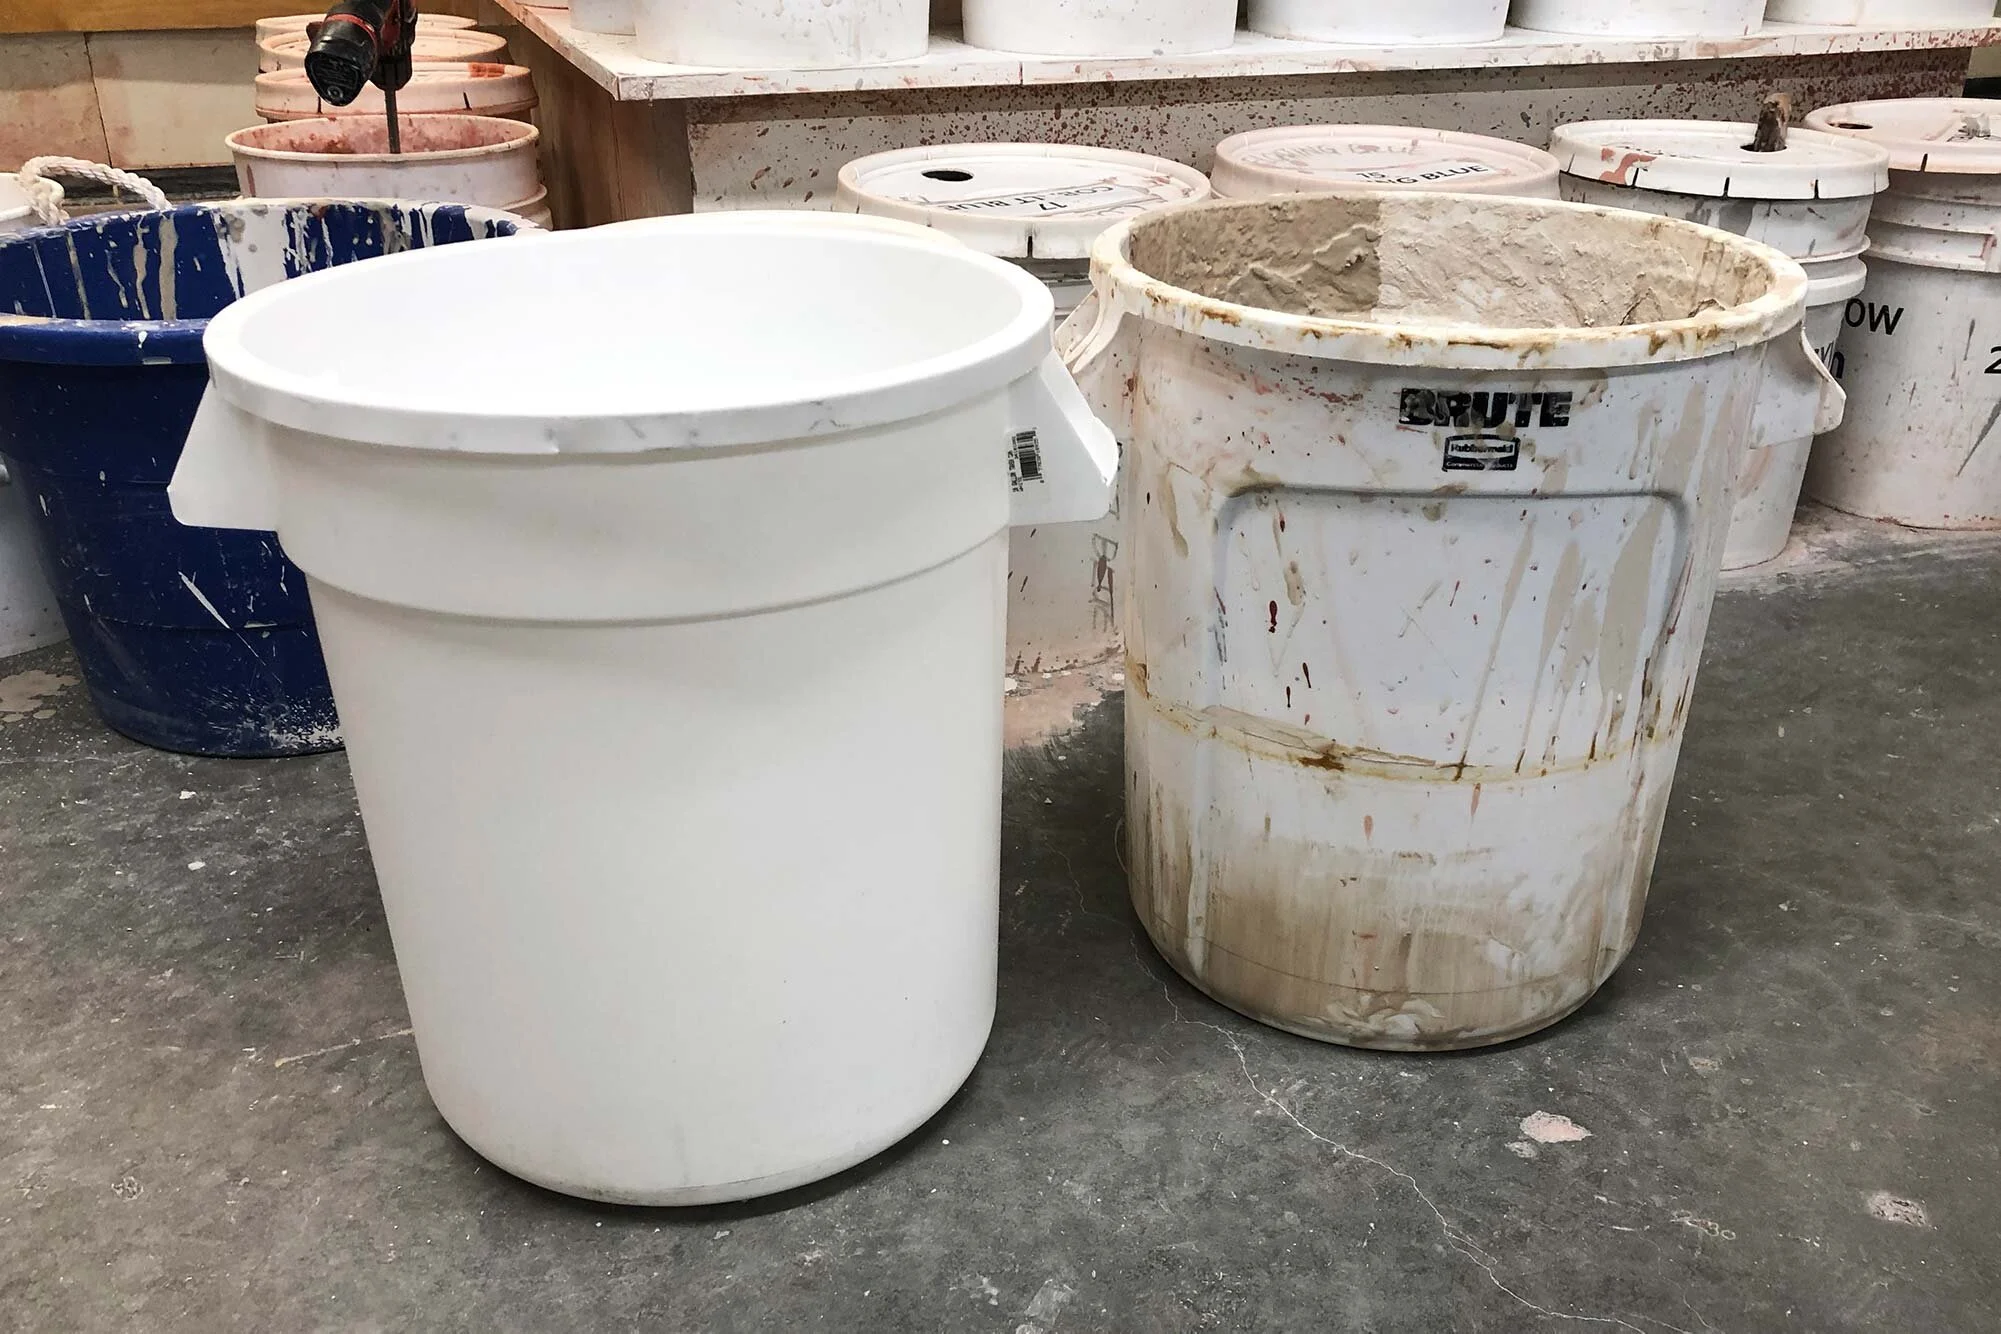
A dirty, stinky throwing slop trash can in need of some cleaning and copper carbonate, to eliminate odors.

A dirty, stinky throwing slop trash can in need of some cleaning and copper carbonate, to eliminate odors.

Stinky slop and glaze buckets can be a problem in any ceramic studio. The smells range from a swampy, pond-mud smell to a very strong sulfurous odor. All are caused by some kind of organic matter in your clay or glaze.

In addition, some glaze materials such as bone ash or CMC are organic materials and will start to smell over time, especially if the bucket is not stirred regularly.

To deal with smelly buckets, the best practices are to:

  1. Keep organic materials like brush bristles, paper, etc out of your buckets and jars

  2. Stir and mix your materials more frequently

  3. Cycle materials more frequently

  4. Clean your buckets with soap and water, and sterilize them with bleach

Adding bleach? In some studios, bleach is added to slop buckets or clean up buckets and mixed with the clay slop. This is an ok thing to do, but has it’s drawbacks. Usually, the bleach will just mask whatever the problem is for a few days or weeks, and then the smell will return. And I personally don’t like to add bleach to buckets where the material is being recycled such as clay slop buckets. And if you add too much bleach, the slop water can be rough on your hands.

The following article covers some ideas for eliminating odors from glaze buckets, underglaze jars, and slop buckets. Discussed is a somewhat extreme method of adding copper carbonate. In general, I would use this as a last resort after you have tried to cycle material, or clean outed and sterilized the problematic bucket. A little bit of copper can get rid of smells, because of the antimicrobial properties of the element, but using it does have some drawbacks as well.

This practice of adding a small amount of copper carbonate comes from a tip I read many years ago I read in Ceramics Monthly. (I haven’t been able to find the link) The tip from the potter was adding a trace amount of copper carbonate to glaze buckets. My memory is just a gram or two. It wasn’t enough to change the color of the glaze (even in a white glaze), but it was enough to prevent mold growth. If you have a glaze that regularly smells, try adding an extremely small amount of copper carbonate to any glaze, and see if that fixes the problem. The tutorial below also covers adding copper carbonate to slop buckets, in addition to some strategies to deal with smell glaze and underglaze jars.


Table of Contents

  1. How To Eliminate Odor From Glaze Buckets

  2. How To Eliminate Odor from Underglaze Jars

  3. Maintaining and Dealing with Odor in Slop Buckets and Reclaim Clay


How To Eliminate Odor From Glaze Buckets

Stinky glaze buckets happen from time to time. Usually, this is caused by some sort of organic matter. It could also be caused by organic glaze materials such as bone ash or CMC gum. For bone ash glazes, try stirring the glaze more often, or proceed with the copper carbonate fix as detailed below. For glazes with CMC gum, try replacing that with bentonite, which is a very fine, inorganic clay that can help glazes stay in suspension.

Before adding copper carbonate to a stinky bucket, screen the glaze first to make sure you’ve removed any brush bristles, bisque chunks, or other foreign matter. Sometimes, just stirring the glaze more often may eliminate the issue, so try that first!

Method:

Add 1 gram of copper carbonate per 5 gallons of glaze, stir, and wait 24 hours.

That’s it!

Just a bit of copper should take care of the problem, and in such a small amount, it shouldn’t change the color of the glaze. I even did this once with 5 gallon bucket of white glaze. A little risky, but it worked without changing the glaze color.

If you are nervous about adding copper carb, or if your studio scale is not very accurate, try measuring the smallest amount you can, such as 2 or 5 or 10 grams, and then physically dividing it up to get down to something like .5 grams or 1 grams, and add that small amount to your glaze. If the smell isn’t gone in 24 hours, repeat the process.

If the copper carbonate doesn’t solve your problem, don’t keep adding it past 2 or 3 grams. Eventually, you will add enough to alter the color of the glaze. If the problem persists, you may have to discard the glaze and start over with a fresh batch.


How to Eliminate Odor from Underglaze Jars

Underglaze jars can get really stinky. Some in particular, such as the various reds from the Amaco Velvet Underglaze line, seem prone to getting stinky.

To prevent odors with underglazes:
> Remove any cardboard liner from the caps
> Stir to mix. Don’t shake all the underglaze against these cardboard liners
> Try to prevent brush bristles from dropping in
> Keep any other organic matter out of the jar

But if your underglaze gets stinky? There may not be much you can do. It’s such a small volume, and our best remedy, copper carbonate, is a colorant. Still, you can try adding a very small amount of copper, approximately 1 gram or less. Stir into your underglaze, cap it up, and wait 24 hours. Check and repeat if necessary. Caution: you will change the color of your underglaze if you add copper to them! I’ve done this a few times with the extremely-prone-to-stinkiness Bright Red Velvet Underglaze. The copper mutes the red a bit, but it’s actually a lovely result that is still red.

But the conclusion is, there may not be much you can do for a stinky underglaze except to tolerate it and/or discard and buy a new jar.


Maintaining and Dealing With Odor in Slop Clay Bucket

A slop bucket is a great way to reduce the amount of clay going into your sink and can also be used for initial cleaning of splash pans and throwing buckets. If there was room, I’d have a series of three of these for cleanup. But in the studio I manage, there is just one 40 gallon trash can with a mesh lid. It’s used to collect all the throwing slop.

Ideally, this trash can gets completely emptied about once a month and the heavier slop is saved and mixed with reclaim clay. But while the slop is building up, the bucket can get pretty stinky. And if you recycle stinky slop, then you have stinky reclaim clay (although the process of mixing does seem to help alleviate some problems with smell.)

The first step I would take with a stinky slop bucket would be to completely empty it and clean with soap. Then, sterilize the bucket or trash can with bleach and let it dry completely. Usually this will eliminate your stinky slop bucket problem for at least a few months up to 6 months. Slop buckets will always get smelly at some point so just plan to fully clean and sterilize it on a regular schedule.

A more extreme solution is adding a small but regular dose of copper carbonate to your slop bucket. Caution: adding copper carbonate to reclaim clay may result in small green spots showing up through white or clear glazes as you are adding copper to your clay! Use this method at your own risk.

The tutorial below covers maintaining a slop bucket with copper. As mentioned, try cycling your materials more regularly, keep organic material out of your bucket, and give your bucket a deep clean before trying this method!:

Step 1: Remove water, add copper carb, and stir

Ideally, the slop bucket is a settling tank so that heavier clay particles will separate and fall to the bottom. Pictured here is a 40 gallon trash can. As the can fills to the top and settles, pull off the top 10 gallons of water. This watery slip goes down the sink in my studio, but you could choose to let it settle and then decant.

After taking off the top 10 gallons, add about a half a spoonful of copper carbonate. This is about 2-3 grams of copper carbonate.

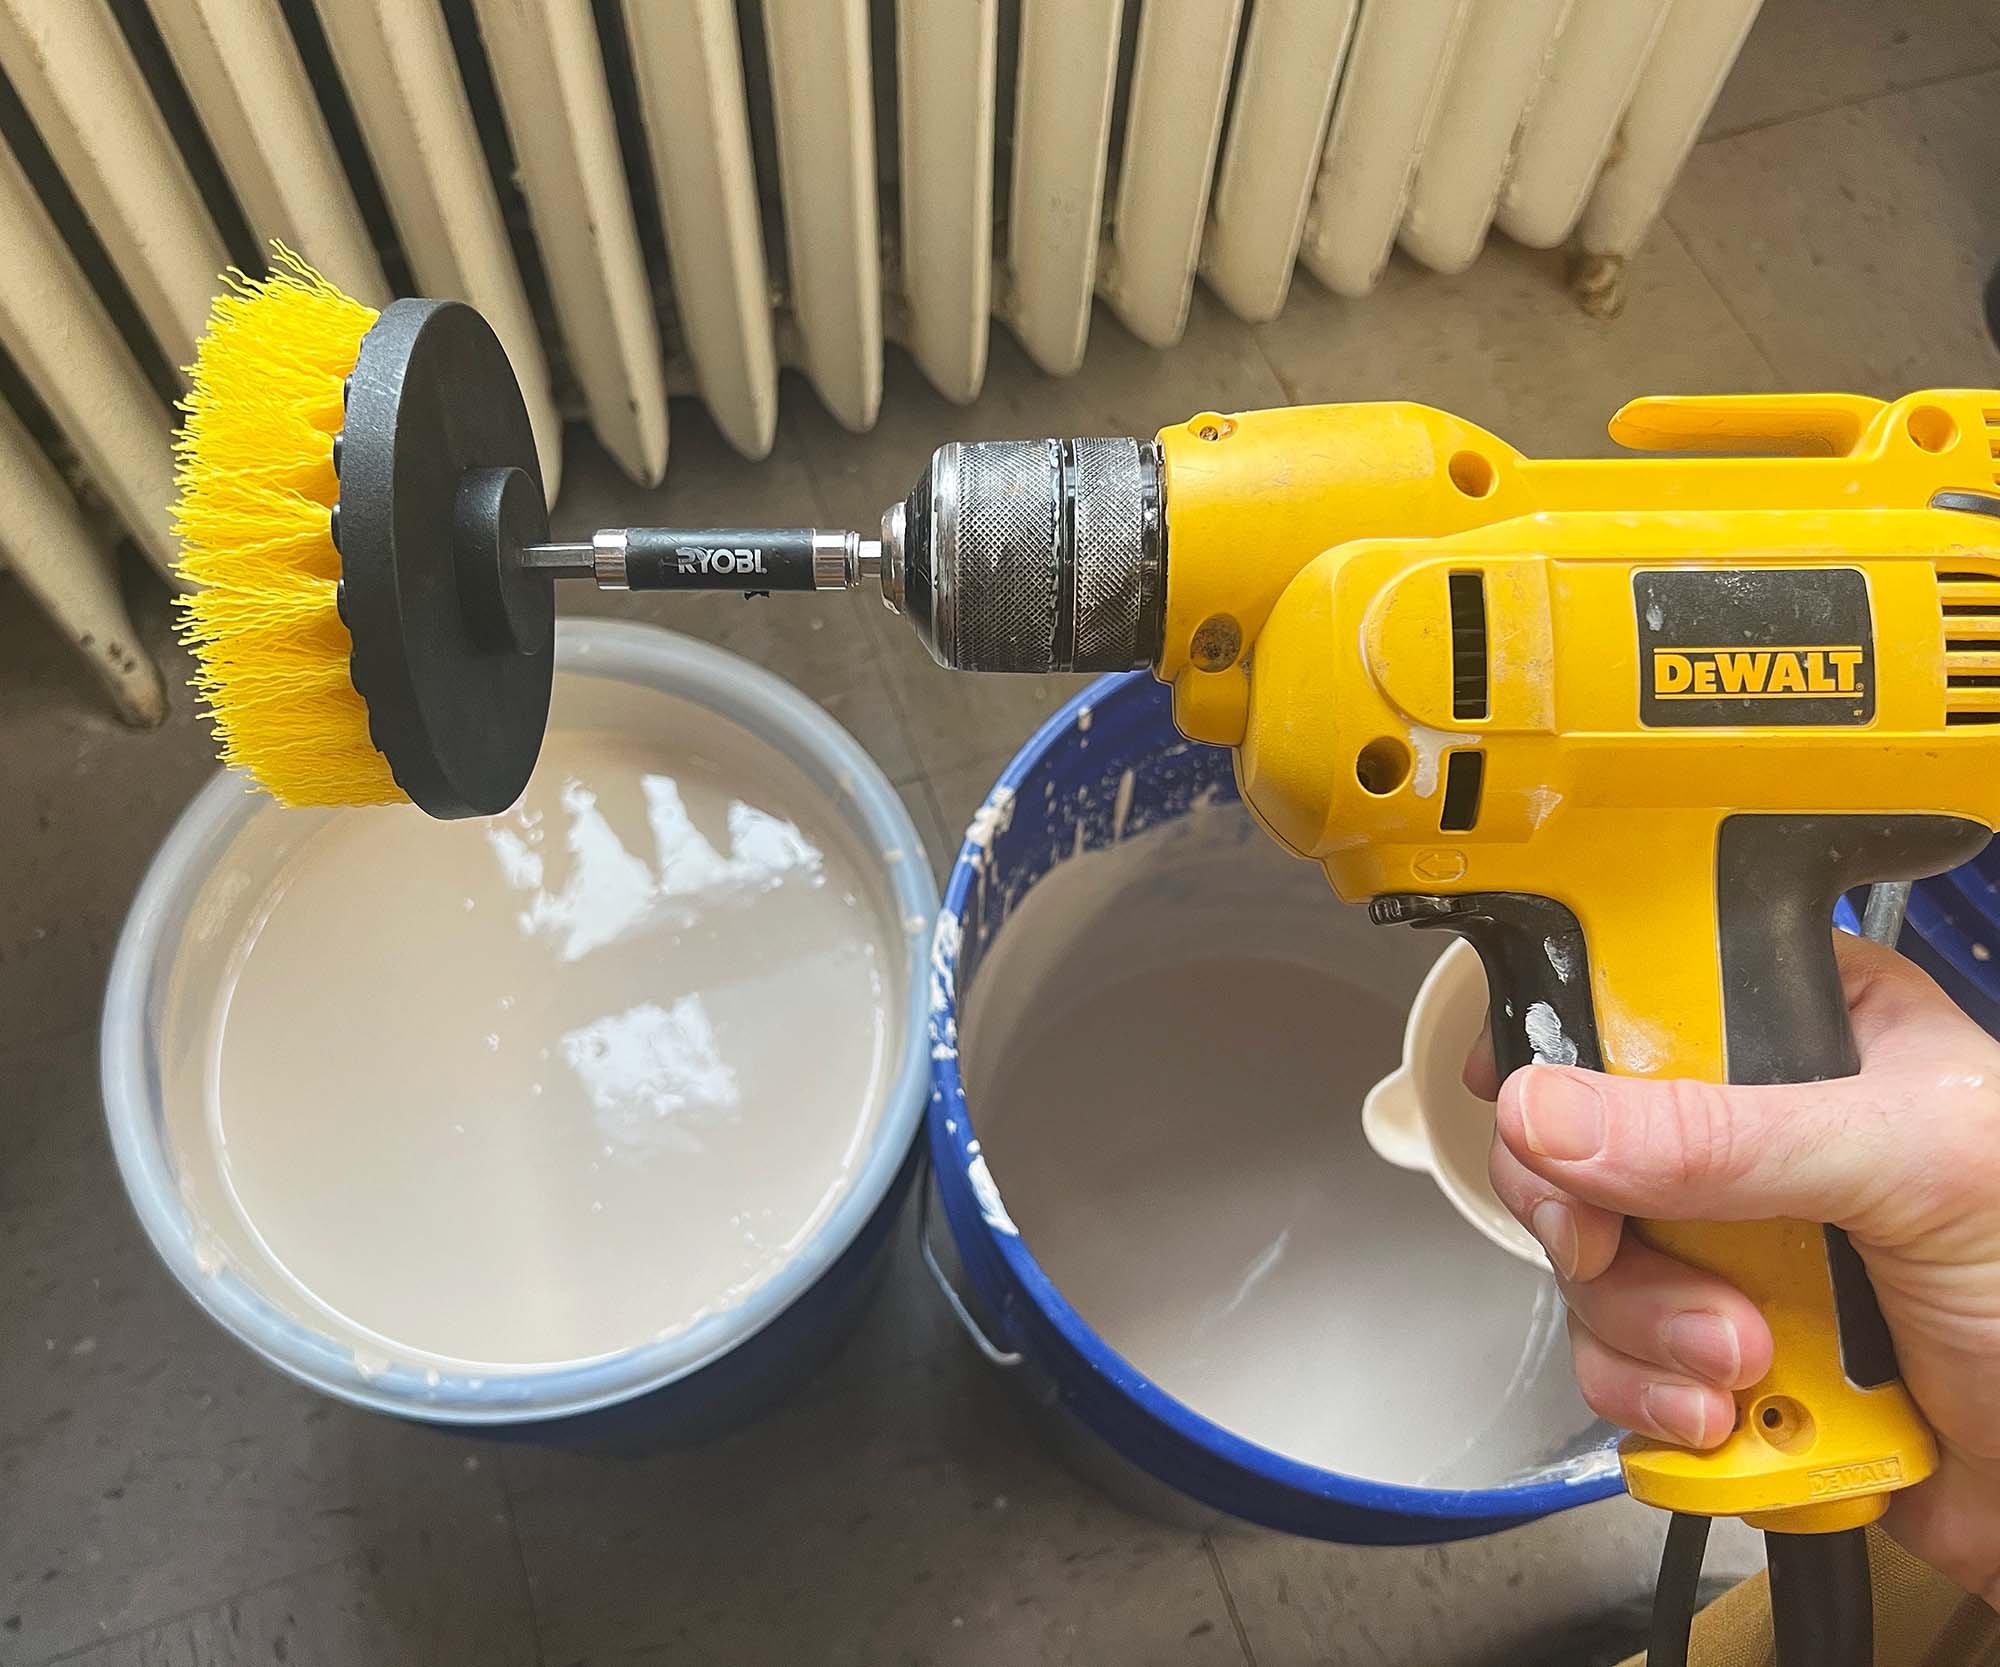
After adding the copper carbonate, stir or mix the whole slop bucket with a drill. It helps to disperse the copper.

Add about 1/2 spoonful of copper carbonate per approximately 20-30 gallons of slop.

Add about 2 to 3 grams (about 1/2 spoonful) of copper carbonate per approximately 20-30 gallons of slop.

Copper carbonate on the surface, ready to be mixed into the slop.

Copper carbonate on the surface, ready to be mixed into the slop.

Step 2: Clean the Lid

A clean lid for our slop bucket.

A clean lid for our slop bucket.

Not exactly necessary, but a regular lid cleaning makes it easier to maintain and inspires respect from your fellow studio mates.

It’s a bit hard to see in the picture, but I am are using my favorite pro-grade cleanup sponges.

For the lid on our bucket has a DIY screen made by cutting a hole in the trash can lid and attaching rubberized mesh with nuts and washers. The mesh helps to keep tools, sponges, and large chunks of clay out of the slop bucket.


Step 3: Repeat as Necessary

Our bucket with a clean lid and a bit of copper to prevent any stinky odors.

Our bucket with a clean lid and a bit of copper to prevent any stinky odors.

As stated above, it takes us approximately 1 month to end up with about 15 gallons of heavy slip but usually every week or more often, I remove the top layer of watery slip from the bucket. Every time water is removed, I add copper to the bucket.

Once there is 15 gallons or so of heavier slop at the bottom of the bucket, I remove it and put it in 5 gallon “settling tanks,” This watery slop is then poured over dried out scraps or added to the pugmill as needed. It’s the best way I can think of to capture all the fine particles left over from the throwing process. I’ve also found that as this slop with copper moves through the reclaim process, it combines with other clay and helps keep that reclaim from getting stinky too.

Occasionally, I do notice a little green copper speck popping into a white glaze from the reclaim clay, so if you want to be extra careful, use the least amount of copper necessary, or mix it into a watery slurry before adding to your slop bucket.

Summary

This post has covered a variety of ways to deal with smelly glaze, underglaze, and slop buckets. Also detailed is how to use copper carbonate to eliminate odor in glaze buckets, underglaze jars, and slop buckets. It’s an effective and affordable way to manage the inevitable odors that arise in a ceramic studio.

Do you have any other techniques for maintaining odor-free slop and glaze buckets? Let us know in the comments.

Shop materials and tools mentioned in this post:


How To Use and Clean Up Wax Resist in a Ceramics Studio

 
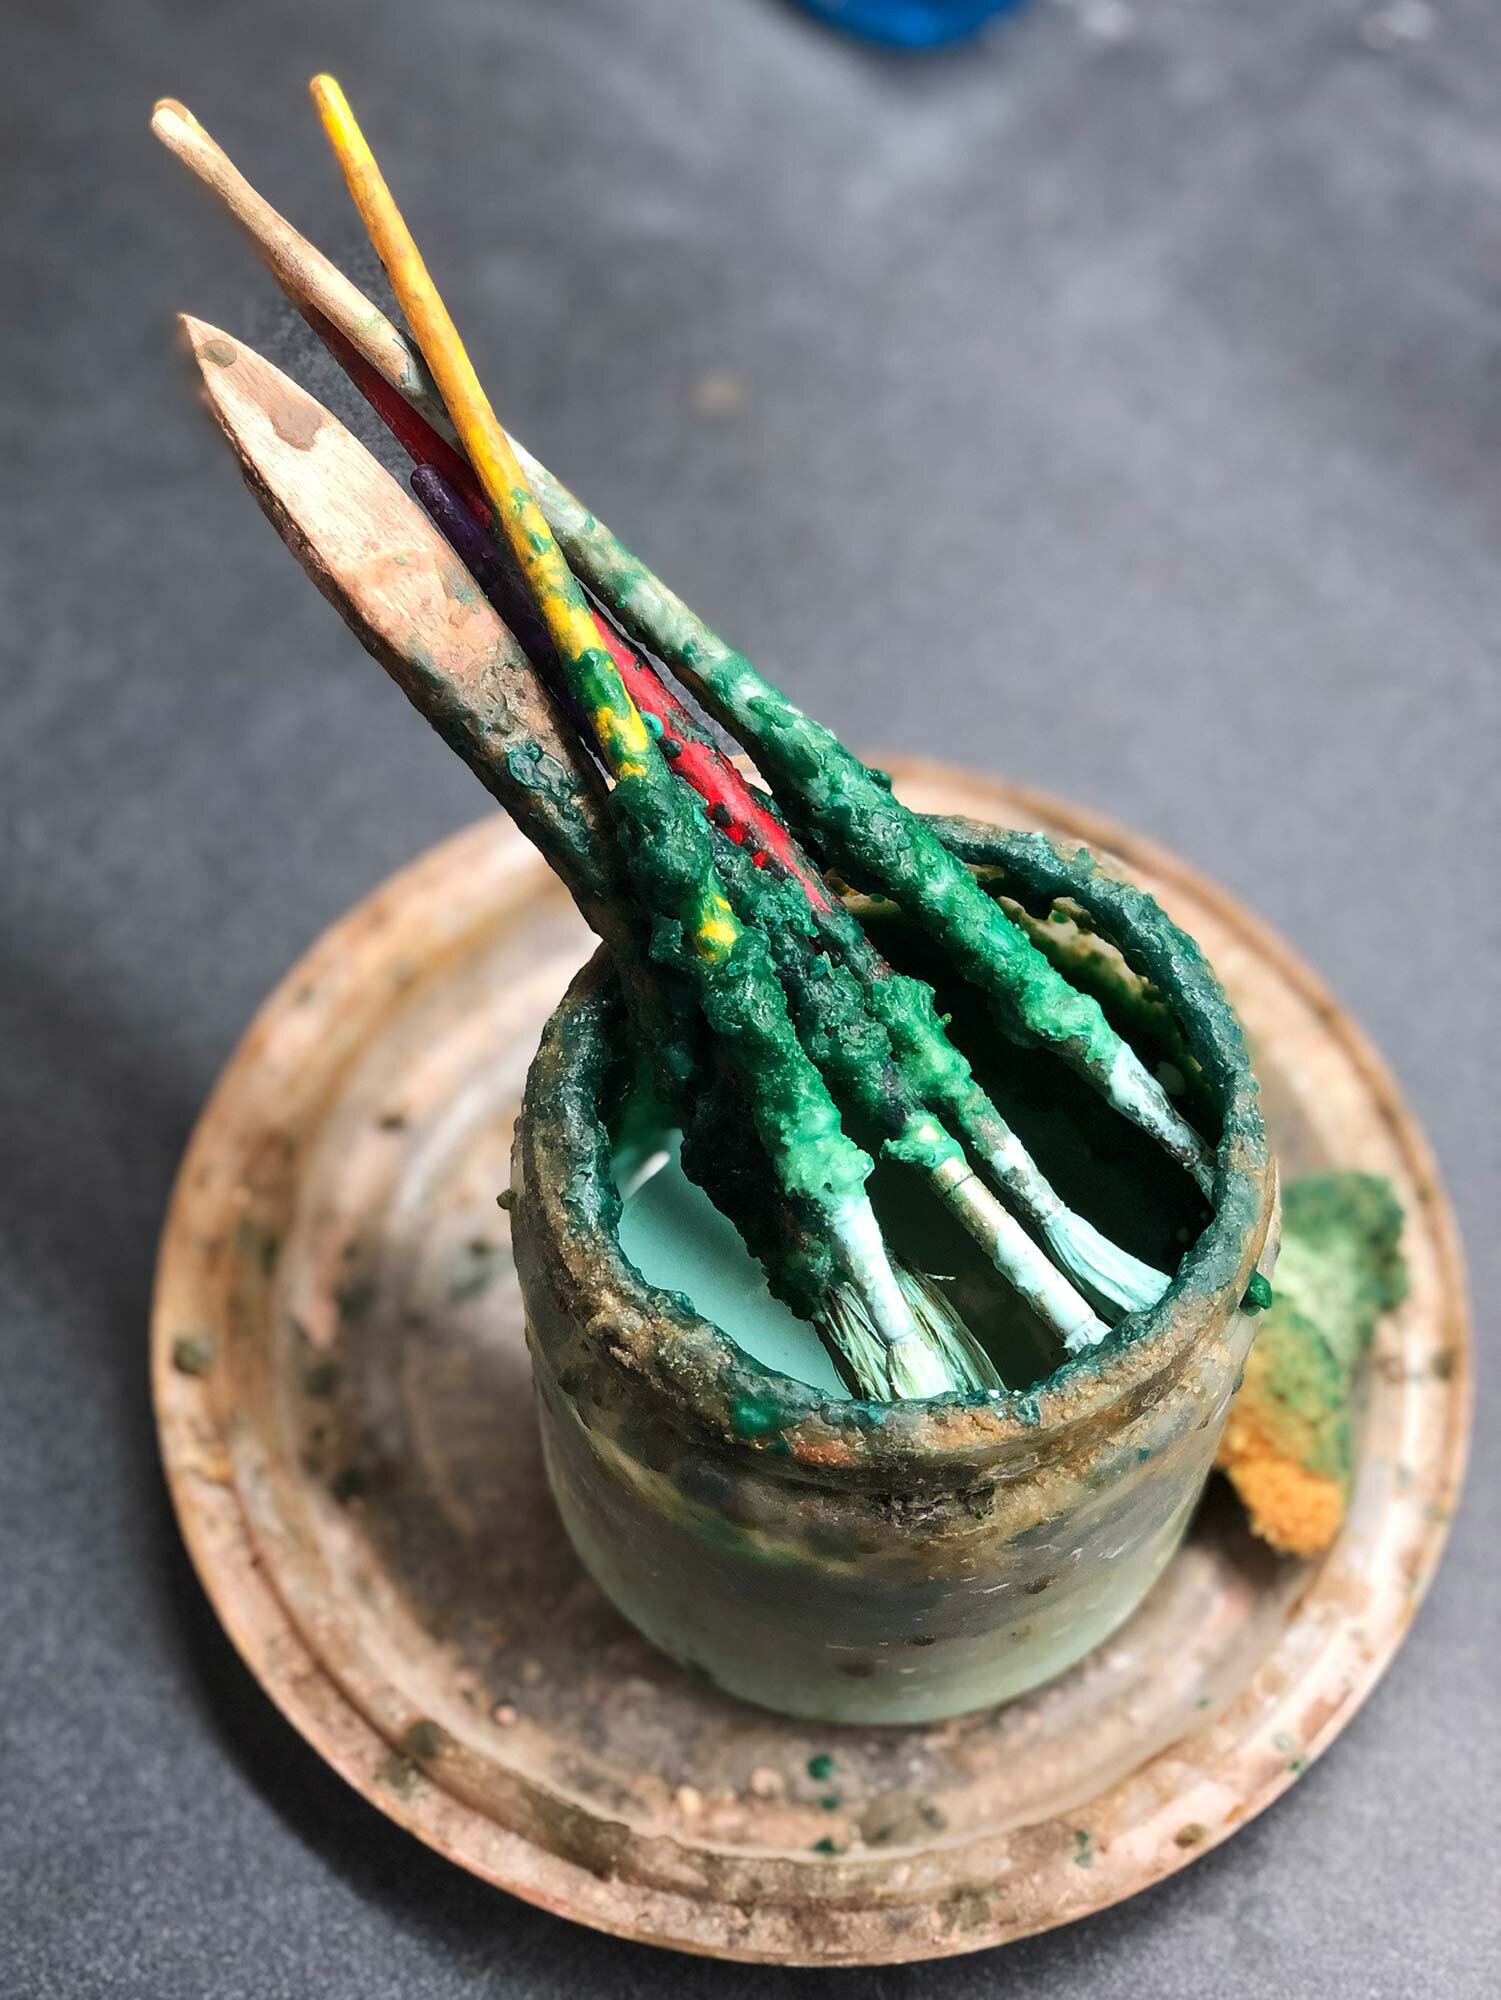
Brushes covered in wax. In this post, we’ll show you how to clean them with boiling water.

Brushes covered in wax. In this post, we’ll show you how to clean them with boiling water.


Wax resist is a great thing to use with ceramics and pottery. It gives you a lot of decorative glazing options, and is useful when glazing rims, lids, feet—anywhere you need to keep free of glaze. But inevitably, you will have to clean it up.

The best way to clean wax resist is with boiling water. Below is a step-by-step tutorial of how to clean your wax brushes and container. There’s also a review a favorite electric water kettle, and some tips of how to best use wax resist. The post will start with a review of wax resists.


Table of Contents

  • Our Favorite Wax Resist: Amaco Green Wax

  • How to Use Wax: Tips and Tricks

  • What You Can Do With Wax

  • How to Clean Wax Brushes tutorial

  • Our Favorite Electric Water Kettle

  • Wrap-Up: Wax Resist Use and Clean Up


The Best Wax Resist

The best wax resist is the green Amaco Wax Resist available in pints and gallon jugs. It’s a premium wax resist that doesn’t peel or fall off when using on top of other glazes for decorative effects. You can buy it by the gallon, which is more economical. One gallon lasts 12 to 15 months in a busy community studio, so a pint is probably an appropriate amount for an individual studio. This resist does everything you need a wax to do and the green dye makes it easy to see on bisqueware or if it drips on a counter top. Out of the bottle, it’s a bit thick so it’s recommended to water it down by about 1/3 to 1/2 with hot tap water.

To store the watered-down wax, use an old container that can also hold your designated wax brush. To make cleanup easier, put a plastic plate or take-out-lid underneath, and and make a notched lid to go around the brushes to prevent the wax from drying. As needed, top up the jar with more wax and water. Inevitably, the brushes and sides of the jar will get wax build up. Below is a tutorial on how to clean this with boiling water.

Buying by the gallon and using a jar is a trade-off. It’s economical to buy in bulk, but the wax jar does take some maintenance. For a busy academic or community studio, this is an easier system to use and maintain than a pint jar with a threaded, screw-on lid. In most shared studios, those threads never stay clean which means the cap is never screwed on tight which can mean…ugh…semi-frequent spills of a pint of wax resist. You definitely don’t want a pint of wax resist all over your floor.


How to Use Wax: Tips and Tricks

This post is mainly about cleaning up wax resist, but here’s a quick overview of how to use wax resist:

Some recommend painting wax resist on the bottom of every pot, but I do not. Instead, think about your piece: will it be easier to clean up your glaze with or without wax? If it’s a large, flat form like a plate, you probably should use wax to cover the bottom. If it’s a small foot ring, it will be easier and faster to clean with a sponge. The key with wax is that you don’t want to unnecessarily waste time, material, or energy because of drips or simply using wax where you don’t need it.

  • As mentioned above, watered-down wax resist is preferred because it dries faster and leads to less build-up on your ware. A thin coat is all you need. Mix 1/3 hot tap water to 2/3 wax resist and stir. You might be able to go thinner! Test what works for you.

  • When applying, be careful to not create drips or puddles where you don’t want wax to go. To remove wax, you may have to re-bisque fire a piece. Alternately, you can remove by sanding or scraping, or by pouring boiling water on the bisqueware. The problem is that wax gets into the pores of your bisqueware, so it can be hard to remove.

  • Allow wax to dry completely before glazing. This can take 15-30 minutes.

  • Wax can be great as a decorative tool, especially on top of one glaze to create a resist effect in combination with a second coat. Cheaper wax resist options often peel up or don’t work on top of a chalky, dried glaze. That’s one reason to use the green Amaco wax. It works on top of every glaze I’ve tested and stays in place with no peeling.

  • Keep in mind that wax burns off anywhere from about 200–500 degrees. It doesn’t do anything to protect your kiln shelves. As this burning can create some smell and a small amount of smoke, it’s best to minimize wax use if your kilns are indoors. Definitely vent your kilns!

Other ideas for wax in the studio

  • Paint over thin areas of greenware to slow the drying of the clay.

  • Lid Wax: add 1/2 cup Alumina Hydrate to 1 pint wax to create a special wax for firing lids on pots. When the wax burns off, the powdered, refractory alumina hydrate will stay behind, leaving a chalky resist. This will hopefully prevent glaze runs, etc, that could cause the lid to stick to the rim of the pot.


How to Clean Wax Brushes and Jars: A Tutorial

To prevent contamination and keep things efficient and functional, designate 3 or 4 brushes of different sizes as wax brushes. These brushes sit in the wax resist pot, and over time, wax builds up on the sides of the brushes and the rim of the wax jar. Here is how to clean them.

Step 1

Brushes and jar with built-up wax resist.

Brushes and jar with built-up wax resist.

Here is a picture of a wax jar with dirty brushes. The wax jar is a wide-mouth, recycled underglaze jar. For brushes, try using economical 1/2” chip brushes, and a few smaller brushes.


Step 2

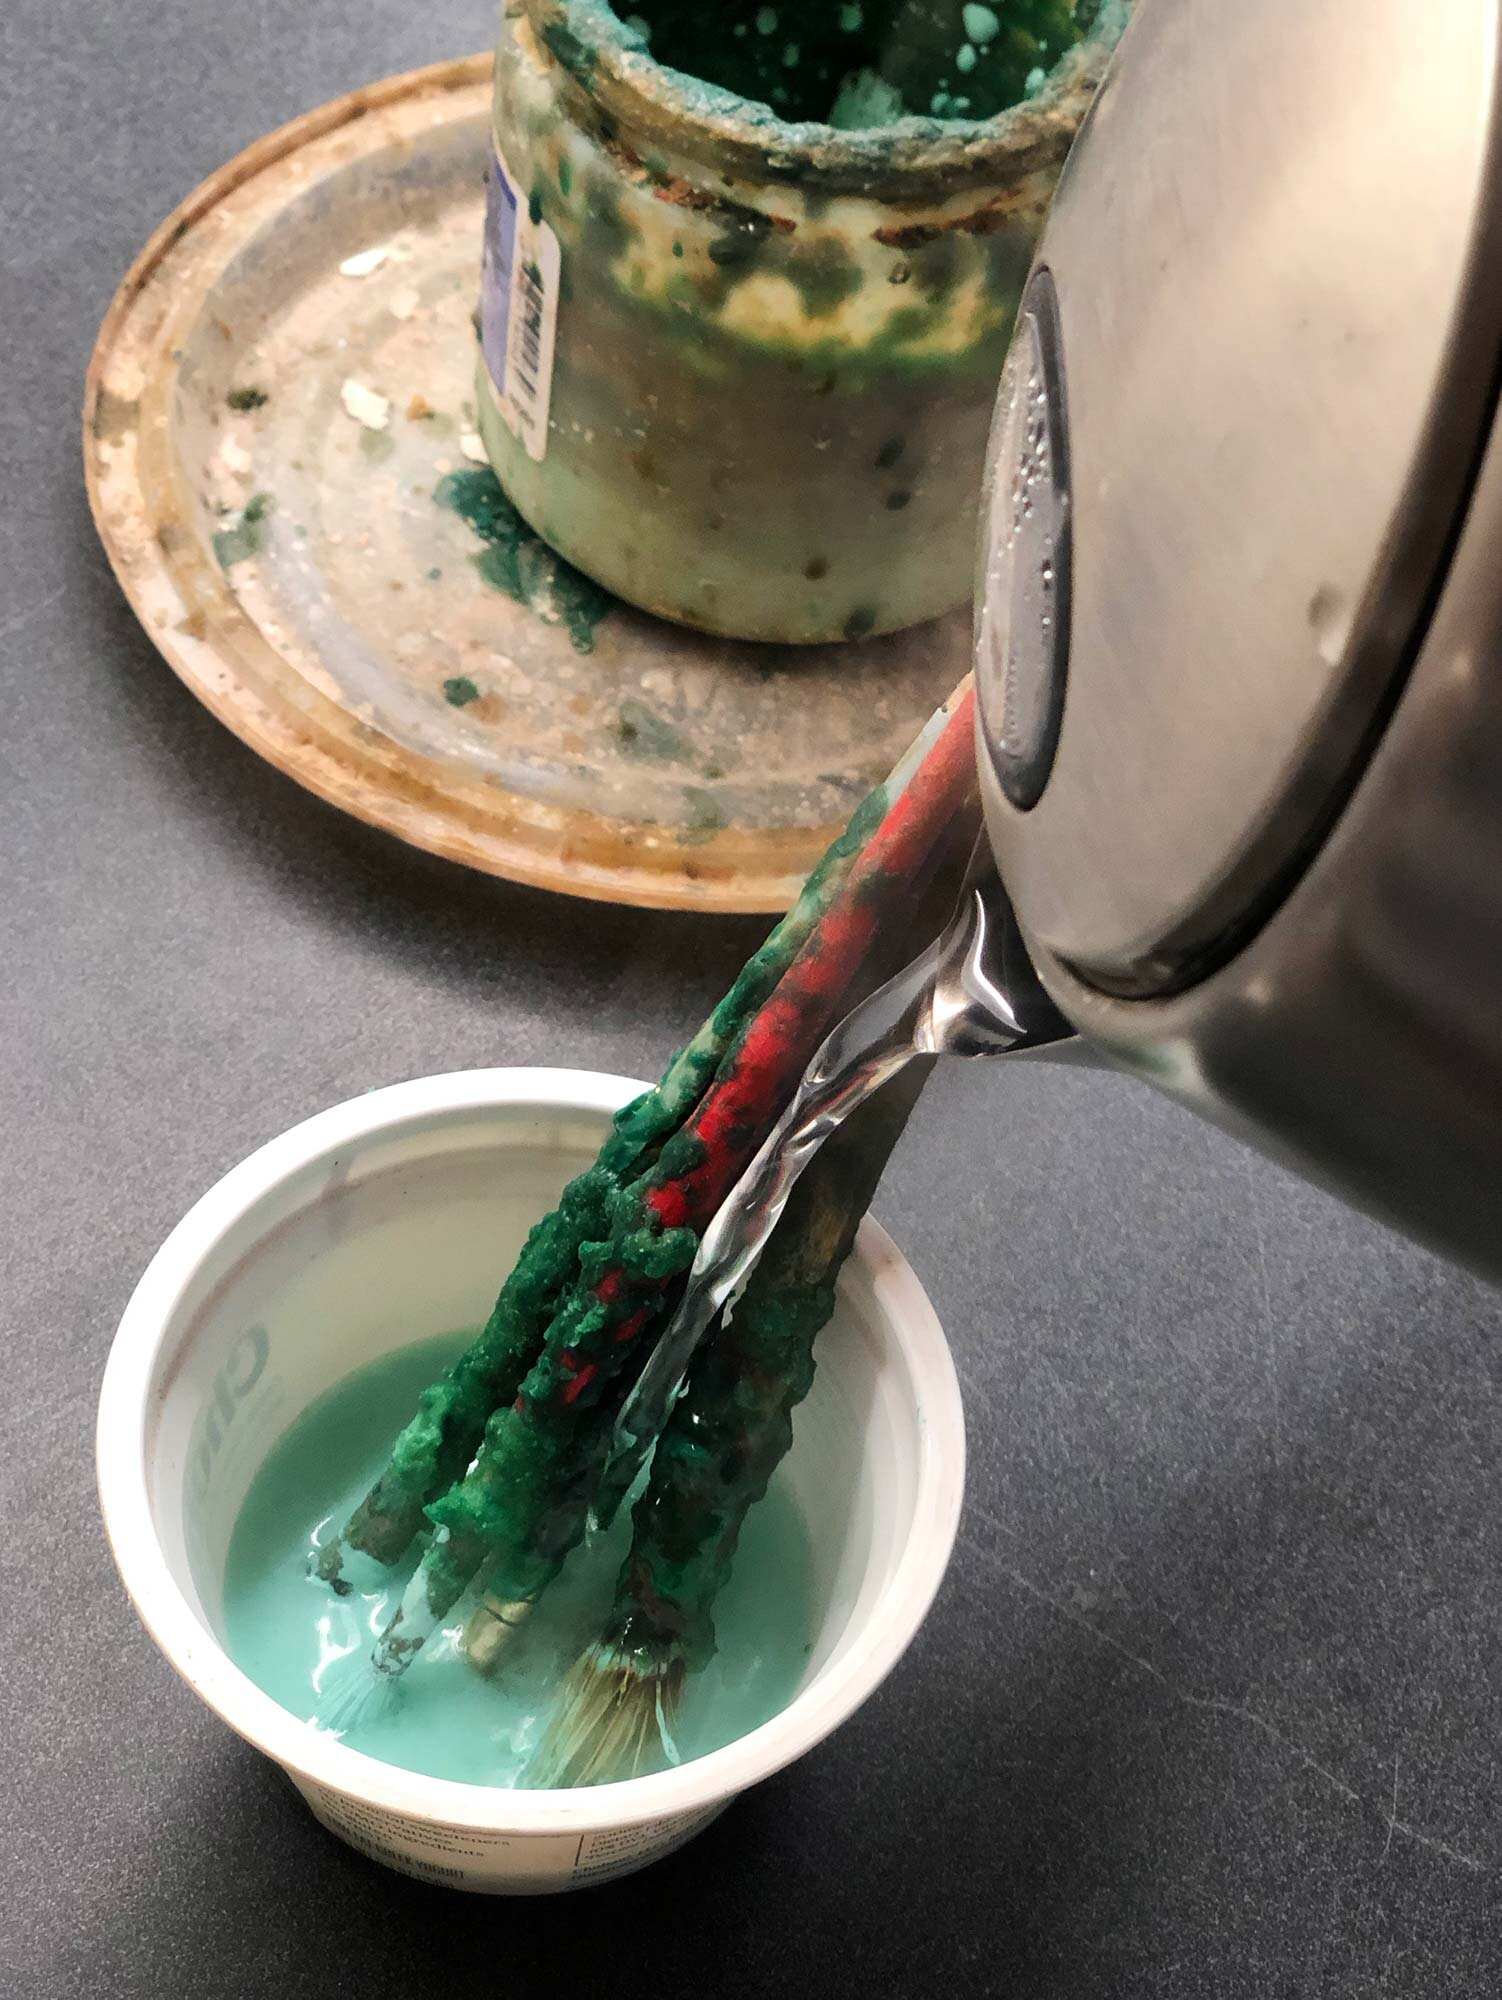
Move brushes to a small container. Pour boiling water over the brushes.

Move brushes to a small container. Pour boiling water over the brushes.

If you have heavy wax build up on your brushes, you may want to cut off and dispose of this build up with a fettling knife.

Then, move brushes to a small container, such as a recycled yogurt cup. Boil water and pour over the brushes. Swirl the brushes in the water and use the brushes to clean the sides of the other brushes.


Step 3

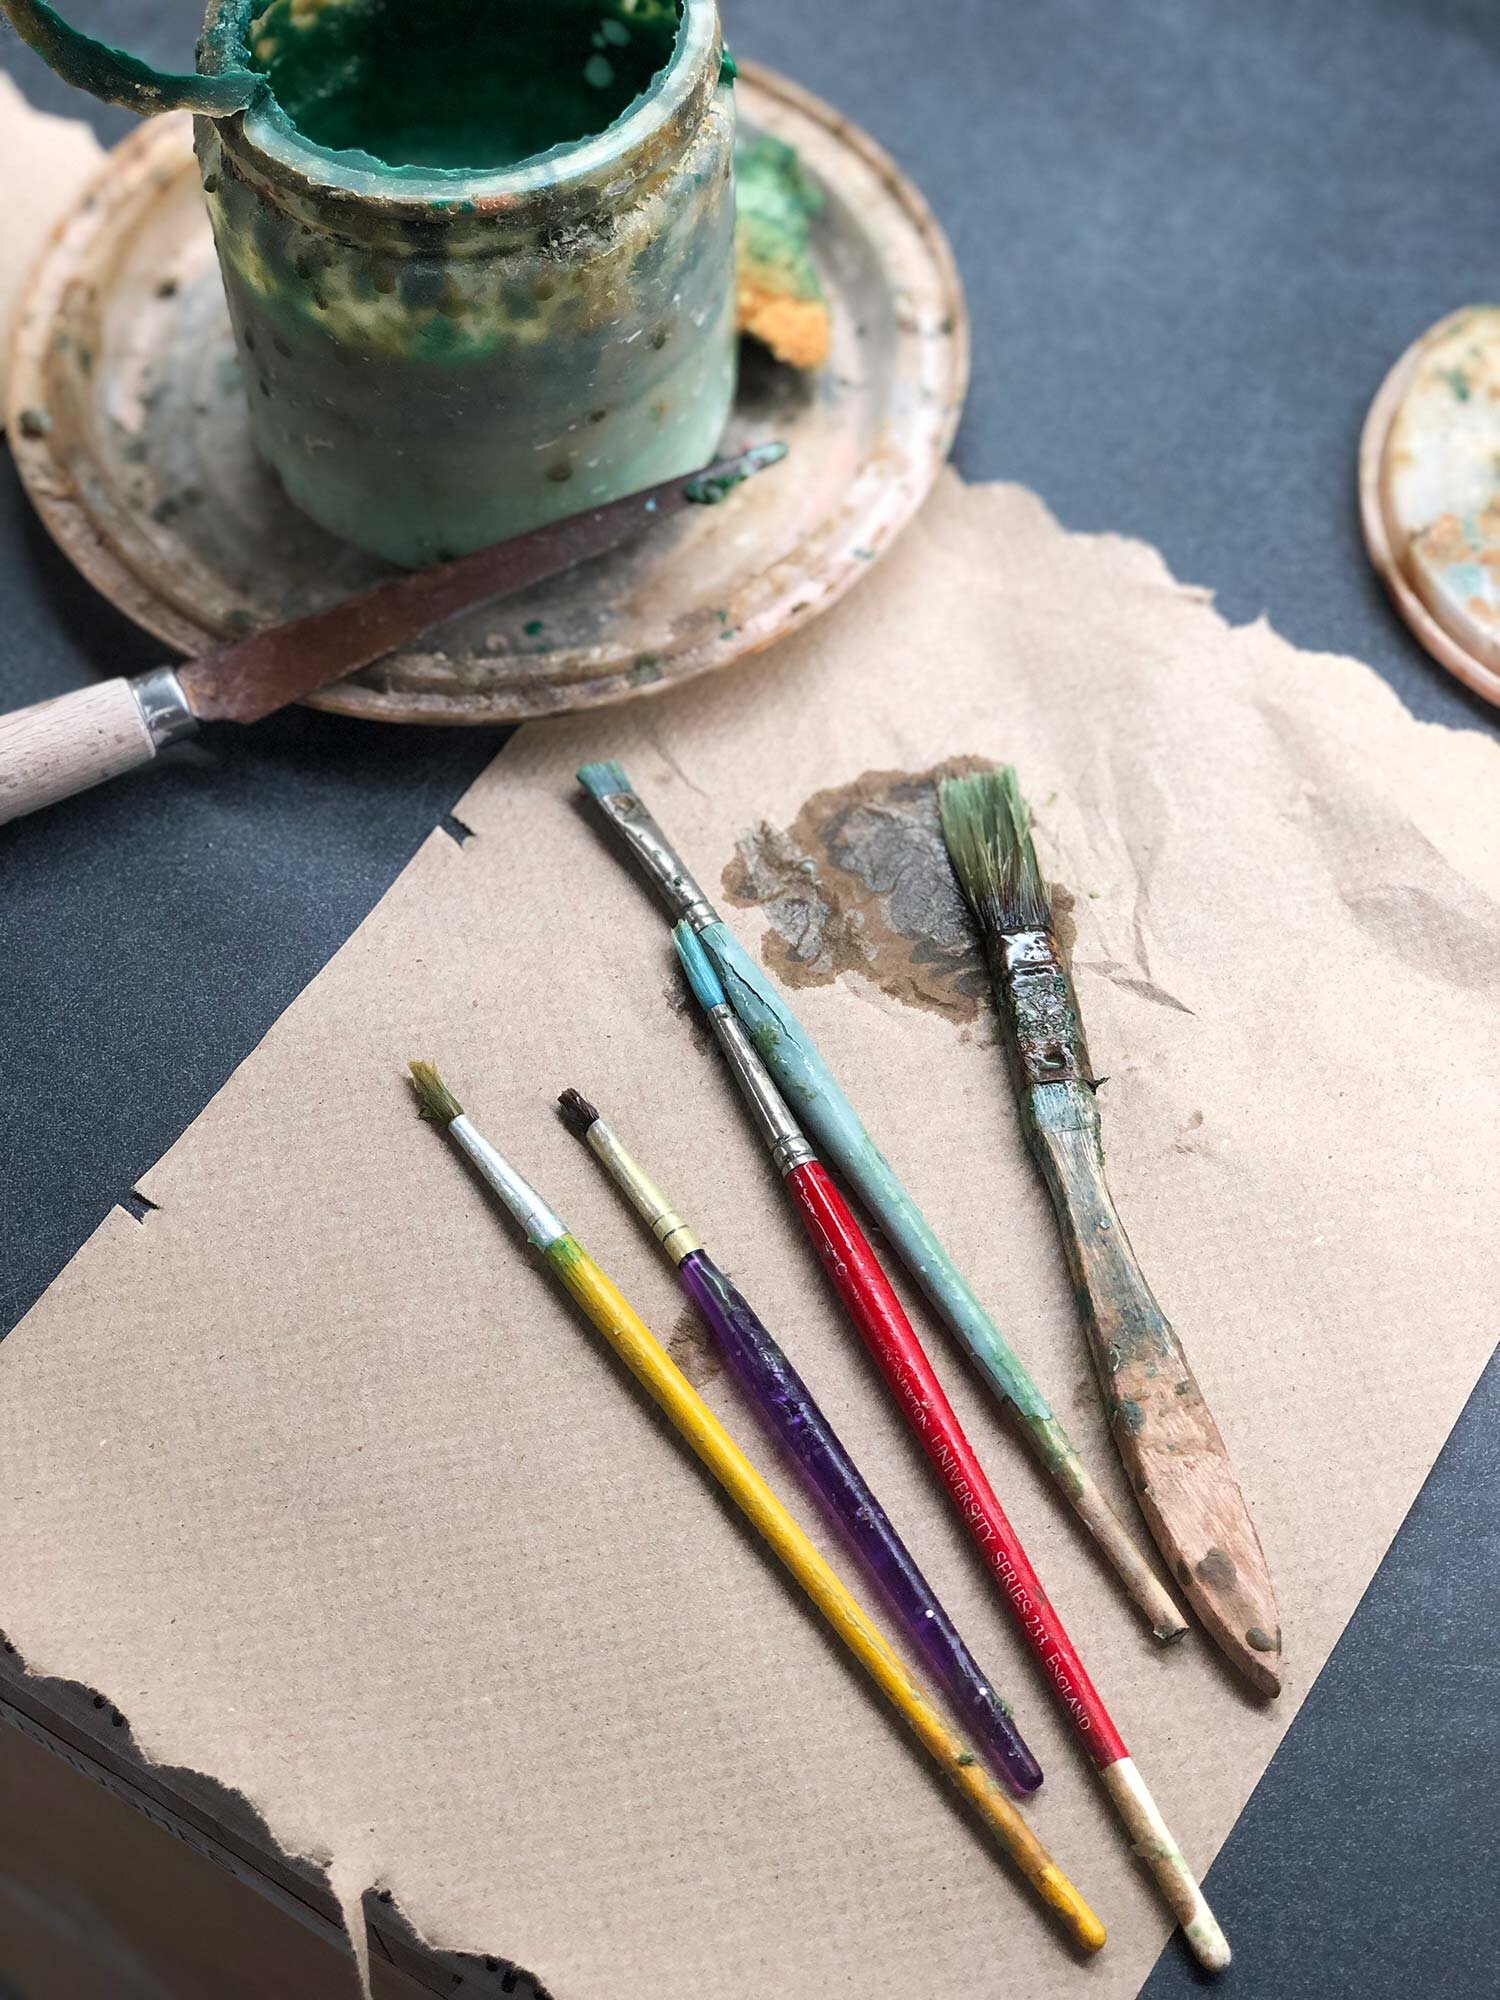
One brush cleaned, four more left.

One brush cleaned, four more left.

Here’s a picture of the cleaning in progress and then the cleaned brushes.

After you’ve cleaned all your brushes, set them aside. The water and cup you’ve used for cleaning can be thrown away. (Don’t pour wax down your drain!) Or, let the water cool, remove and dispose of the cooled wax, and then clean the container. If possible, you could save this one container to reuse over and over as your wax-brush cleaning container.

 
The brushes after cleaning.

The brushes after cleaning.


Step 4

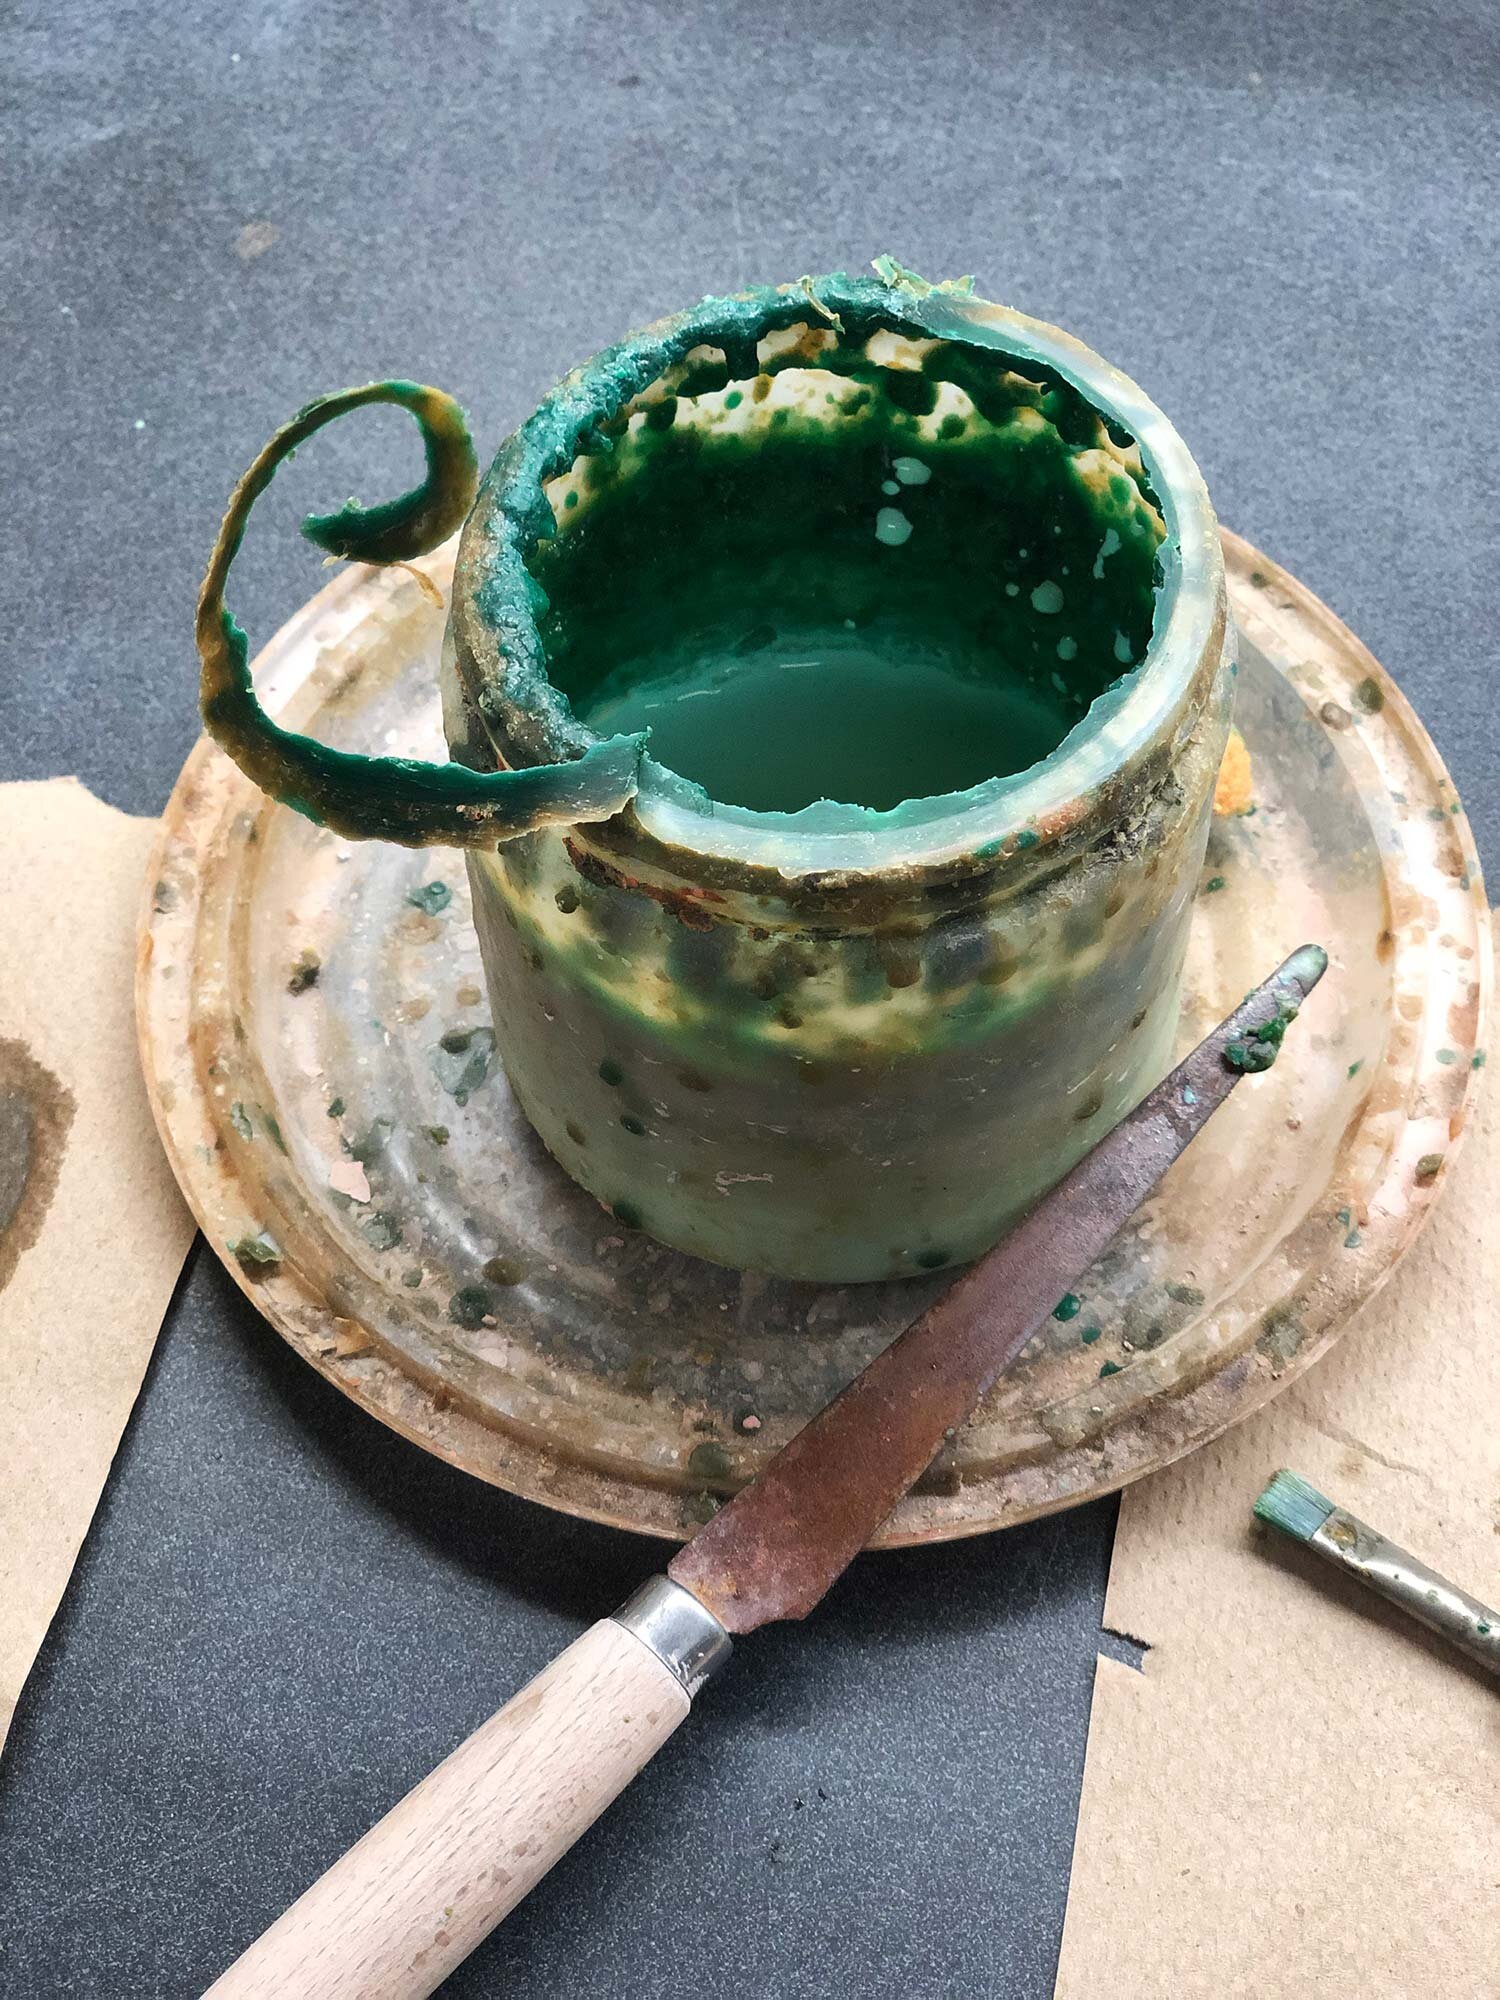
Removing built-up wax resist

Removing built-up wax resist

Next, it’s time to clean the cup. Using a fettling knife, cut off built-up wax from the rim and inside of the cup. If needed, pour out any wax into a reserve container, and use boiling water to clean the entire cup or jar.

Another option, if you have heavy build up, is to switch to a new container. The wide-mouth underglaze jars from Spectrum underglazes are great for a wax container.


Step 5

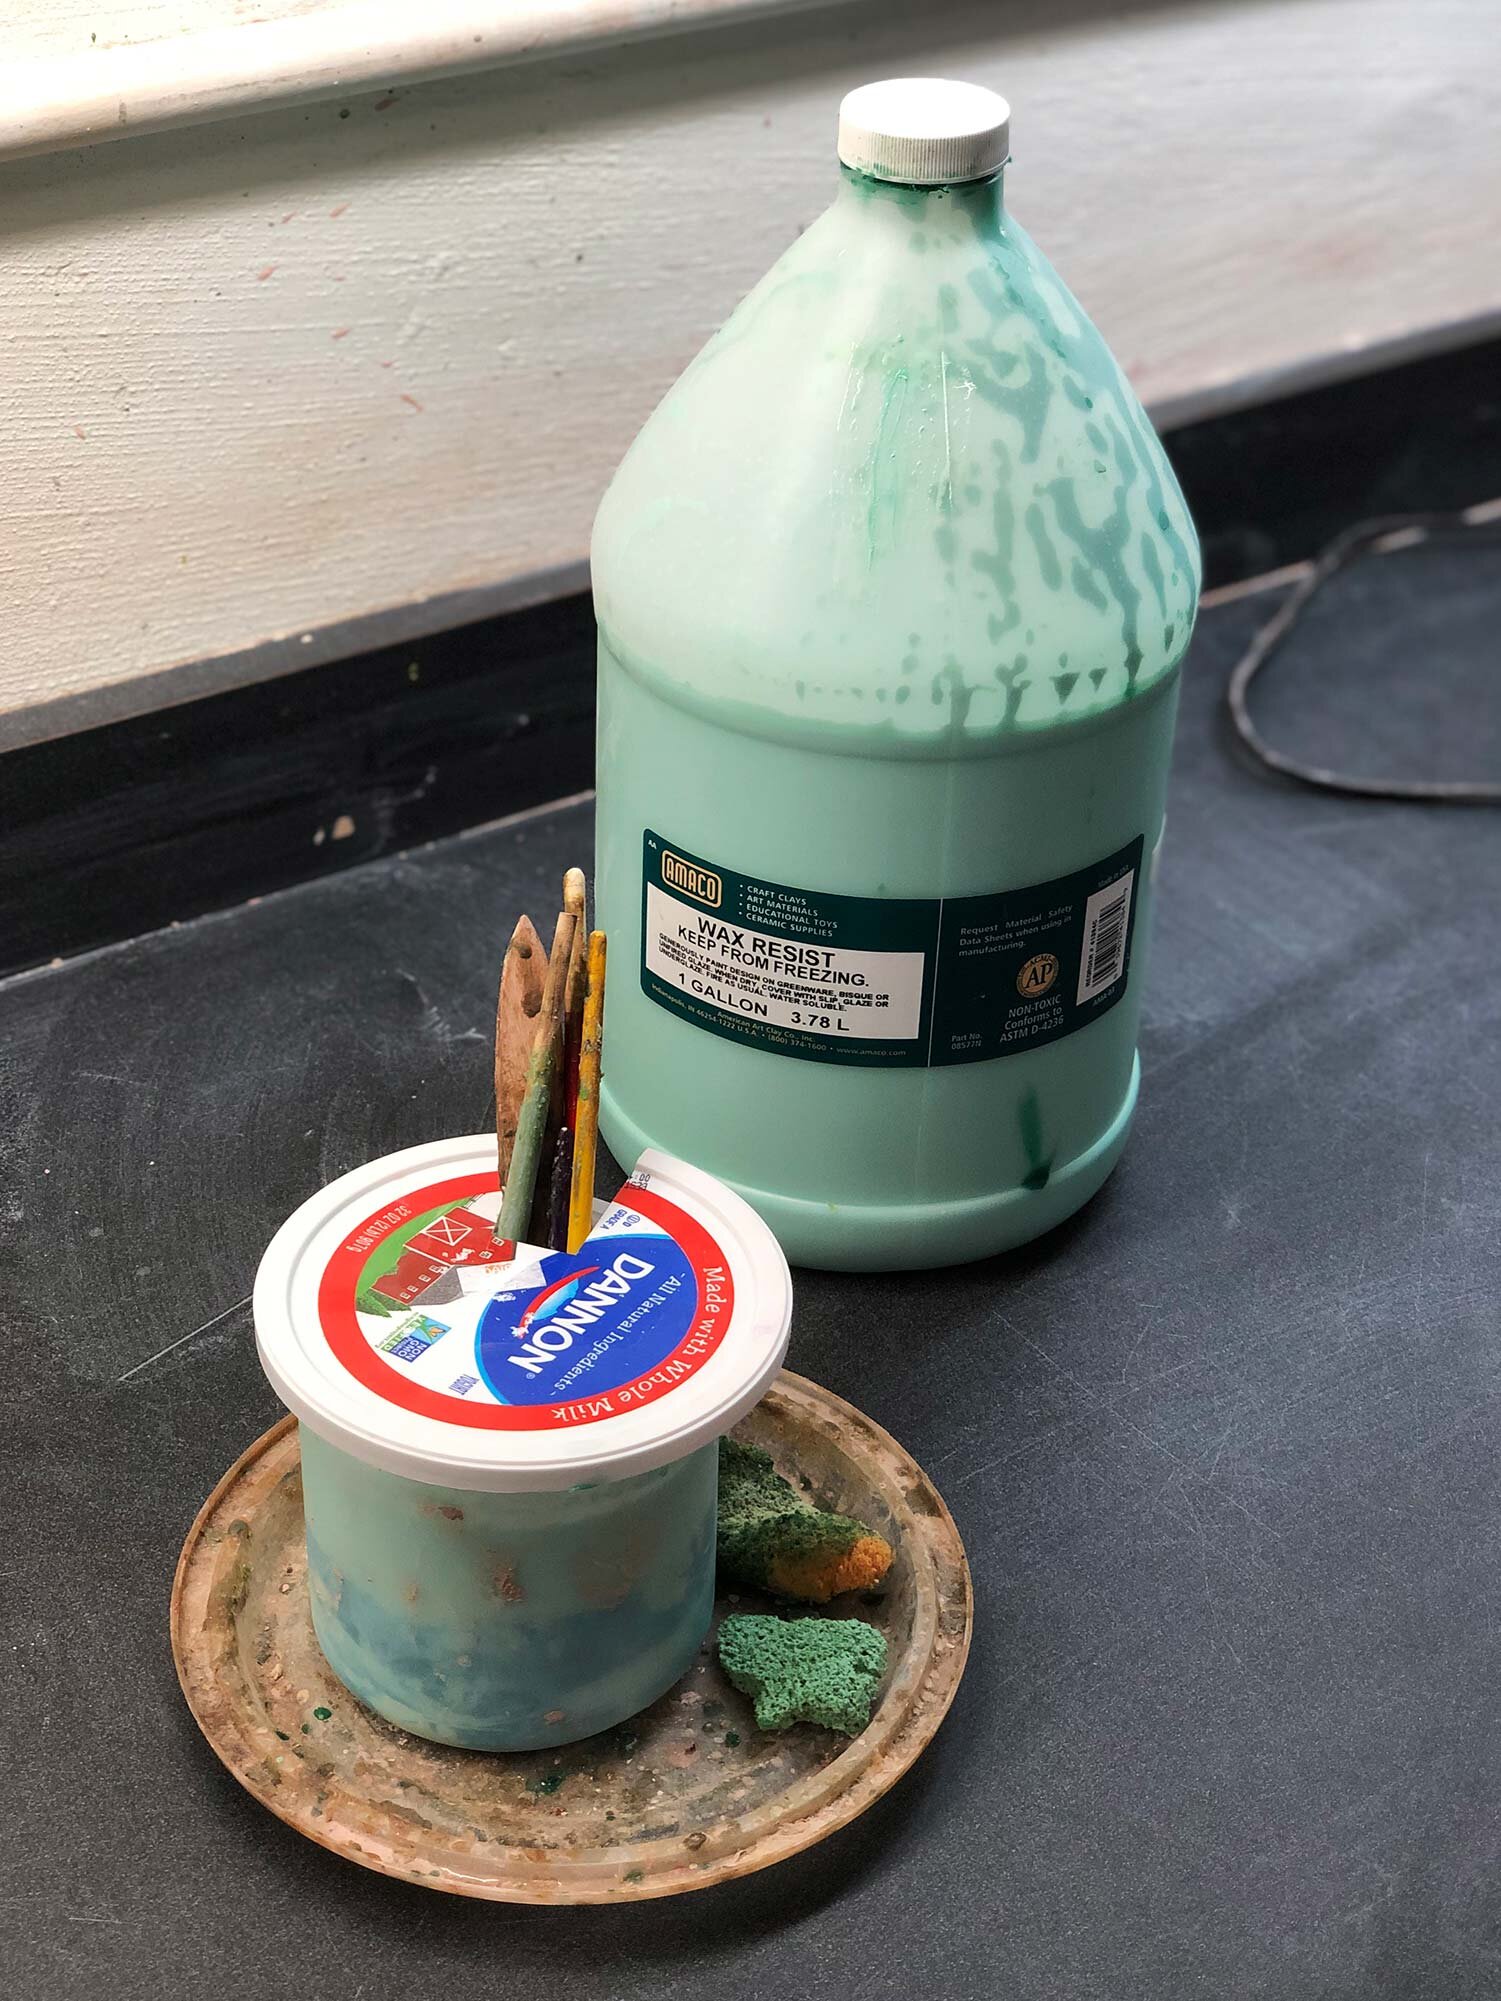
wax6.jpg

After cleaning the brushes and jar, refill the cup and you’re ready to go. Pictured here are a fresh glaze cup and lid. Depending on how often you clean, you might need a new wax cup about once a year or you could completely clean it and keep it going longer than that.

To conclude: Cleaning wax resist with boiling water is quick, easy, and effective.


Our Favorite Electric Water Kettle

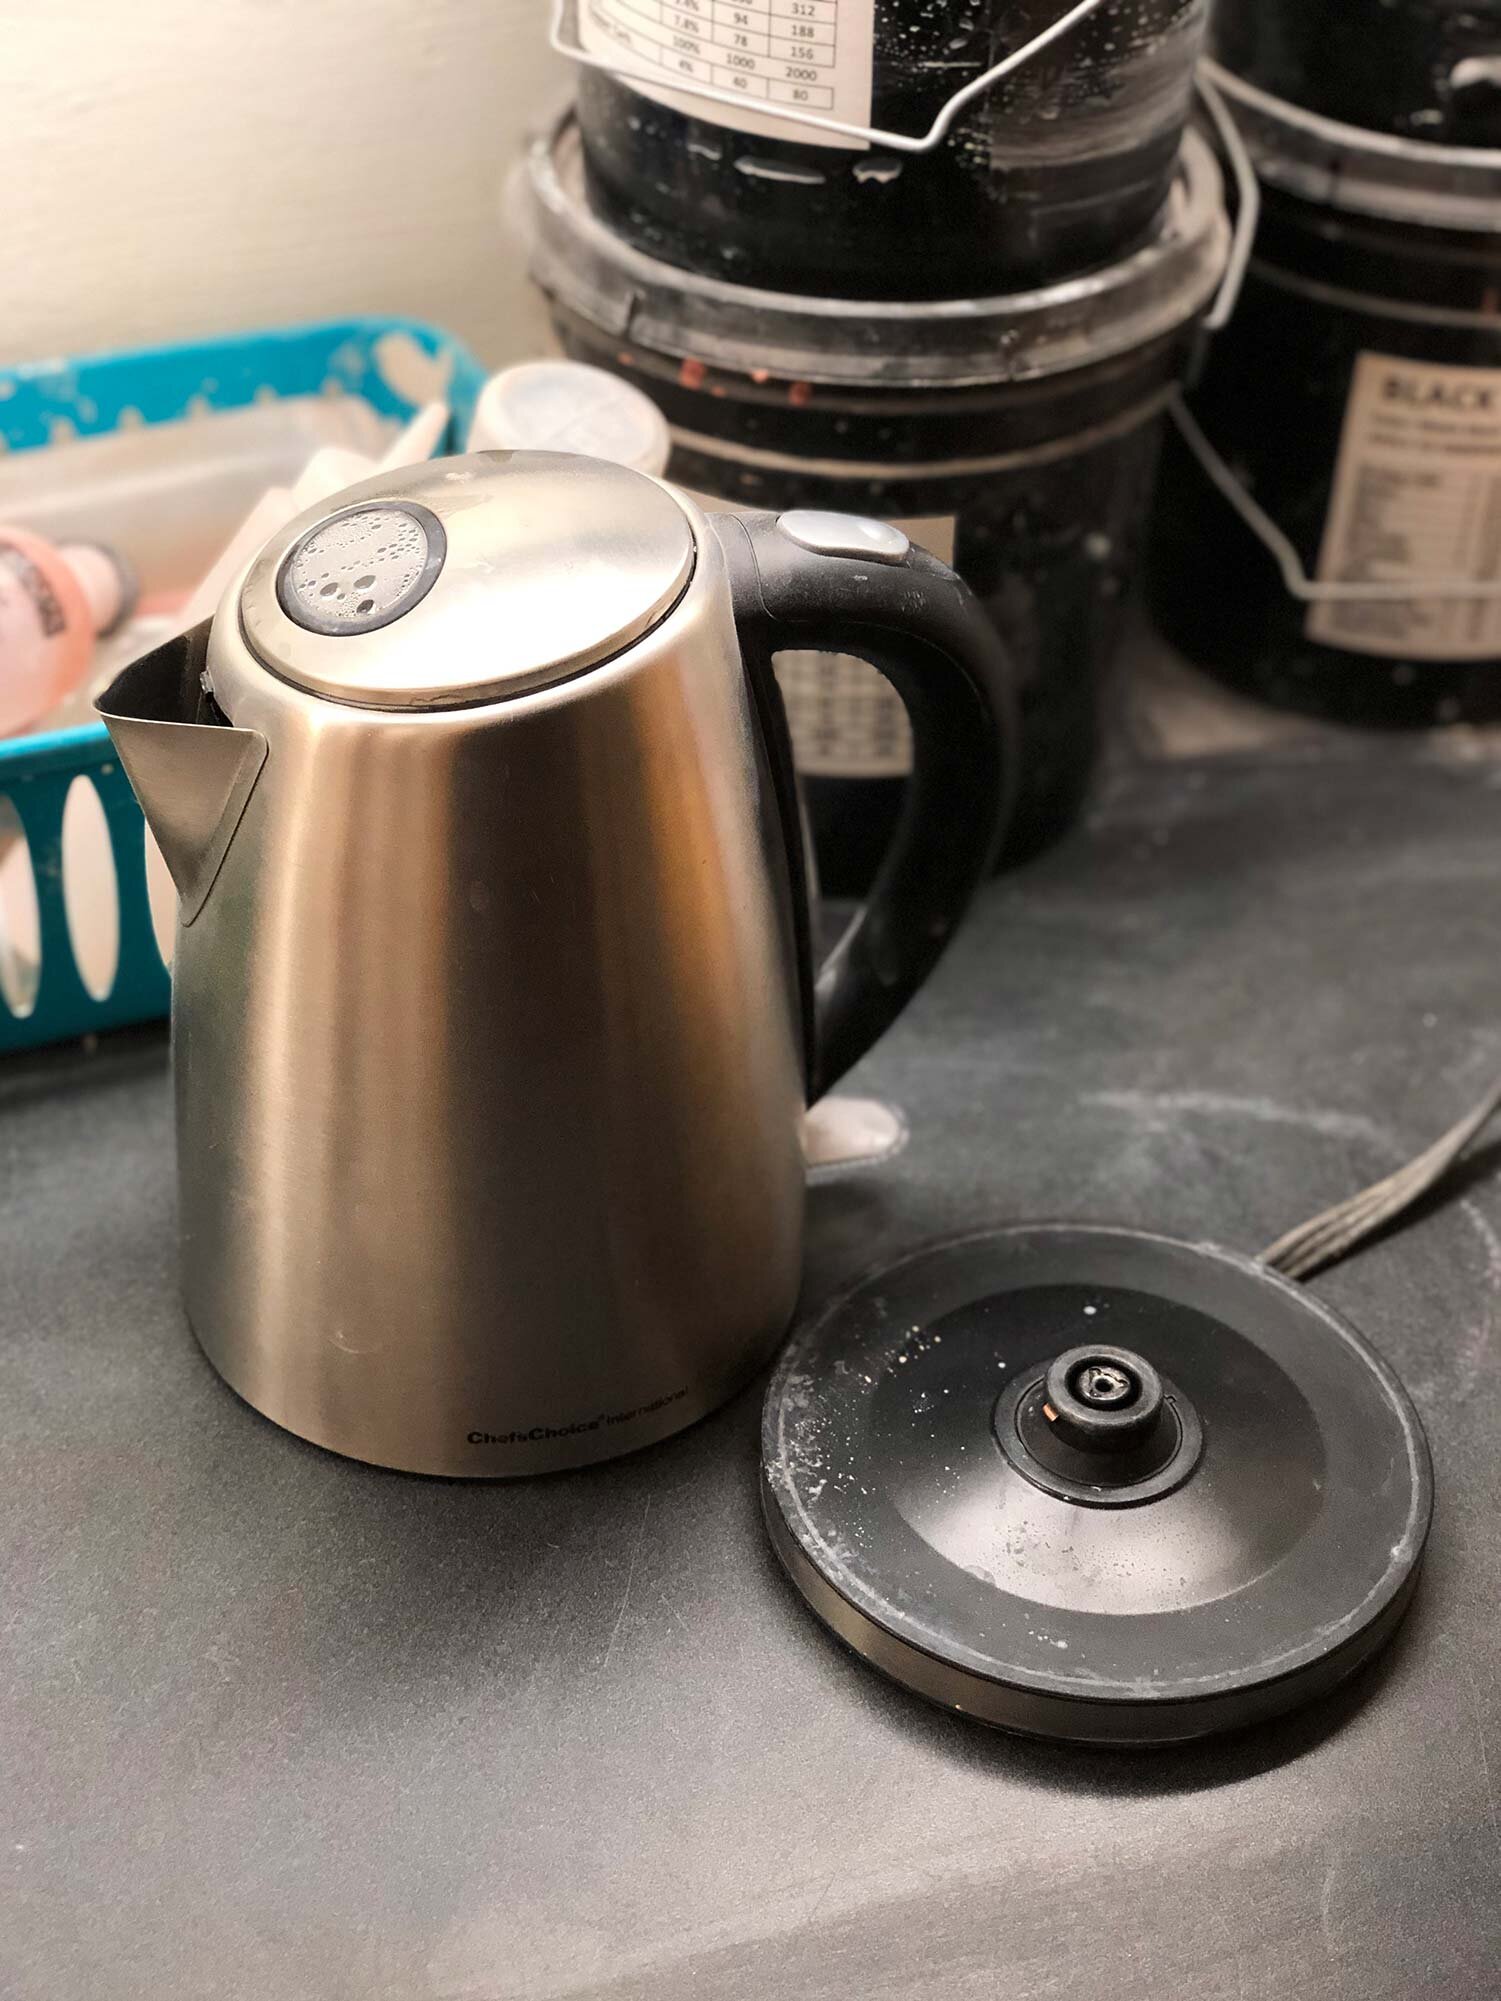
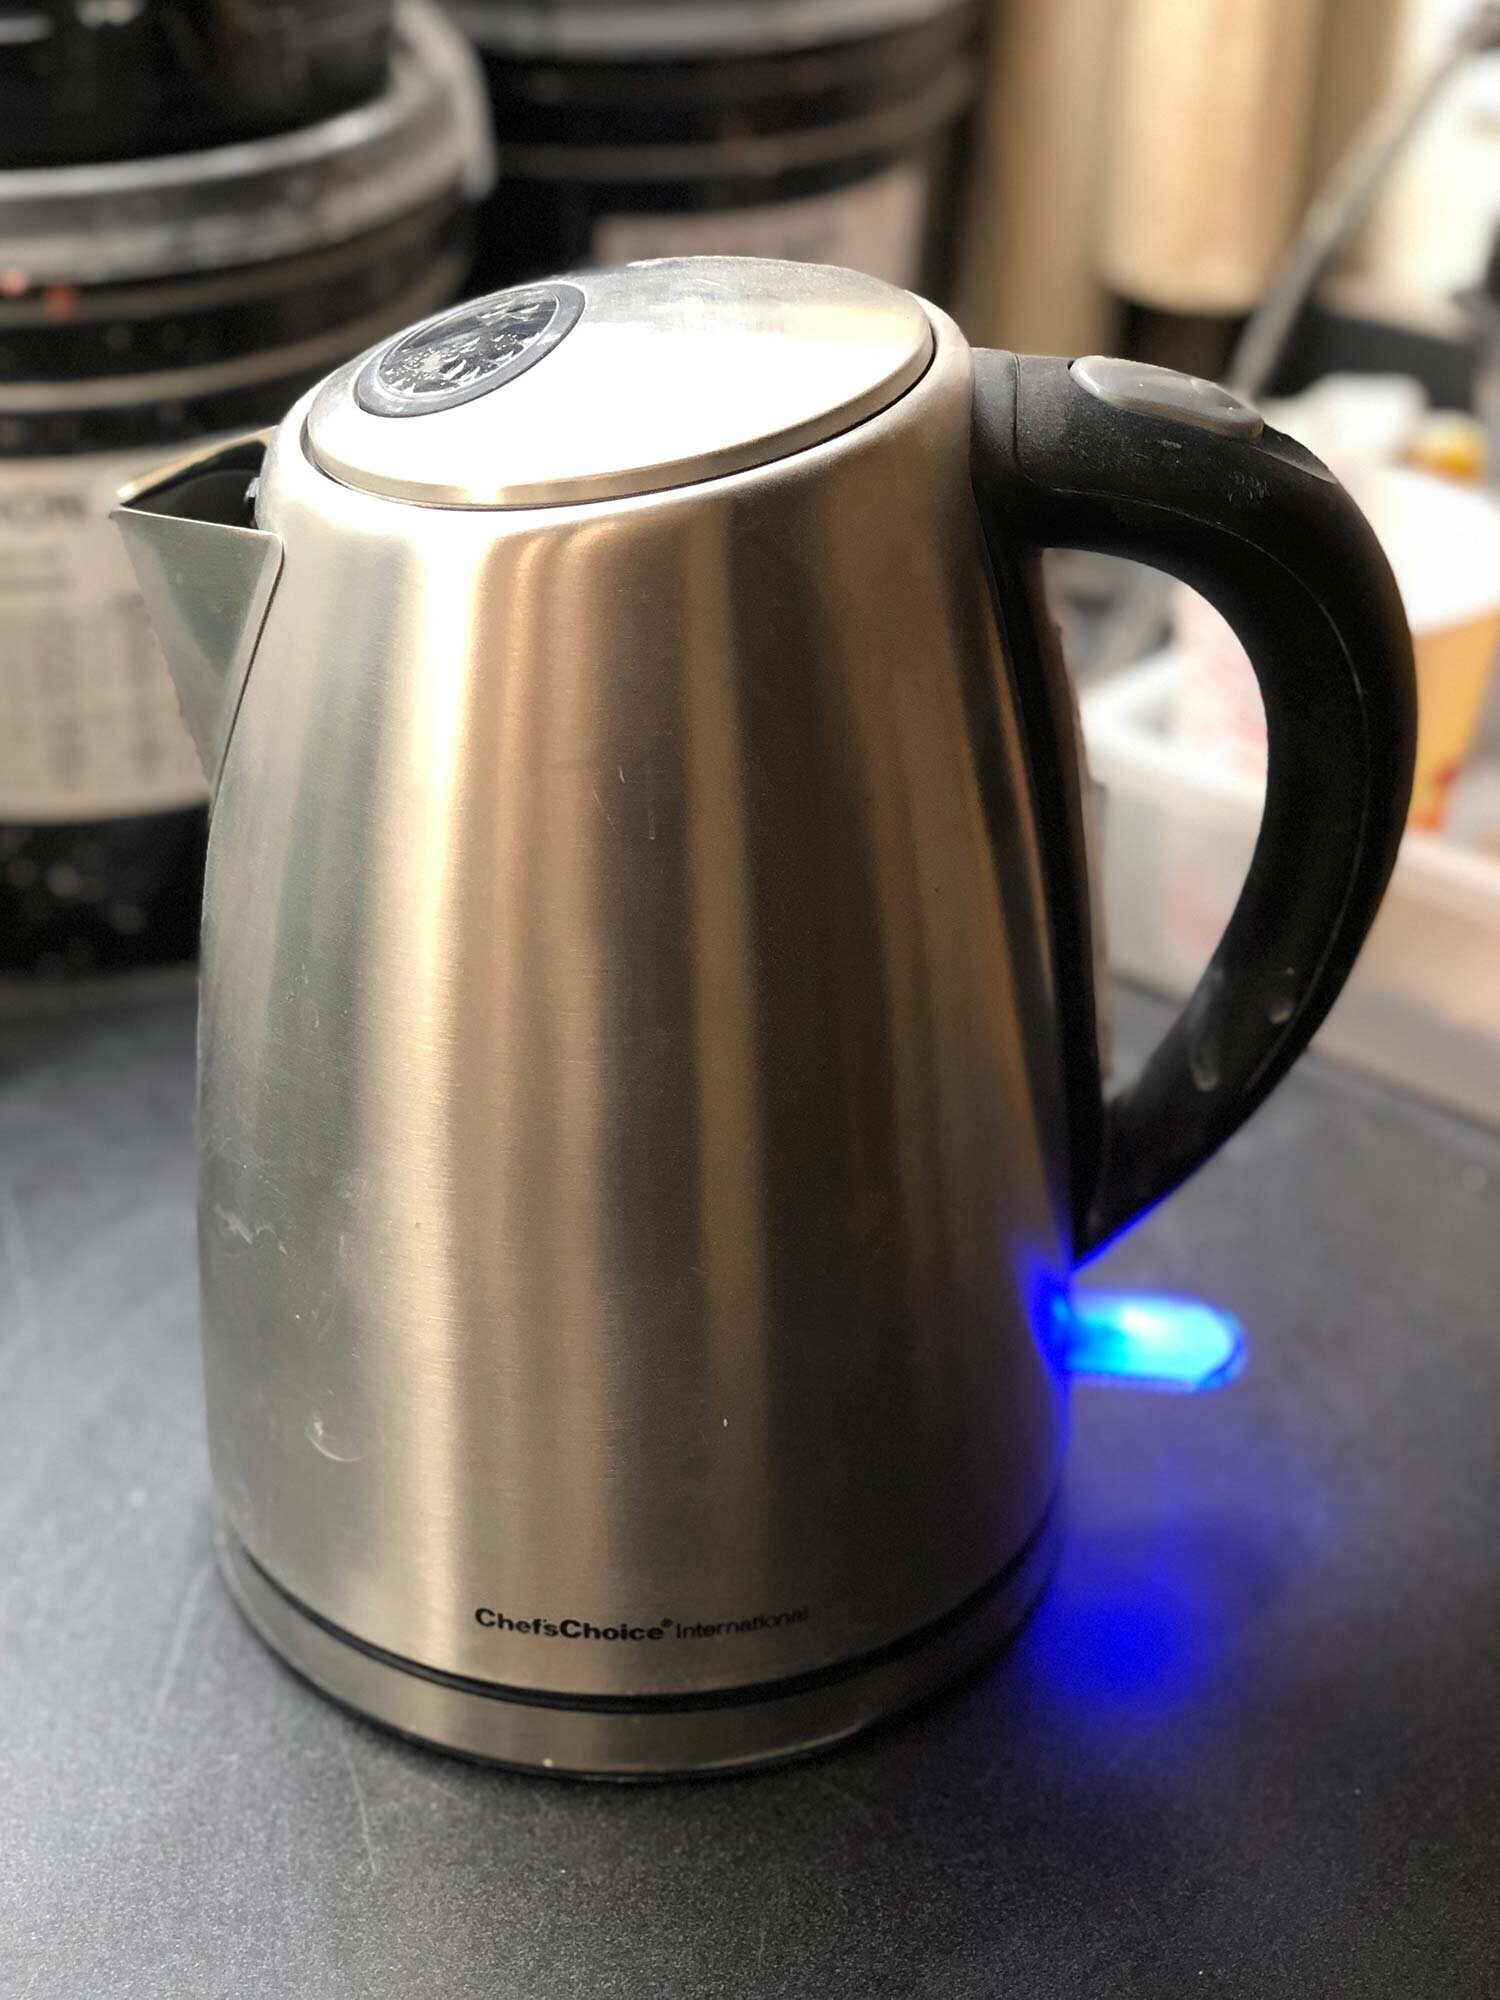
To clean wax resist, you’ll need boiling water and an excellent kettle is the Chef’s Choice Cordless Electric Kettle. This is not a comprehensive review of kettles, but this kettle is great. In community studio I manage, it’s been in heavy use for almost 18 months and has had no problems.

Here’s what I love about it:

  • Sturdy construction and design. Simple on / off switch with light

  • Kettle is cordless

  • Base has storage area for excess cord.

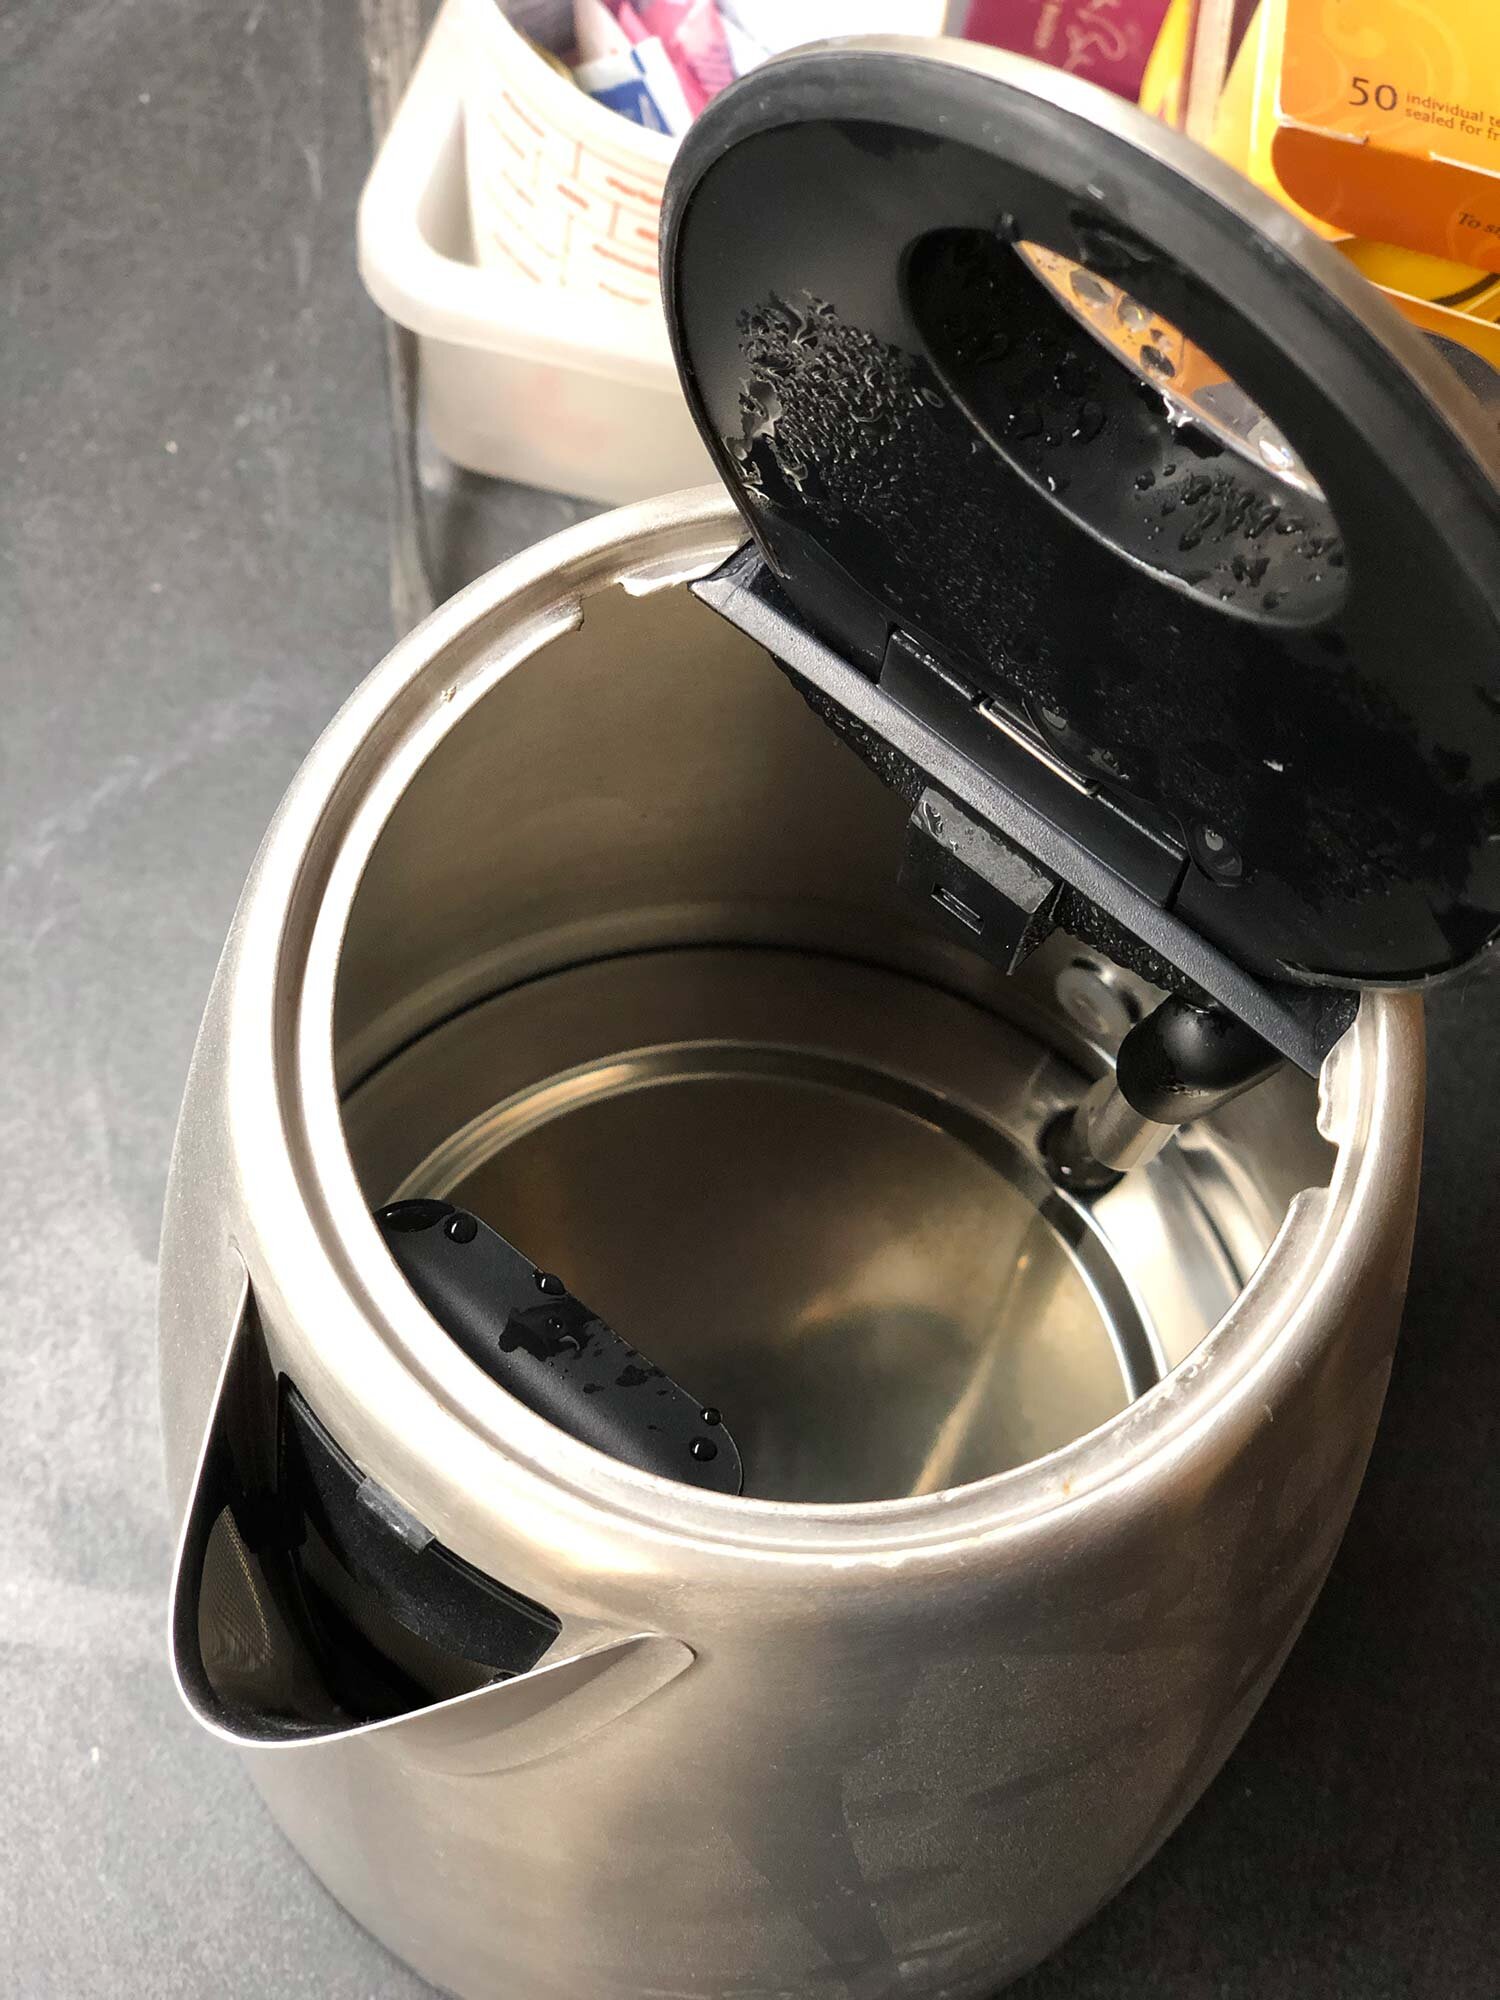
  • Easy to clean

  • Inside is all metal

  • Boils water quickly

This is a great kettle that does exactly what you need it to do. If you don’t have a water kettle in your studio, it’s a simple addition that is great for making tea or instant soups. Adding the option of hot tea can really augment and improve the culture of your studio.


Wrap-Up: Wax Resist Use and Clean Up in a Ceramic Studio

Wax resist is a great tool for a ceramics studio. It takes some clean up, should be used only as needed, and my recommendation is to use a premium wax resist such as the Amaco green wax resist. To apply, try using chip brushes or other simple, cheap brushes.

It’s easiest to clean up with boiling water and this tutorial provides some tips, tricks, and ideas of how to do that.

What do you use wax resist for? Do you have a favorite brand? Please share in the comments.


Make Your Own Metal Pottery Rib

 
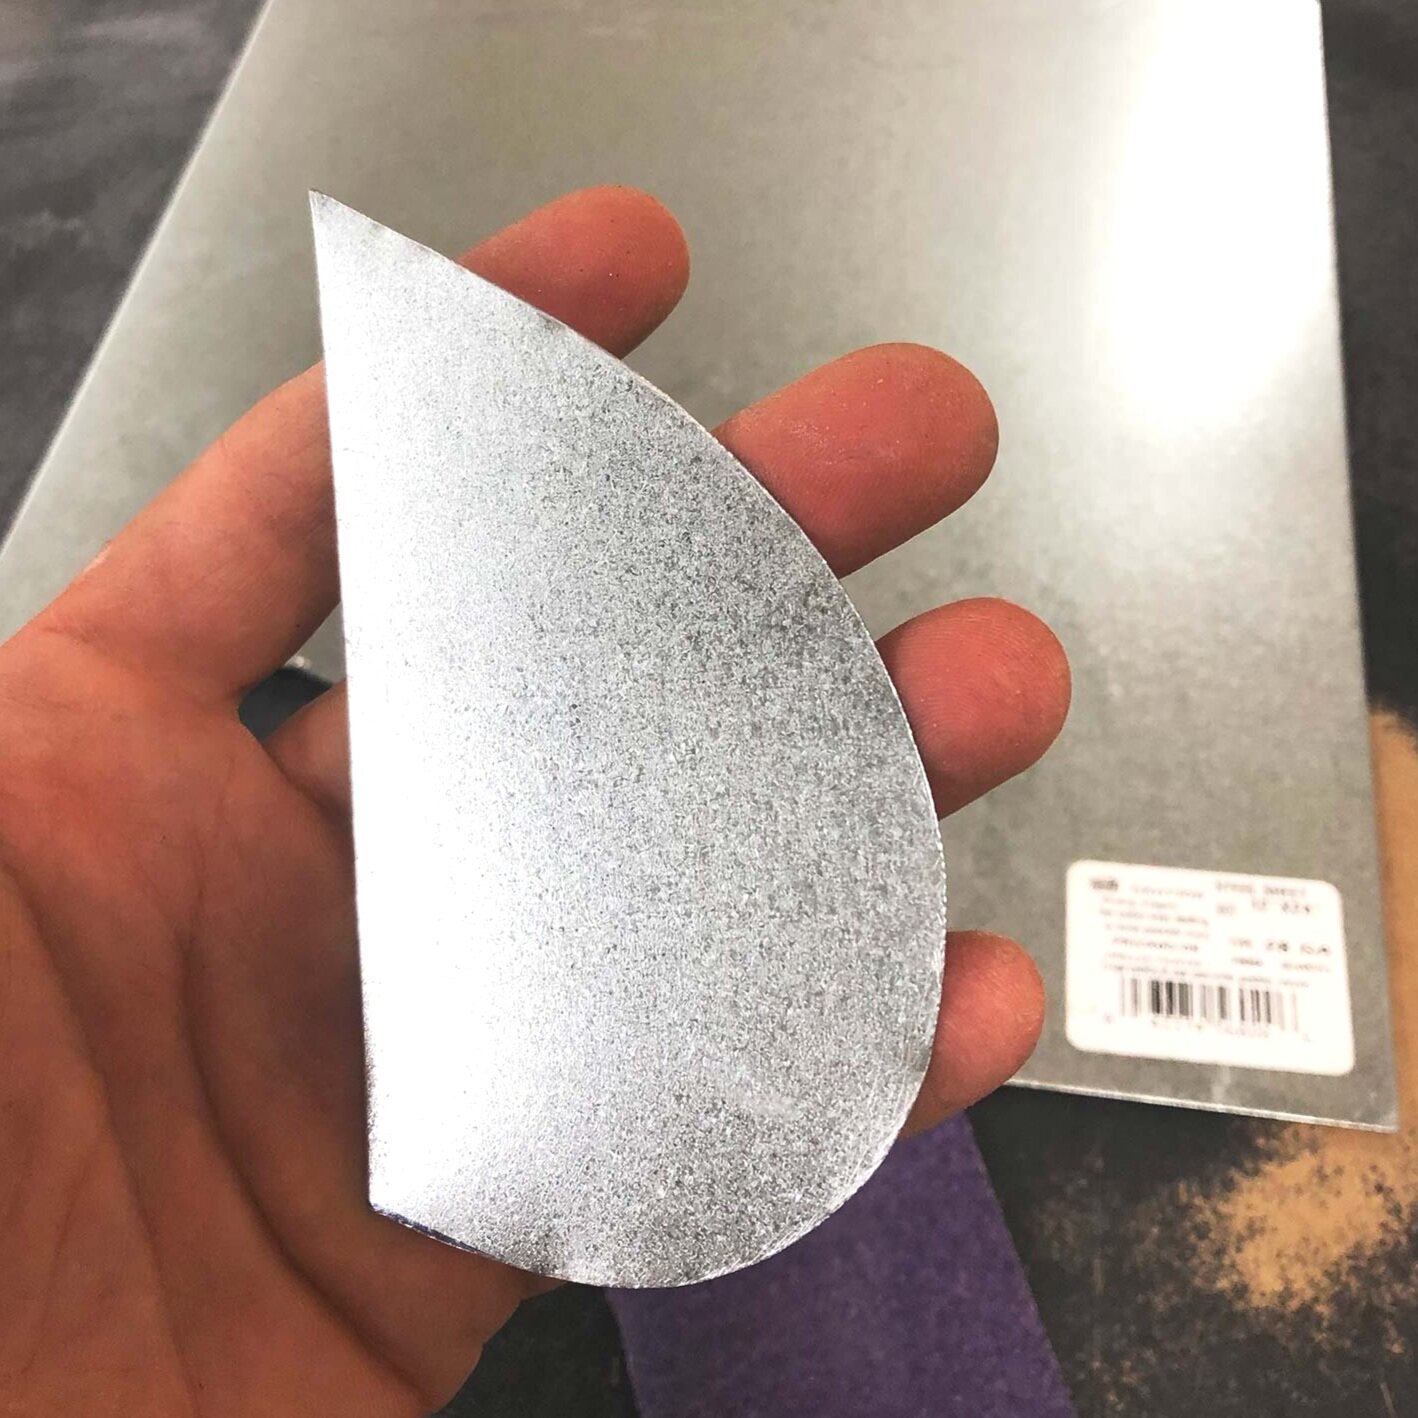
A handmade, metal pottery rib.

A handmade, metal pottery rib.


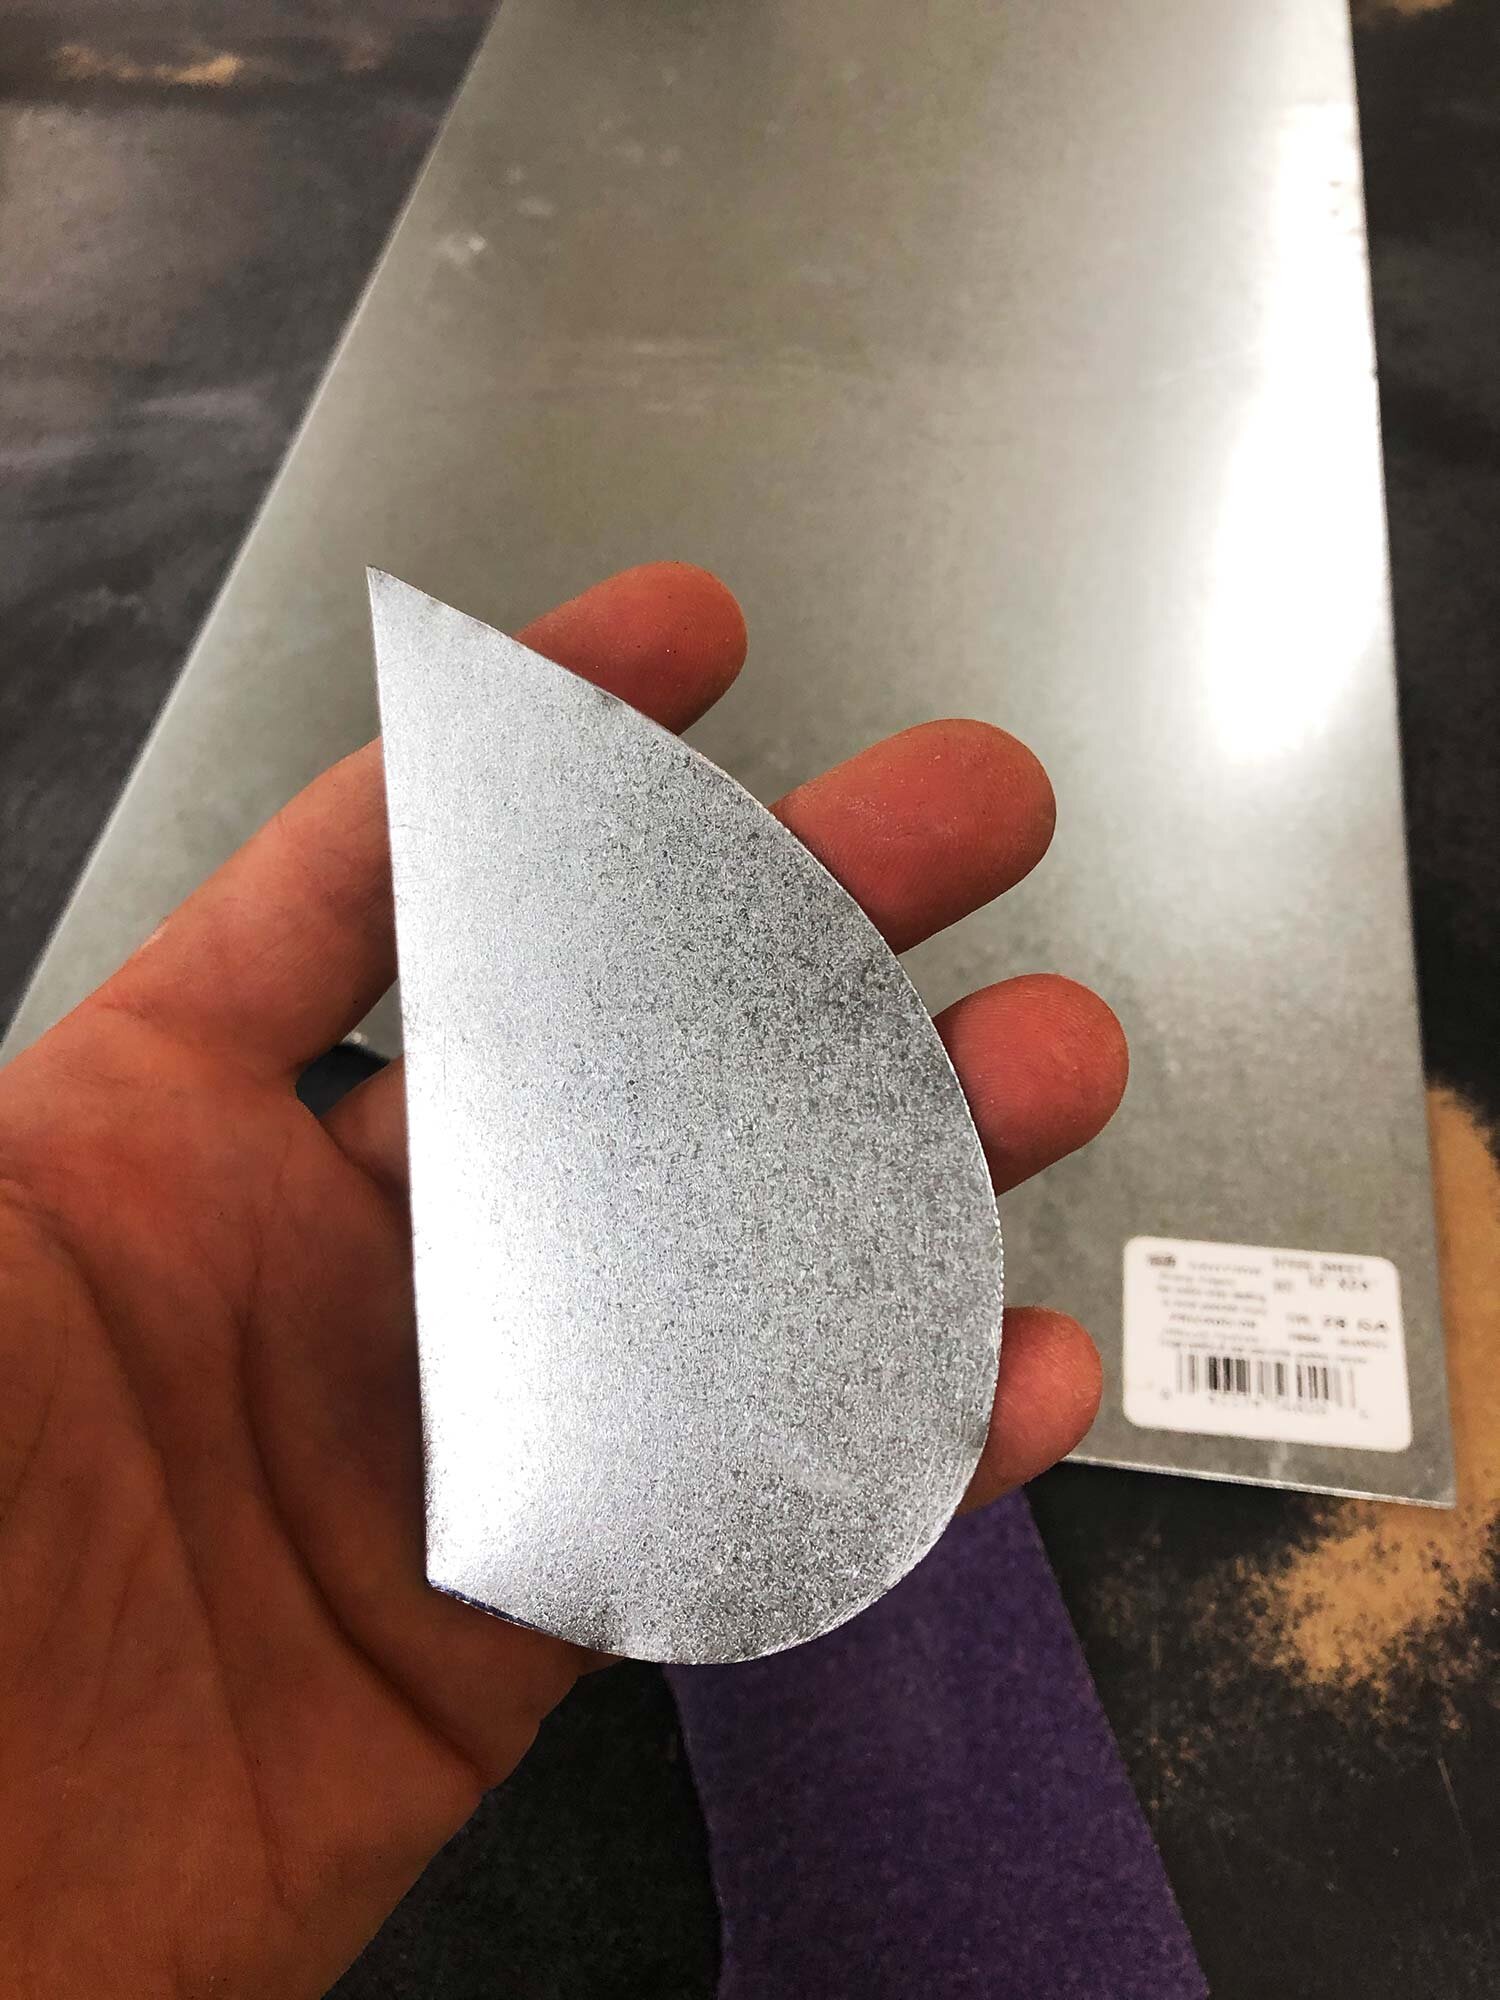
Making your own tools is a great way to get exactly what you need, and a metal rib is one of the easiest tools to make. For a DIY metal pottery rib of any shape, all you need is a small sheet of metal and wire snips. My favorite shape is the flat-edged teardrop shape with a point pictured above, but you can make any shape.

To make this DIY metal pottery throwing rib, you will need:

  • 24 or 28 gauge galvanized steel sheet. This thickness has the right mix of hardness and flexibility. You can buy galvanized steel at your local hardware store or click here to shop Amazon for an affordable 12” x 12” sheet.

  • Metal Snips, such as aviation snips. (Shop aviation snips at Amazon)

  • Marker, such as a Sharpie

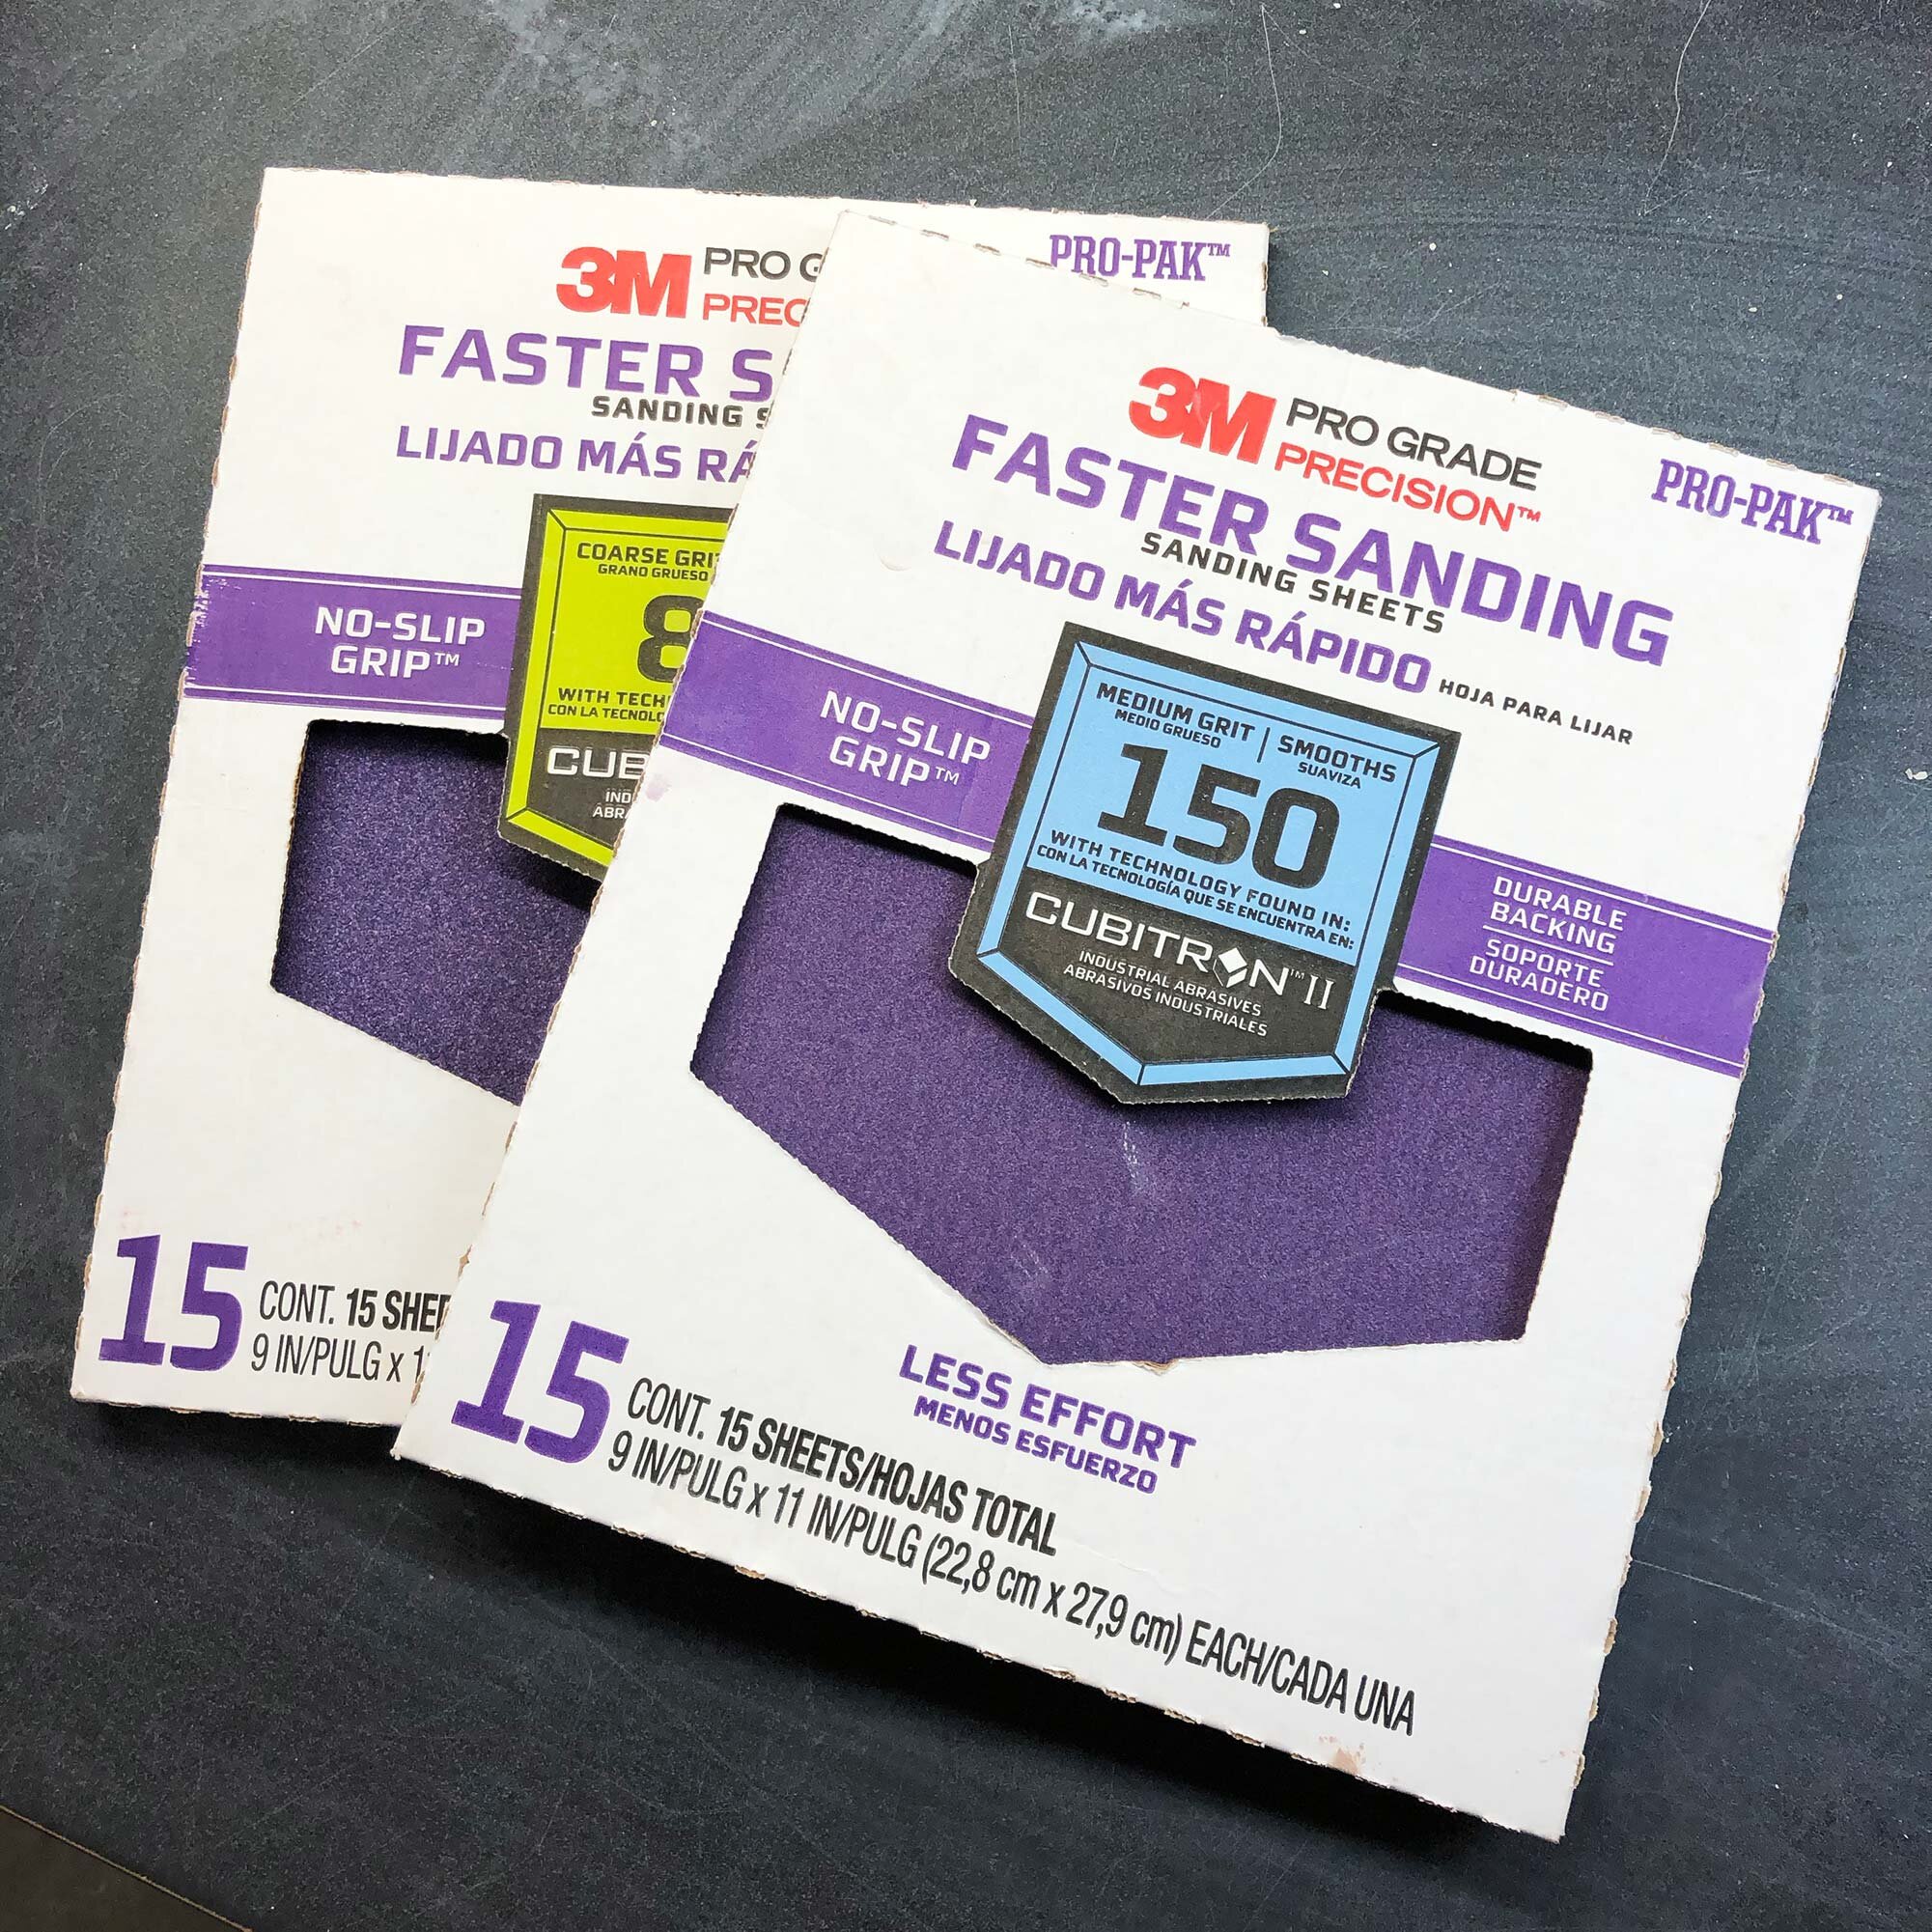
  • Sandpaper. 3M Pro-Grade sandpaper is my favorite (shop at Amazon)

  • Rib template, use an old rib or make a cardstock template

The galvanized steel is flexible but harder, resulting in a more useful rib that that which comes with a basic pottery tool kit. (Check out our review of the best beginner pottery tools here.) The galvanized steel also stays relatively rust free, if you keep your tools clean and dry.

These homemade ribs were introduced to me many years ago when I was first studying pottery. I can’t imagine using any other rib to get just the perfect curve in a bowl and the pointed side is super handy for cleaning up the foot or adding a decorative notch. I also use these tools to remove the slip from the outside of pots, and to shape the inside of a bowl. They also make great ribs for hand building. I occasionally use wood or plastic ribs for throwing, but this metal rib is my go-to pottery workhorse.


Make a Metal Rib: Step by Step

Step 1:

Gather your materials. You’ll need a piece of 24 or 28 gauge galvanized steel, metal snips, a marker, sandpaper and a template. Links to order materials online are above.

metalrib.jpg
metalrib1.jpg

Here’s a close up of the label on the metal sheet. It’s a 1 foot x 2 foot, 28 gauge sheet of galvanized steel.


Step 2:

Trace the template outline with your marker.

metalrib2.jpg
 

Step 3:

metalrib4.jpg

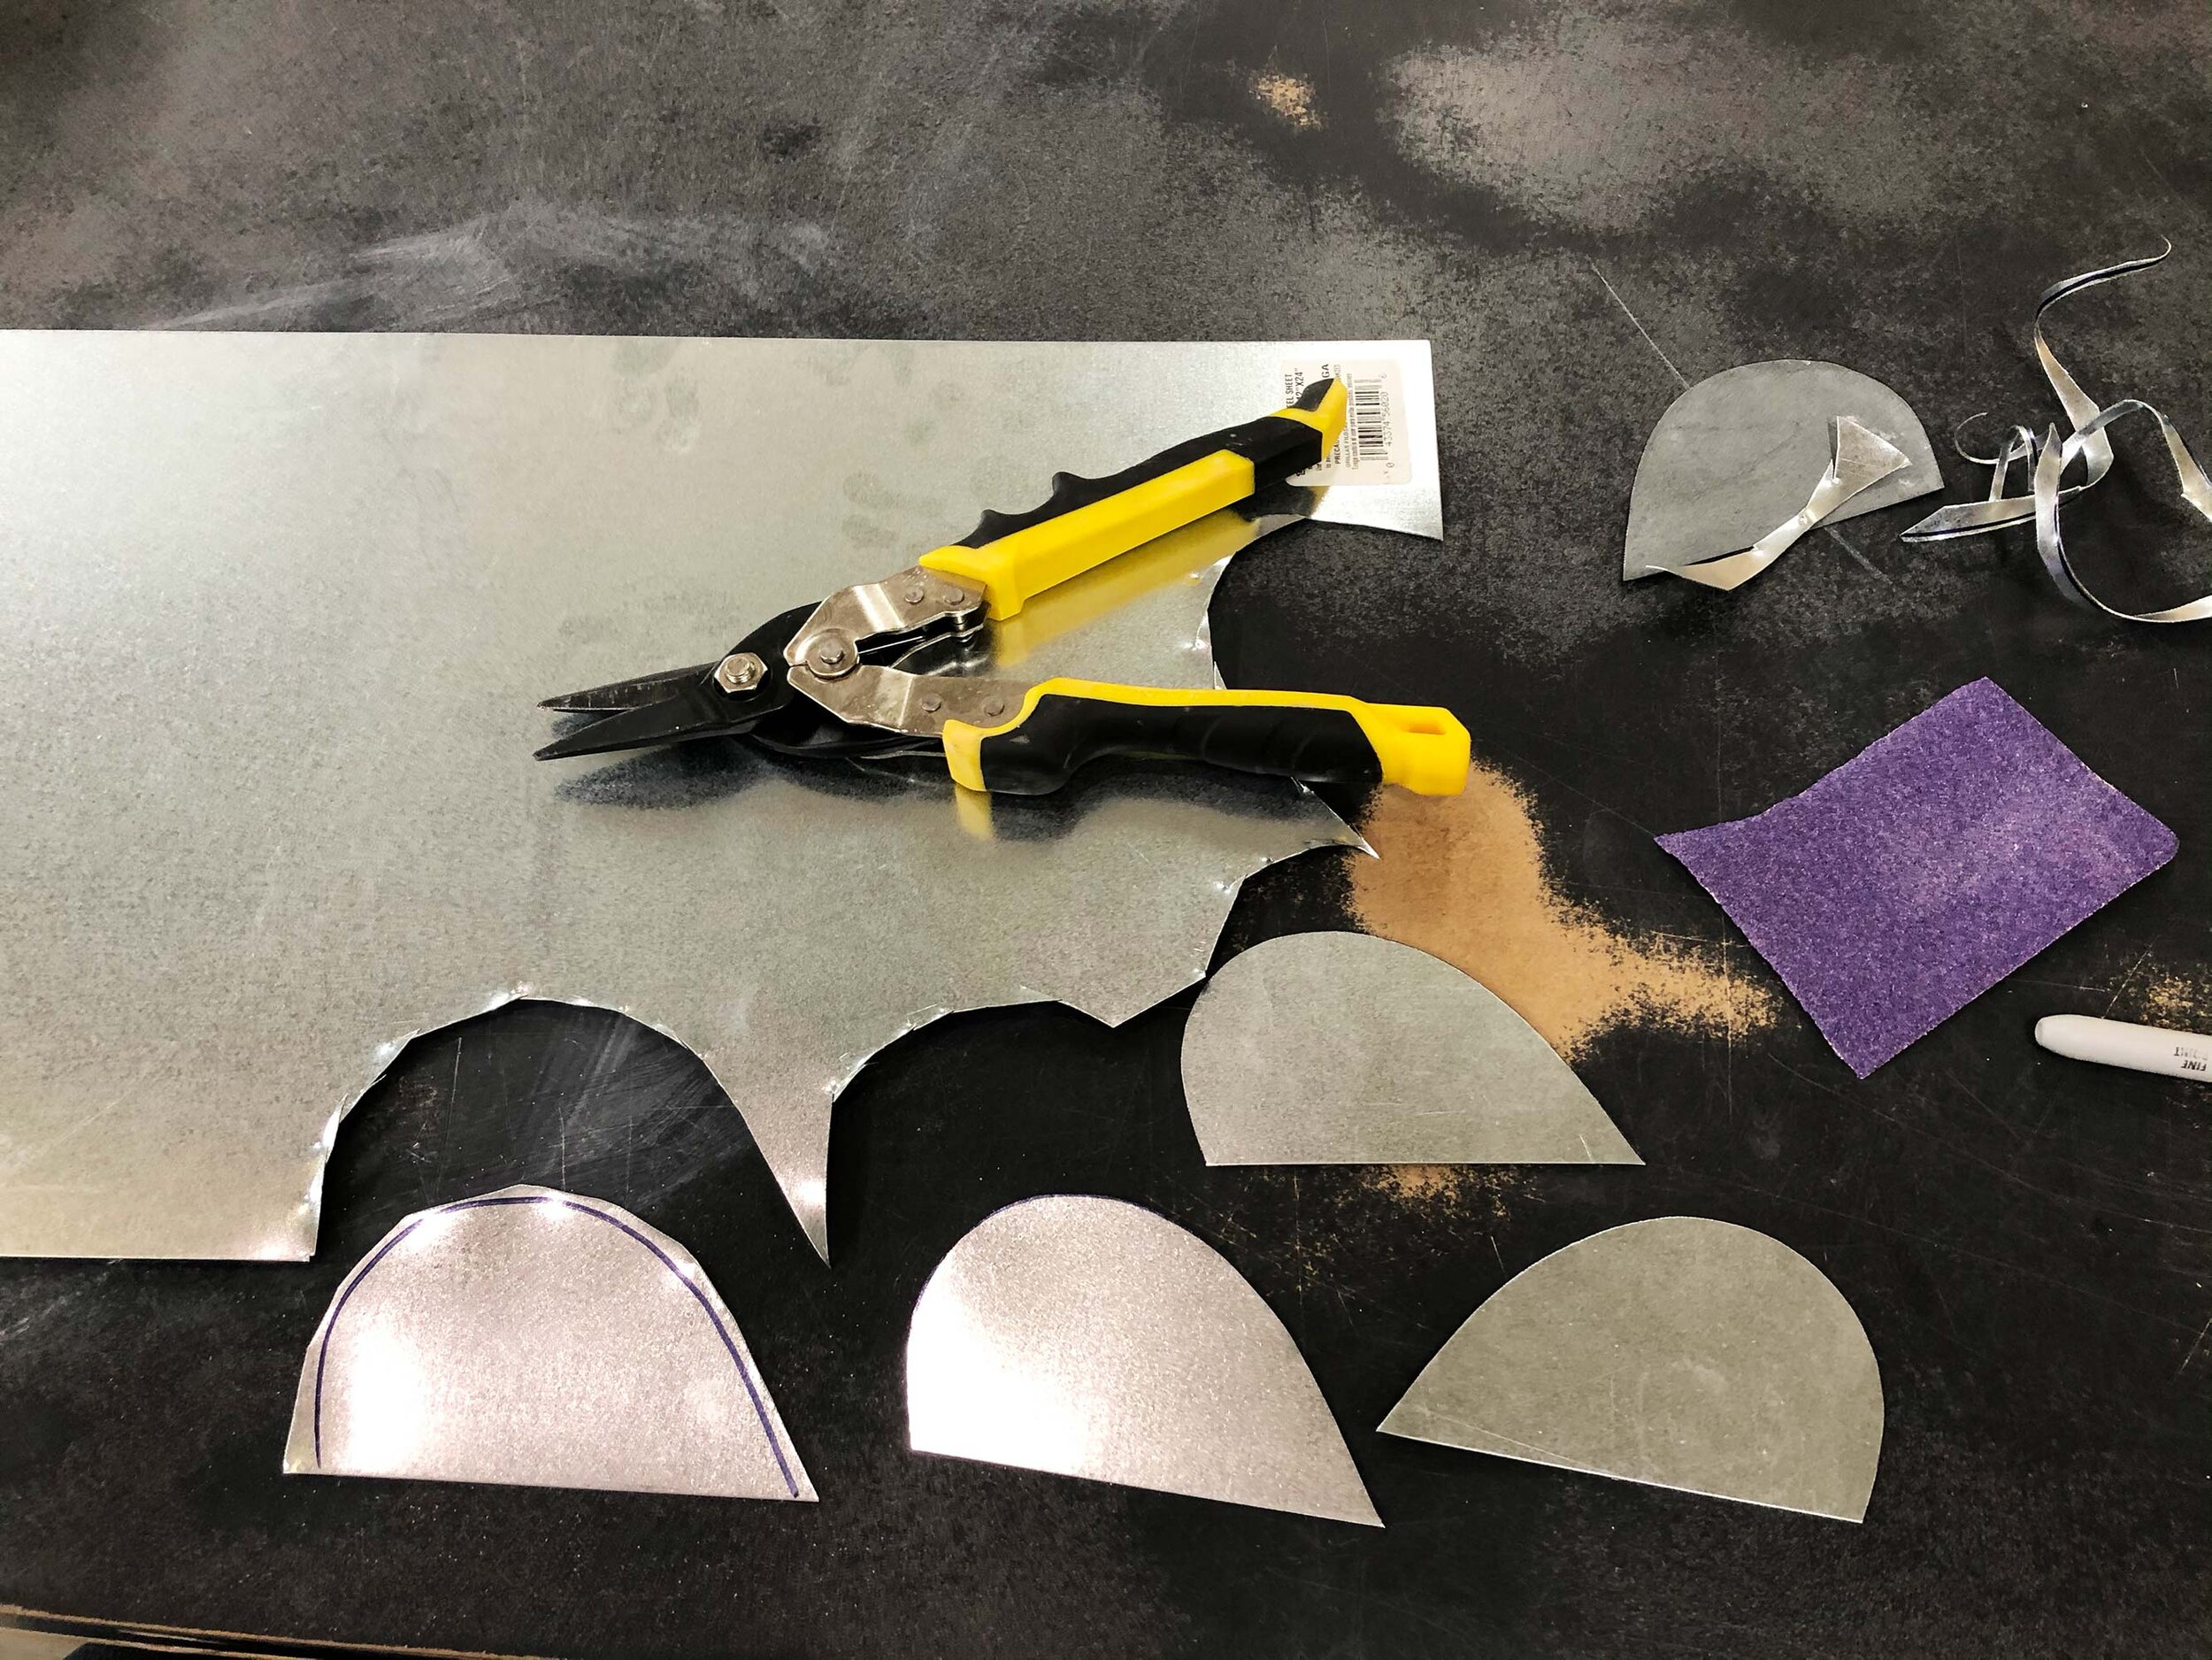
Make a rough cut of the rib. It’s easier to make the more exact cuts on a second pass with the snips.


Step 4:

Make a second cut to get the exact shape you want. It’s ok to make multiple cuts if you want to alter the shape.

metalrib3.jpg


Step 5:

Sand any burrs or rough edges.

metalrib5.jpg
 

Step 6:

Congrats! You have a new rib. Time to throw awesome pots.

metalrib6.jpg
 

Step 7:

Make more ribs! Your friends could all use one. Or make a bunch of different shapes. Small ribs, big ribs, whatever you need.

metalrib7.jpg
 
metalrib8.jpg

What’s your favorite rib? Have you ever made your own tools? Leave a comment below.


Spectrum Underglaze Cone 6 Test Tiles

Spectrum underglazes are dependable, have great colors, and are economical. I use a few of the Spectrum 500 series, along with a mixture of AMACO Velvet Underglazes, AMACO LUG underglazes. Spectrum has a few colors, such as orange and bright green, that have hues I can’t find in other lines. And they are often waaay cheaper than other underglazes.

Spectrum 500 series underglazes can be color-mixed with other underglazes or slips like paint, and can be applied with a variety of tools including brushes, spray guns, sponges, or really any way you can think to get them to stick. They are also perfect for scraffito, stenciling, marbling, and other decorative techniques.

Spectrum underglazes are available in a variety of sizes, including 2oz, 4oz, and 16oz pints. Expect to pay anywhere from $15 to $20 for a 16oz pint of underglaze, making these some of the most affordable underglazes on the market. The best place to find Spectrum Underglazes are with speciality ceramic suppliers, such as The Ceramic Shop in Philadelphia.


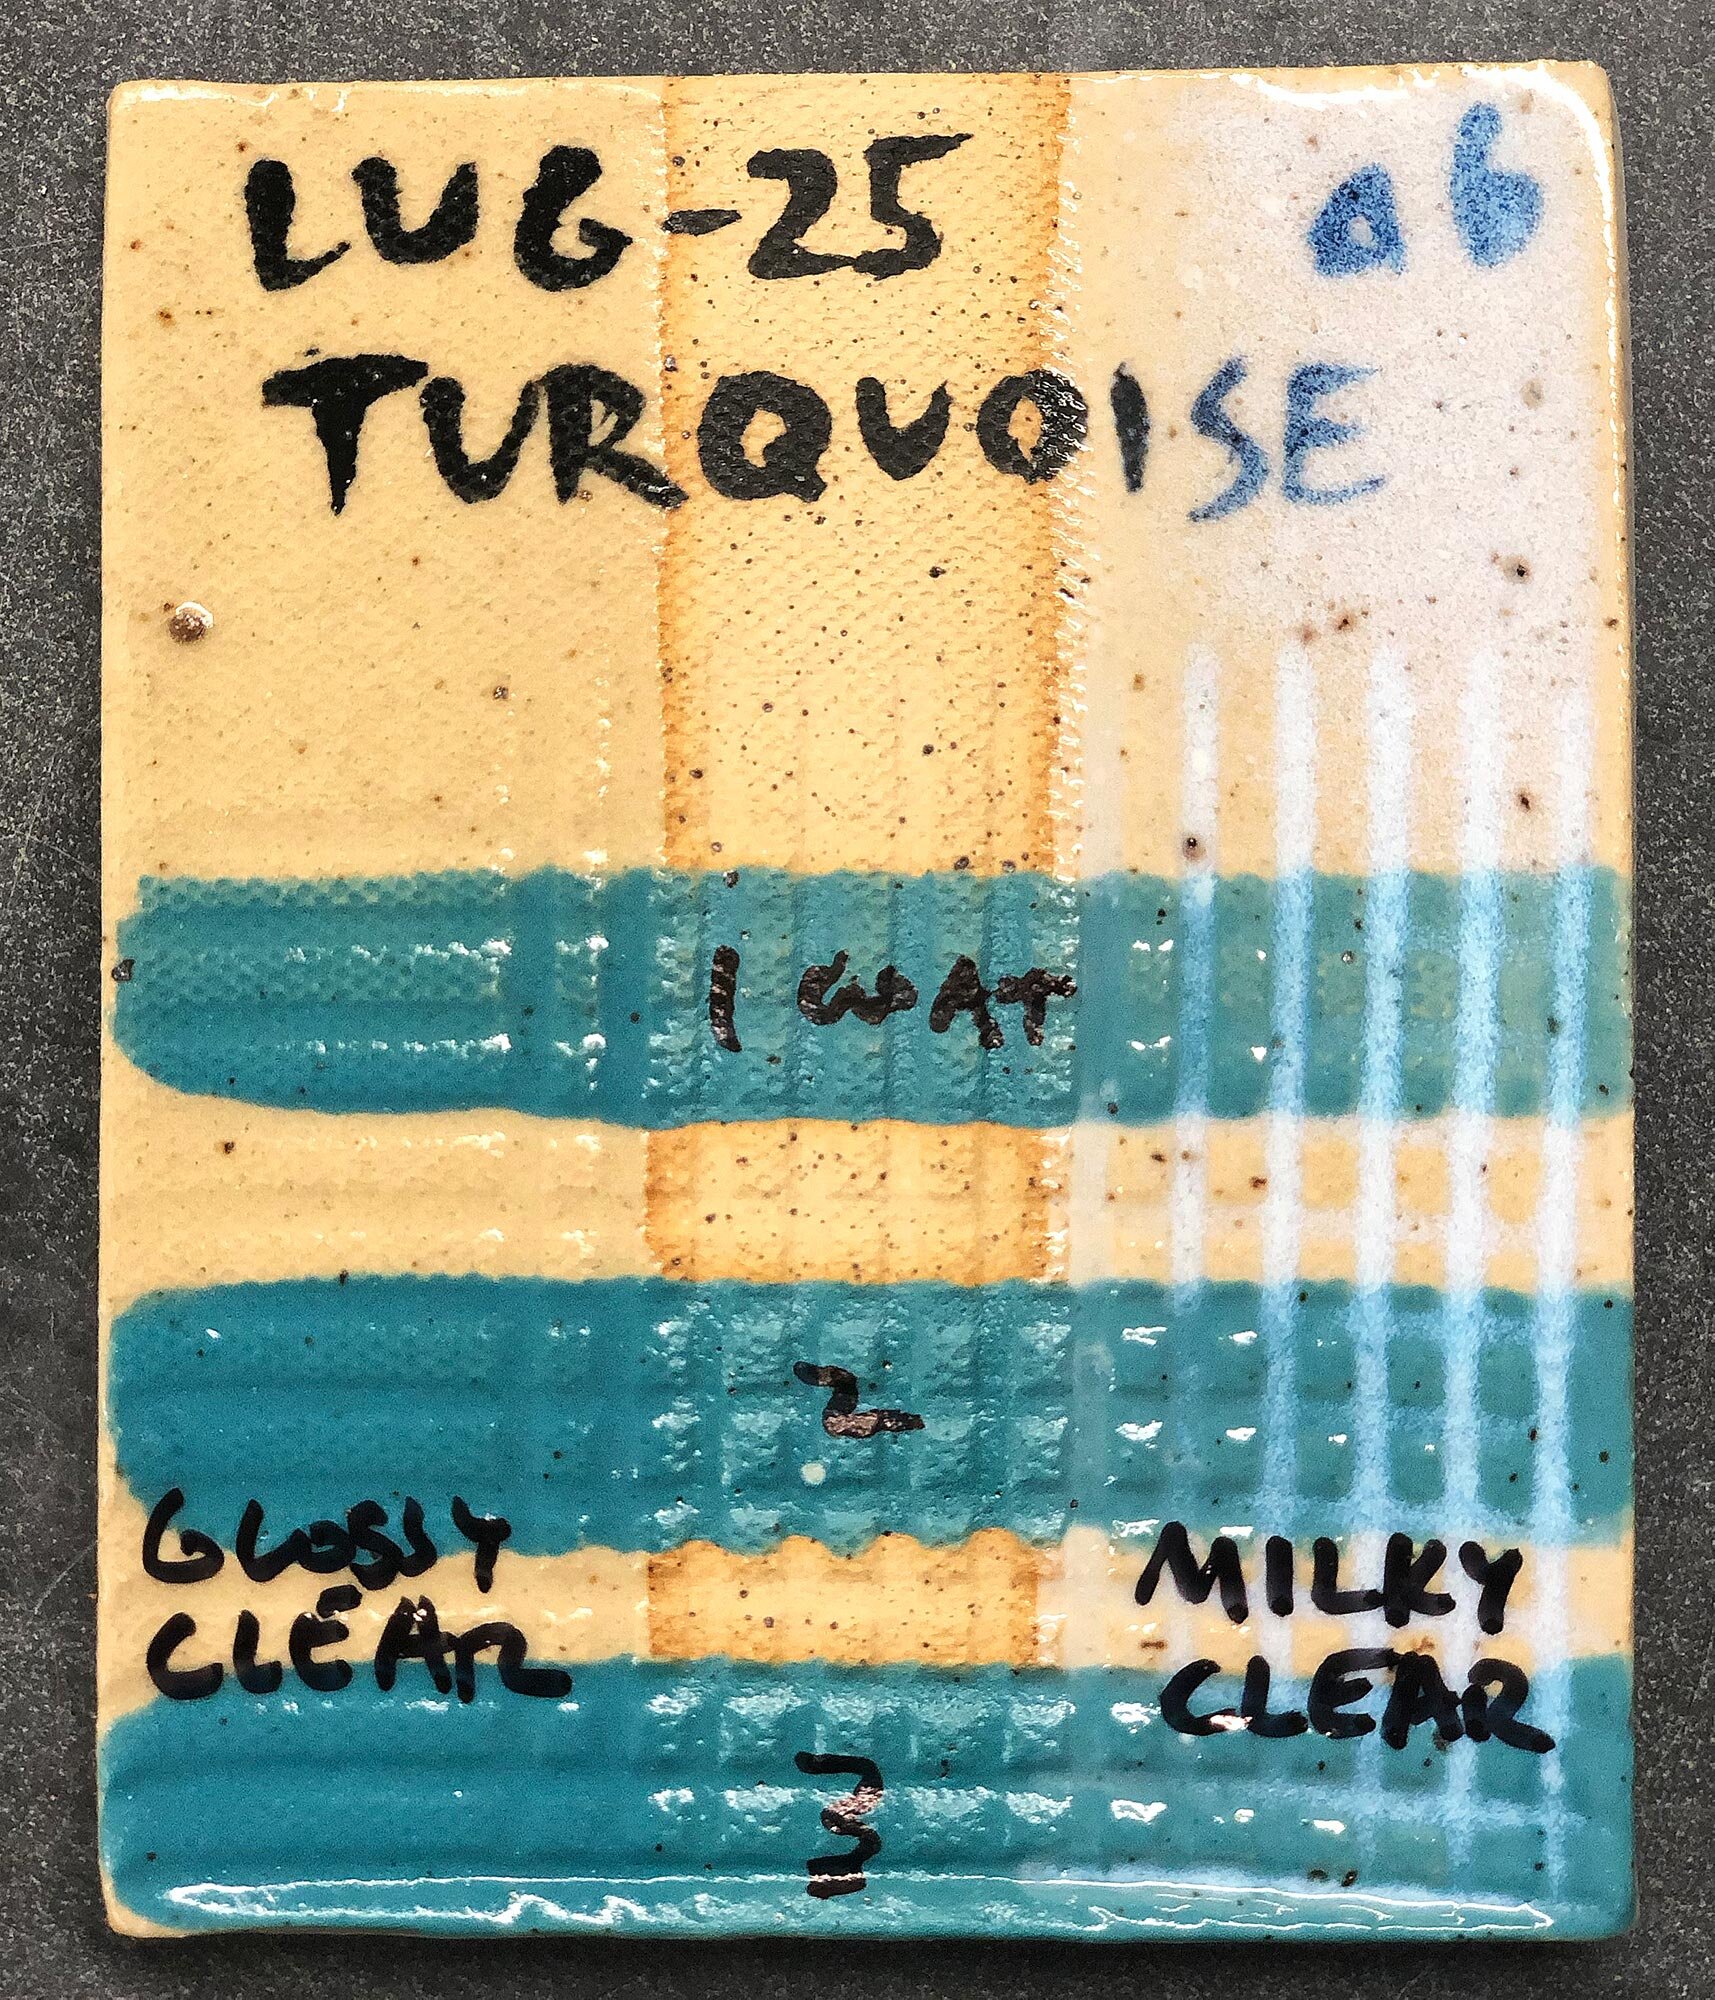
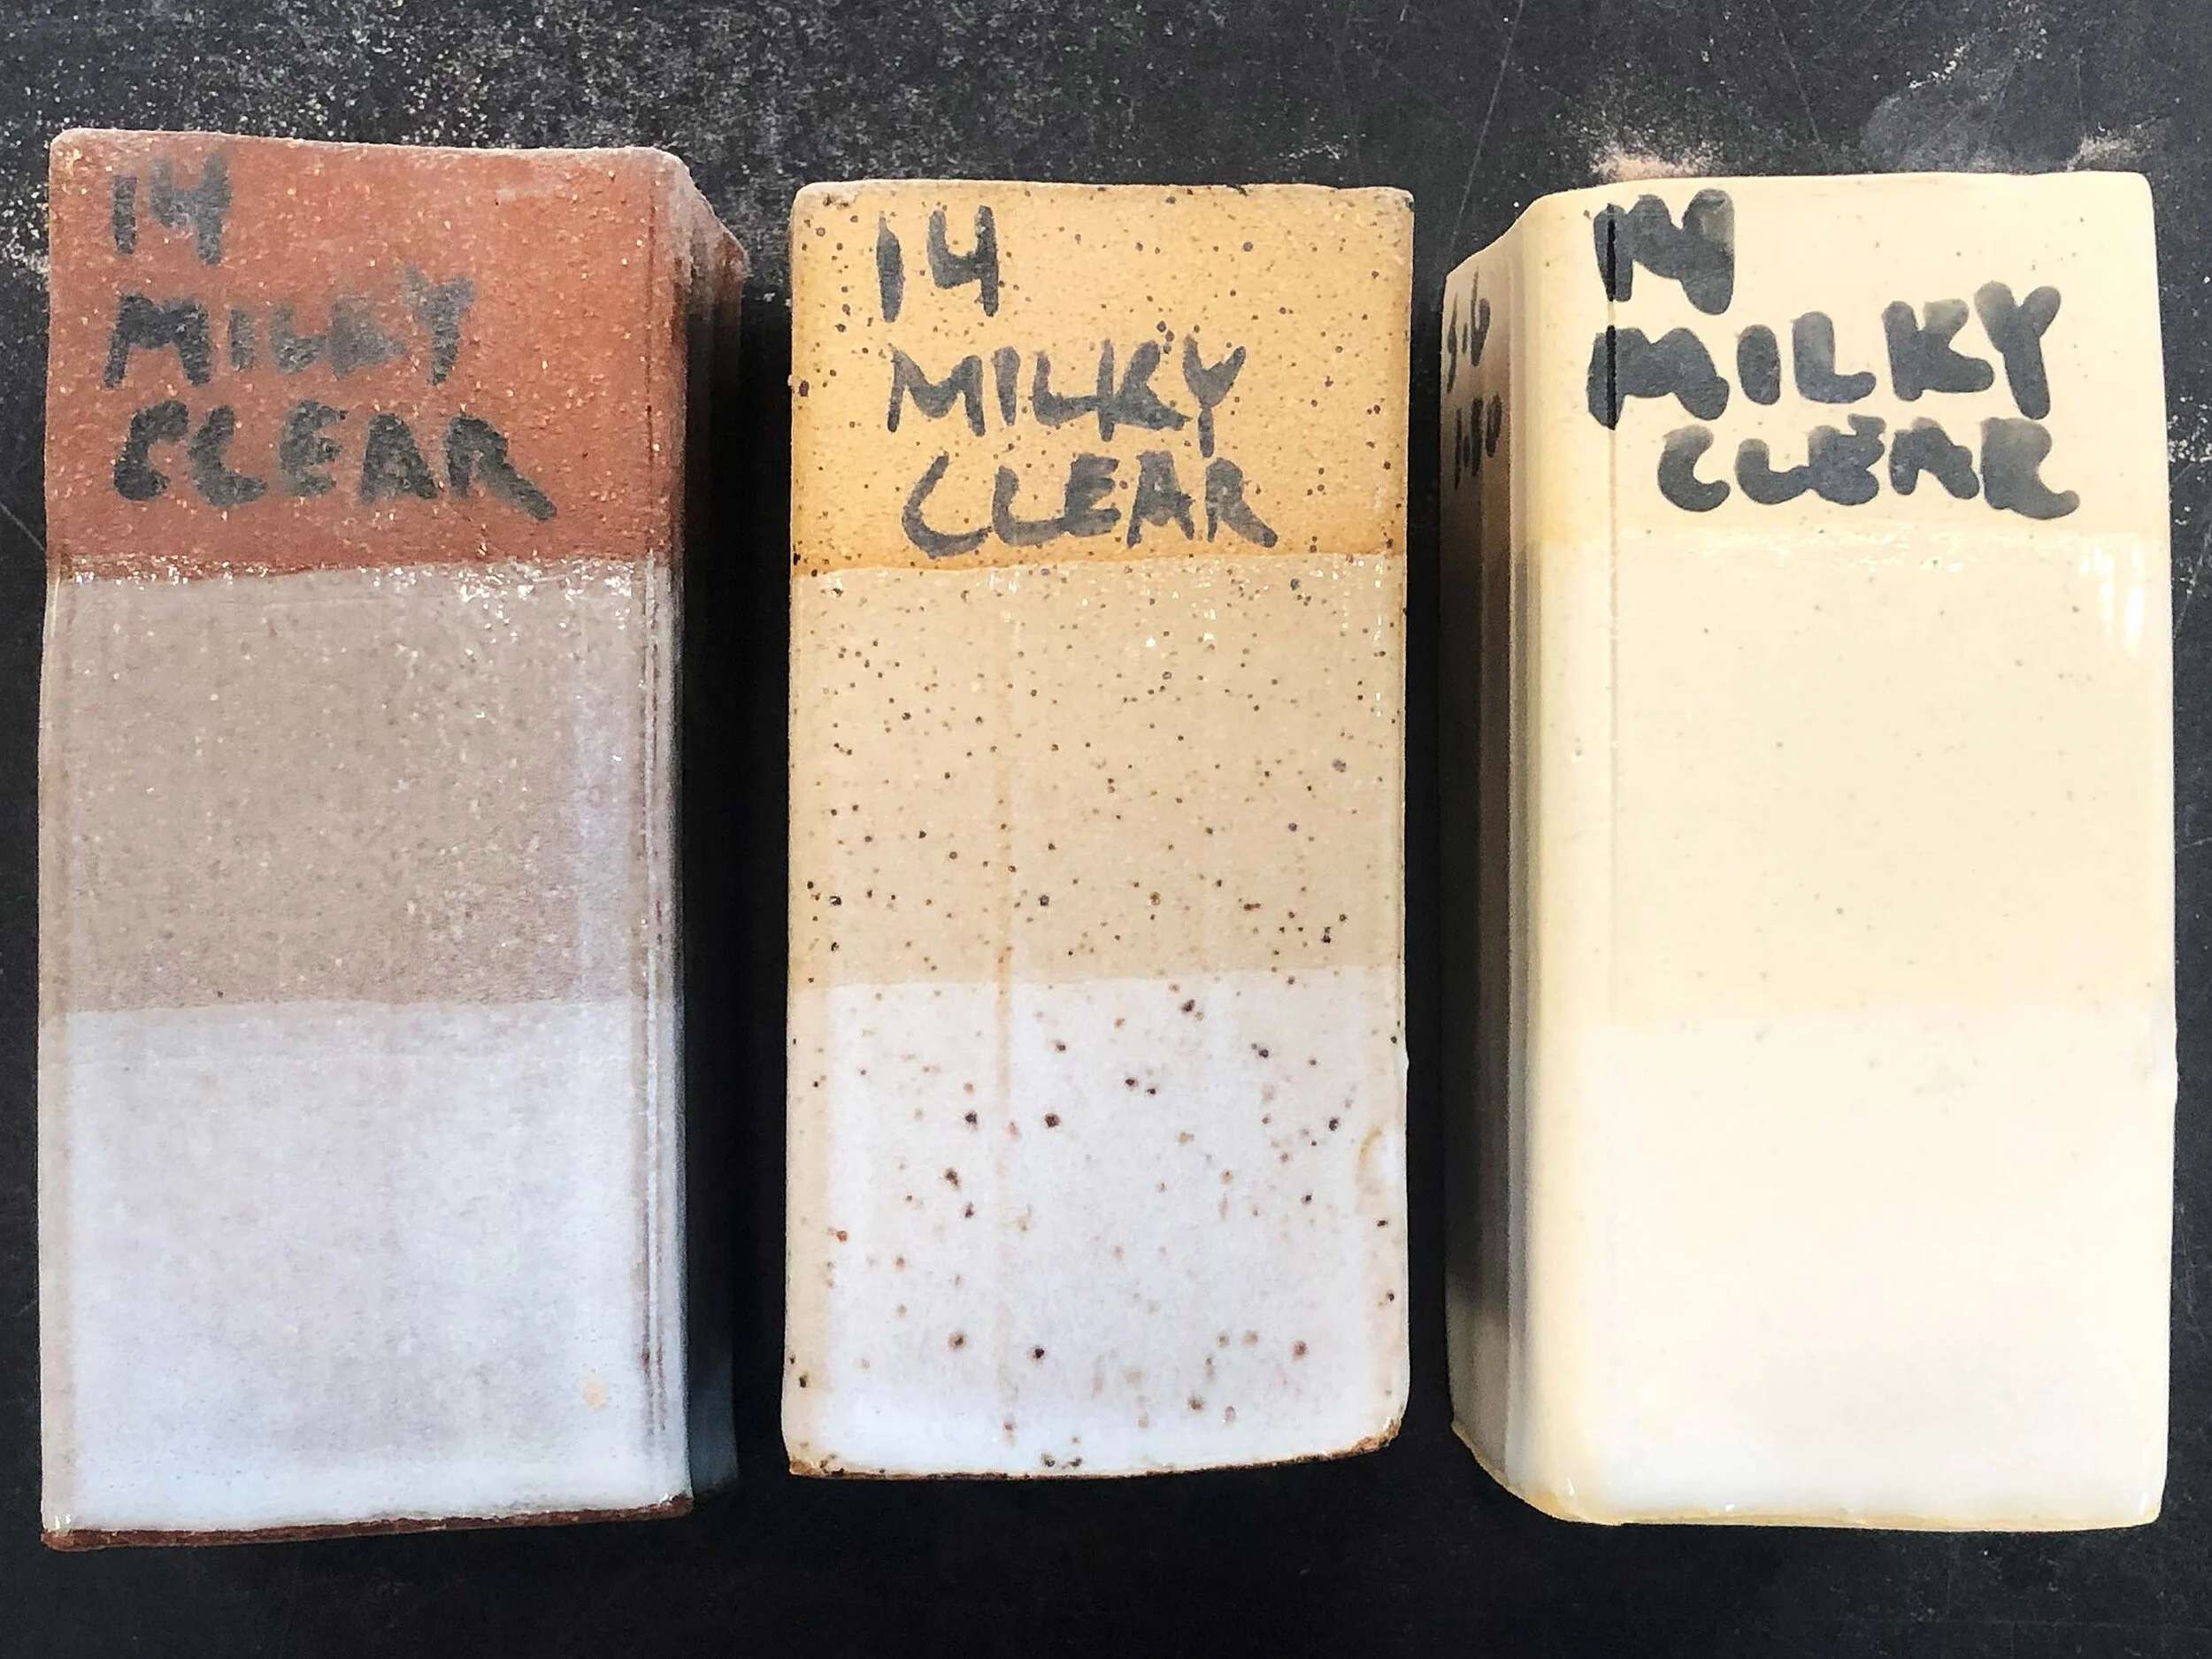
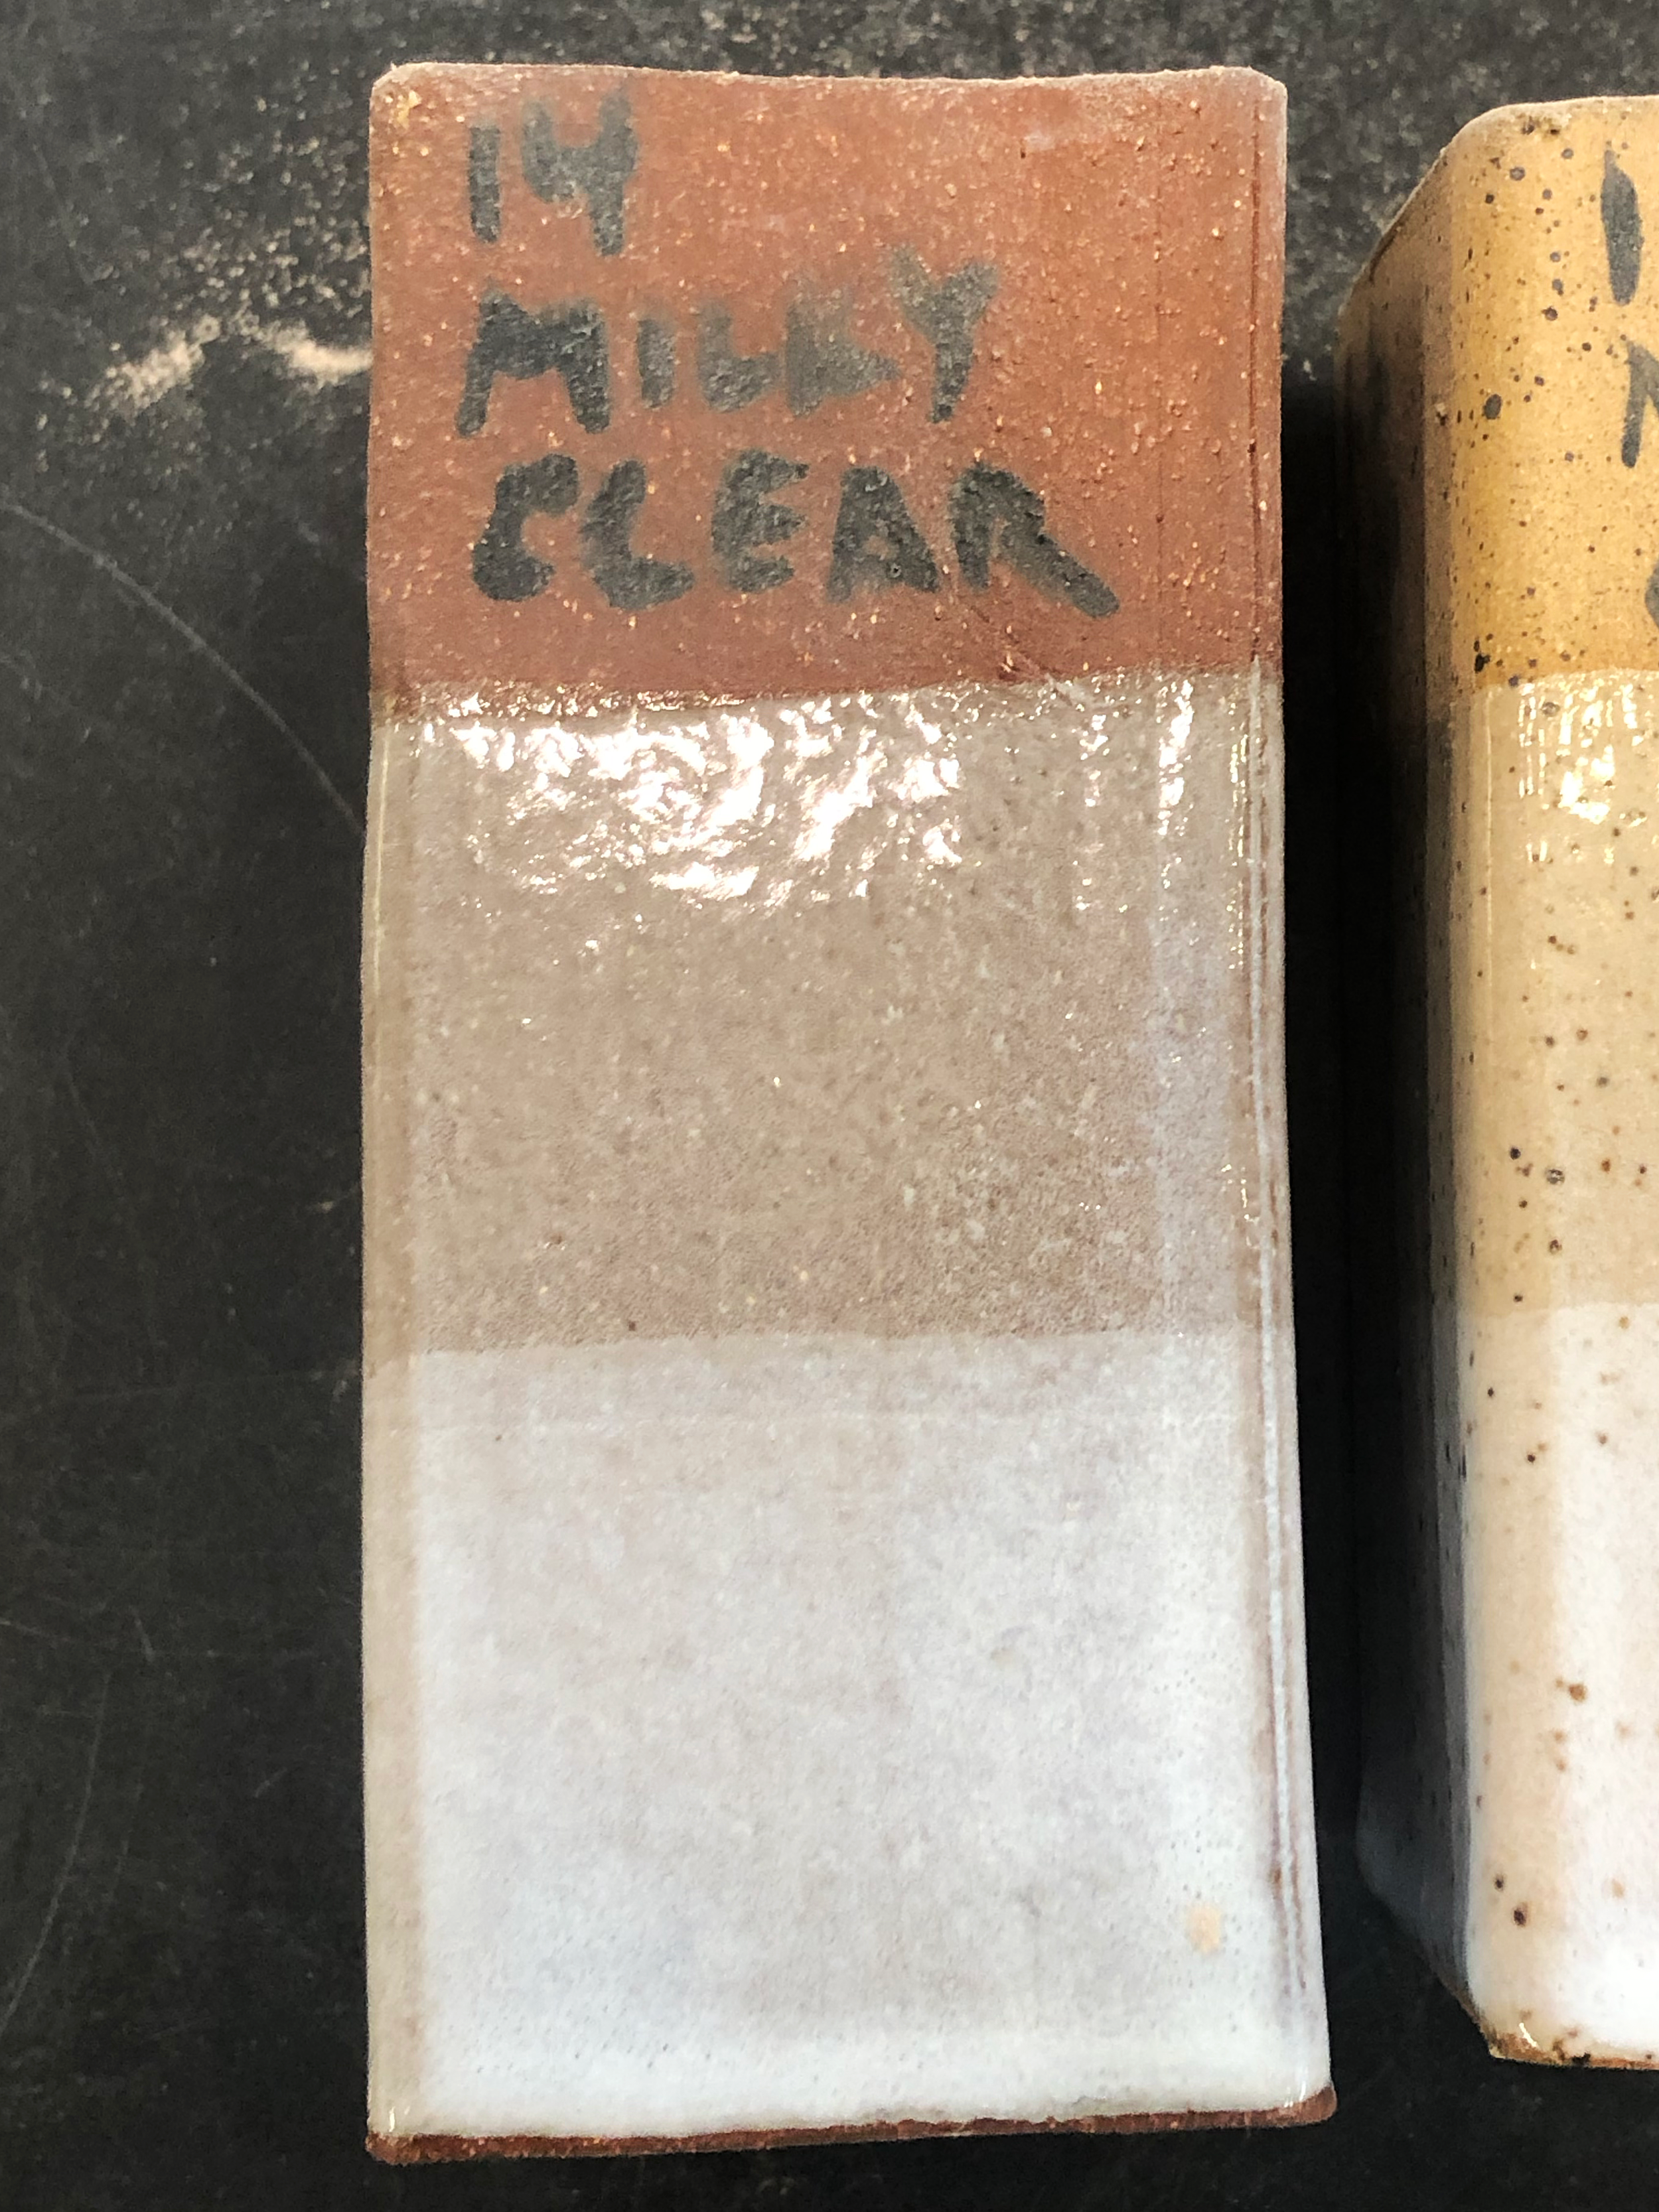
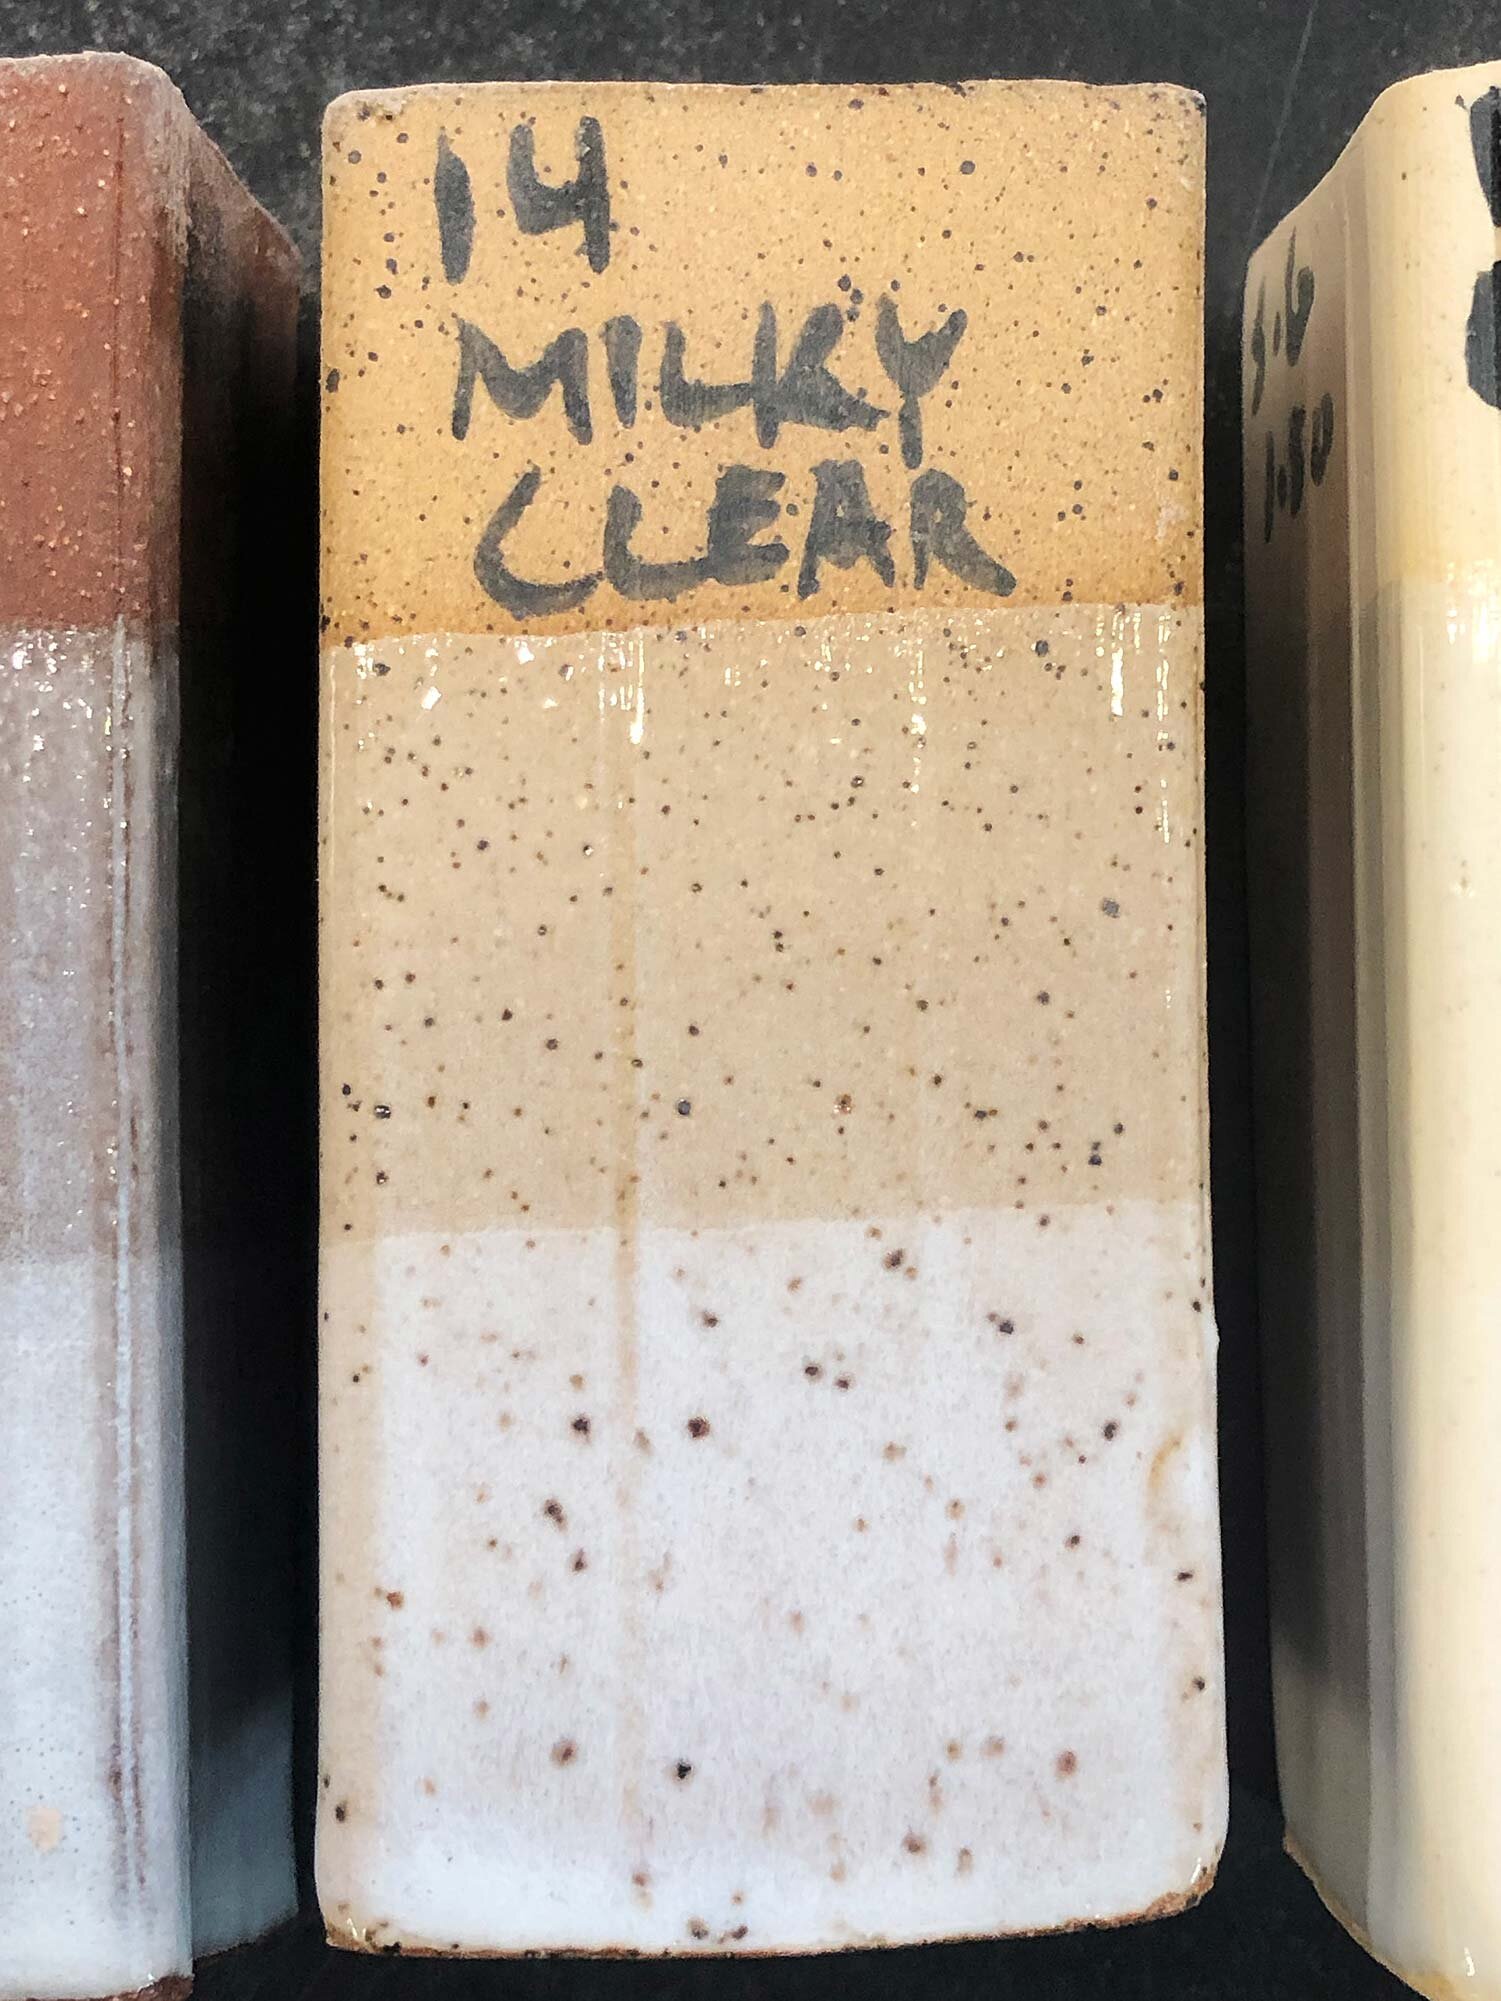
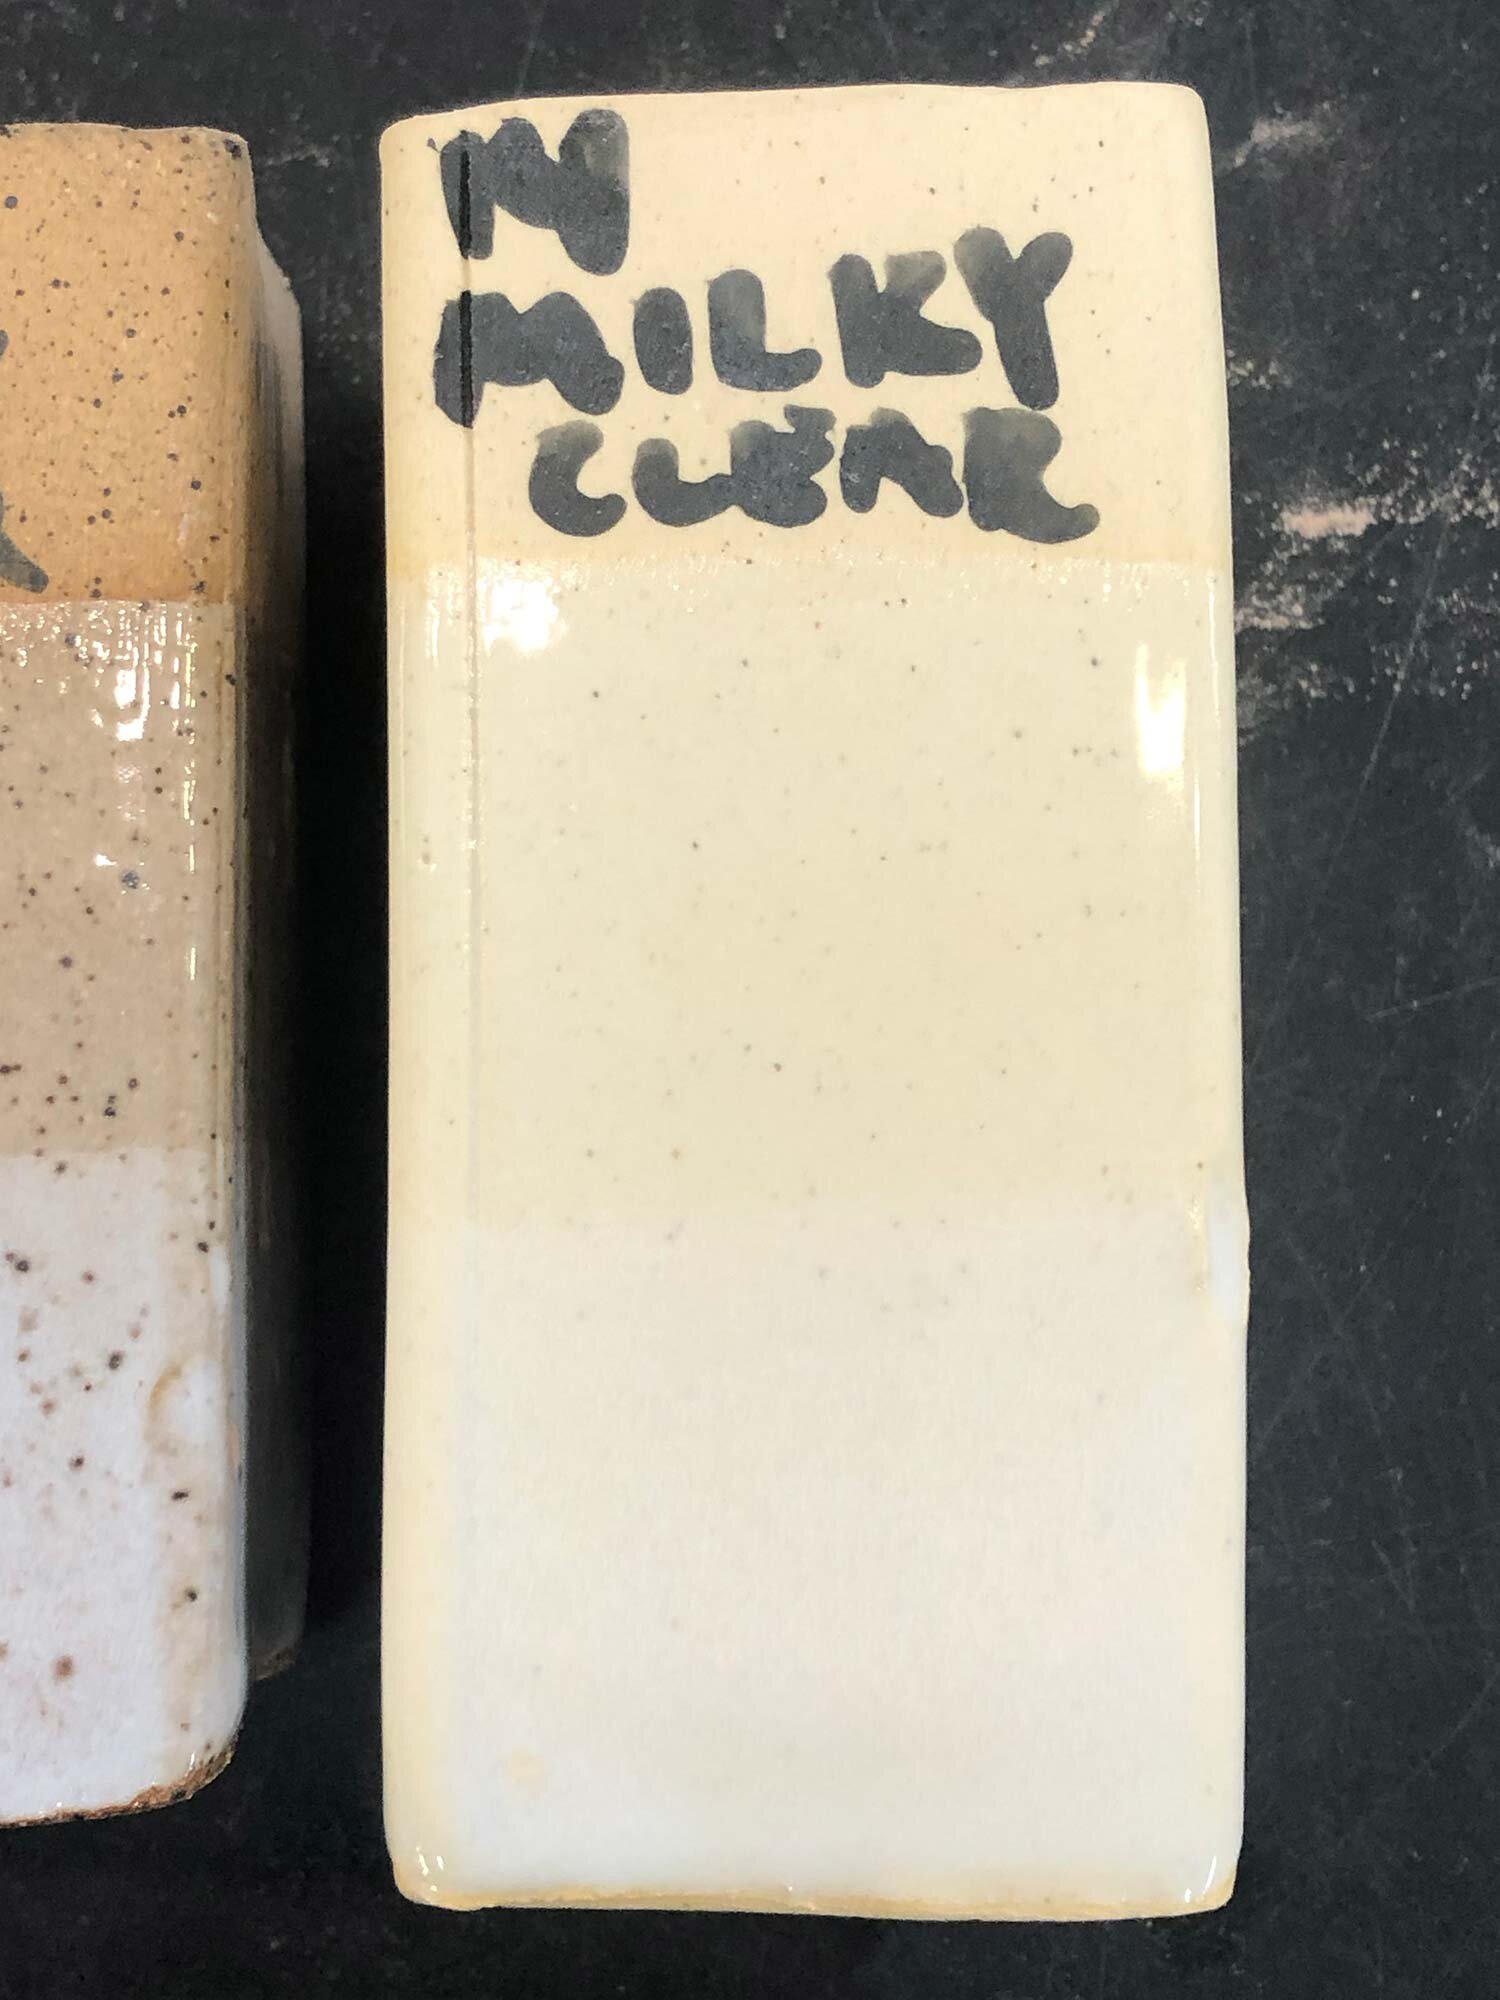
Spectrum 500 series underglazes are designed for cone 05 to cone 6. For best results, test in your kiln first. The following images of Spectrum Underglazes test tiles were fired at Cone 6 in oxidation on a speckled clay body, to illustrate what these colors look like underneath the Glossy Clear and Milky Clear cone 6 mid-range glaze recipes. But they will also work underneath a commercial clear glaze. Try them at high fire too, most colors will stay true. For more information about Spectrum Underglaze, please visit the manufacturer’s site.


Spectrum 500 Series Underglaze Cone 6 Test Tiles

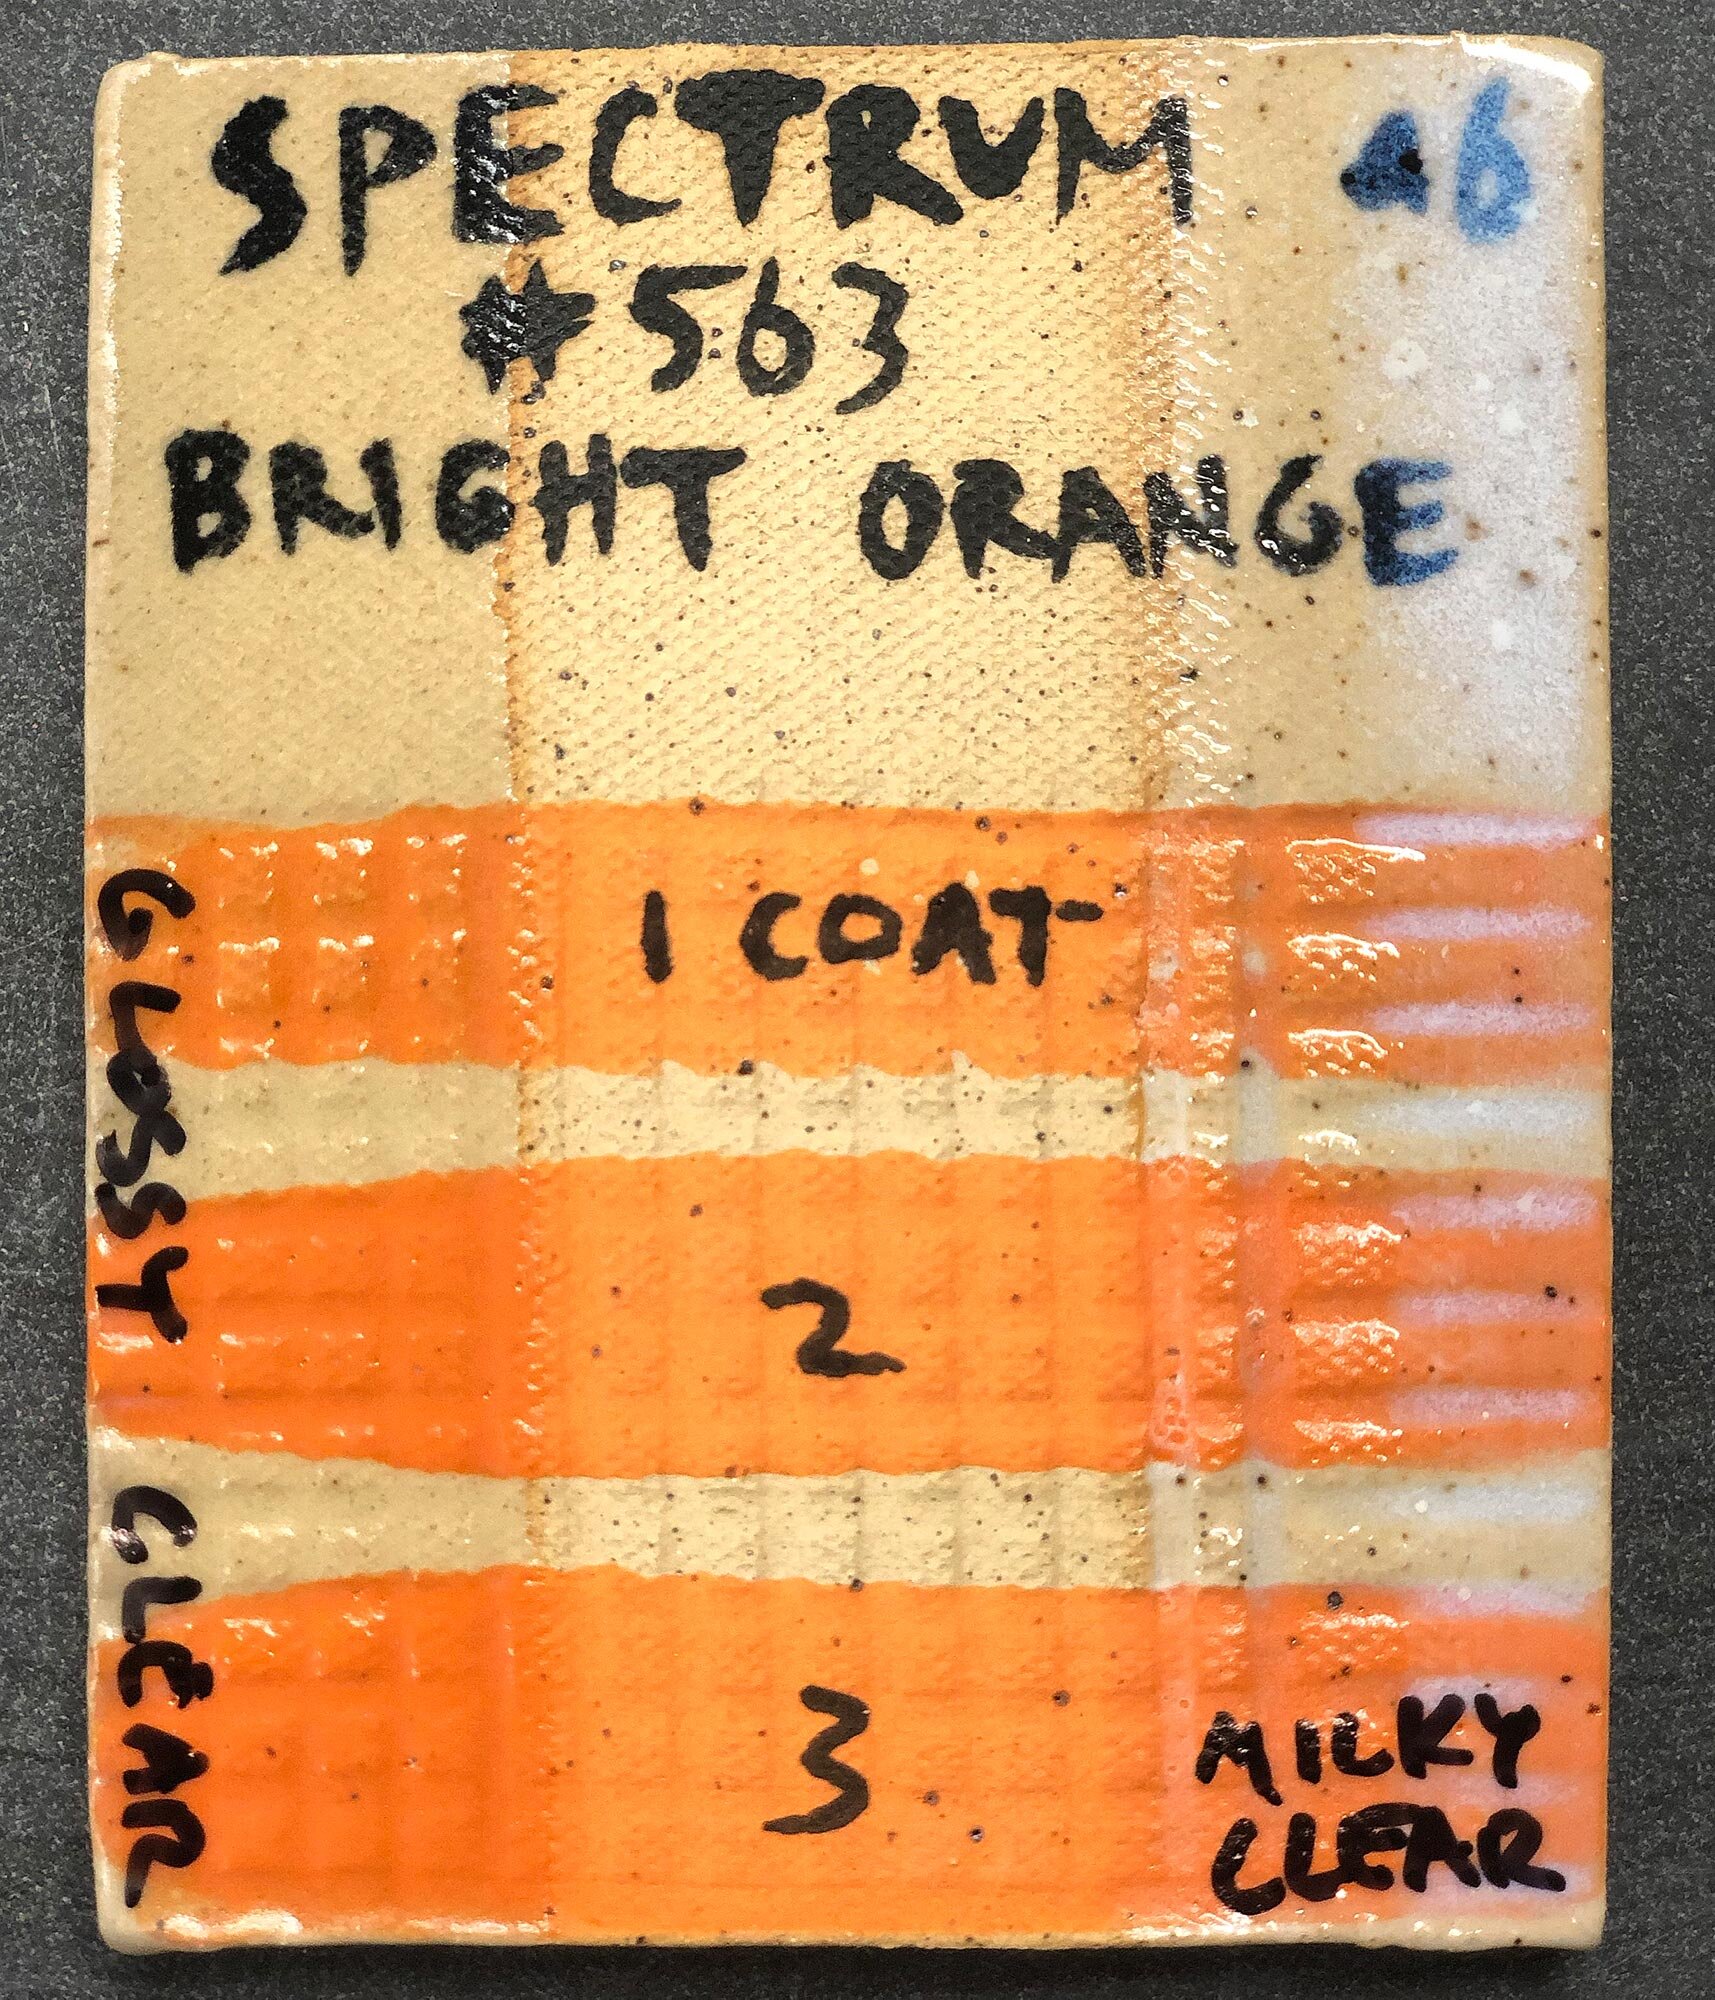
All images show 1, 2, or 3 coats of underglaze painted on a speckled stoneware fired to cone 6 in oxidation. The left side of the tile shows Cone 6 Glossy Clear glaze on top, the middle section is unglazed, and the right side is the underglaze underneath Cone 6 Milky Clear glaze. As commercial underglazes are quite expensive, I like to pair them with economical clear glazes that are mixed from scratch.

Spectrum 513 Mahogany Brown painted in 1, 2, and 3 coats on speckled stoneware and fired to cone 6 in oxidation.

Spectrum 513 Mahogany Brown painted in 1, 2, and 3 coats on speckled stoneware and fired to cone 6 in oxidation.

 
Spectrum 563 Bright Orange painted in 1, 2, and 3 coats on speckled stoneware and fired to cone 6 in oxidation.

Spectrum 563 Bright Orange painted in 1, 2, and 3 coats on speckled stoneware and fired to cone 6 in oxidation.


Spectrum 564 Bright Green painted in 1, 2, and 3 coats on speckled stoneware and fired to cone 6 in oxidation.

Spectrum 564 Bright Green painted in 1, 2, and 3 coats on speckled stoneware and fired to cone 6 in oxidation.

 
Spectrum 567 Fire Engine Red painted in 1, 2, and 3 coats on speckled stoneware and fired to cone 6 in oxidation.

Spectrum 567 Fire Engine Red painted in 1, 2, and 3 coats on speckled stoneware and fired to cone 6 in oxidation.


About Underglazes

Underglazes are the best way to apply saturated, bright colors to your ceramics. Not quite a slip and not quite a glaze, underglazes contain metallic oxides or mason stains to achieve the desired color, and manufacturers generally mix underglazes with some sort of gum material that helps with brushability and getting the material to stick. That versatility allows them to be painted on leather hard greenware, bisqueware, and they will even stick on top of glaze for a refire.

Do you have a favorite underglaze? Let us know in the comments.


AMACO LUG Underglazes Cone 6 Test Tiles

The Liquid Underglaze (LUG) line from AMACO is an economical, quality option for ceramic underglazes. They can be easily color-mixed like paint with other underglazes or slips, and can be applied with a variety of tools including brushes, spray guns, sponges, or really any way you can think to get them to stick. They are also perfect for scraffito, stenciling, marbling, and other decorative techniques.

LUG underglazes are available in a variety of sizes, including 2oz jars, 16oz pints, and some colors come in gallon jugs. Expect to pay anywhere from $20 to $30 for a 16oz pint of underglaze. Yes, they can be a bit expensive but if anything, they are a bit cheaper than many similar colors in the AMACO Velvet Underglaze line. If you are unsure where to start, a great way to sample colors can be to buy a few 2 oz jars and test them out.

LUG underglazes are designed for cone 06-04 low fire underneath a low fire clear glaze, but most colors stay true at mid-range (cone 5-6) and high fire (cone 8-11). For best results, test in your kiln first. Below, I’ve posted images of LUG Underglazes fired at Cone 6 in oxidation on a speckled clay body, to illustrate what these colors look like underneath our favorite Glossy Clear and Milky Clear cone 6 mid-range glaze recipes. But they will also work great underneath a commercial clear glaze. Try them at high fire too, most colors will stay true.


To make a complete palette of colors, I use a mixture of AMACO Velvet Underglazes and Spectrum 500 series underglazes along with LUG underglazes. The LUG underglazes I’ve tested all stay true to color at cone 6, although some do begin to melt into satin or shiny glazes on their own. For more information about LUG Underglaze, check out AMACO’s site.


AMACO LUG Underglaze Cone 6 Test Tiles

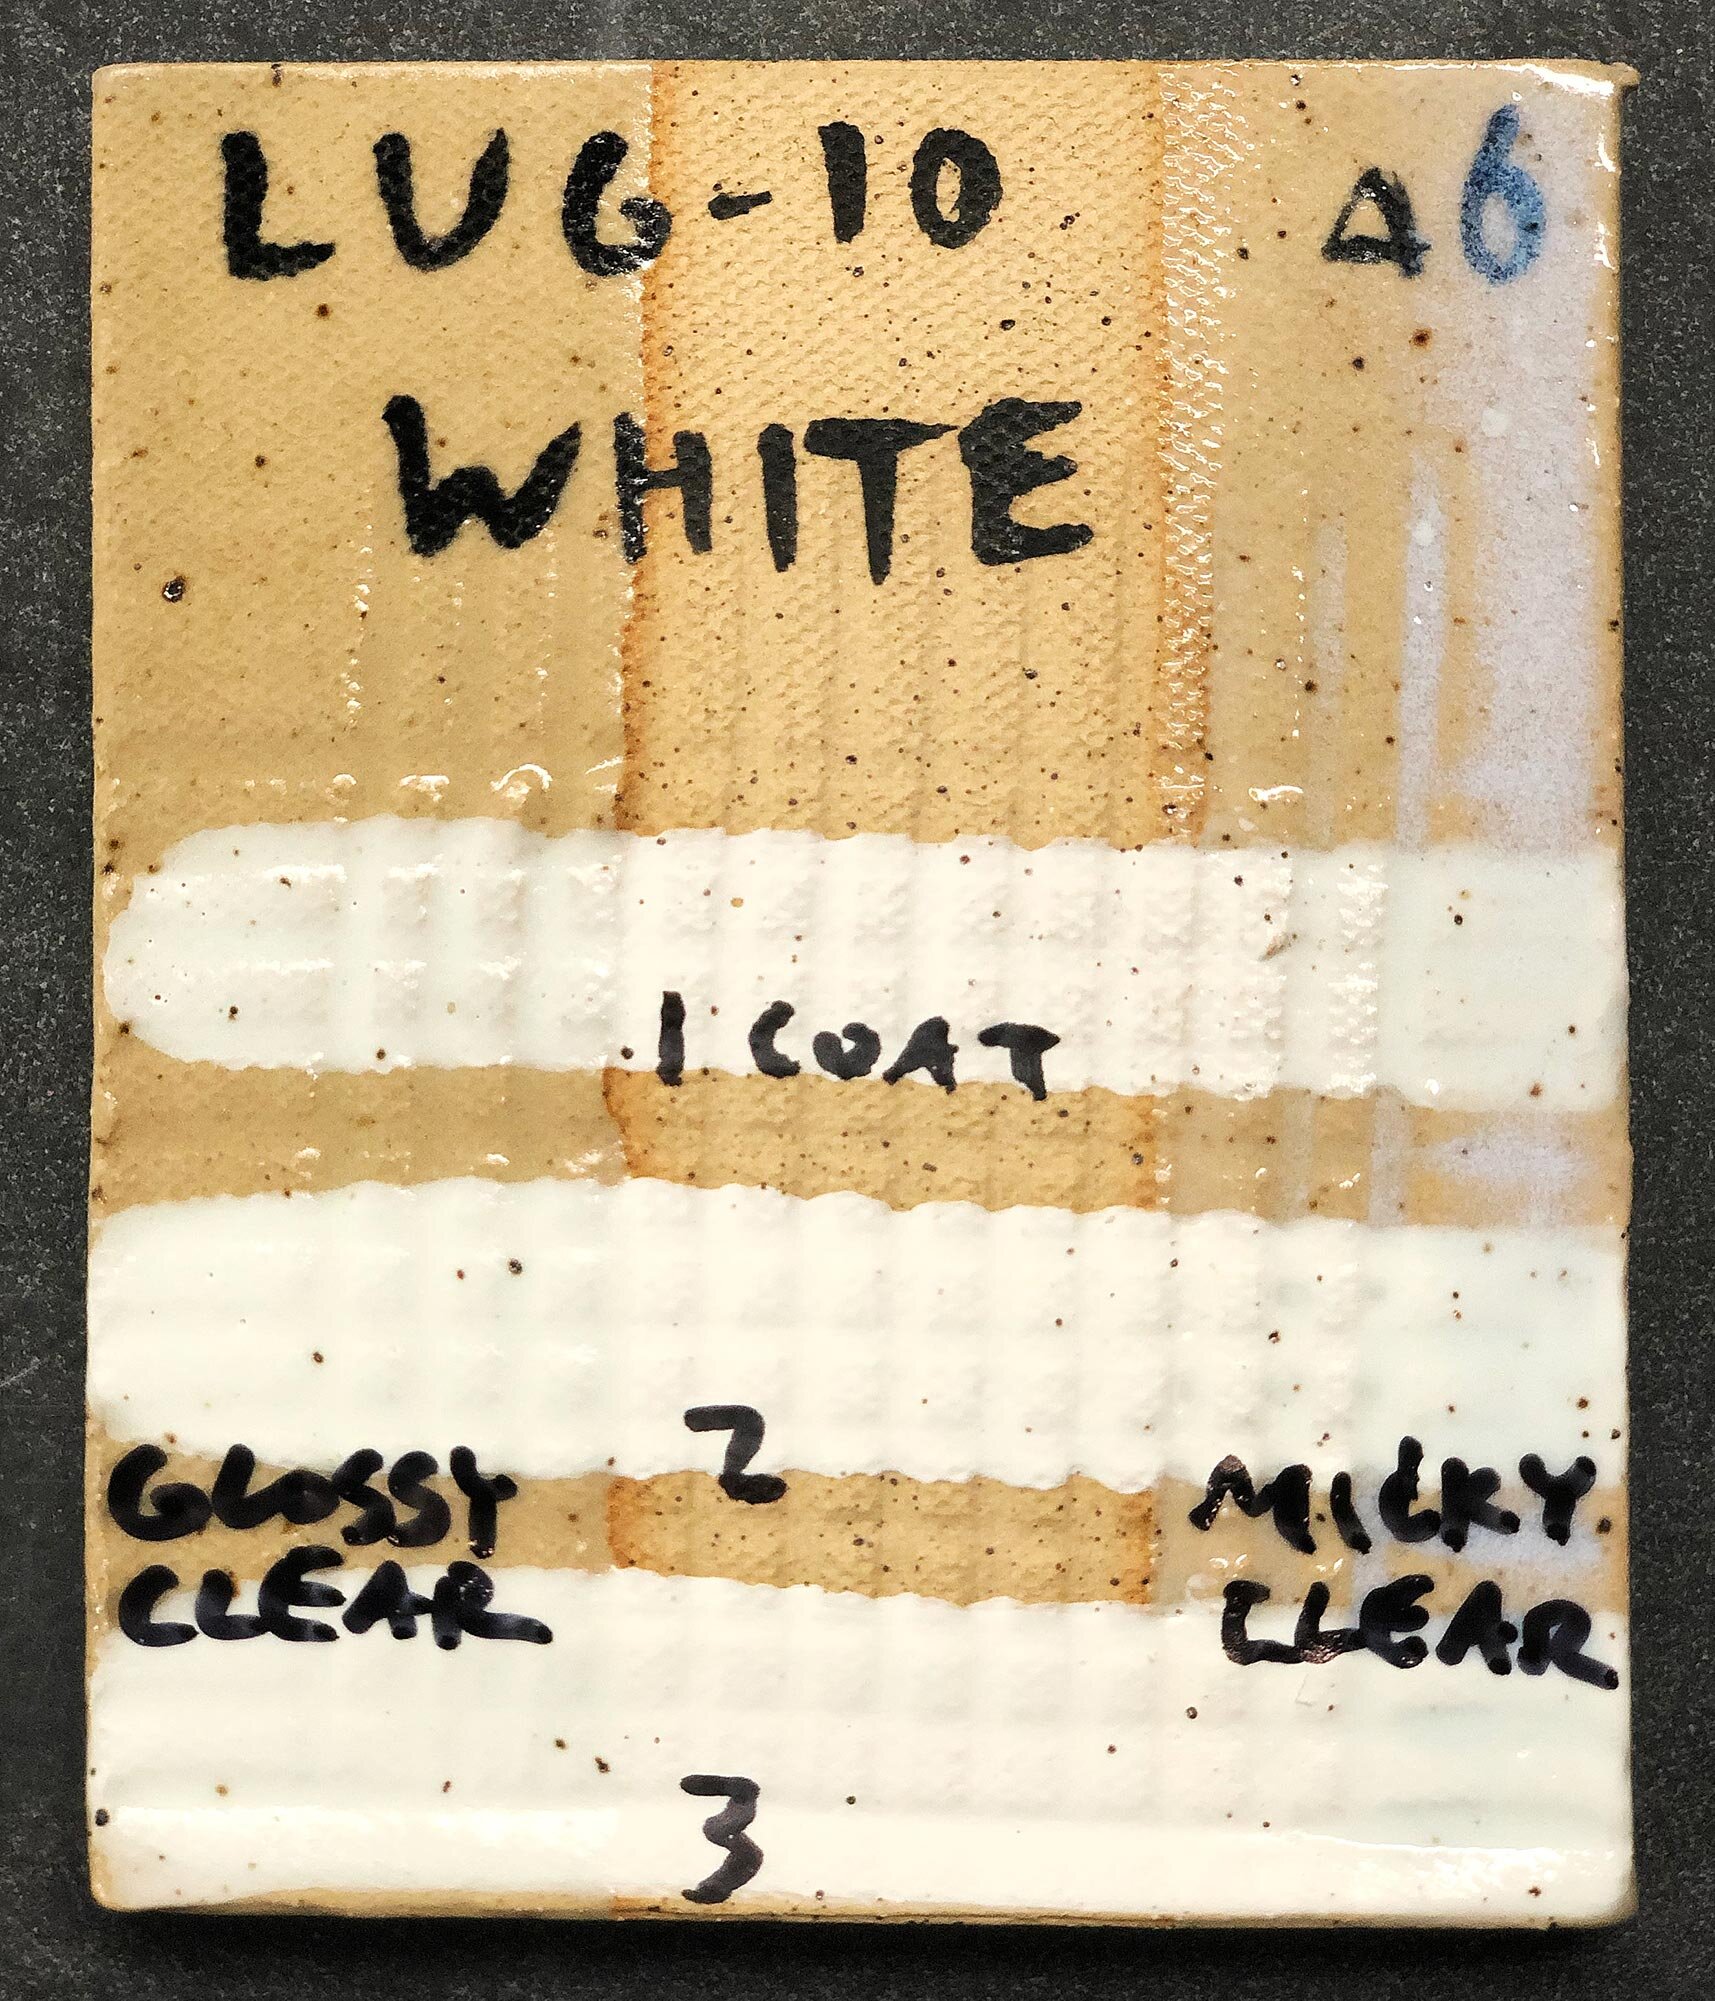
All images show 1, 2, and 3 coats of underglaze painted on a speckled stoneware fired to cone 6 in oxidation. The left side of the tile shows Cone 6 Glossy Clear glaze on top, the middle section is unglazed, and the right side is Cone 6 Milky Clear glaze. As commercial underglazes are quite expensive, I like to pair them with economical clear glazes that are mixed from scratch.

AMACO LUG-1 Black Underglaze painted in 1, 2, and 3 coats on speckled stoneware fired at cone 6 in oxidation.This is a very dark black that is similar to the AMACO Velvet Underglaze black.

AMACO LUG-1 Black Underglaze painted in 1, 2, and 3 coats on speckled stoneware fired at cone 6 in oxidation.

This is a very dark black that is similar to the AMACO Velvet Underglaze black.


AMACO LUG-10 White Underglaze painted in 1, 2, and 3 coats on speckled stoneware fired at Cone 6 in oxidation.This is a bright white. To my eye, it is very similar to the Velvet Underglaze white.

AMACO LUG-10 White Underglaze painted in 1, 2, and 3 coats on speckled stoneware fired at Cone 6 in oxidation.

This is a bright white. To my eye, it is very similar to the Velvet Underglaze white.


AMACO LUG-15 Warm Gray Underglaze painted in 1, 2, and 3 coats on speckled stoneware fired at cone 6 in oxidation.A kitten-gray option for underglaze.

AMACO LUG-15 Warm Gray Underglaze painted in 1, 2, and 3 coats on speckled stoneware fired at cone 6 in oxidation.

A kitten-gray option for underglaze.


AMACO LUG-22 Dark Blue Underglaze painted in 1, 2 and 3 coats on speckled stoneware fired to cone 6 in oxidation. At mid-range or higher, this underglaze will turn satin / glossy as shown in the middle unglazed section.This is a deep, saturated blue…

AMACO LUG-22 Dark Blue Underglaze painted in 1, 2 and 3 coats on speckled stoneware fired to cone 6 in oxidation. At mid-range or higher, this underglaze will turn satin / glossy as shown in the middle unglazed section.

This is a deep, saturated blue/almost black that can turn a deep ultramarine under certain clear glazes.


AMACO LUG-25 Turquoise Underglaze painted in 1, 2, and 3 coats on speckled stoneware fired at cone 6 in oxidation.This is a great option for a solid, opaque turquoise underglaze.

AMACO LUG-25 Turquoise Underglaze painted in 1, 2, and 3 coats on speckled stoneware fired at cone 6 in oxidation.

This is a great option for a solid, opaque turquoise underglaze.


AMACO LUG-31 Mahogany Brown painted in 1, 2, and 3 coats on speckled stoneware fired to cone 6 in oxidation.This is a rich, chocolate brown underglaze.

AMACO LUG-31 Mahogany Brown painted in 1, 2, and 3 coats on speckled stoneware fired to cone 6 in oxidation.

This is a rich, chocolate brown underglaze.


AMACO LUG-43 Dark Green Underglaze painted in 1, 2, and 3 coats on speckled stoneware fired to cone 6 in oxidation.LUG-43 is an opaque forest green that is similar to a chrome oxide green.

AMACO LUG-43 Dark Green Underglaze painted in 1, 2, and 3 coats on speckled stoneware fired to cone 6 in oxidation.

LUG-43 is an opaque forest green that is similar to a chrome oxide green.


AMACO LUG-50 Pink Underglaze painted in 1, 2, and 3 coats on speckled stoneware fired to cone 6 in oxidation.This is the best pink underglaze that I have found. It is bright, opaque, and birthday-cake pink.

AMACO LUG-50 Pink Underglaze painted in 1, 2, and 3 coats on speckled stoneware fired to cone 6 in oxidation.

This is the best pink underglaze that I have found. It is bright, opaque, and birthday-cake pink.


AMACO LUG-61 Bright Yellow Underglaze painted in 1, 2, and 3 coats on speckled stoneware fired to cone 6 in oxidation.This is one of the brightest, most intense yellow underglazes on the market. And for some reason, the LUG Bright Yellow is much mor…

AMACO LUG-61 Bright Yellow Underglaze painted in 1, 2, and 3 coats on speckled stoneware fired to cone 6 in oxidation.

This is one of the brightest, most intense yellow underglazes on the market. And for some reason, the LUG Bright Yellow is much more economical than the similar yellows in the Velvet Underglaze line.


About Underglazes

Underglazes are the best way to get saturated, bright colors on your ceramics. Whether it is detailed, layered paintings or covering larger areas, underglazes are great for beginners, students, and experienced professionals. Not quite a slip and not quite a glaze, manufacturers generally mix underglazes with some sort of gum material that helps with brushability and getting the material to stick. That versatility allows them to be painted on leather hard greenware, bisqueware, and they will even stick on top of glaze for a refire.

Do you have a favorite underglaze? Let us know in the comments.


AMACO Velvet Underglaze Cone 6 Test Tiles

Velvet Underglazes from AMACO are some of the best, most reliable, and popular commercial underglazes available. They have saturated, bright colors that stay true to color and they can be mixed with other underglazes like paint. They can be applied with a variety of tools including brushes, spray guns, sponges, or really any way you can think to get them to stick. They are also perfect for scraffito, stenciling, marbling, and other decorative techniques.

To get a complete palette of colors, I use a mixture of AMACO Velvet Underglazes, AMACO LUG underglazes, and Spectrum 500 series underglazes. This post will cover Velvet Underglazes and includes Cone 6 test tile images below.

Velvet underglazes are available in a variety of sizes, including 2oz, 16oz, and some colors come in gallon jugs. Expect to pay anywhere from $22 to $45 for a 16oz pint of underglaze. Yes, they can be a bit expensive but there is simply nothing comparable out there. If you are unsure where to start, a great way to sample colors can be to buy a class pack of 2oz jars.


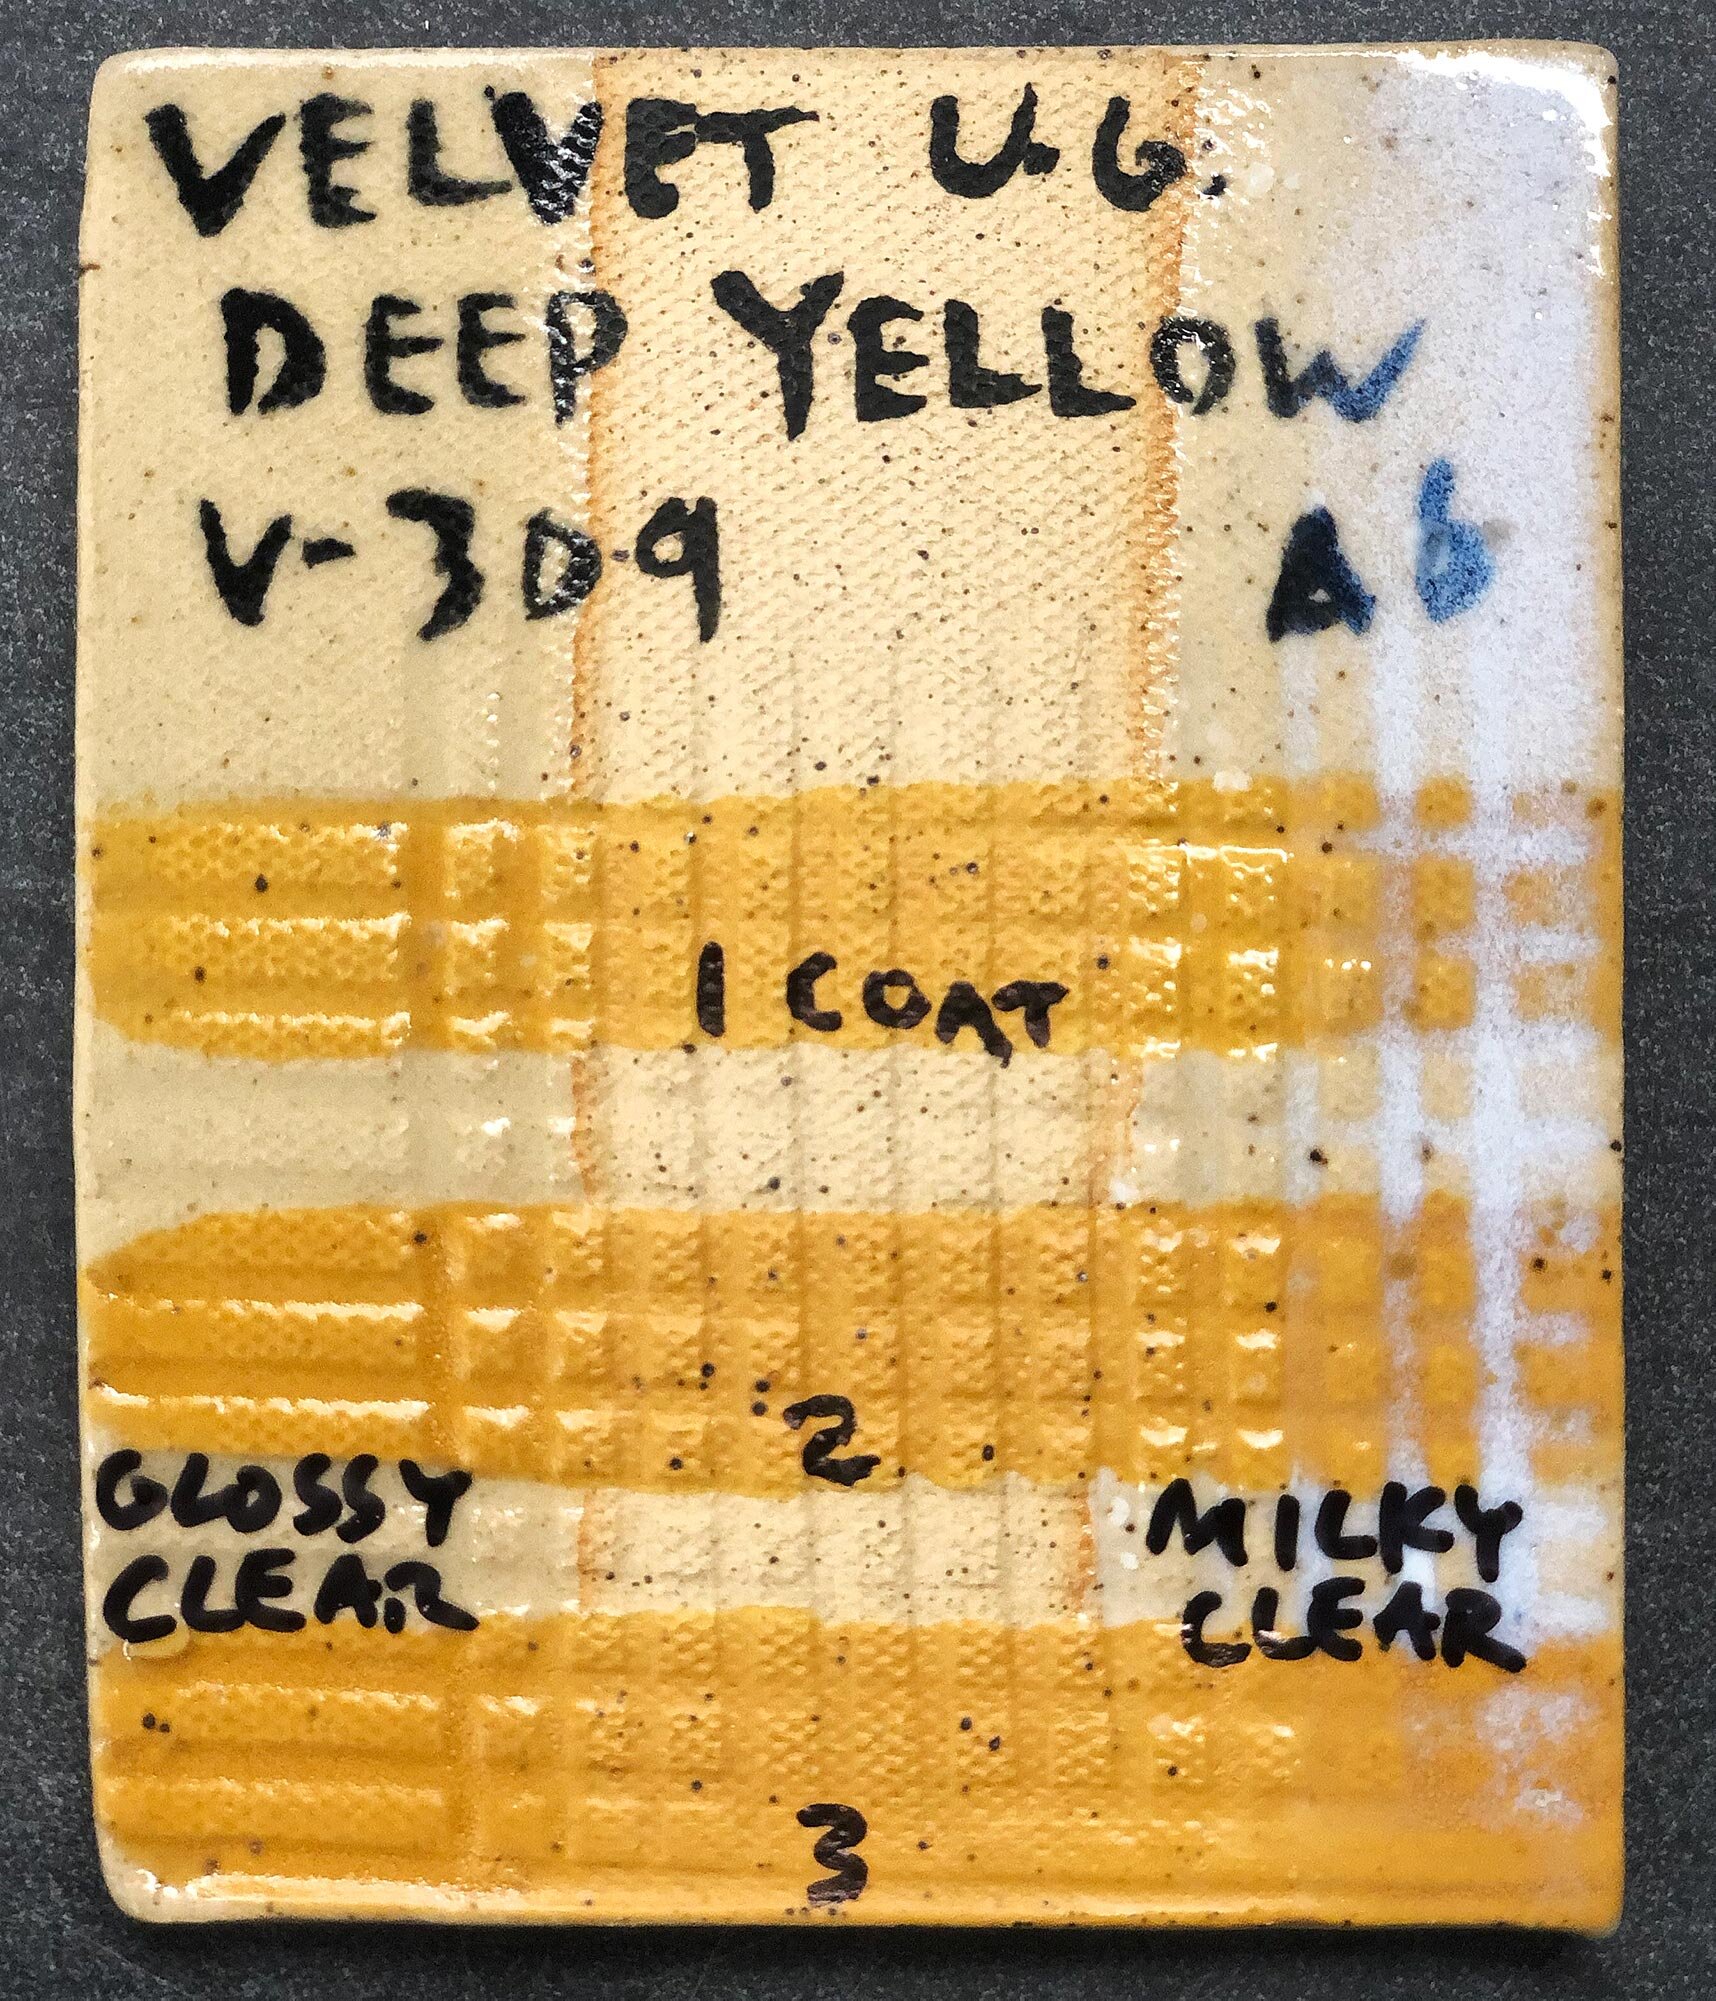
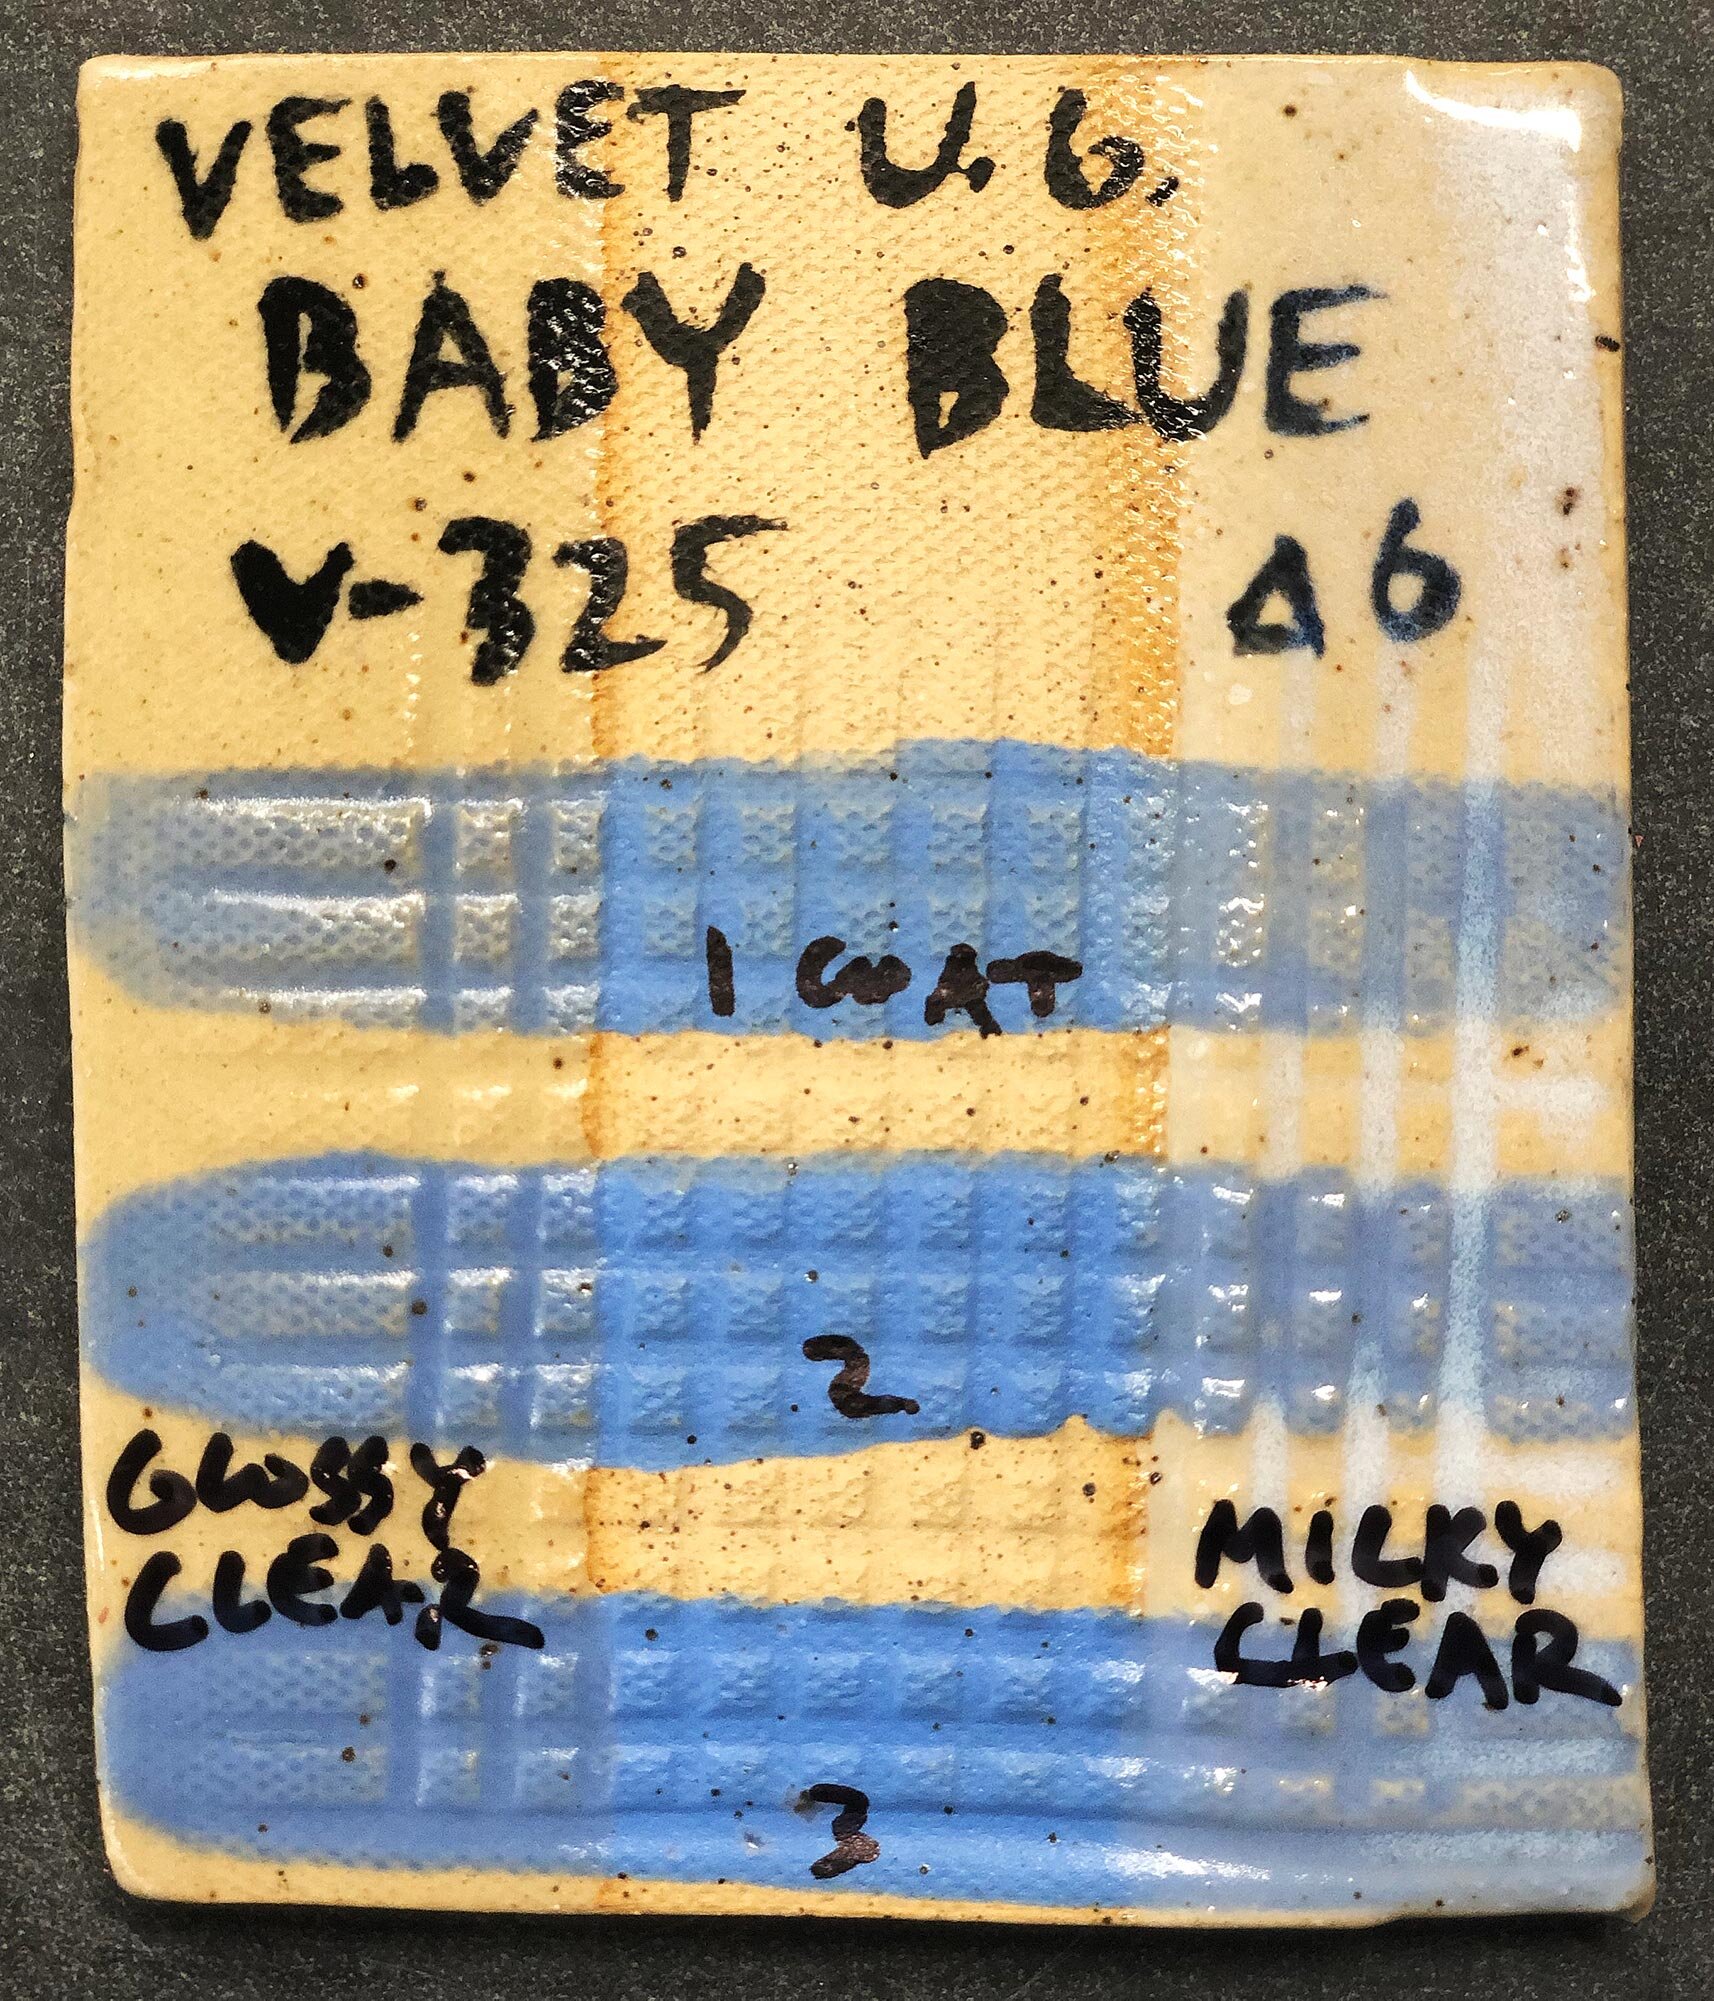
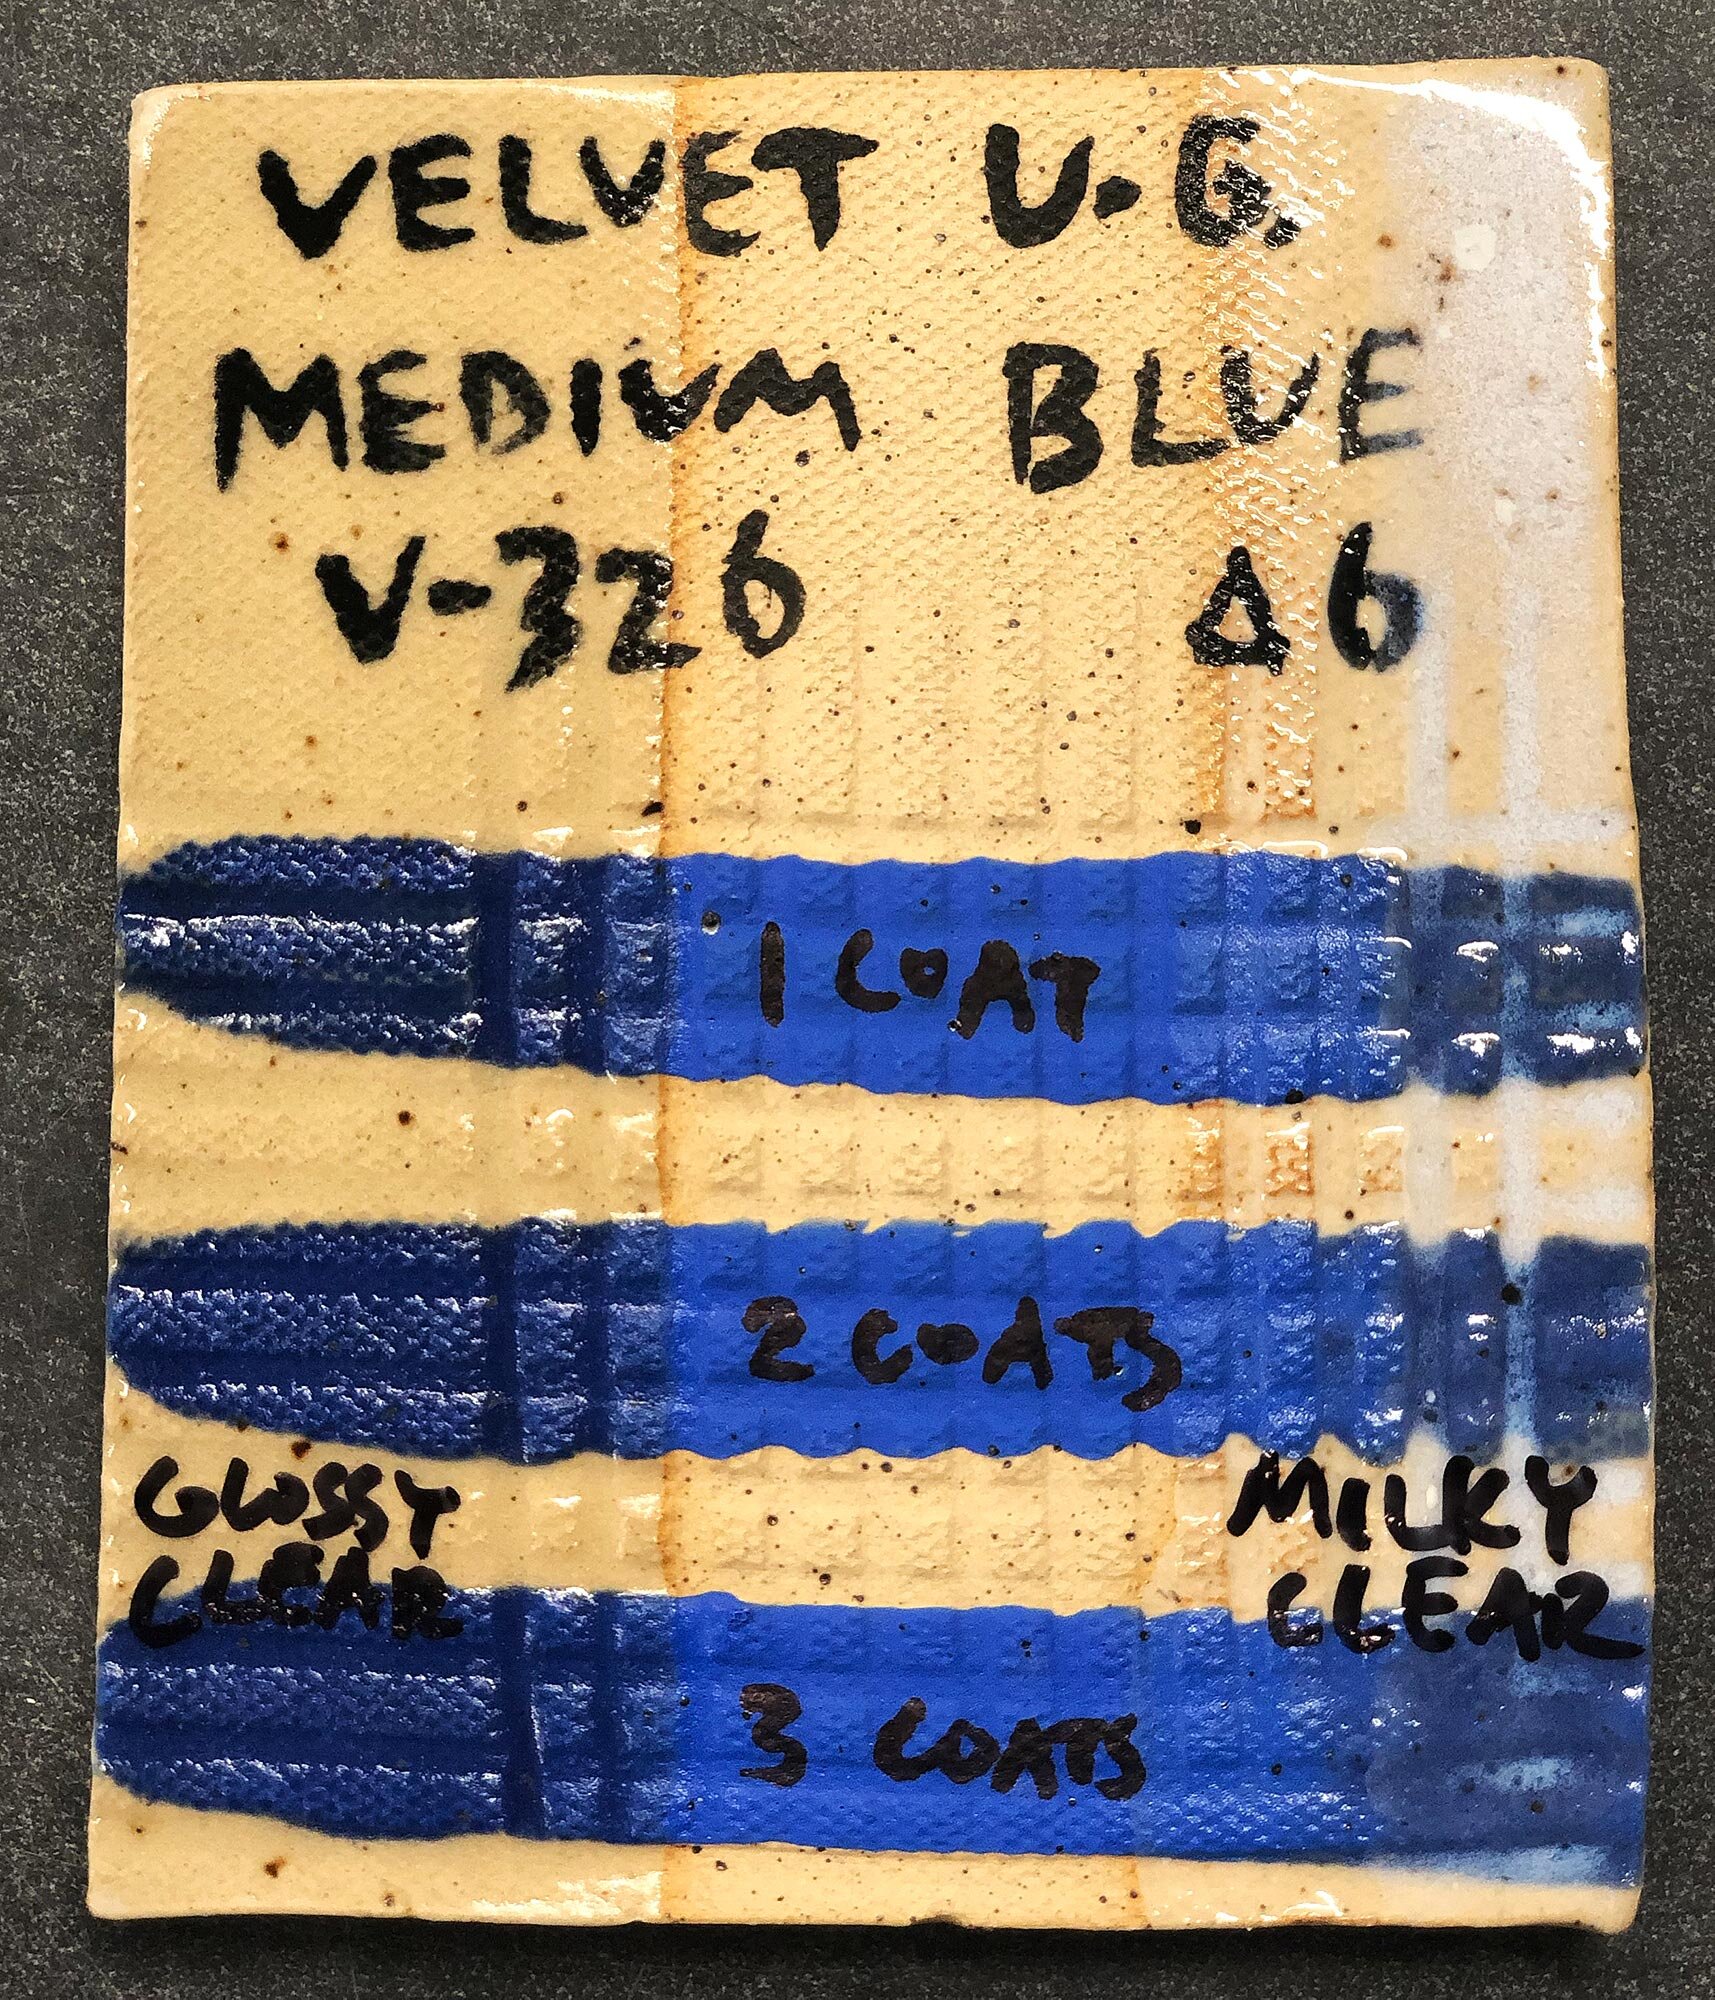
Velvet underglazes are designed for cone 04 low fire underneath a low fire clear glaze, but most colors stay true at mid-range and high fire. For best results, test in your kiln first. The following images of Velvet Underglazes were fired at Cone 6 on a speckled clay body, to illustrate what these colors look like underneath Glossy Clear and Milky Clear cone 6 mid-range glaze recipes. But they will also work great underneath a commercial clear glaze.

As I make more test tiles of different underglazes, this post will be updated. For more information about Velvet Underglaze, check out AMACO’s site.

AMACO Velvet Underglaze Cone 6 Test Tiles

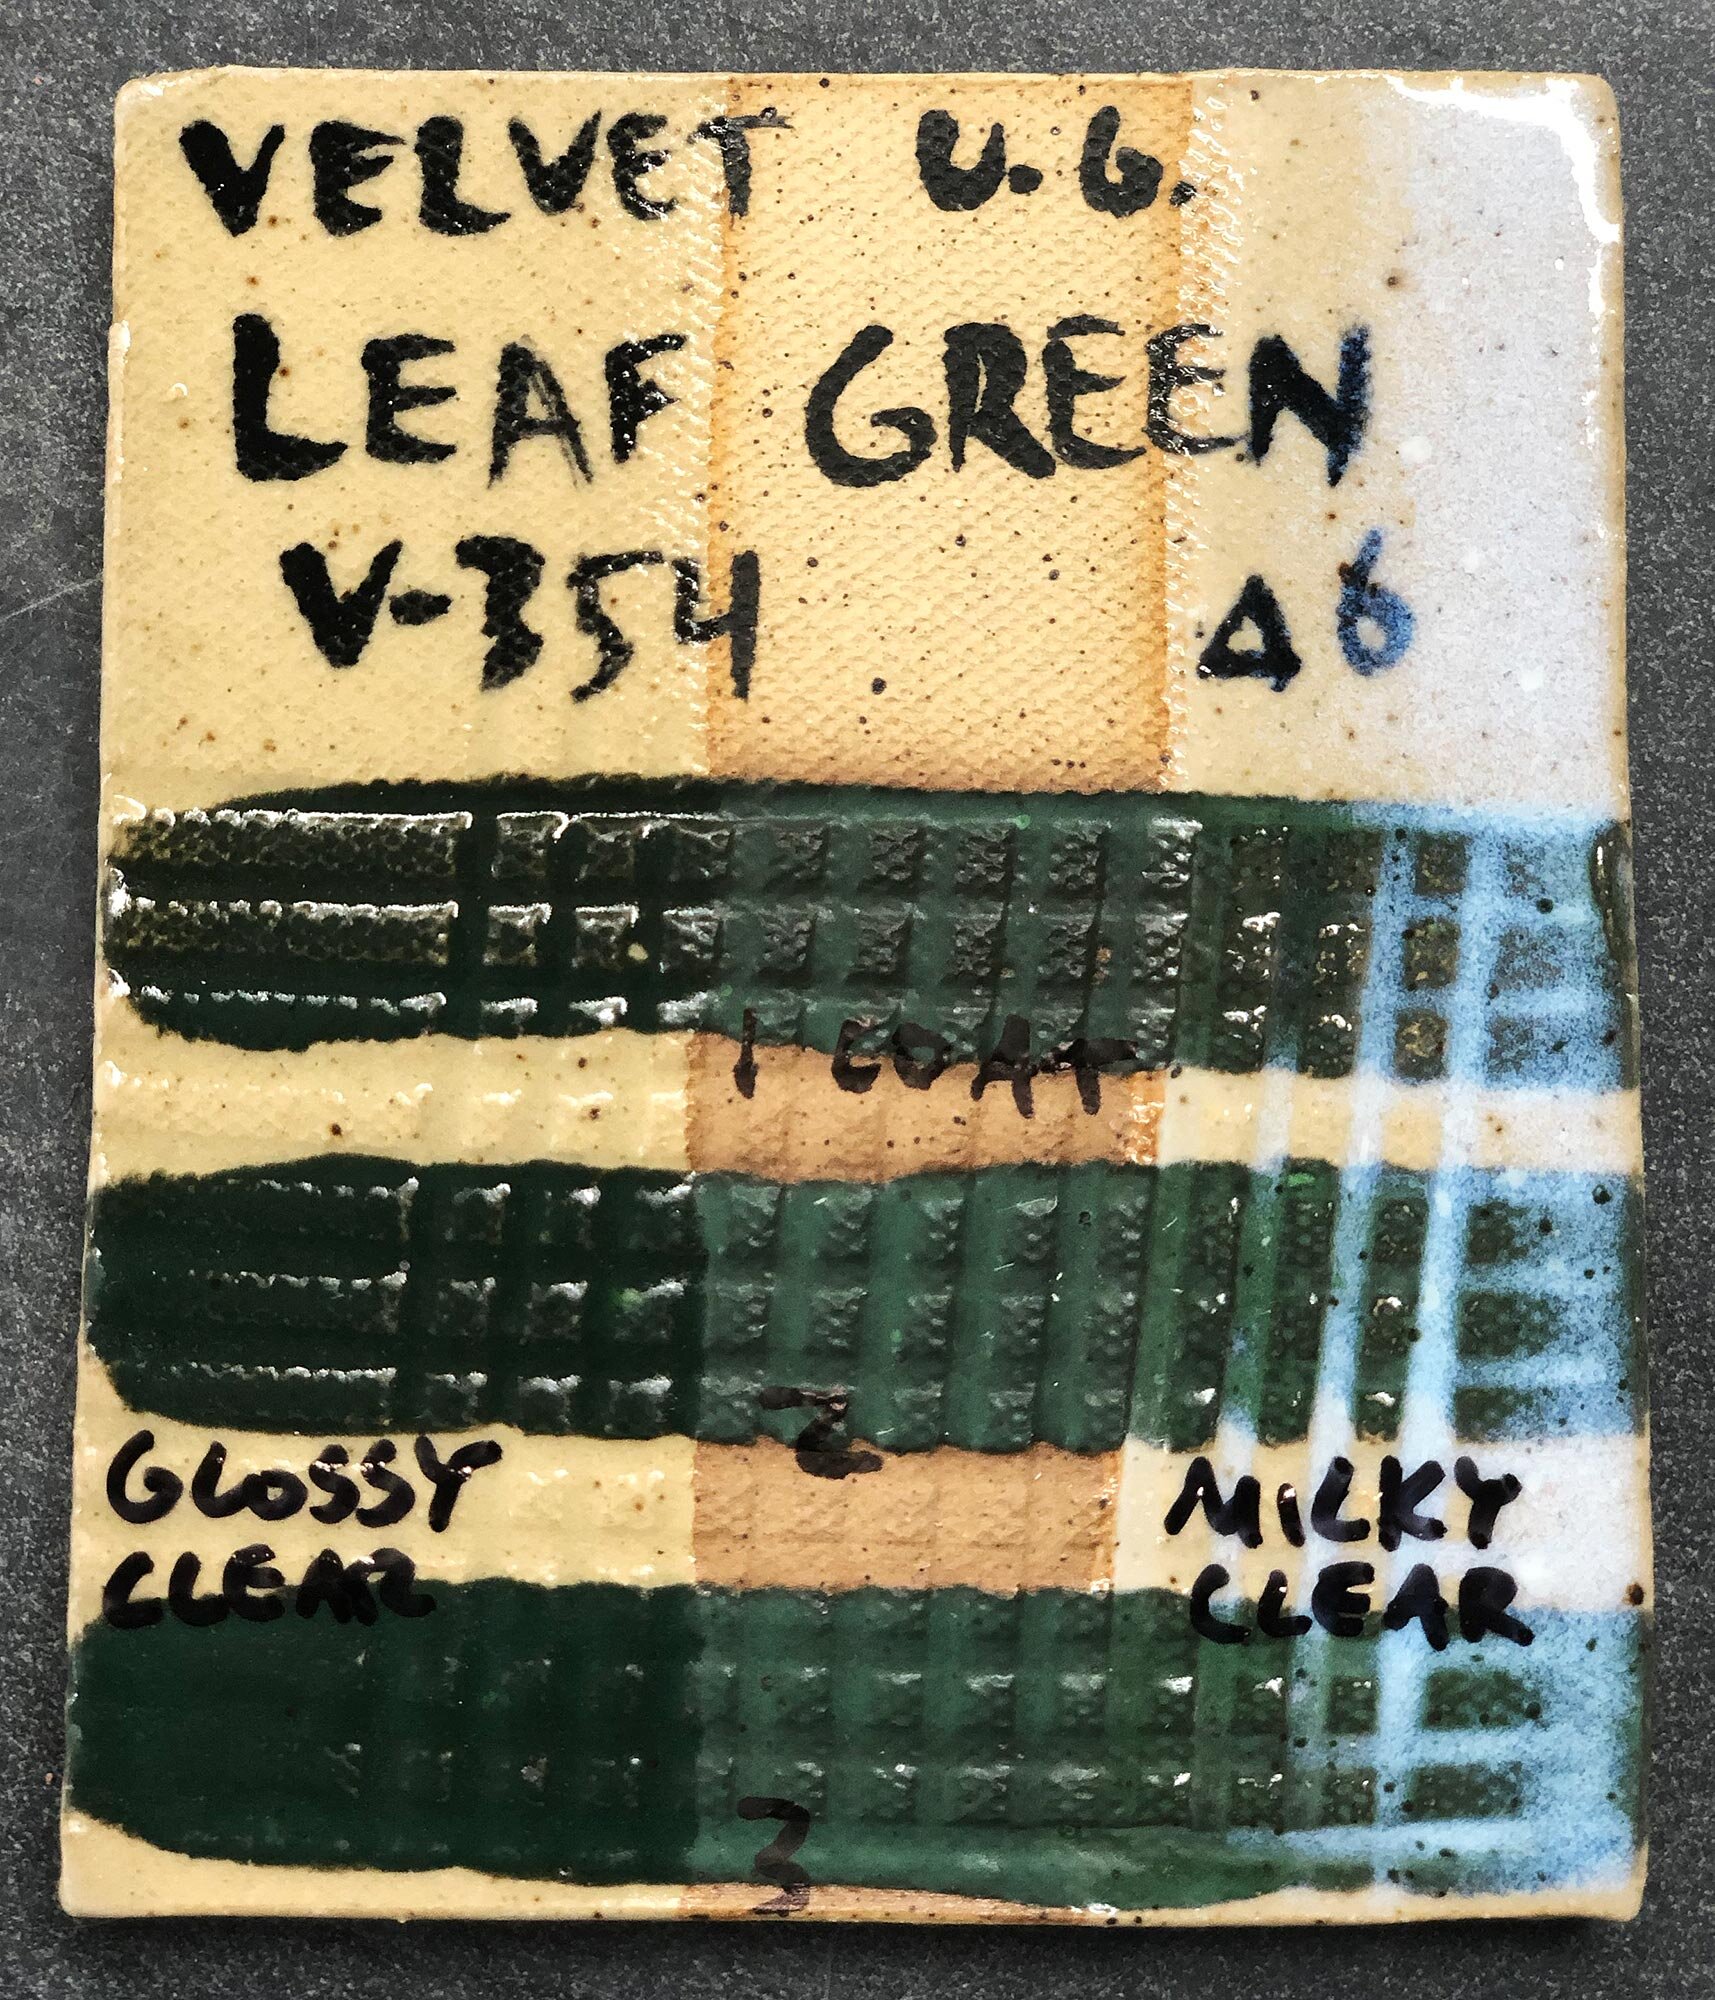
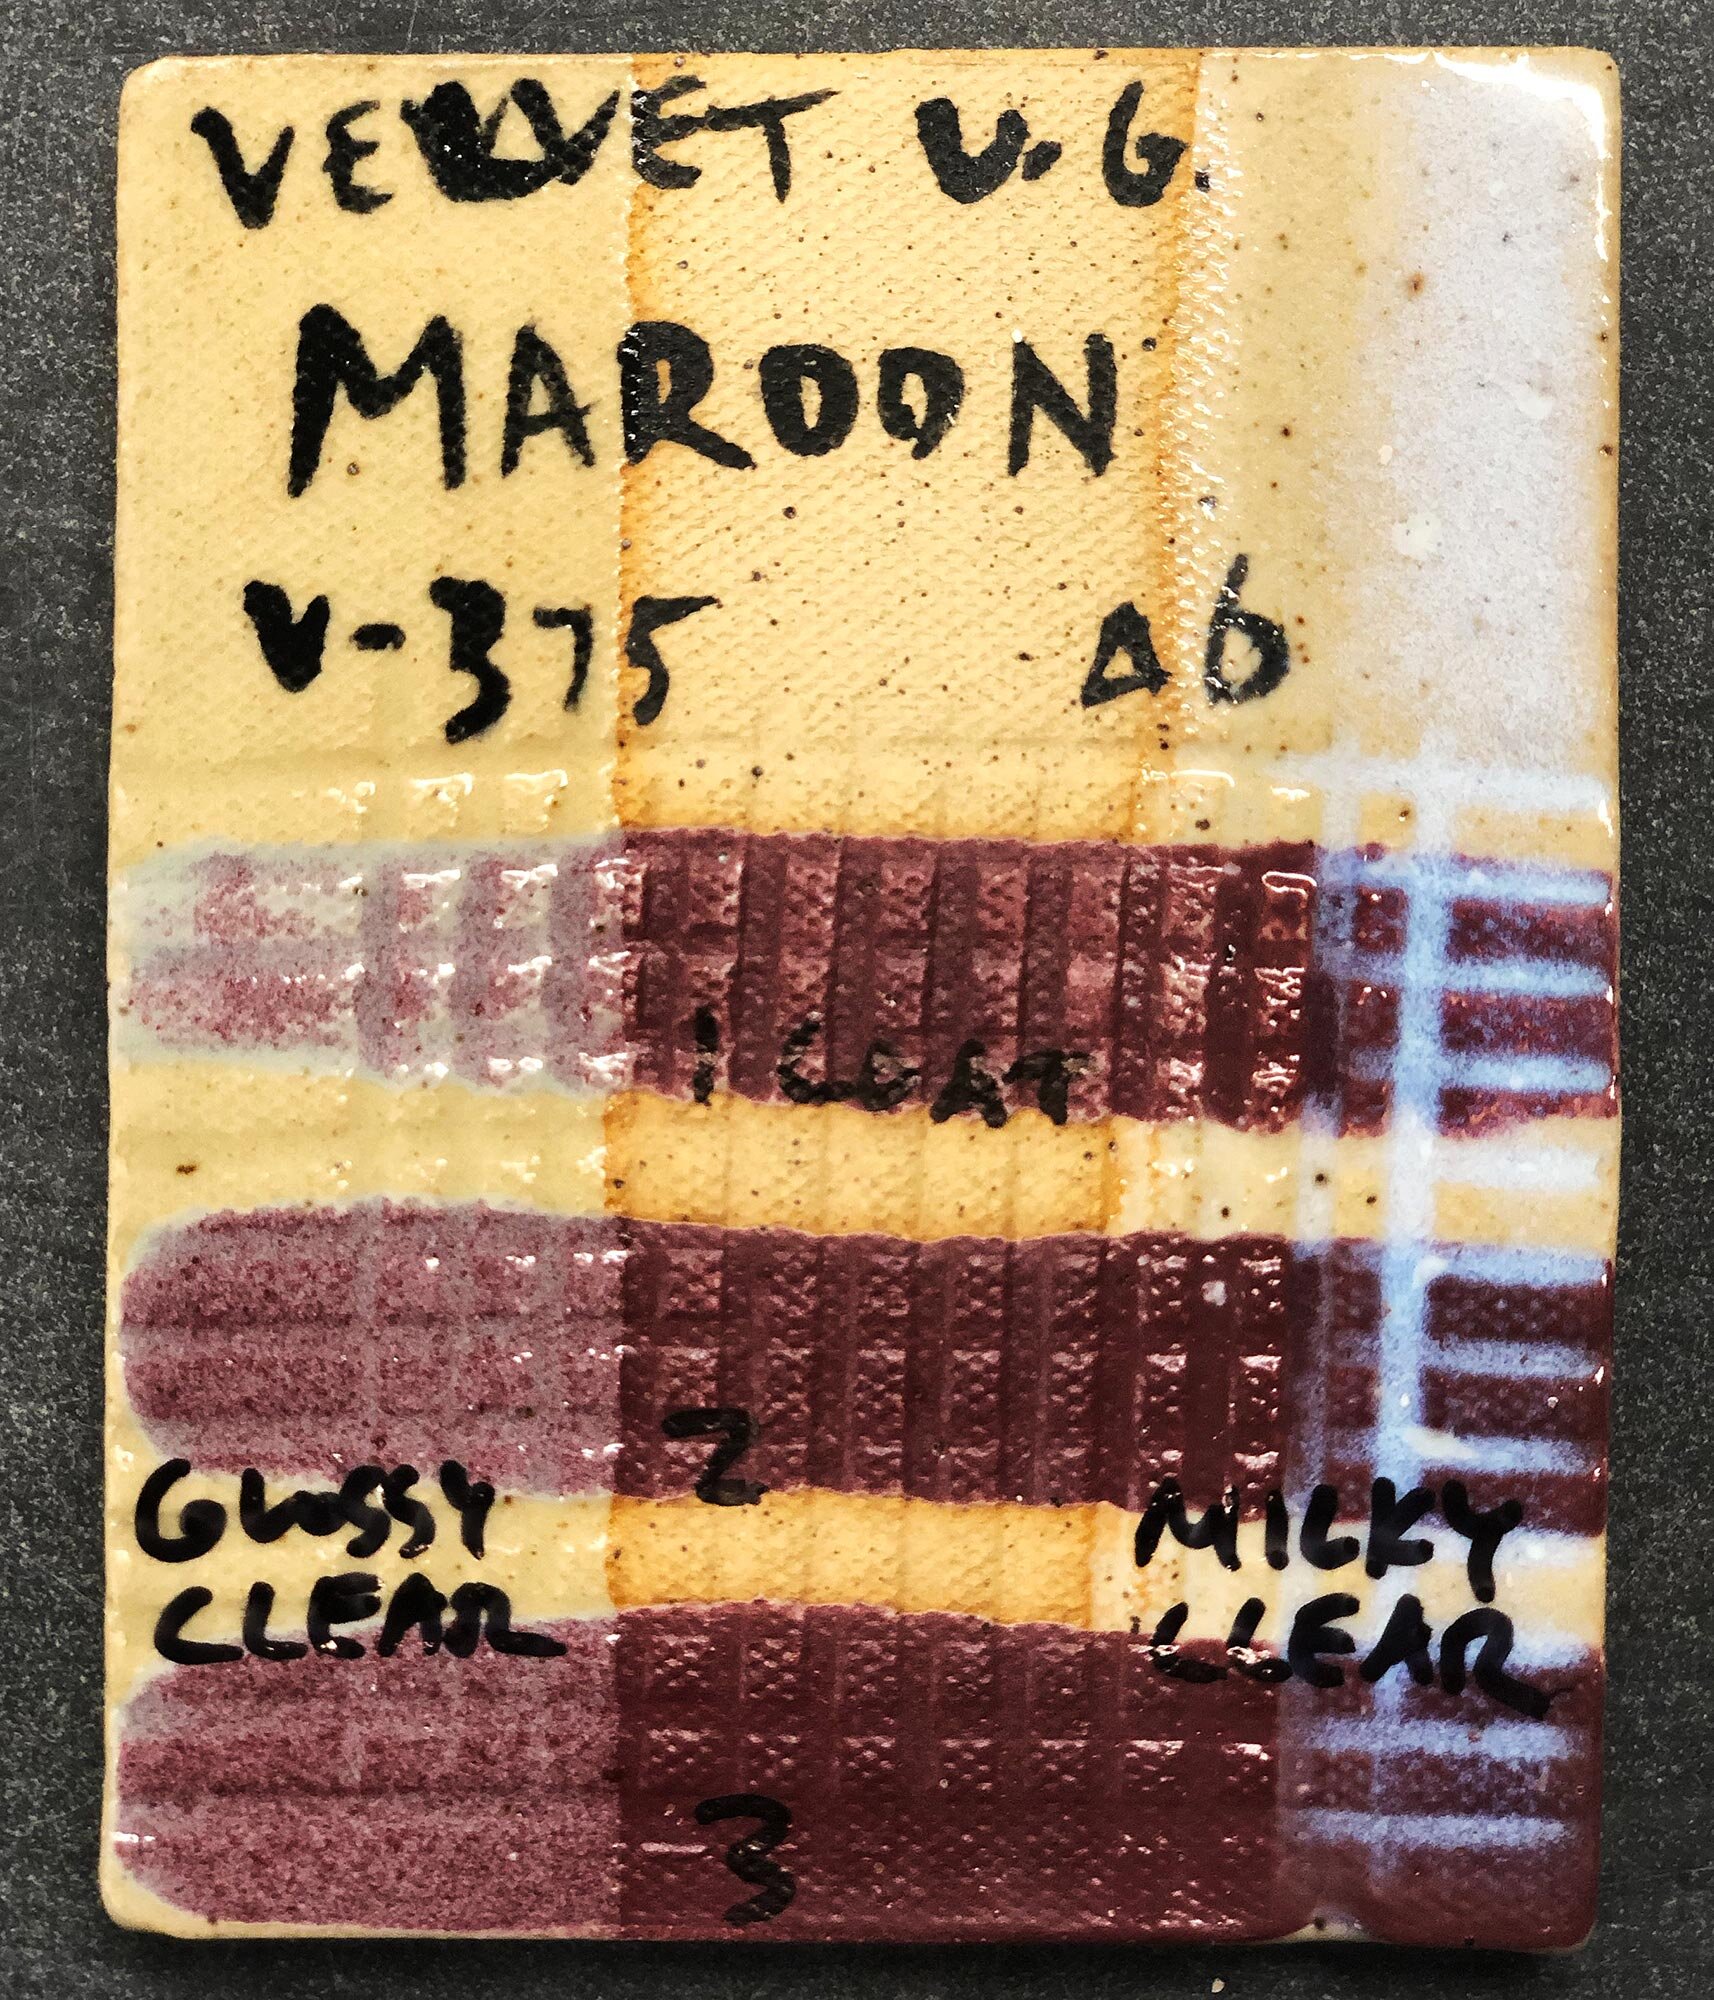
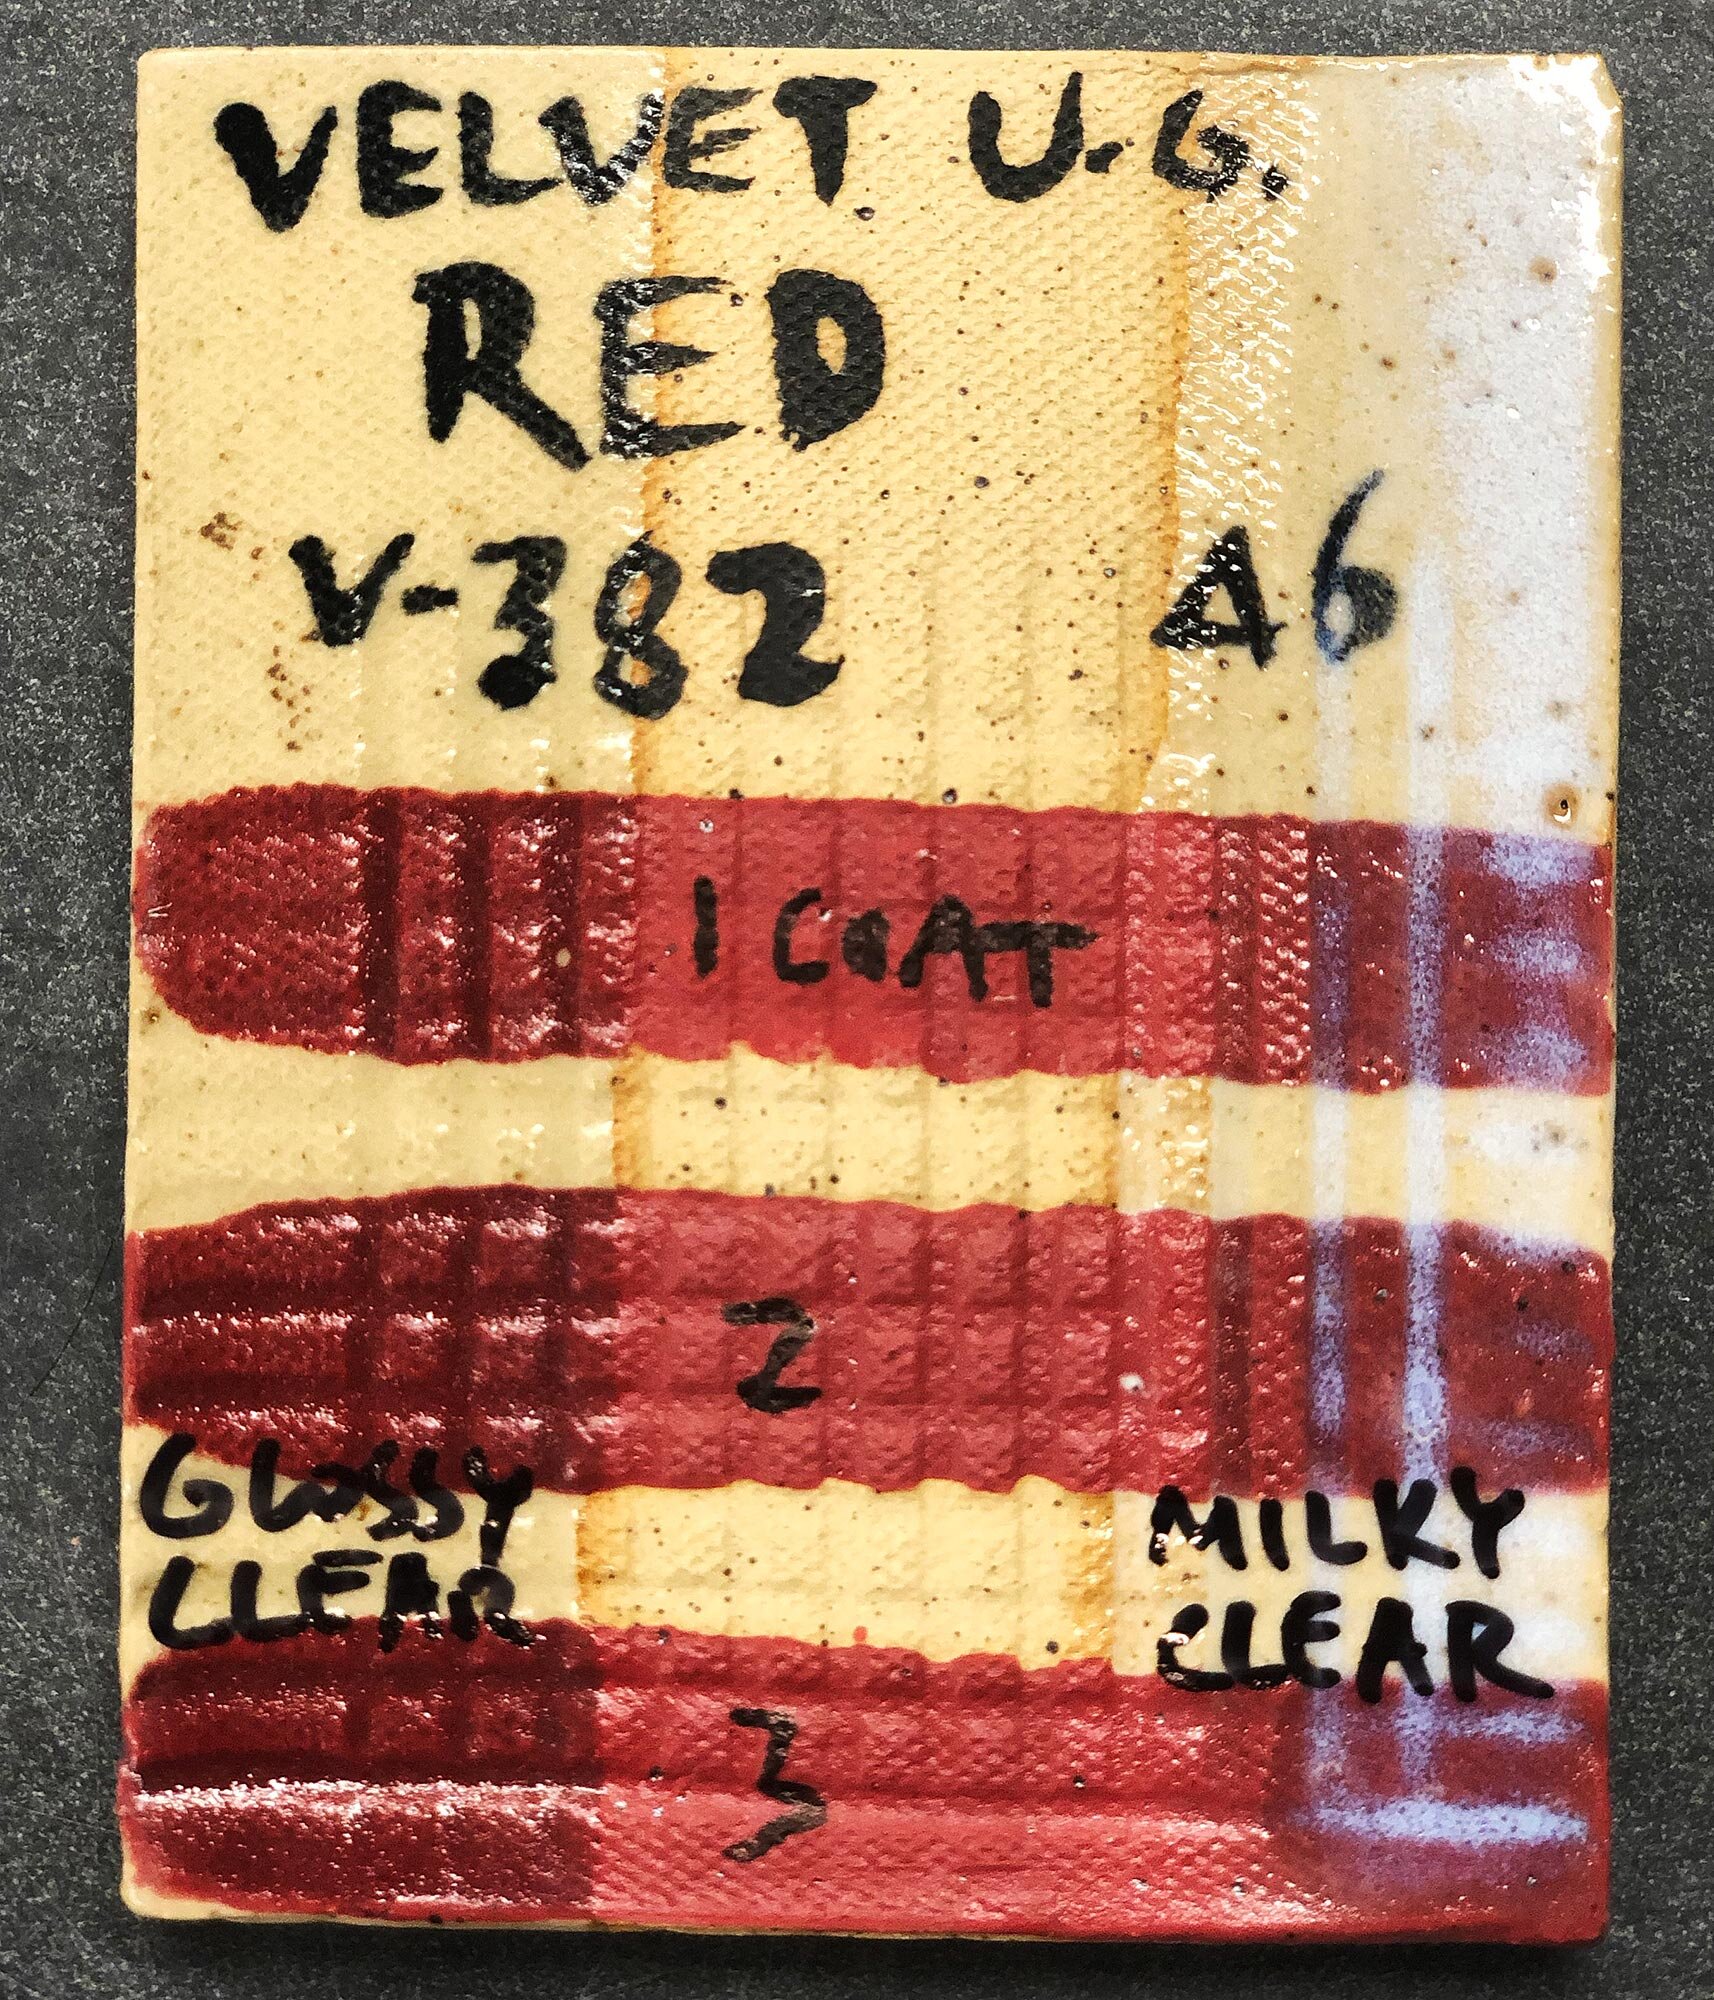
All images show 1, 2, or 3 coats of underglaze painted on a speckled stoneware fired at cone 6. The left side of the tile shows our Cone 6 Glossy Clear glaze on top, the middle section is unglazed, and the right side is our Cone 6 Milky Clear glaze. As commercial underglazes are quite expensive, I like to pair them with our economical clear glazes that are mixed from scratch.

AMACO V-309 Deep Yellow Velvet Underglaze on speckled stoneware fired at cone 6.This is a nice ochre / straw yellow that stays matte at Cone 6.

AMACO V-309 Deep Yellow Velvet Underglaze on speckled stoneware fired at cone 6.

This is a nice ochre / straw yellow that stays matte at Cone 6.


V-325 Baby Blue Velvet Underglaze on speckled stoneware fired at cone 6.

V-325 Baby Blue Velvet Underglaze on speckled stoneware fired at cone 6.


AMACO V-326 Medium Blue Velvet Underglaze on speckled stoneware fired at Cone 6.This is an intense blue that stays matte at cone 6. It will turn a deeper blue underneath a clear glaze.

AMACO V-326 Medium Blue Velvet Underglaze on speckled stoneware fired at Cone 6.

This is an intense blue that stays matte at cone 6. It will turn a deeper blue underneath a clear glaze.


AMACO V-354 Leaf Green Velvet Underglaze with 1, 2, and 3 coats painted over speckled stoneware fired at cone 6.This leaf green turns more of an army / forest green at cone 6. It’s still a nice green, but I wouldn’t call it a leaf green at this temp…

AMACO V-354 Leaf Green Velvet Underglaze with 1, 2, and 3 coats painted over speckled stoneware fired at cone 6.

This leaf green turns more of an army / forest green at cone 6. It’s still a nice green, but I wouldn’t call it a leaf green at this temperature.


AMACO V-375 Maroon Velvet Underglaze painted in 1, 2, and coats on speckled stoneware fired at cone 6. *NOTE: this underglaze turns frosted white/maroon under our glossy clear.A decent option if you are looking for something on the red side of purpl…

AMACO V-375 Maroon Velvet Underglaze painted in 1, 2, and coats on speckled stoneware fired at cone 6. *NOTE: this underglaze turns frosted white/maroon under our glossy clear.

A decent option if you are looking for something on the red side of purple.


AMACO V-382 Red Velvet Underglaze painted in 1, 2, and 3 coats on speckled stoneware fired at cone 6.A great red underglaze, on the deeper side of the red spectrum. Stays matte at cone 6.
AMACO V-382 Red Velvet Underglaze painted in 1, 2, and 3 coats on speckled stoneware fired at cone 6.

A great red underglaze, on the deeper side of the red spectrum. Stays matte at cone 6.


AMACO V-387 Bright Red Velvet Underglaze painted in 1, 2, and 3 coats on speckled stoneware fired at cone 6.A few shades lighter and brighter than V-382, Bright Red is a a great red.

AMACO V-387 Bright Red Velvet Underglaze painted in 1, 2, and 3 coats on speckled stoneware fired at cone 6.

A few shades lighter and brighter than V-382, Bright Red is a a great red.


About Underglazes

The best way to get bright, saturated colors on your ceramics are with commercial underglazes. Perfect for detail work or to cover large areas, underglazes are perfect for beginners, students, and experienced professionals. Not quite a slip and not quite a glaze, manufacturers generally mix underglazes with some sort of gum material that helps with brushability and getting the material to stick. That versatility allows them to be painted on leather hard greenware, bisqueware, and they will even stick on top of glaze for a refire.


Do you have a favorite underglaze? Please share in the comments.