Note: Originally published 2021, updated August 2025.
A sink trap is a vital tool for keeping clay, plaster, and other heavy particles from clogging your plumbing. If you are working with these materials, don’t just assume your plumbing will be fine; be proactive and install something! This guide will cover a variety of sink traps, and touch on DIY methods.
The first step for clear drains is to keep clay, plaster, and heavy particles out in the first place.
Let me repeat: pre-clean everything to keep clay and sediment out of the sink. And never pour wet plaster down a sink. You can pre-clean your clay and glaze tools in a bucket, bin or trash can filled with water. Let this settle over time, decant the clear water and discard the waste. Warning! It will get stinky. But so will a sink trap.
See more clean up advice and reommendations at the end of this article.
Even with pre-cleaning, it’s inevitable that some particles will go down the drain, so you will need some sort of trap. Many plumbers will simply install a grease trap or other system that is more appropriate for restaurants. But there are a few products designed especially for clay, plaster, and other sediment, and they are much easier to use and clean than a grease trap.

The Gleco Trap System, pictured here with 64 oz jars.
TOP PICK: Practicon Gleco 64 oz System
The top pick for a sink trap is the Gleco 64 oz Sediment Trap System. The Gleco is similar to other systems with an inlet and outlet pipe and a screw-top bottles that act as a settling tank. When full, the bottles can be disposed, or cleaned and reused. But the side drain is the big extra feature with the Gleco system. This valve allows you to drain standing water before removing the bottle. This feature really help keep your sink area clean and allows you to quickly and efficiently swap out the bottles as they fill.
The Gleco 64 oz System is currently around $107 to $117 for the kit.

The clearance needed for the different size Gleco Systems.
The Gleco System with a drain has four jar sizes: 32, 43, 63, and 128 oz. All the jars are interchangeable. Due to the weight of the jars as they fill, many users recommended that the two larger sizes sit on something—plan to add wood shims or support underneath the jar. You’ll also need to measure your undersink area before selecting a jar size. The minimum clearance between the floor and outlet pipe ranges from 11.5 inches to 20 inches, depending on the bottle size. You may also need to get extra plastic piping to fit the system into your sink.
For more info on keeping your pipes clean and other sediment trap systems, keep reading.
Larger Settling Tanks: 3.5 and 5 Gallon Options

In recent years, Practicon Gleco has added 3.5 and 5 gallon settling tanks, which are simple settling tanks without a settling tank.
Practicon has added 3.5 and 5 gallon settling tank options to the Gleco line. These are simple settling tanks that are sealed into your drain system. They don’t have a release spigot, making them much cheaper, but they do have a pressure release valve that is released before changing buckets. The buckets can be discarded, or emptied, cleaned, and replaced. These are very similar to the Buffalo Trap-Eze system that has been on the market for some time, but at a slightly lower price.
The 3.5 and 5 Gallon systems cost around $60.
Shopping links At Amazon: The 43 oz and 64 oz Systems come with the pipes and two bottles, and replacements jars are available. These kits cost around $107 to $117. The 3.5 Gallon and 5 Gallon systems come with buckets and pipes, and cost around $60. Note that the 3.5 and 5 gallon systems are just settling tanks, they don’t come with the water drain valve that makes changing jars easier. But the larger systems are good for busier studios.
Gleco 43 oz System | Gleco 64 oz System | Gleco 3.5 Gallon System | Gleco 5 Gallon System
Gleco 32 oz jars | Gleco 43 oz jars | Gleco 64 oz jars | Gleco 128 oz / Gallon Jars
Table of Contents
Top Pick: Practicon Gleco Sediment Trap System
Buffalo Trap-Eze System
Keystone Metal Sink Trap
Rohde Sediment Tank
DIY Systems
Recommendations for keeping your sink clog-free
Summary
Buffalo Trap-Eze Systems

The Buffalo Trap-Eze 64 oz bottle system.
Designed for dental offices, these are also ideal solutions for pottery and craft studios. There are two basic models of this system: the 64 oz bottle system which is very similar to the Practicon Gleco system but without a side drain valve, and then a few simple bucket systems that attach to your plumbing with flexible hoses.
The Buffalo Trap-Eze 64 ounce system is a decent option, but if you were to get this style, I would choose the Gleco system. As of 2025, this 1/2 gallon system is still listed on the Buffalo Dental website, but it is hard to find it for sale.

The Buffalo Trap-Eze bucket sediment trap.
But where the Buffalo Trap-Eze system really shines is the larger systems with 3.5 or 5 gallon buckets. This is a super simple settling tank that connects to your existing plumbing with flexible hoses. Easier to install (and cheaper) than the Gleco system, it’s a great option that just about anyone should be able to install without too much trouble. Just make sure you have enough clearance under your sink for the buckets and for the attachment to your outlet pipe. In recent years, Practicon has added very similar products to their line, so there are options to consider with this style of system.
These buckets don’t contain baffles or separate compartments, but if you make sure to preclean all your tools and hands, these will work well to trap those fine particles that do make their way down the drain. And the full buckets can be disposed, or cleaned and reused.
Some users report problems with these leaking. Make sure to tightly seal the lid to the bucket for this system to work. If you read clay forums, many potters use these traps without any problems. Both of these systems are around $65.
Keystone Metal Sink Trap

The Keystone Metal Sink Trap
The Keystone Metal Sink Trap is a 2 gallon metal canister-style sink that also accommodates disposable liner bags. This style is somewhere in between the Buffalo Trap-Eze bucket systems and a regular grease trap. The metal fittings may be more long-lasting and durable than a plastic bucket, but you’ll also have to factor in the time of opening and cleaning. In general, if your system is easy to clean (like the Gleco) you’ll be more likely to do it often.
The Keystone Metal Sink Trap is available at a variety of ceramic suppliers.
Rohde Sedimentation Tank

The Rohde Sedimentation Tank, pictured here with the lid off.
Available in Europe, the Rohde Sedimentation Tank is a three-chambered plastic tub on a wheeled, stainless-steel base. It’s an ideal solution for any pottery studio, especially a busy community or academic studio. It measures 450 x 603 x 520 mm (17.7 x 24.8 x 20.5 inches). To my eye, it looks like a commercial version of many of the DIY settling tanks people make out of storage tubs and buckets. Rohde—if you are reading this, please start distributing worldwide!
DIY Sedimentation Tanks
Practically any ceramic forum has guides and instructions on how to build a DIY settling tank. While these may not be appropriate or up to code for a commercial or academic studio, these will work for home or private studios.
The basic idea is running your drain into a bucket or two for settling. These buckets are inside a larger storage tub, which has an outlet. And definitely build a small platform or casters so this can be moved for cleaning.
With the right tools, parts, and caulk, anyone can build a system like this. However, it might be easier to just order something like the Gleco or Buffalo trap system…but you’ll know what is right for your studio. Personally, I use a trap system along with extra-careful pre-cleaning (read below) and never have a problem.
Click here for a great guide to a DIY sediment trap system.
Clean Up Tips and Tricks
With just a bit of planning, you will never have a problem with your sinks or drains clogging from clay or other heavy particles. The solution: pre-clean buckets. Make it a goal to never have clay chunks come anywhere near your sink!
The Three Bucket System
A prewash bucket or three will give you plenty of space to wash and clean clay tools, splash pans, and dirty hands before using the sink. For an individual studio, this can be a simple tub or 5 gallon bucket. For a busy studio, it could be a trash can full of water. Or try a “three bucket system” where you progressively move from dirty to clean water. With a system like this, you might not even need to use the sink except to rinse off your hands. It is also very efficient, as the dirty water is constantly reused, which is definitely a concern for any area affected by drought.

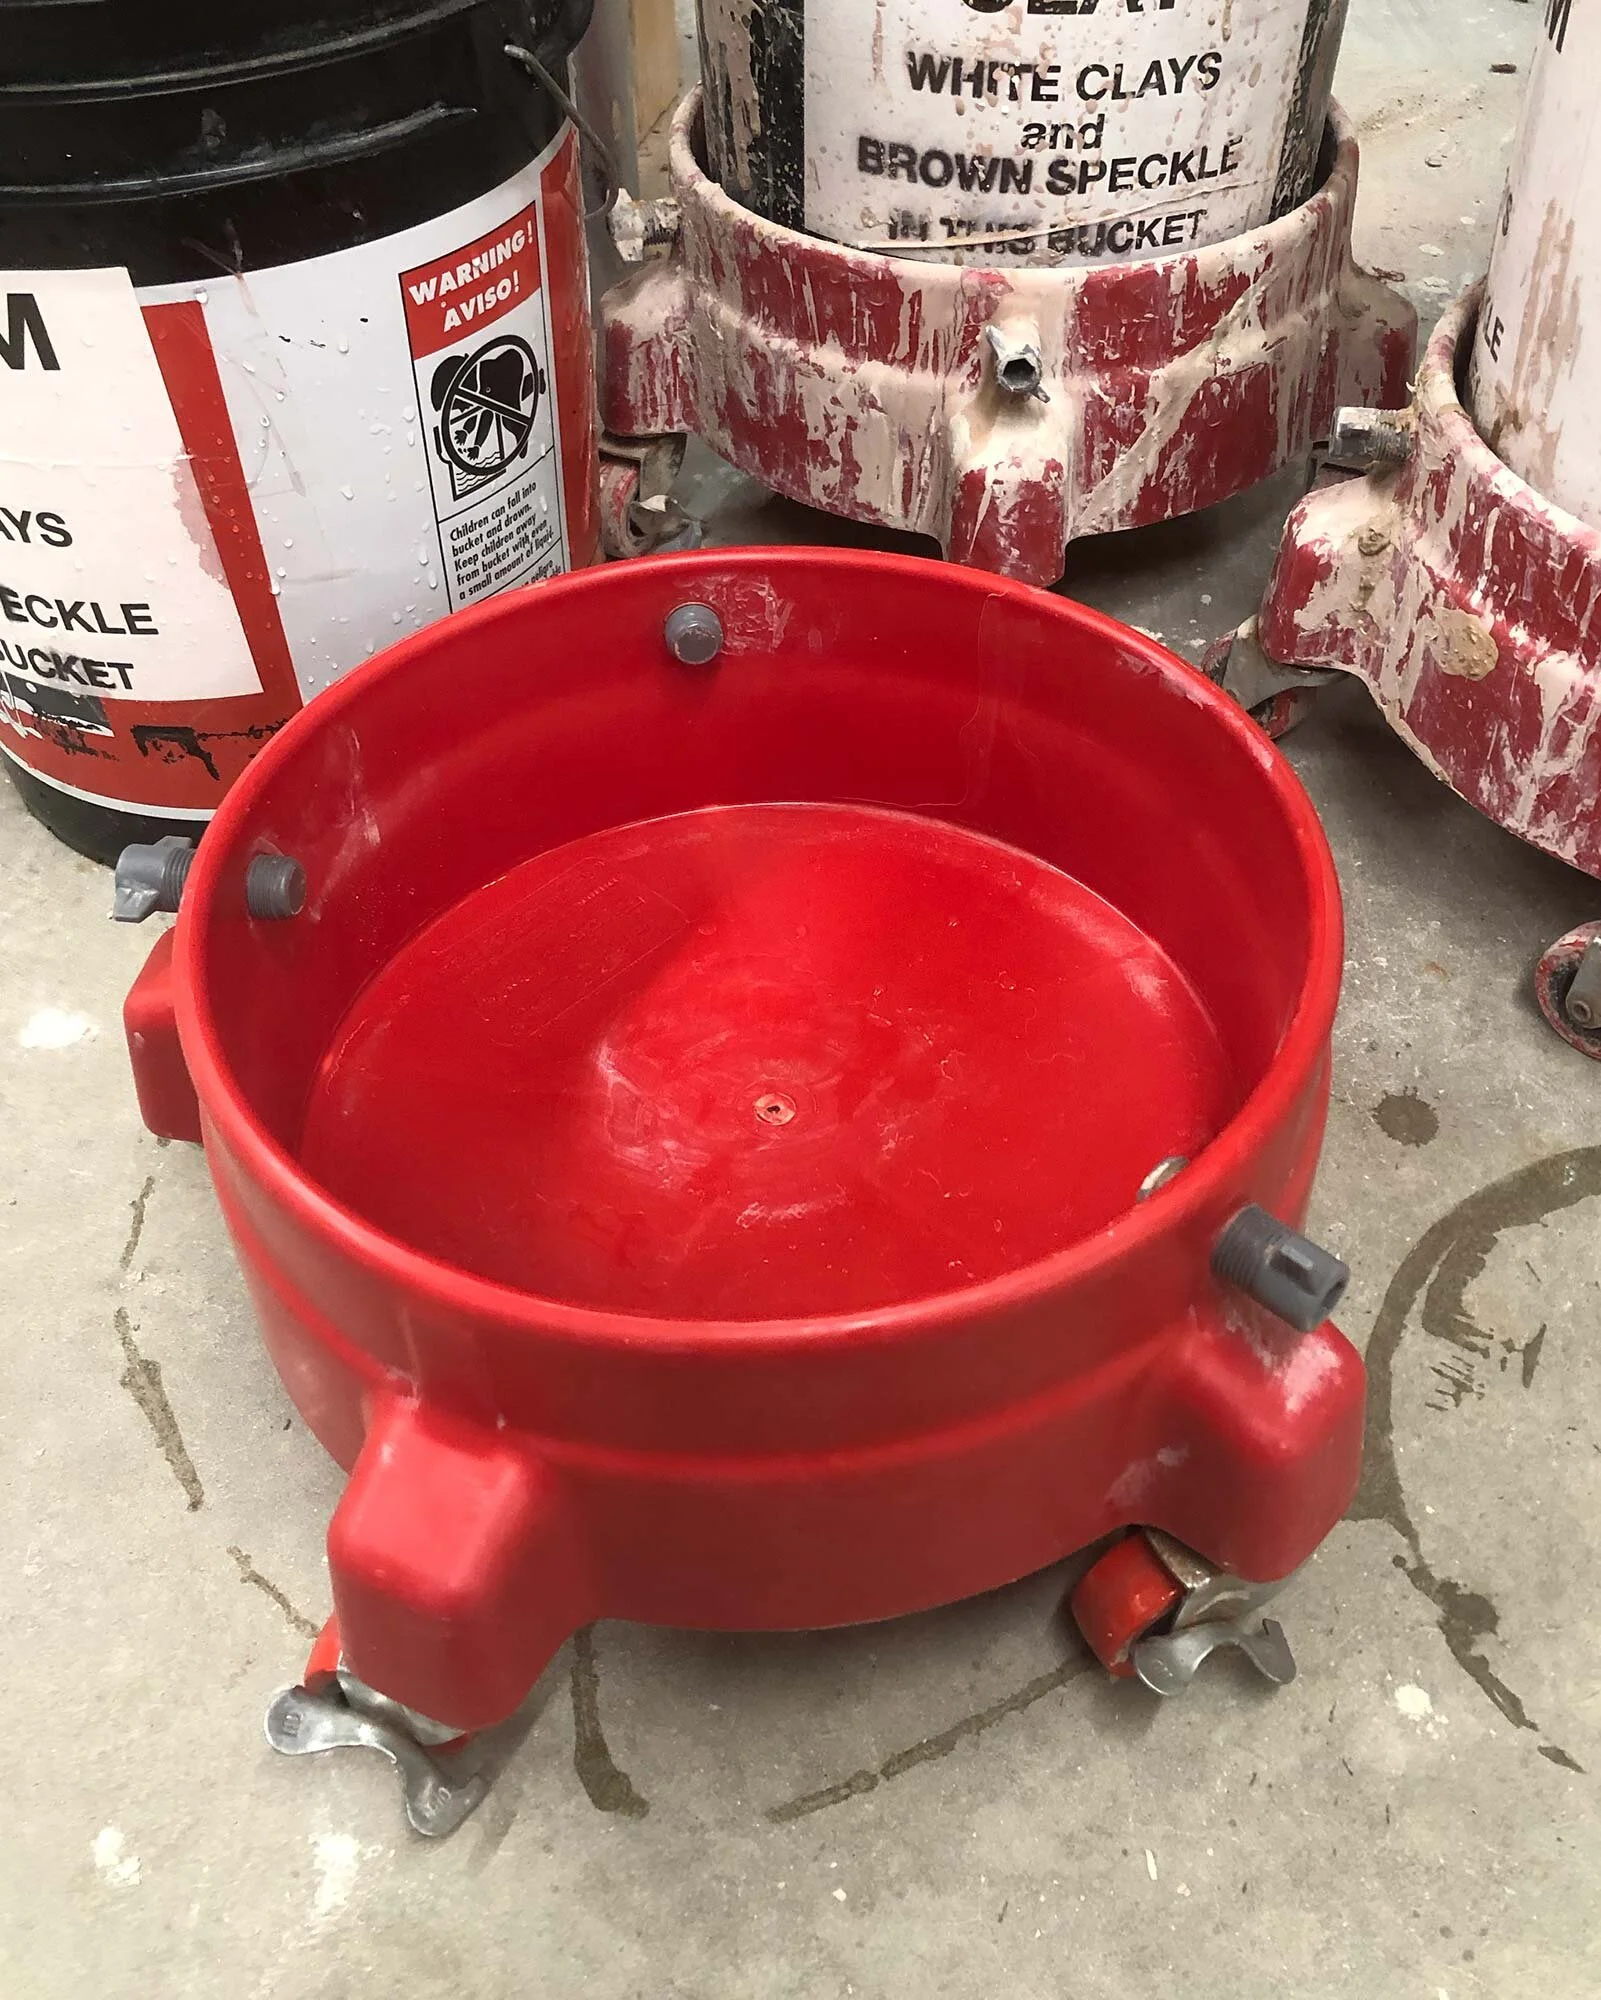
The Carlisle Bronco 32 Gallon Waste Container, an ideal size for pre-cleaning.
In a personal studio, I still prefer to use a big, wide trash can of water as that allows me to dip splash pans and other large tools in the water for pre-cleaning. If this bucket gets smelly, use the method described here for sanitizing.
My favorite option for clean up is the Carlisle Bronco 32 Gallon Waste Container. It’s tall enough that you don’t have to bend over to clean, and it’s not super huge like a 44 gallon. You can also get a wheeled caster dolly, which makes it easy to move around the studio. These cans are the same style as the older Rubbermaids, and they are thicker walled and stronger than the current models of Rubbermaid waste containers.
Amazon Basics also has a simple 32 gallon trash can.
Other options:
Generic 32 gallon trash can with caster and lid combo package. Shop at Amazon
Rubbermaid Brute 32 Gallon vented trash can. (The fluted vents make it harder to clean) Shop at Home Depot

A drain cover / strainer will help catch large chunks.
Sink Strainer
Your final defense before your trap is some sort of sink strainer. Get the size that fits your drain. This will keep any chunks of clay or bits of hard plaster from going down the drain.
The 4 pack pictured here should cover most sink sizes.
Summary
This post has covered a variety of options for sink traps and sedimentation tanks for pottery, sculpture and craft studios, but these same systems will work in dental offices or anywhere that is using heavy particles that will sink and potentially clog pipes. The top pick is the Gleco system for it’s ease of use and innovative side valve. The Buffalo Trap-Eze system is also a great option because it is so easy to install. You can also make your own system. The main thing, though, is to follow best practices of keeping clay, plaster, and other heavy stuff out of the sink in the first place. Setting up your studio with a pre-clean bucket or trash can is an easy solution that will pay off in clean pipes and help you avoid costly plumbing bills or problems down the road.
What do you use in your studio for a sediment trap? Let us know in the comments.