Gift Guide for Artists who Paint and Draw

This guide has more than 30 ideas for artists who paint, draw, and create. Most suggestions are priced between $25 and $100, along with a few higher ticket items. There are plenty of ideas for the painter or artist in your life, or perhaps you’ll find a gift for yourself. In general, this guide focuses on high-quality art supplies, equipment, and books.

Note: This site uses affiliate links for sites such as Amazon and Blick. If you click the links and complete a purchase, we may receive a percentage at no extra cost to you.


Blick Noir French Easel

The Blick Noir French Easel.

The Blick Noir French Easel.

Perfect for in the studio or on the go, this black French-style wooden easel from Blick is stylish, functional, and a great deal. The easel combines a sketchbox, easel, and canvas carrier into one unit. Folded, it measures a compact 22 x 16 x 6.5 inches, and it can extend up to 73” tall and accommodate canvases up to 34” tall. It weighs about 10 lbs. This is a great easel for someone setting up an at-home studio and can be carried or folded down for painting in plein air. It retails for around $100.


Golden A-Z Acrylic Explorers Kit
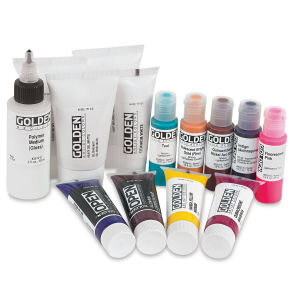
The Golden A-Z Acrylic Explorer Kit.

The Golden A-Z Acrylic Explorer Kit.

This popular set introduces artists to a variety of products Golden Acrylics—the company bills it as a workshop in a box and it basically is. It includes heavy body (i.e. thick) acrylics, fluid acrylics, high flow acrylics as well as pastes, gels and mediums. It’s a great intro to Golden’s high quality product line, and can really expand an artist’s skill set. The kit retails for around $28 and includes 4 tubes of paint, 5 small bottles of paint, 4 tubes of different mediums and a bottle of clear painting medium.


Aquabee Super Deluxe Sketchbook

The Aquabee Super Deluxe Sketchbook.

The Aquabee Super Deluxe Sketchbook.

The Aquabee Super Deluxe Sketchbook from Bee Paper is a favorite mixed media pad that came out on top in our recent review of mixed media pads. It can do everything from light watercolor to ink to marker, colored pencil, and anything else. The sketchbooks are available in a variety of sizes (9x12” is a great option) and has a stiff cardboard back and a leatherette cover with a wire binding for easy turning of pages. The 93 lb / 150 gsm paper is light cream color and is a pleasure to use, and the books range from 6x4 inches to 14x17 inches, with 50 or 60 pages per book.


Williamsburg Oil Paint Sets
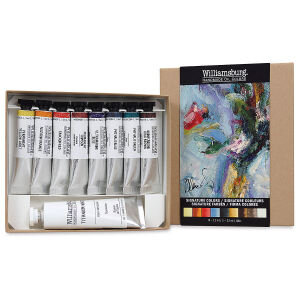
The Williamsburg Oil Paint Signature Series has 9 colors in 11 ml tubes.

The Williamsburg Oil Paint Signature Series has 9 colors in 11 ml tubes.

Williamsburg is known for its intensely pigmented, handmade oil paints that are the favorite paints of many professional artists. Available individually or in a variety of sets, try the Signature Series set of 9 for an introduction to these wonderful oil paints. An oil painter will appreciate this, or any set of the high quality Williamsburg paints. The Signature Series set has 9 tubes with 11 ml of paint each, or about 1/3 of an ounce.


The Artist’s Way by Julia Cameron

The Artist’s Way by Julia Cameron

The Artist’s Way by Julia Cameron

This classic, first published almost 30 years ago, helps artists, writers, and creative types unlock their full potential. Through a series of exercises, such as a letter to yourself and the famous “morning pages” of free writing (visual artists can just substitute sketching) everyone can discover their creative path in an open-ended way that accommodates everyone. At times a bit new age-y, this book is still worth a read for the ideas and exercises. The book grew out of a series of workshops that Cameron ran, and the book feels like you are in the room with Cameron’s gentle but insistent guidance.


Faber-Castell 9000 Series Drawing Set

Faber-Castell 9000 Series Drawing Set.

Faber-Castell 9000 Series Drawing Set.

Faber-Castell makes some of the best pencils and is the choice of professionals and serious artists. It’s easy to just reach for the signature green pencils first. This set of 12 pencils from F-C’s signature 9000 series has one pencil each ranging from the soft and dark 8B up to 2H. There’s also a set for designers that ranges from 5B to 5H. The sets come in a hinged metal tin or a soft bag and usually retail for around $15-$20. This is the perfect set for anyone who loves to draw. Pair it with a sketchbook and a sharpener for a perfect gift.


Tote Bag for Tools, Pencils, and Brushes

JJRing Nylon Tote Bag

JJRing Nylon Tote Bag

Every artist can use a little organizational help, and a tote bag keeps everything is at hand and easy to find. The JJRing nylon art/craft bag is has a 16 pockets, is available in eight colors, and is a great value, typically priced at $15 to $25.


Caran D’Ache Luminance Colored Pencils

The Caran D’Ache Luminance pictured here in the 20 pencil box.

The Caran D’Ache Luminance pictured here in the 20 pencil box.

The ultra-premium Luminance colored pencils are a joy to use and the entire set is 100 percent lightfast, which means that the pigments are designed to withstand UV rays. Under museum conditions, these colors will hold up for at least 100 years. The Luminance (and the Derwent Lightfast) were our top picks in a recent test of colored pencils based on the color intensity, quality, and the lightfast ratings. The Luminance also has an easy-to-use cardboard box where each pencil is inset into foam, so the pencils don’t jumble around. Prices range from a set of 20 pencils for $55 to a set of 76 pencils for around $225.


The Story of Painting: How Art Was Made

The Story of Painting: How Art Was Made from DK.

The Story of Painting: How Art Was Made from DK.

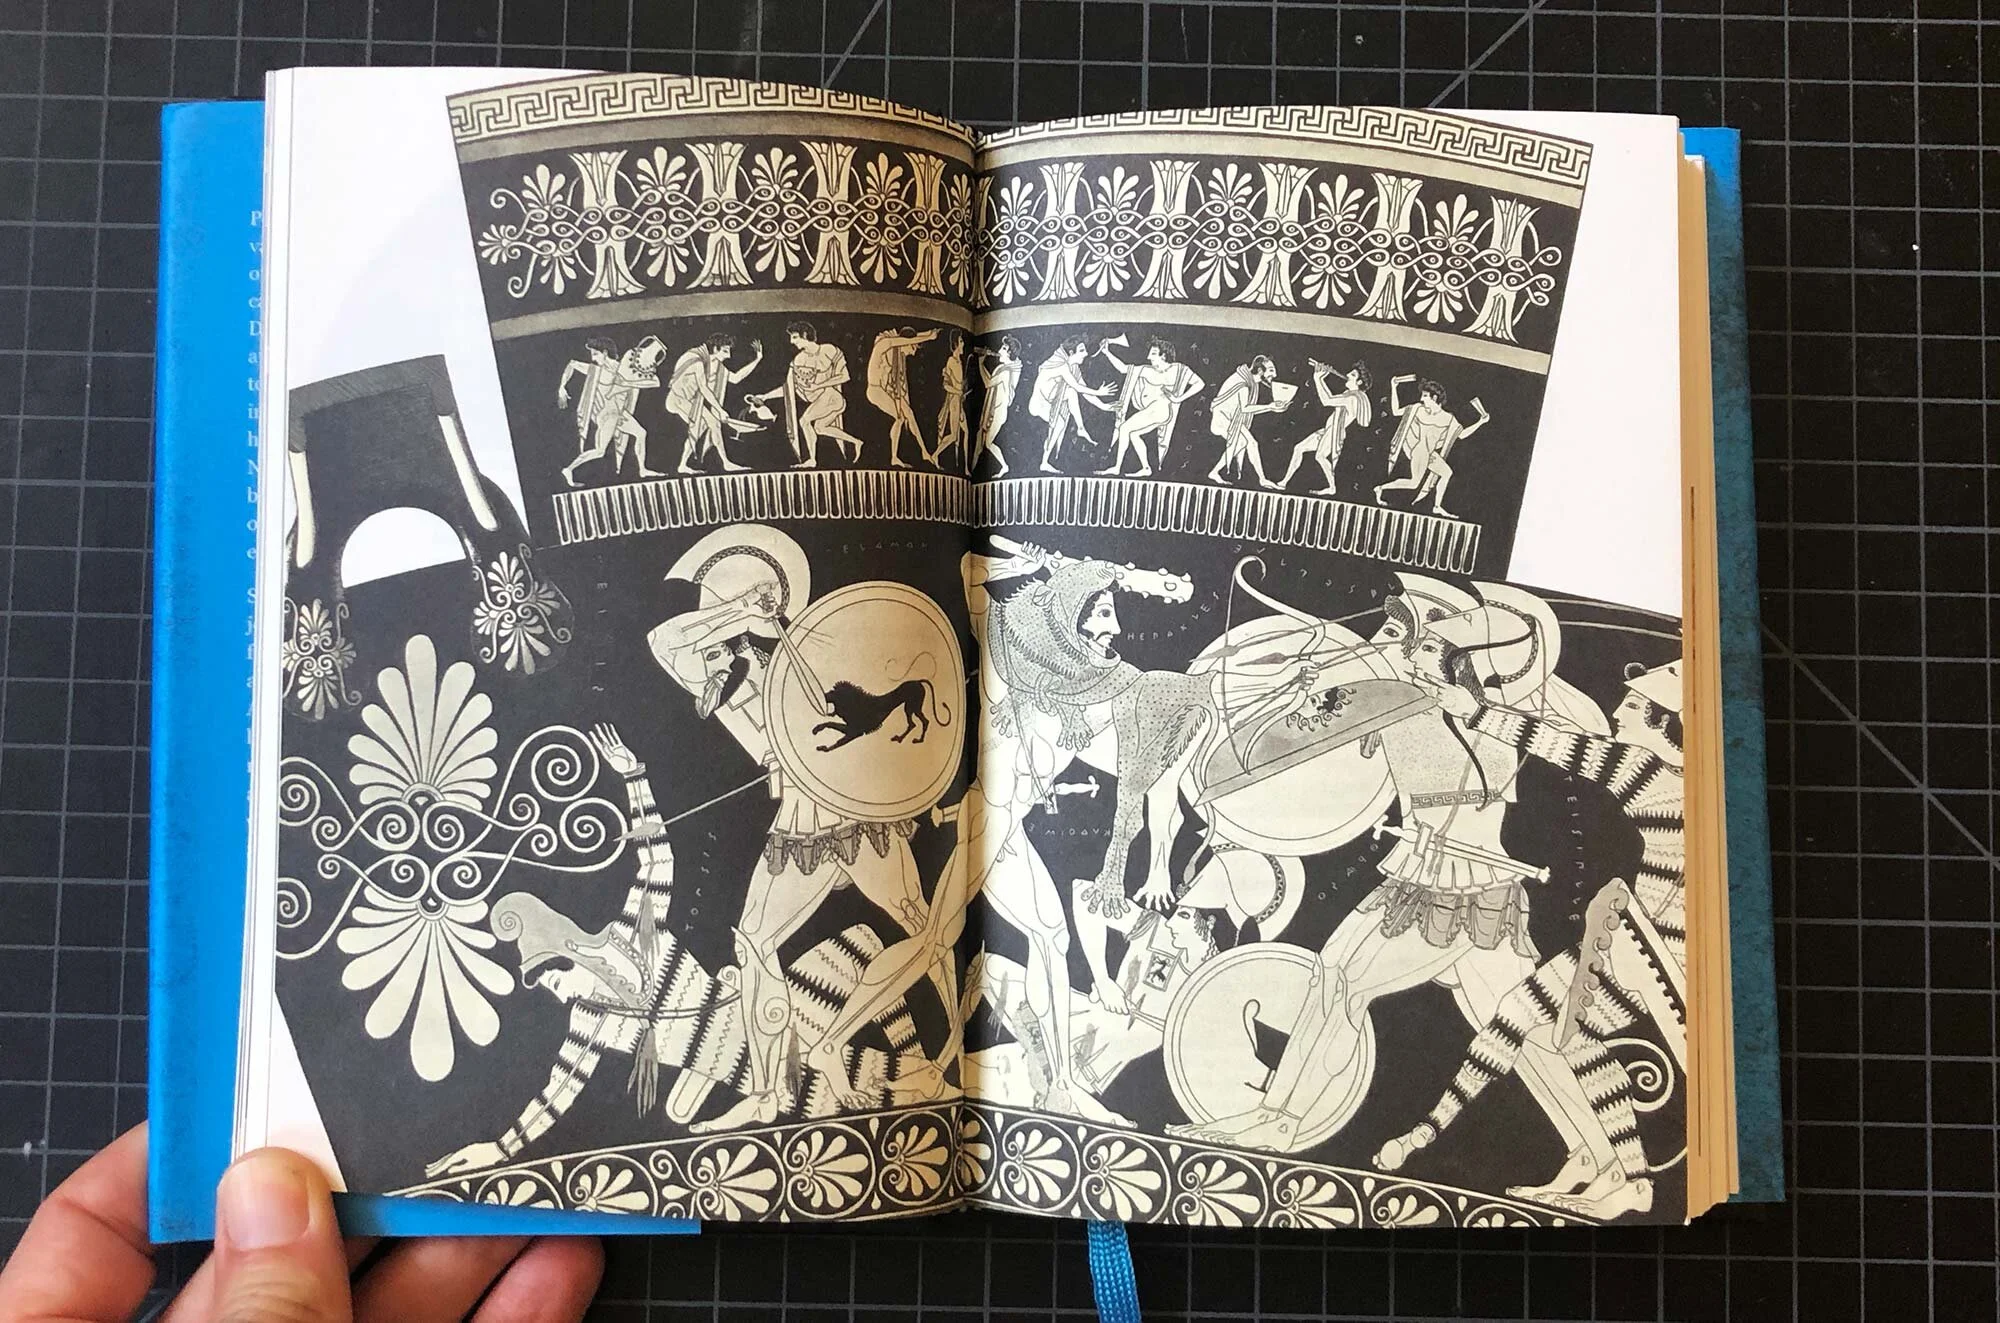
This 2019 book covers the entire 25,000 year history of painting with illustrations, texts, and guides to technique, composition, and subject matter. It’s a great overview for a beginning painter, or a wonderful reference book for the more experienced artist. The details, images, and texts make this more than just a coffee table book. It’s available in hardcover for around $25.

 
The book includes detailed examinations of numerous paintings.

The book includes detailed examinations of numerous paintings.


Utrecht Artists’ Watercolor Paint Box

The Utrecht Watercolor Box is a complete painting kit.

The Utrecht Watercolor Box is a complete painting kit.

This set has everything an artist needs to get started with watercolor painting and it’s made by Utrecht, the Brooklyn, NY company known for high quality, artist-grade paints and mediums. It comes in a beechwood box and includes a 9x12” watercolor block, four brushes, a flat knife, a needed eraser, plastic palette with 24 wells, and 18 tubes of watercolor paint. The box usually retails for around $225.

Utrecht also sells smaller sets of just watercolor paints.


Anker Soundcore Q20 Noise Cancelling Headphones

The Anker Soundcore Q20 Noise Cancelling Headphones.

The Anker Soundcore Q20 Noise Cancelling Headphones.

Over-ear noise cancelling headphones can really help you focus on your work, especially if you work in a shared or noisy environment. There are a lot of options for this type of headphone, but the Anker Soundcore Q20 strike a balance between quality and affordability, especially considering they will probably get covered in paint at some point. These headphones have an impressive 40 hour playing time, and a dynamic sound quality that while not quite audiophile level, really deliver a lot for the $50 price tag.


Liquitex Acrylic Gouache

The Liquitex Acrylic Gouache 12 color essentials kit.

The Liquitex Acrylic Gouache 12 color essentials kit.

Gouache is a type of opaque watercolor paint, and the Liquitex Acrylic Gouache is an interesting twist on this product that is really nice to use. Think of it as a matte acrylic paint that is fluid right out of the bottle and will result in a matte finish that doesn’t show brush strokes or cracks. It’s become a favorite acrylic paint of many. It’s available in small squeeze bottles—to use, just press out what you will need on a tray or palette. The colors are available individually or in a variety of sets. Try the 12 color essentials set for around $55 or the fluorescent set is also fun.


Blick Super Value Bulk Canvas Pack

The Blick Super Value Bulk Canvas Pack has 40 16x20” pre-primed canvases.

The Blick Super Value Bulk Canvas Pack has 40 16x20” pre-primed canvases.

Almost a gag gift for the extreme size, this bulk pack of 40 stretched canvases are great for anyone who paints a lot. These 16x20” canvases are pre-primed with acrylic gesso on 5/8” thick stretcher bars. At around $120, these canvases work out to about $3 each—an incredible value. And a gift like this will provide plenty of surfaces for an artist to get to work.


Winsor & Newton Artisan Water Mixable Oil Paint

Winsor & Newton Artisan Water Mixable Oil Paint.

Winsor & Newton Artisan Water Mixable Oil Paint.

Water mixable oil paint is an interesting innovation made by a variety of manufacturers. It allows you to thin paint with water (although most companies do make some mediums as well) but more importantly, you can clean up this paint with water and soap. This makes it so much easier to keep hands, brushes, palettes, and everything clean, especially if you are painting at home. Winsor & Newtown makes a great line of water mixable oil paint called Artisan, and it’s available individually and in sets. The set of 10 colors in the smaller 0.7 ounce tubes is a great introduction to this line.


Foam Daubers

Foam daubers aka sponges on a stick.

Foam daubers aka sponges on a stick.

These sponges on a stick are a fun craft tool for artists of all ages. Variously known as spouncers, daubers, or stick sponges, these are a great way to add polka dots and round shapes to any surface. Use with acrylic, watercolor, or inks. Available in bulk packs for around $10–20, they are a great tool for any artist.


Create Dangerously: The Power and Responsibility of the Artist by Albert Camus

Create Dangerously by Albert Camus.

Create Dangerously by Albert Camus.

This 1957 speech by the Nobel Prize winner was first published as a standalone text in 2019 in this small, pocket-sized book. A call to arms for artists to participate in society, it’s an interesting read for anyone considering a career in the art or who is interested in what role artists might take in civic discourse. The paperback usually retails for $8.


Canson XL Black Drawing Pad

The Canson XL Black Drawing Sketchbook

The Canson XL Black Drawing Sketchbook

A sketchbook with black paper is a fun way to mix things up in the studio. Pair it with opaque colors from pens or pencils, and you’ve got a whole new way to approach color and design. A studio favorite is the student-grade Canson XL Black Drawing Pad. Each pad features 40 pages with 92lb black paper, with micro-perforations at the side if you want to remove a drawing for framing or other purposes. Available in 7x10” or 9x12”, expect to pay $7 to $10 for these pads. For a great gift, pair this with gel pens or colored pencils.


X-Acto Basic Knife Set and Case

The X-Acto Basic Knife Set with case.

The X-Acto Basic Knife Set with case.

Every artist needs X-Acto knives at some point, and this basic set of 3 knives and 10 replacement blades is a great introduction to the variety of blades from this venerable company. Use this for trimming watercolor paper, collages, or any art and hobby purposes, these will get used all the time. This set typically retails for around $23. Pair it with a cutting mat (see below) for a great gift.


Self-Healing Cutting Mat

Alvin Cutting Mats are one option for self-healing cutting mats.

Alvin Cutting Mats are one option for self-healing cutting mats.

Self-healing cutting mats are a great way to protect both your tables from cuts and it helps your knife blades stay sharp longer. Available from a variety of manufacturers (Alvin, Blick, Cricut, X-Acto etc) the main thing is to pick the size and color that works for your space. Traditionally available in green and black from Alvin, there are now a variety of colors and sizes. For at-home use, an 18x24” mat or 24x36” sizes are usually best, but you can go bigger or smaller. In addition to cutting, these make great surfaces for using liquid or hot glue, or for moving around drawings or paintings that are not yet dry. The larger sizes are also useful for covering tables used for drawing, painting, and crafts.


Arches Watercolor Blocks

Arches watercolor blocks come in a variety of paper thicknesses and finishes.

Arches watercolor blocks come in a variety of paper thicknesses and finishes.

Arches makes some of the best watercolor paper and watercolor blocks are a great way to try out their paper. Sealed on the side with glue, each sheet stays in place and won’t warp, and can then be cut off using a dull knife. Then the next sheet is ready to go. These come in hot and cold press in a variety of thickness. Cold press paper has a bit more texture and the mid-weight 140 lb / 300 gsm paper is a good place to start, such as an 8x10 block of 20 sheets that retails for around $33. Pair this with a high-quality set of watercolors (such as Sennilier, Utrecht, etc) and you’ve got a great gift for a watercolor artist.


Sennelier Watercolor Travel Set
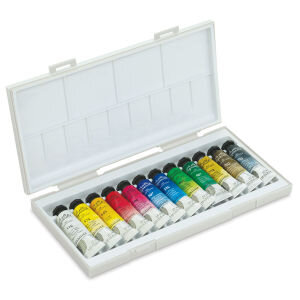
Sennelier La Petite Watercolor Travel Set

Sennelier La Petite Watercolor Travel Set

Sennelier makes some of the best watercolors that are rich in hue, depth, and just enough transparency. They are a pleasure to use and when paired with a watercolor block (see above) make a great gift. This travel set includes 12 tubes of watercolor paint and a small palette for adding water. The tubes hold 10ml or .33 oz of watercolor paint, which can go a long way—especially if they are mixed with water and used wet on wet. It’s a great introduction to the Sennelier line of watercolors, and generally retails for $35-$40.


JBL Bluetooth Speaker

The JBL Flip 4 portable bluetooth speaker.

The JBL Flip 4 portable bluetooth speaker.

It’s always great to have music or podcasts in the studio, and a portable bluetooth speaker makes it easy to play anything from your phone, tablet, or laptop. The JBL Flip 4 is slightly older (meaning it’s available at a discount) but is still a great option that sounds great, is easy to pair with devices, and comes with long-lasting build quality. For something bigger and louder, check out the JBL Charge line of speakers. The JBL Flip 4 is waterproof, available in a variety of colors, and usually retails for around $90.


Studio Designs Fusion Center Drafting Table

Studio Designs Fusion Drafting Table and Stool. (Cabinet is not part of the set).

Studio Designs Fusion Drafting Table and Stool. (Cabinet is not part of the set).

Studio Designs is known for high quality but affordable studio furniture (I’ve been using the Graphix II Workstation for years) and the Fusion Center is a great introductory table and stool for artists who draw, paint, or craft. Featuring a work area that is just under 24 x 35 inches, the table can adjust from flat to a 60 degree angle. There’s also a pencil and brush rack, and a slide-out side table, giving the table an overall potential footprint of 24x48 inches, and the table is adjustable from 26.75 to 35.35 high. It’s a great first desk for the serious hobbyist or art student who is ready for their own dedicated table. It typically retails for around $125.


Daybook: The Journal of an Artist by Anne Truitt

An older edition of Daybook by Anne Truitt.

An older edition of Daybook by Anne Truitt.

This classic journal by the American sculptor has been in print continuously since it was published in the early 1980s. In it, Truitt details her daily observations about artmaking as well as her history as an artist and mother. It’s an enlightening read that ranges from the mundane, to money concerns, to the theoretical underpinnings of her works and how she made them. It’s available new and used, including a recent digital edition that includes Daybook and two more books of Truitt’s journals. For more, check out this excerpt of the book. Daybook is available in paperback for around $15.


Holbein Artist’s Gouache Set

The 12 color set of Holbein Artists’ Gouache.

The 12 color set of Holbein Artists’ Gouache.

Gouache is the opaque version of watercolors and Holbein makes some of the finest gouaches around. These professional grade paints are vibrant, dry to a matte finish, and can be thinned with water if less intensity is desired. The colors are available individually or as sets, ranging from five colors for around $30 to all 84 colors for over $700. A set of 12 or 18 colors makes a great introduction to this line of colors and in the smaller .2 ml tubes, these sets range from $44 to $53.


Pentel Pocket Brush
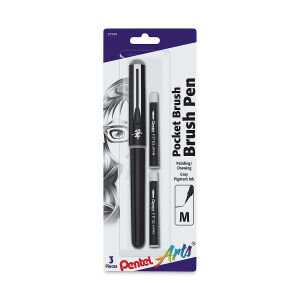
The Pentel Pocket Brush Pen with two refills.

The Pentel Pocket Brush Pen with two refills.

The Pentel Pocket Brush is a portable, easy-to-use, and refillable brush pen that can lay down a super-fine line or a heavier stroke. Perfect for travel and on the go ink sketches, it can also be used in the studio for finished work. It’s good for painting, cartooning, and more, and is available with gray, black, or sepia-colored ink. The brush and two refills typically retails for around $13, and refills are about $3 for a two pack. Pair this with a mixed media sketchbook (such as the Aquabee Super Deluxe Sketchbook) and you’ve got a great gift.


Alice Neel: People Come First

Alice Neel: People Come First is a 2021 monograph published by the Met Museum.

Alice Neel: People Come First is a 2021 monograph published by the Met Museum.

This 2021 monograph focuses on Neel’s history, social activism, and portraits. Published by the Metropolitan Museum of Art in New York and based on the blockbuster exhibition there, the hardcover book includes high-quality reproductions and essays on Neel and her work. A sense of life was in every mark that Neel made and this book is a deep look into a fascinating artist and her body of work.


Sennelier Abstract Kit

The Sennelier Abstract Acrylic Paint Kit with 8 tips.

The Sennelier Abstract Acrylic Paint Kit with 8 tips.

Sennelier Abstract acrylic paints are a new twist on painting. The paint can be squeezed out on a palette like any other paint, or try the various tips directly on these plastic pouches to squeeze paint right out of the bag. It makes the act of painting physical and immediate, and can open up a new way of working for any artist. The set includes 5 paints and 8 tips, and typically retails for around $35.


Blick Studio Black Cotton Canvas

Blick Studio Black Cotton Canvas are pre-primed and stretched and ready to paint.

Blick Studio Black Cotton Canvas are pre-primed and stretched and ready to paint.

Black primed canvases are a completely different way to approach painting, and these pre-primed and stretched cotton canvases from Blick allow you to get right to painting in acrylic or oil. Available in 5 sizes ranging from 8x10 inches to 20x24 inches, these canvases have a traditional 3/4” deep stretcher bar and are suitable for hanging or framing. Pair these with an acrylic or oil painting set for a great gift.


Golden Fluid Acrylics Set
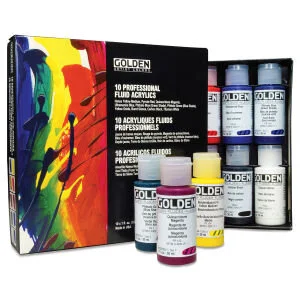
The Golden Fluid Acrylic Set includes 10 paints.

The Golden Fluid Acrylic Set includes 10 paints.

Golden fluid acrylics are high flow, thin paints for artist that spray, brush, stain, or paint. They are highly saturated with pigment and they are almost ink-like in how they lay down and dry. They are a great way to mix things up and can be used with various mediums or thinned even further with water. The set of paints includes 10 colors in 1 oz jars and usually retails for around $42


Blick Super Value Hardbound Sketchbook

The Blick Super Value Hardbound Sketchbook two pack.

The Blick Super Value Hardbound Sketchbook two pack.

Hardbound sketchbooks are great ways to keep all your sketches, thoughts, and notes in one place and this 2 pack is simply an incredible deal. At around $12 for two sketchbooks, it’s the same price you’ll pay for one hardbound sketchbook at other stores. The 65 lb paper measures 8.5x11 inches and is smooth, white, and acid free.


Caran D’Ache Pablo and Supracolor Gift Box
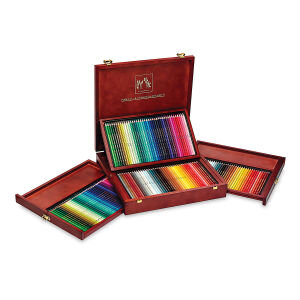
The Caran D’Ache Pablo and Supracolor box set.

The Caran D’Ache Pablo and Supracolor box set.

This handsome wooden box has a full set of Caran D’Ache Pablo colored pencil and Supracolor water-mixable colored pencils. The two lines blend together easily, giving you an unlimited range of possibilities for drawing, shading, blending, and working wet. At $464, it’s quite the statement gift but it includes 180 pencils, for an average cost of $2.58 each.


Other Gift Ideas

Classes: A set of classes at a local studio or art studio can be a great gift.

Magazine Subscriptions: Magazines are great sources of ideas and inspiration.

Tours, Trips, or Conferences: Look for painting-specific travel tours, retreats, or conferences.

What are your favorite gift ideas for artists? Let us know in the comments.

Gift Guides

Check out these posts:

Gift Guide for Potters

Gift Guide for Young Artists and Creative Kids


"If you can walk, you can dance" Louise Nevelson on making art

Louise Nevelson: Light and Shadow by Laurie Wilson

Louise Nevelson: Light and Shadow by Laurie Wilson

Louise Nevelson: Light and Shadow is a 2016 biography of the artist by Laurie Wilson. It’s a comprehensive, detailed overview of Nevelson’s life and approaches to art and is a great read.

From a young age, Nevelson was always making art but a combination of factors kept her on the margins of the art world until her late 50s, when she began to show in New York City and then, around the world. In her 60s and 70s, Nevelson became one of the most prominent sculptors in the world, working with installations, public art, and making numerous museum and solo gallery shows with her sculptural works.

It’s an inspiring story, and one that probably rings true to most artists in both the joy of art making but also the struggles to forge an artistic life and create your own path.

Below are a few excerpts from the book, with words by Wilson and quotes from Nevelson. The book is available in hardcover or digital editions.

Nevelson on making art:

“I’d rather work twenty-four hours a day in my studio … than do anything I know. Because this is living. It’s like pure water…. The essence of living is in doing, and in doing, I have made my world, and it’s a much better world than I ever saw outside.”

Sculpture is like a person…

One of Nevelson’s observations about this work could describe her aim as an artist: “I tell people who ask, that I don’t use wood; I don’t use black; I don’t make sculpture. If the sum of this wall doesn’t transcend wood and black and making something, then I’ve failed. Sculpture is like a person, who adds up to a lot more than a few cents worth of chemicals. I’m trying to communicate. Not to make something.” For Nevelson, this went beyond a statement about art; she was trying to articulate what she knew about the human condition: We are all alike and we are all different. And she saw her mission as expressing these contradictory truths, not in so many words, but through the formal decisions she made in her art.


On terra cotta clay, and approaches to different mediums.

Nevelson claimed that she worked on stone only when she was “a little exhausted creatively.” When she felt in full power, she preferred terra-cotta because “it gives flight and does not retard or restrict … the quick response of the clay to each idea; it permits a simplicity of approach.

…

It seems Nevelson was repeatedly driven to create new formats and new versions, when she approached a familiar medium, as though the tried-and-true was never quite so satisfying as what had yet to be attempted or seen.

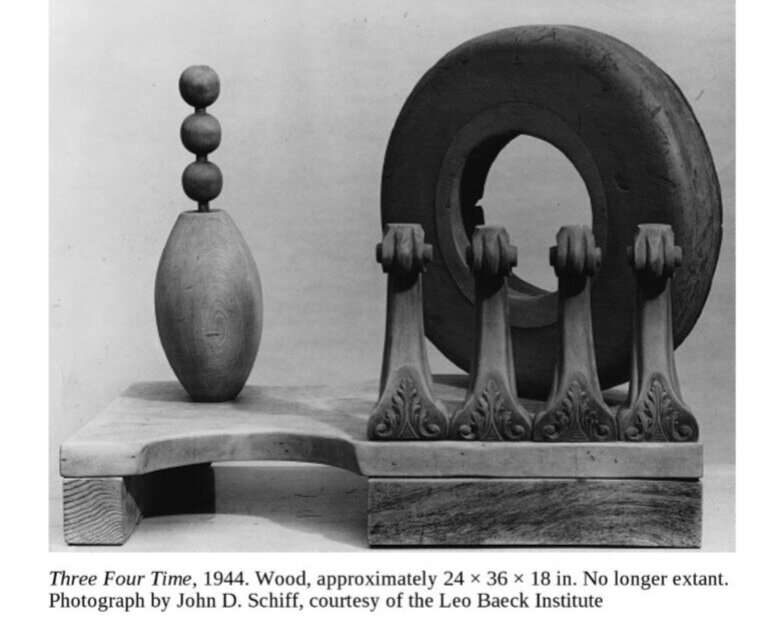
From the book: a 1944 experiment with found wood and a tire.

From the book: a 1944 experiment with found wood and a tire.

On sexism in the arts:
When asked if men treated her as an equal, Nevelson was quick to answer. “Originally, no—at 70 years, yes.”

“When I first started, nobody took me seriously. In the galleries—a woman! I’d look in the mirror and see the gestures they made behind my back. Meshugganah! A woman wanting to be a sculptor. A man sculptor said to me, ‘Louise, you don’t want to be a sculptor. To be a sculptor, you’ve got to have balls.’ ‘I’ve got balls,’ I said. But it hurt inside.”

Ferocious Bull, 1942. Another sculptural experiment that was lost.

Ferocious Bull, 1942. Another sculptural experiment that was lost.

If you can walk…

Jean Lipman, who had written Nevelson’s World a few years earlier, recalled a moment when Charles Kuralt asked Nevelson toward the end of the TV interview how, at age eighty, she could possibly maintain the energy and quality of the work that had made her famous. Nevelson paused for a full minute and said: “Look, Dear, if you can walk, you can dance.”


Louise Nevelson: Light and Shadow

512 pages, 2016, by Laurie Wilson.


The "Arena of My Own Spirit." Anne Truitt on Finding Certainty in Her Work

Daybook by Anne Truitt, the 1984 Penguin paperback edition.

Daybook by Anne Truitt, the 1984 Penguin paperback edition.

This text is from Anne Truitt’s journal Daybook. First published in 1982, it’s been in print since and is a wonderful book that should be on every artist’s bookshelf. Truitt was known for her minimalist sculptures and paintings. She also published three journals, including Daybook, Turn, and Prospect, that chronicled her approaches to art making, parenthood, memories, and thoughts on life as an artist.

This journal entry is from 1975, but is reflecting on 1961, about a year after the birth of Truitt’s son. In this passage, she describes how she started making the work that became her signature style.

From Daybook, by Anne Truitt:

27 March, 1975

It was in this familiar context that, one year after Sam’s birth, my work suddenly erupted into certainty. I was taken by surprise and to this day do not know why it happened.

When Sam was a few months old, fairly launched, I rented a room at 1506 30th Street, across from our house. On the third floor, looking west from a sort of turret that jutted out into the air, it was rather pokey but exceedingly convenient as I could run back and forth easily. I picked up my work where I had left off in San Francisco and continued to make loose drawings with black and brown ink. These were done very fast, on sheets of newsprint paper into which the ink was absorbed in such a way as to make them look more expressionistic than they were in my mind. I was on the track of square and rectangular shapes, articulated back into the depth of the ink, echoing the structures I had seen on archeological sites in Mexico, most particularly those of Mayan temples. I began making these obsessively repetitive shapes in the summer of 1958 after Mary’s birth, not only in drawings but also in three dimensions. I used very dark brown clay, heavily grogged, and built up the sculptures from the inside out, using the classical method taught me by Alexander Giampietro. I still sometimes miss the marvelous feeling of rolling the clay between my fingers and thumb and then pushing the warm, full shape against its fellows to swell the unity of a structure growing slowly under my hand. This satisfaction with the certainty of a familiar and compatible process was one of the pleasures I had to forego when my work changed direction and forced me to go against the grain of my own taste and training.

On a visit to my studio early in 1961, Kenneth Noland pointed out to me the possibility of enlarging the scale of these sculptures. I remember my reluctance to absorb this idea, partly because I was afraid and partly because of my pleasure in using clay in a way that gave me such satisfaction. I think, however, that his suggestion opened up my thinking and combined with my obsessive concern with the weights of squares and rectangles to pave the way for the change that took place some months later.

The change itself was set off by a weekend trip to New York with my friend, Mary Pinchot Meyer, in November 1961, almost one year to the day after Sam’s birth. We went up on Saturday and spent the afternoon looking at art. This was my first concentrated exposure since 1957, when I had moved to San Francico, and I was astonished to note the freedom with which materials of various sorts were being used. More specifically, how they were being put to use. That is, I noticed that the materials were used without particular attention to their intrinsic bent, as if what I had always thought of as their natural characteristics was being disregarded. For the first time, I grasped the fact that art could spring from concept, and medium could be in its service. I had always rooted myself in process, the thrust of my endeavor being to seek patiently and unremittingly how an idea would emerge from a material. My insight into the art I saw that afternoon reversed this emphasis, throwing the balance of meaning from material to idea. And this reversal released me from the limitations of material into the exhilarating arena of my own spirit.

At the Guggenheim Museum, I saw my first Ad Reinhardt. I was baffled by what looked to be an all-black painting and enchanted when Mary pointed out the delicate changes in hue. I remember feeling a wave of gratitude—to her for showing me such an incredibly beautiful fact and to the painter for having made it to be seen. Farther along the museum’s ramp, a painting constructed with wooden sticks and planes also caught my attention, setting off a kind of home feeling; I do not remember the artist’s name but liked his using plain old wood such as I had seen all my life in carpentry. And when we rounded into the lowest semicircular gallery, I saw my first Barnett Newman, a universe of blue paint by which I was immediately ravished. My whole self was lifted into it. “Enough” was my radiant feeling—for once in my life enough space, enough color. It seemed to me that I had never before been free. Even running in a field had not given me the same airy beatitude. I would not have believed it possible had I not seen it with my own eyes. Such openness wiped out with one swoop all of my puny ideas. I staggered out into the street, intoxicated with freedom, lifted into a realm I had not dreamed could be caught into existence. I was completely taken by surprise, the more so as I had only earlier that day been thinking how I felt like a plowed field, my children all born, my life laid out; I saw myself stretched like brown earth in furrows, open to the sky, well planted, my life as a human being complete. My yearning for a family, my husband and my children, had been satisfied. I had looked for no more in the human sense and felt content.

I went home early to Mary’s mother’s apartment, where we were staying, thinking I would sleep and absorb in self-forgetfulness the fullness of the day. Instead, I stayed up almost the whole night, sitting wakeful in the middle of my bed like a frog on a lily pad. Even three baths spaced through the night failed to still my mind, and at some time during these long hours I decided, hugging myself with determined delight, to make exactly what I wanted to make. The tip of balance from the physical to the conceptual in art had set me to thinking about my life in a whole new way. What did I know, I asked myself. What did I love? What was it that meant the very most to me inside my very own self? The fields and trees and fences and boards and lattices of my childhood rushed across my inner eye as if borne by a great, strong wind. I saw them all, detail and panorama, and my feeling for them welled up to sweep me into the knowledge that I could make them. I knew that that was exactly what I was going to do and how I was going to do it.

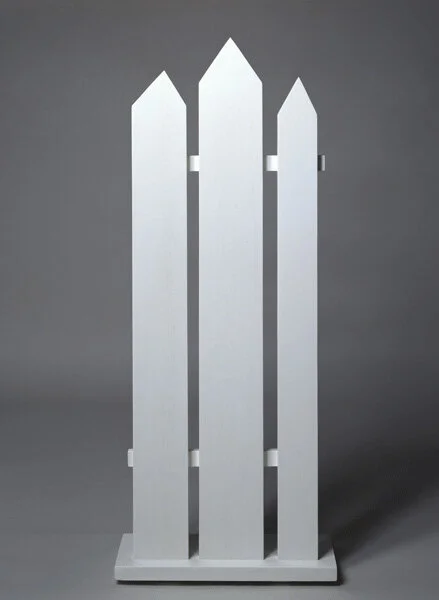
Anne Truitt, First, 1961. Acrylic on wood, 44 1/4 x 17 3/4 x 7 inches. Image via annetruitt.org.

Anne Truitt, First, 1961. Acrylic on wood, 44 1/4 x 17 3/4 x 7 inches. Image via annetruitt.org.

Mary Meyer and I returned to Washington the next day, and early Monday morning I bought some white shelf paper and went to my studio. There I drew to full size three 54” irregularly pointed boards, backed by two rectangular boards, placed on a flat rectangular board. I went straight down 30th Street to a lumber store and ordered the boards cut to the size of my drawing; I bought clamps and glue and some white house paint. When the boards were ready, I glued them together, painted them, and there was my sculpture: First.

I returned immediately to the lumber store with two more drawings. While I was explaining to the man what I wanted and what I intended to do, he said mildly, “You can have them put together across the street if you want to, in our mill.” “Oh, can I?” I said. “Thank you.” And I seized my daughter Mary in her dark blue snowsuit from the counter where she had been perched to watch what was going on. I had to rush off for a carpool and hadn’t time to go to the mill right then, but I remember stopping outside the store and going down on my knees in the snow to hug Mary and tell here that I could make whatever I wanted to now, overcome by the possibilities that surged into my mind. I had seen that size would be a problem and had had no idea how I was going to make what I saw in my mind in that little studio with my meager equipment, time, and strength.

When I got back to the mill, I went in to see the manager. He placidly looked at my roll of drawings and allowed as how he could make them up for me. But, he suggested, I could make scale drawings and that would be easier for us both. So off I went and bought a scale ruler. A young architectural student was buying something at the same time and showed me how to use it. So I set up a system: scale drawings and mill fabrication. I also telephoned the financial advisor who had charge of the money I had inherited and asked him to transfer five thousand dollars into a new, special checking account. I used this account exclusively for my work from then on, replenishing the funds from my capital without giving it too much thought.

Anne Truitt, 1978.

Anne Truitt, 1978.

In 1962, I made thirty seven sculptures, ranging in size from that of the first fence up to around ten feet tall. Most of these I made in Kenneth Noland’s studio in Twining Court, which he generously allowed me to rent for ten dollars a month after his departure for New York. It was a ramshackle old carriage house with a huge hayloft equipped with a large hay door and hooked lift, which I used to hoist the larger sculpture in and out. There were also four other rooms, two crammed with rusted bedsprings; I had these carted off, and then whitewashed one of the rooms so I had a place for finished work. No heat, no water, rats—I used to stamp my feet when I came in—and the place was dismally damp. No matter.

— Excerpt from Daybook by Anne Truitt, 1984 paperback edition, pages 148–153.


Gift Guide for Young Artists and Creative Kids

Art supplies make a wonderful gift for kids and this guide will cover a wide variety of quality tools and kits for kids of all ages.

As an artist and a parent, my philosophy is to provide quality supplies such as colored pencils and paper and let kids follow their own ideas. But it can also be fun to work with a kit or set, so I have included a few favorites here too. And sometimes a special tool or supply is just the thing to unlock a whole world for a kid, and for adults too.

This post has a variety of ideas for kids of all ages, including art supplies, kits, books, and supplies.

Note: This site uses affiliate links for sites such as Amazon and Blick. If you click the links and complete a purchase, we may receive a percentage at no extra cost to you.


Faber-Castell Young Artist’s Essentials Gift Set

3 Faber Castell Young Artist Essentials copy.jpg

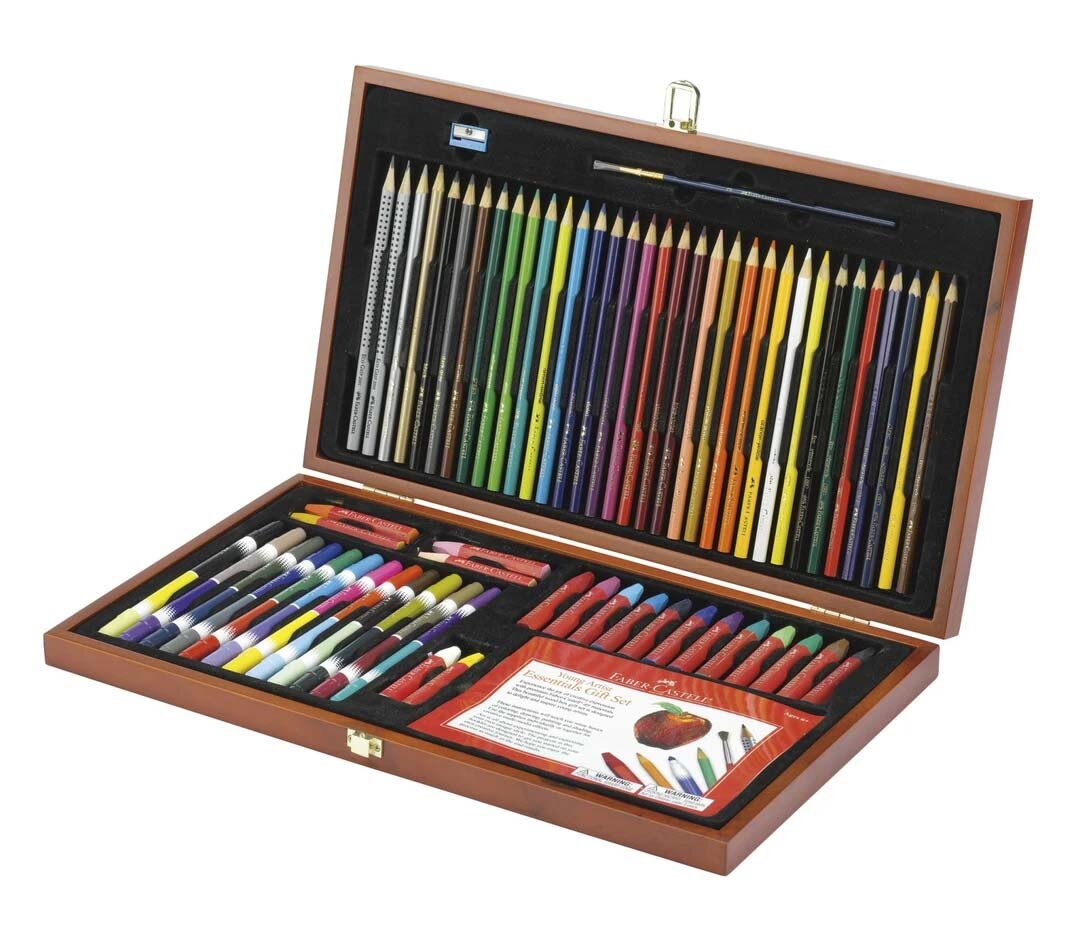
This kit, from the venerable German art supply manufacturer, includes 64 pieces in a handsome wooden box. The kit includes colored pencils, watercolor pencils, graphite pencils, oil pastels, markers, small sheets of watercolor paper, and a sharpener. Pair this with a drawing pad and your kid is set for hours and hours of drawing and painting. Kids love having these sets and it also helps organize their materials. This kit is listed at $50 but I’ve seen it on sale for half that.


Strathmore Vision Sketchbook

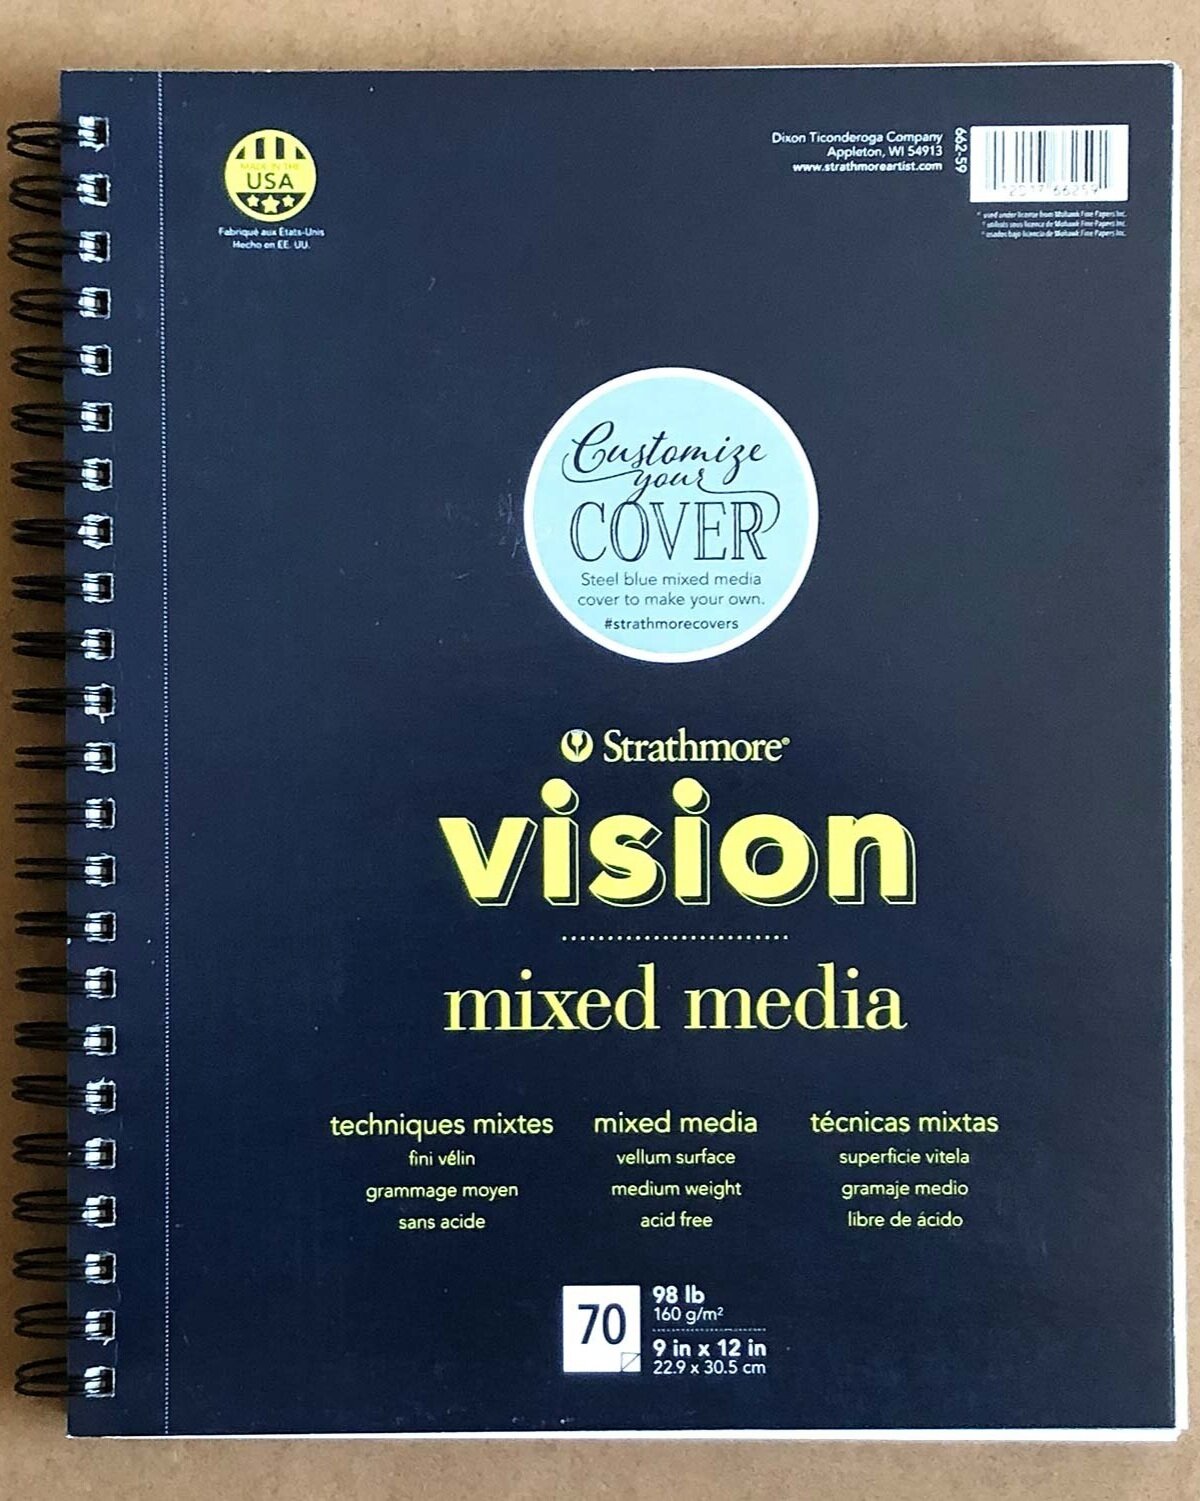
Strathmore Vision Mixed Media sketchbook is great for anyone.

Strathmore Vision Mixed Media sketchbook is great for anyone.

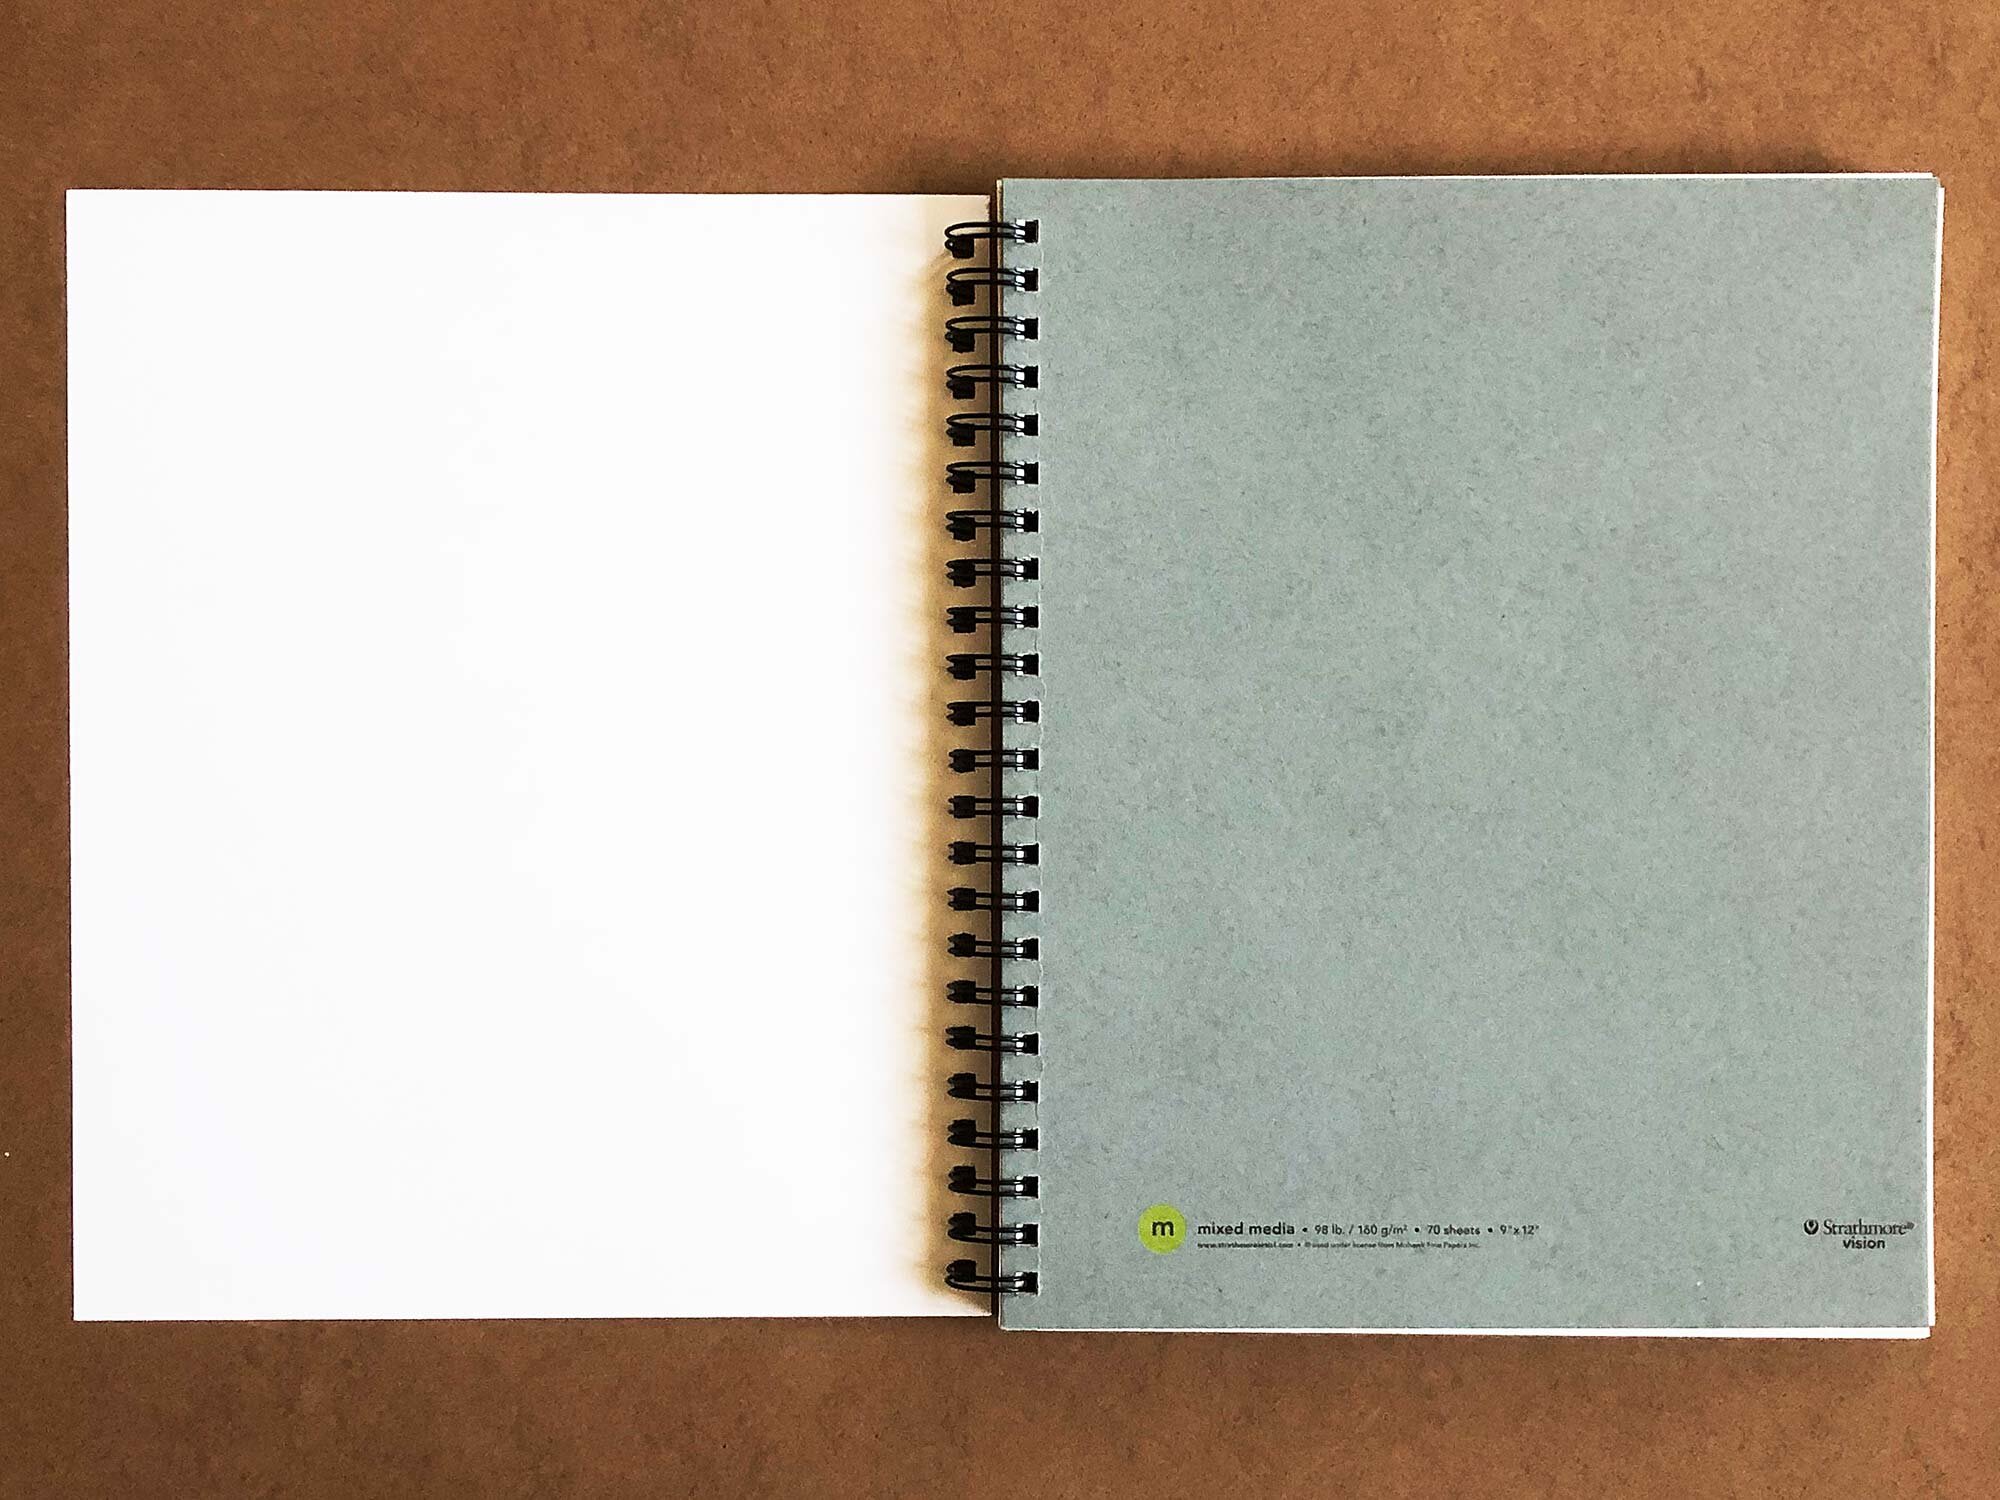
The Strathmore Vision Mixed Media sketchbook has great paper and a second, customizable cover in slate blue cardstock. Simply rip off the first cover and start drawing and painting! And the thicker, 98lb mixed media paper works well with pencils, crayons, markers, and can even be used with ink and light washes of watercolor. Any mixed media pad is better than a drawing sketchbook because of the thicker paper (check out our mixed media sketchbook review here) but this pad is a great option for kids, teenagers, and students. It usually costs around $10 for a 9x12'“ pad.

The customizable, blank cover is a great feature of the Strathmore Vision mixed media pad.

The customizable, blank cover is a great feature of the Strathmore Vision mixed media pad.


Prismacolor Premier Colored Pencils

The Prismacolor Premier 24 count pack in a metal tin with two plastic trays of pencils.

The Prismacolor Premier 24 count pack in a metal tin with two plastic trays of pencils.

Prismacolor Premiers are some of the best and most affordable artist-grade colored pencils on the market. They are great for adults but kids will also appreciate the soft cores and vibrant colors. And they are quite affordable too. They do cost more than Crayola or other school brands, but those pencils are have hard cores and inferior pigment. Go with the bold colors of Prismacolor Premiers, or click here to see our full review of colored pencils.

Prismacolor Premier Colored Pencils are available individually or in sets ranging from 12 to 150 colors. A 24-count tin typically costs around $25.


Magic Clay Kit

Magic Clay.jpg

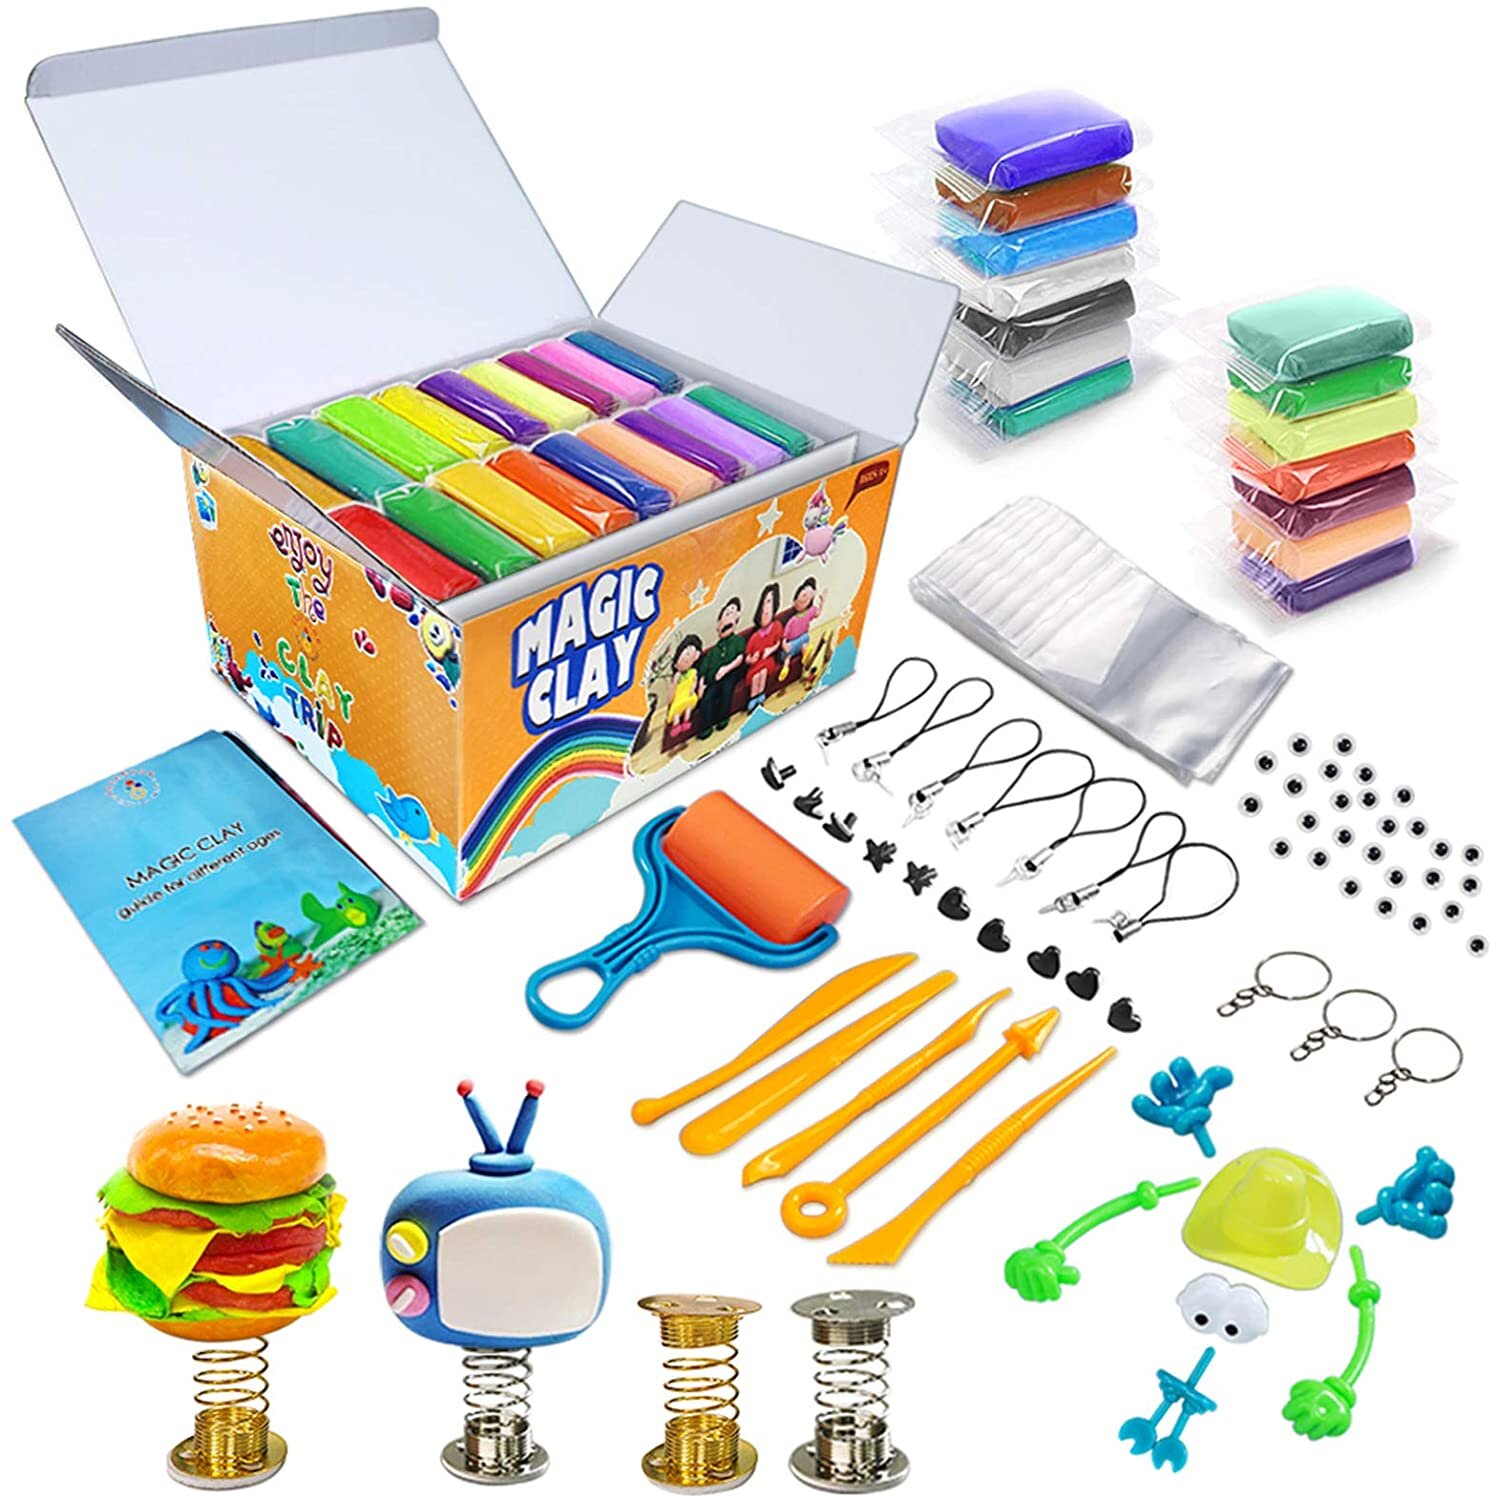
This set of air-dry clay comes with 36 colors, 47 accessories including a few tools, and will generate hours of fun crafting and creating. The clay dries in about 24 hours and has mess-free clean up. There’s also a larger kit with 50 colors of clay. Recommended for ages 6 and up.


Spirograph.jpg

The Original Spirograph

No childhood is complete without this classic geometric drawing tool, first released in 1965. It’s equally fun for adults and allows you to explore patterns, math, and hand control. Create endless designs and try it with pens, pencils, and any sort of drawing media. The sets do come with fine point pens as well.

There are a variety of sets including a Spirograph Jr., scratch art, or a small travel version, but the Original Deluxe for around $24 is a great option.


Arnold Grummer Zig-Zag Books

Arnold Grummer Zig Zag Book.jpeg

These prefolded, acid-free, accordion-style zig zag booklets give kids a fun way to make their own books, stories, or extended drawing panels. Available in three different sizes, the packs come with 12 booklets. Pair these packs with colored pencils or markers for a gift that will provide hours of fun and creativity. The packs come with chipboard covers and insert pages too.

The Arnold Grummer Zig Zag book packs typically range from $16 to $23.


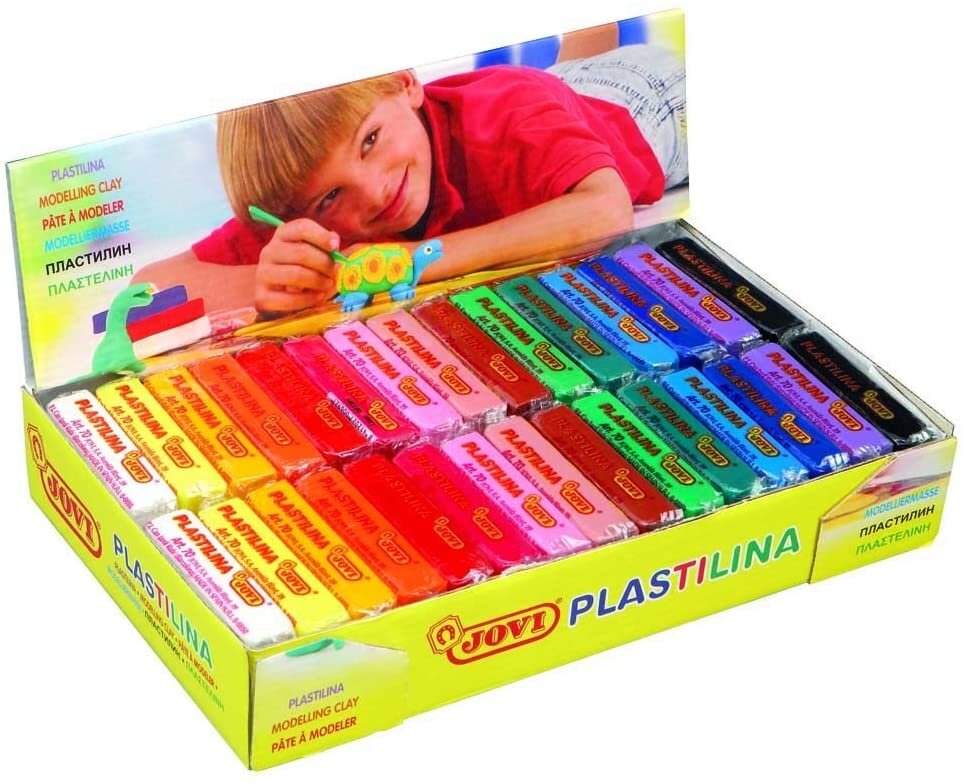
Jovi Plastilina

Jovi Plastilina 2.jpg

For sculptors of all ages, Jovi Plastilina is a non-hardening modeling clay that holds fine detail and can be reused over and over. It’s great for model making, small sculptures, or can be used to make stop-motion animation.

The colors will blend, if desired, or you can work to keep them separate. The clay is gluten free, is non-staining, and cleans up easily. The recommended pack costs around $29 and comes with 30 bars, 2 each of 15 colors, but there are a variety of pack sizes available that range in price from $9 to $75. This is a great, basic art supply that provides amazing, open-ended sculpting possibilities.


Dough Builders

colorations dough builders.jpg

These plastic body parts—essential generic Potato Head parts—pair well with Plastilina, Play-Do, or any sort of modeling dough. Make fun creatures, characters, monsters and animals.

Amazon sells a huge 260-piece tub for around $30, while Blick has a more modest sized set for around $6.50 with 25 assorted parts. The large tub has 26 styles of pieces with 10 of each, so a smaller set might be enough for most kids but the big tub is great for parties, classrooms, or larger gatherings.


Alphacolor Biggies Tempera Cakes

AlphacolorBiggies.jpg

These semi-moist cakes of non-toxic tempera paint respond immediately to a wet brush. These cakes will never spoil or dry out, making them a long-lasting addition to your craft drawer without dealing with a bunch of bottles of paint. These opaque colors will blend, and stay vibrant and velvety smooth when dry. Pair these with a pad of mixed media or watercolor paper, and your kid will have unlimited possibilities.

These are available as an 8 pack in a plastic tray, or as 12 individual cakes. There are some complaints about the tray (it can get messy) but consider putting the paints inside separate deli containers or styrofoam trays, or any sort of system that makes sense to you. For $20 for the 8 pack, they’re an awesome set of paints for young artists.


ArtBin Sketch Board and Storage Bin

ArtBin Sketchboard 1.jpg
ArtBin Sketchboard 2.jpg

The ArtBin Sketch Board is great for drawing or watercolor on the go, or to simply organize art supplies at home. ArtBin makes simple, functional storage bins and this takes their basic bin to the next level with pencil storage, pocket, and a clip inside and on the top to hold a pad or paper in place. Note that the plastic molding is not perfectly flat, so plan to use this with cardboard behind your paper such as a sketchpad or watercolor block.

The ArtBin Sketch Board typically retails for between $26 and $30. It measures 11.5” x 16” x 1.5” deep, and will easily hold a 9x12” sketchpad.


Canson XL Black Drawing Pad

Canson XL Black Paper.jpeg

Black paper really makes colors pop and pairs well with colored pencils, pastels, and gel pens. It’s a fun a way to switch things up and the Canson XL Black Drawing Pads have great quality at an affordable price. Available in two sizes: 10x7” and 9x12”, they typically retail for $7 to $10.


Sakura Gelly Roll Pens

Sakura Gelly Roll Pens.jpeg

Gel pens look great on all sorts of media, including black paper or on top of other paints, and the Sakura Gelly Roll Pens are some of the best out there. These may not be best for younger kids, but older elementary school children and older should be able to use these without too much mess—just let the ink dry before touching. Available in a variety of sets, try the Classic set of 10 pens for a young artist for around $12 to $14. There are other sets available, including metallic pens or the complete line of 74 Gelly Roll pens retails for around $85.


Arnold Grummer Dip Handmade Paper Kit

products-53_mediumdiphandmold_1-scaled.jpeg

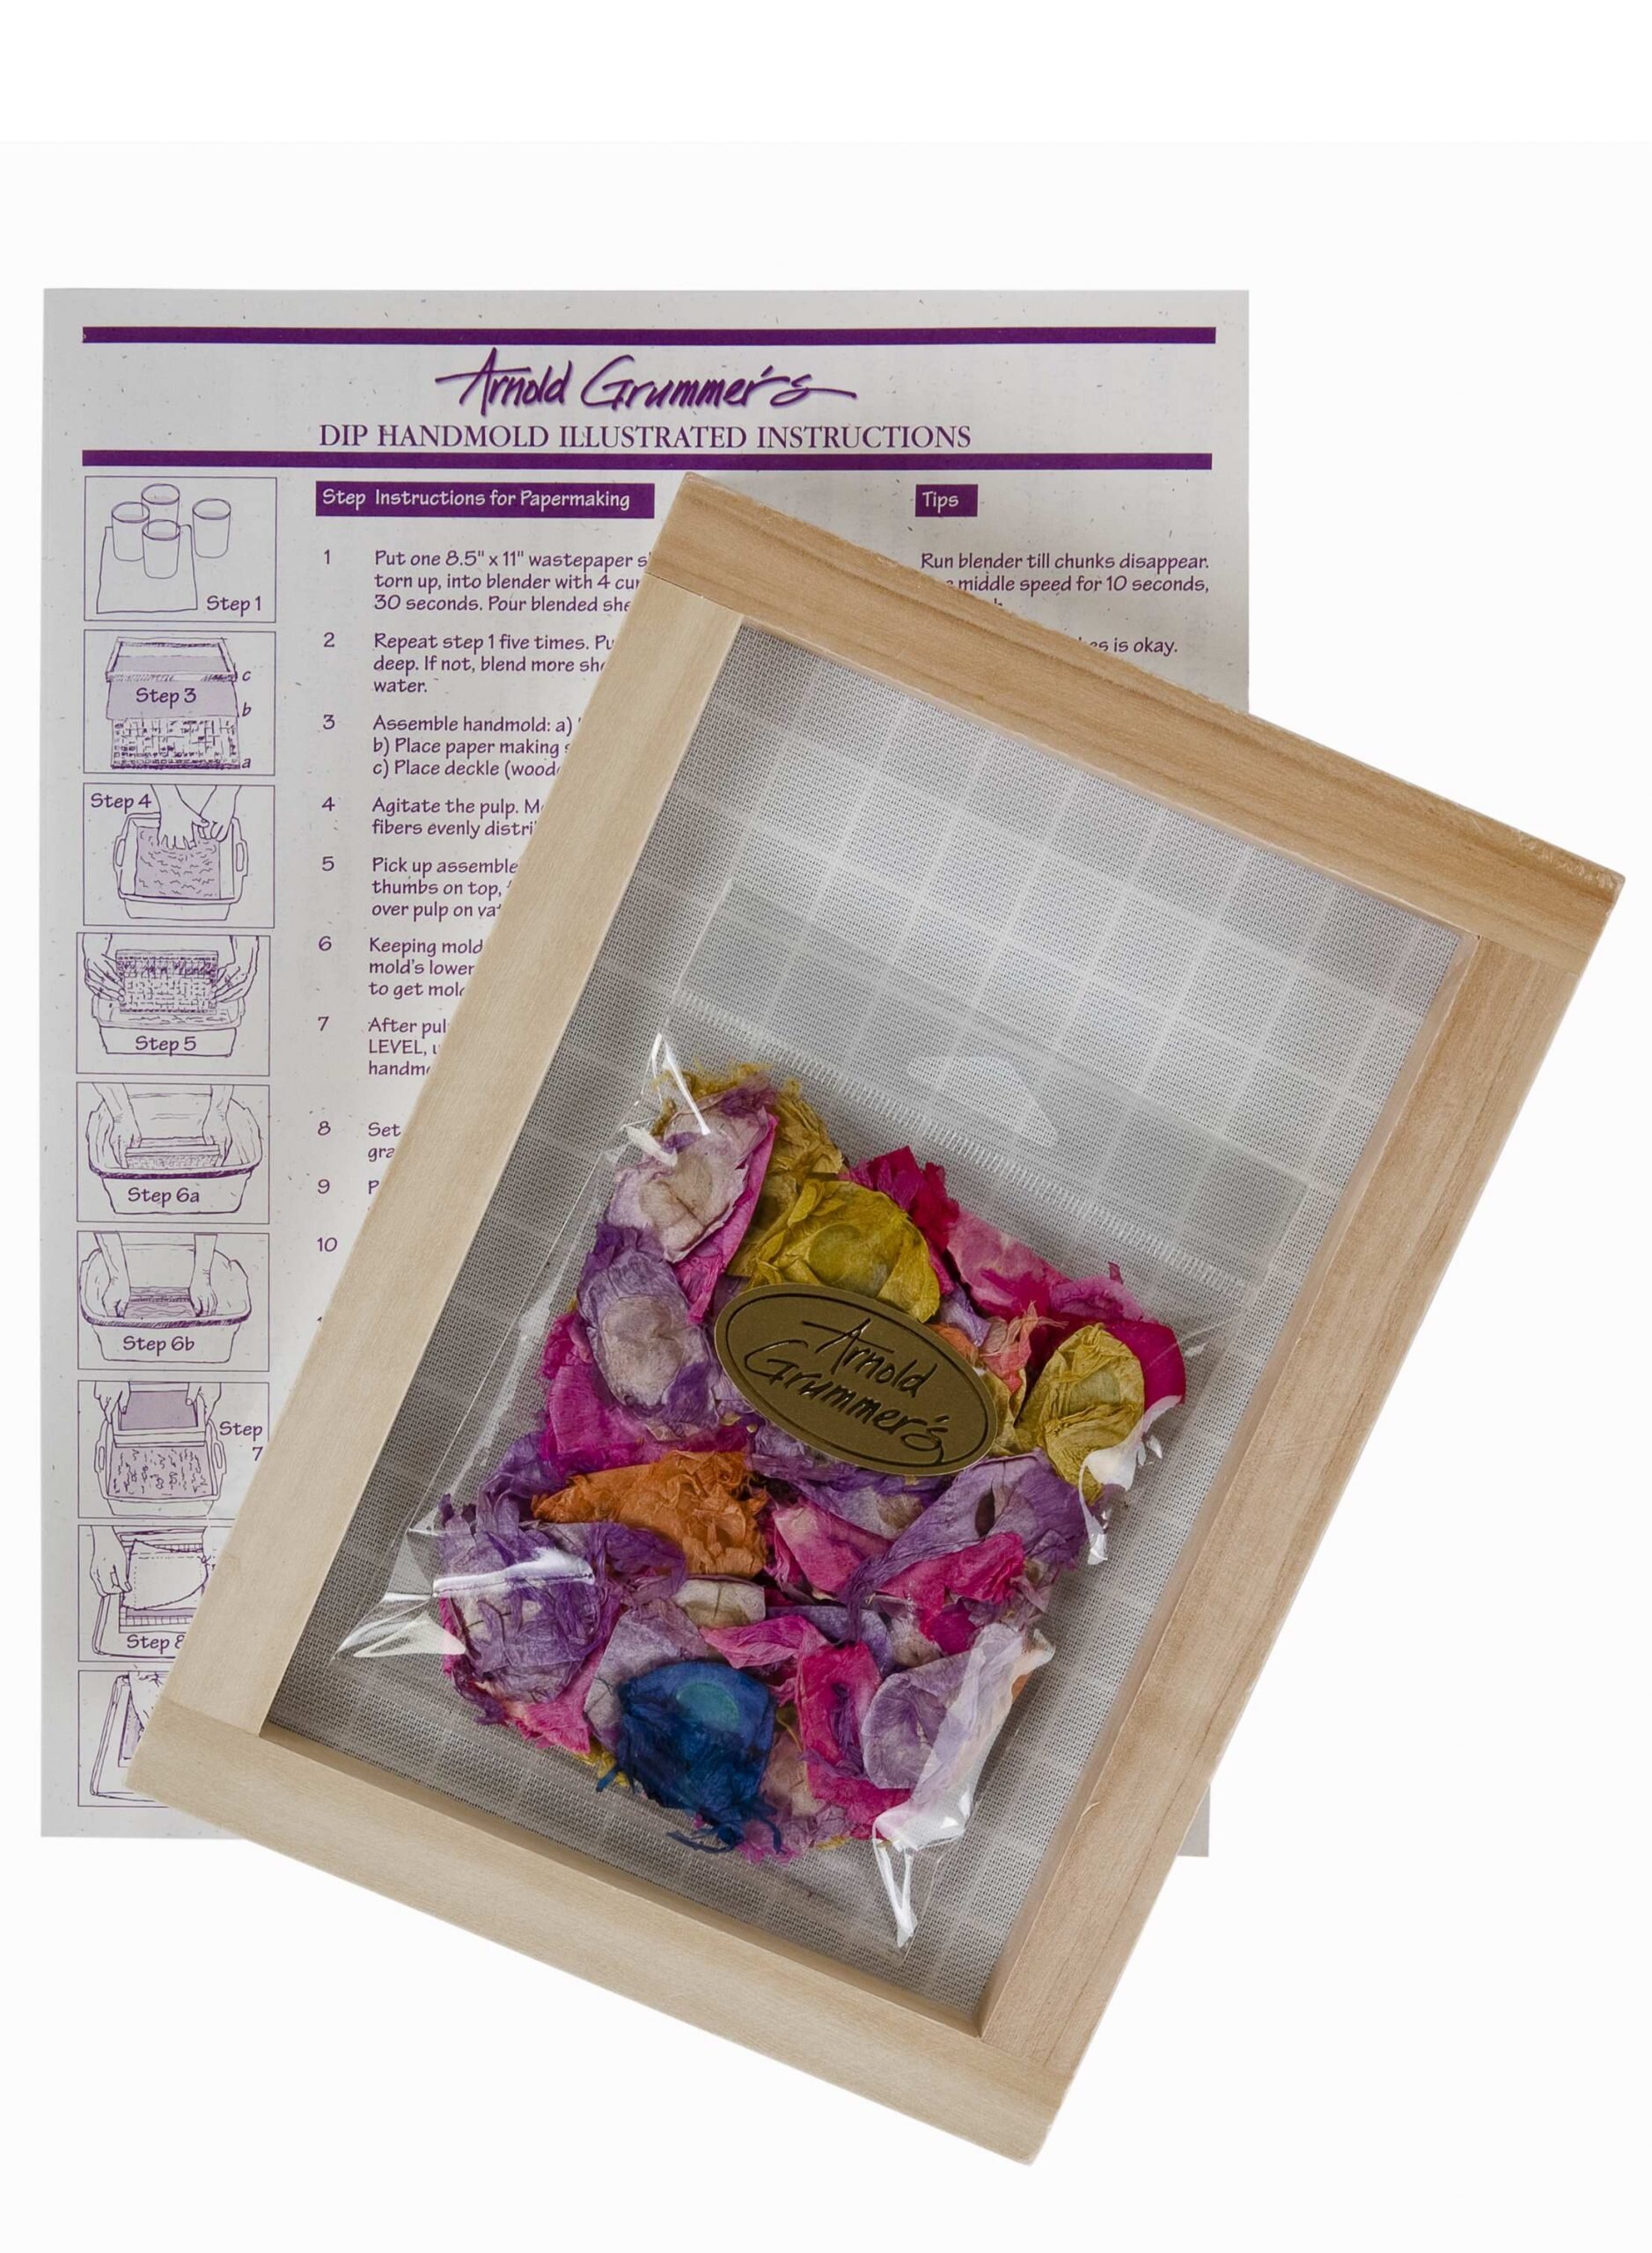
Turn your scrap and waste paper into beautiful homemade paper with this 8 1/2” x 11” paper making screen. It’s super fun to explore this process, and you can use the results to make more projects! In addition to this screen, you’ll need a tub that can fit the screen (such as a plastic dish tub or deep cake pan), blender, and recycled paper or buy speciality paper fiber. The kit does come with some dried botanical pieces to get you started.

The 8 1/2 x 11” screen is a great size to start, but there’s a smaller screen available, as well as a deluxe kit that comes with a variety of templates. Kids will love making paper but you might find yourself experimenting with your own paper.


Jumbo Crayons and Pencils

Small hands will love extra big pencils and crayons, but even as an adult, these are some of my favorites. Here’s a few different quality options for jumbo-sized art supplies:

Stabilo Woody.jpg

Stabilo Woody

The Stabilo Woody is a “3 in 1” pencil that combines the features of a colored pencil, watercolor pencil, and a wax crayon. It can even be wiped off flat surfaces such as glass windows or tiles. It has an extra thick, 10mm thick core. Available in sets ranging from 6 to 18 pencils.

 
Faber-Castell Jumbo Pencils.jpeg

Faber-Castell 9000 Series Jumbo Pencils

The Faber-Castell 9000 Series pencils have been in production since 1905 and they are an artist-grade classic. But hands old and young will appreciate the Jumbo version (these are my favorite sketching pencils too) that comes in a set of 5 with hardnesses ranging from HB to 8B. Be sure to get a large pencil sharpener that will accommodate these pencils, such as a Faber-Castell sharpener.


Jumbo Colored Pencils from Cretacolor, Jolly or Faber-Castell

There are a variety of jumbo colored pencils that are well made and will provide extra-thick, durable cores for hours of vibrant drawing. Some adults love these big pencils for coloring book work too!

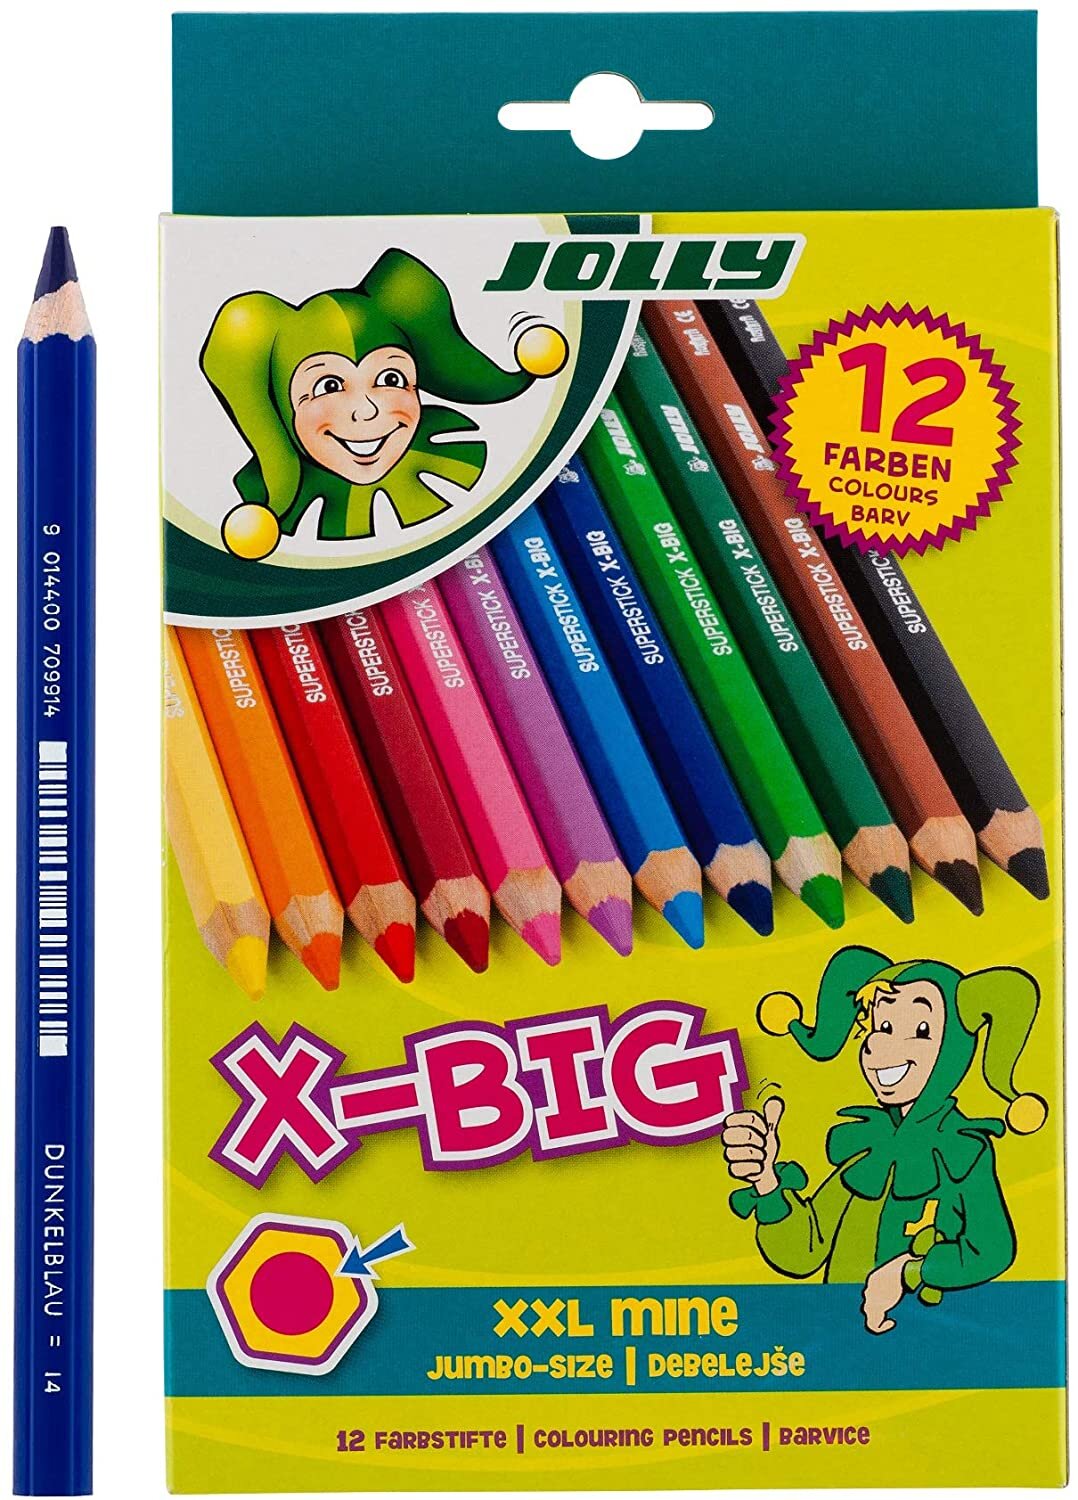
For colored pencils, check out Cretacolor Megas or the Jolly X-Big options.

Jolly X Big Colored Pencils.jpg
Cretacolor Mega.jpg
 
F-C Magnus Watercolor Pencils.jpeg

Faber-Castell Albrecht Dürer Magnus

For oversized watercolor pencils, check out the Faber-Castell Albrecht Dürer Magnus pencils. These are professional, artist-grade pencils with 5.3mm cores that will be appreciated by any artist including kids. Use dry as a colored pencil, or blend with water and brush to activate the line. Available individually or in sets of 12, 18, or 24.


The Arts: A Visual Encyclopedia

DK Arts Encyclopedia.jpg

Recommended for ages 8 and up, this visual encyclopedia from DK covers the history of art including painting, sculpture, and photography. The 9x11” book has 304 pages that are full of images and info on art history classics. Available in paperback or hardcover, it’s a great deal at $18 to $22.


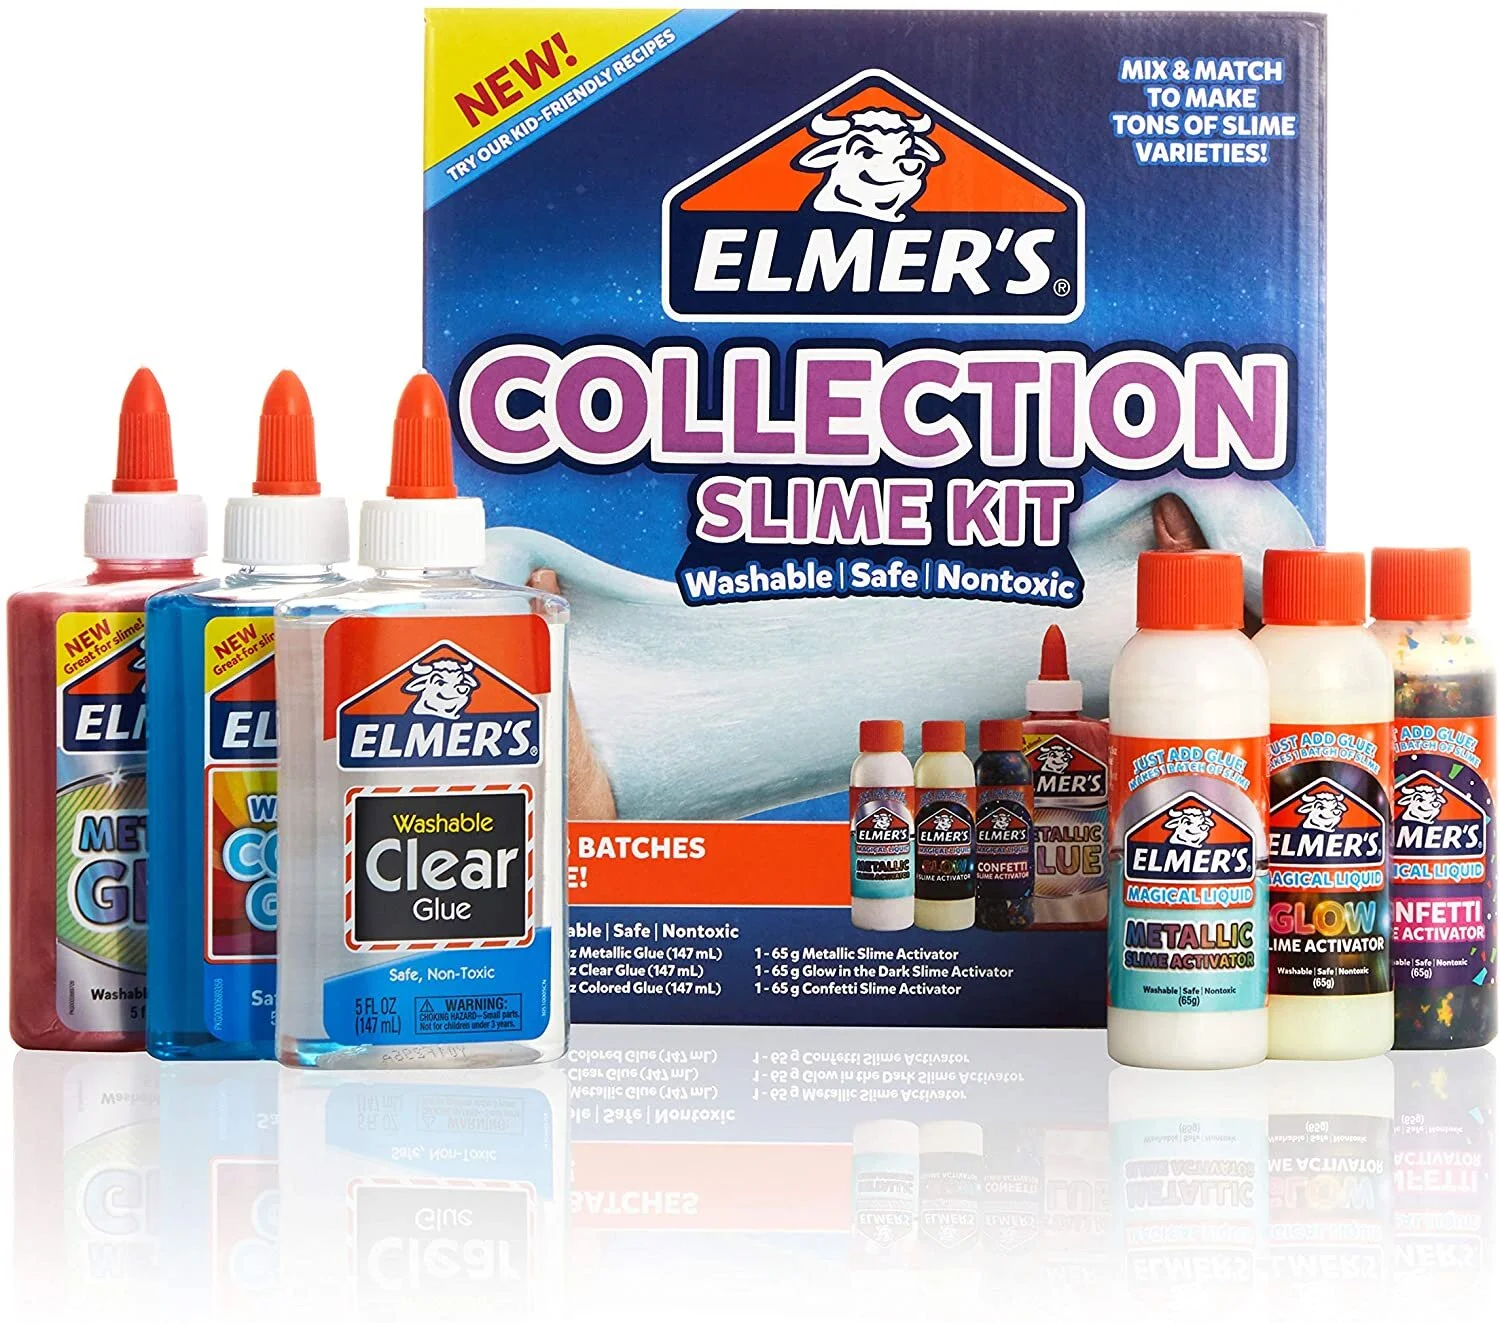
Elmer’s Slime Kits

Elmers Slime Kit.jpg

Make your own slime at home! These are so fun for kids and get their hands moving and imagination going. Just be prepared for some cleanup, but the good news, is it’s all washable.

Add metallic glitter, confetti, and other fun effects to customize your slime.


Make Ink: A Forager’s Guide to Natural Inkmaking by Jason Logan

Make Ink.jpg

Use this book as a guide to turn things you find inside or outside into ink. Beautifully illustrated and full of info and recipes, this book will show you and your kid how to make ink from flowers, plants, acorns, bark, copper, turmeric and more. Middle school and up will be fine with this book but elementary-age kids will need parent help.

The book is available in hardcover for around $26.


Marbling Kits and Supplies

The Boku-Undo marbling dye kit is sold at Blick and Amazon, and Amazon also carries an option (linked below) with brushes.

The Boku-Undo marbling dye kit is sold at Blick and Amazon, and Amazon also carries an option (linked below) with brushes.

Making marbled paper is fun for kids, teens, and adults. There are a variety of kits and supplies, some require mixing a thickener with water and waiting for everything to mix overnight. But the inks from Boku-Undo float on plain water and can be used right away. You will need some sort of tray or tub, inks, brushes, and paper such as watercolor paper. You will only be limited by the size of your tub and paper, and your imagination.


Alginate / Plaster Casting Kit

Luna Bean Casting Kit.jpg

The Luna Bean Hand Casting Kit is a foolproof way to make a mold in a bucket using skin-safe alginate, and then cast the mold with the provided gypsum plaster cement. But you don’t have to just make hands. Make a mold of a toy, a Playdoh sculpture, heck—make a mold of anything! Teenagers will be able to use this on their own (make sure they wear a dust mask) and you can work with younger children to introduce them to the casting process. It’s really fun, and if you’ve never made a mold, the resulting detail will astonish you. This $40 kit includes a bucket, alginate, and plaster. There are also larger and smaller kits.

If you are looking for your own skin-safe casting material without the bucket, try Smooth-On Alja Safe


Blick Studio Table Easel by Jullian

Blick Tabletop Easel.jpeg

This table top easel is stable, well made, and will hold canvases up to 24” tall. It also folds flat so it can be put away when not in use. It folds to 10 1/2” x 18” x 2” deep, making it small enough to take on the go too. For $18, this is a great option that will be equally useful to adults as kids. Inspire the painter in an artist of any age with this table top easel.


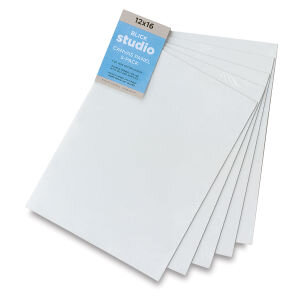
Blick Studio Canvas Panels

Canvas Panels.jpeg

Canvas panels are an economical way to introduce beginners to painting on canvas. Each panel is approximately 1/8” thick and features double-primed, 5oz canvas stretched over a stiff board. Lightweight, warp resistant, and acid free, these canvas panels are ready for acrylic, oil or any painting medium. Available in packs of 5 or larger classroom packs, young painters can make lots of work without taking up a ton of room with these. These panels are available in sizes ranging from 4” x 5” to 20” x 24”.


Sargent Art Acrylic Paint Pot Set

Sargent+Acrylic+Paint+Set.jpg

This set of acrylic paints includes 6 or 12 paint pots with screw on caps. The pots are not removeable, so the paints all stay together and are less likely to be tipped over. And the pots can be refilled with other acrylic paint as needed. This is a great set for elementary-age painters or any artist looking for a bit of organization in their studio. These cost around $5 for 6 colors, or $10 for 12 colors.


Klutz Friendship Bracelet Kit

Klutz Friendship Bracelet.jpg

Making friendship bracelets is a classic childhood activity and introduces ideas of pattern making, detail work, and craft skills. This book and kit includes everything a kid needs to make 12 bracelets. Recommended for ages 8 and up, the kit comes with 10 skeins of thread.


Wear’m Denim Apron

Wear'm Denim Apron.jpeg

This simple denim apron with a back tie and a front pocket comes in two sizes, the smaller is perfect for kids while the large will work for teens and adults. Easy to launder and long-lasting, just make sure to tie the string together before washing, or it may pull out. These are just about the cheapest aprons out there, and they work great. $6 for the small or $9 for the larger size.


Lomida Flip Book Kit

Lomida Flip Book kit.jpg

Young artists can create their own cartoons with this complete kit! It includes six 4.5” x 2.5” flip books with 90 pages each, a set of 12 pencils, sharpener, and pencil. This is sure to entertain and inspire, and gives kids insights about cartoons and stop-motion animation. The kit is $15.


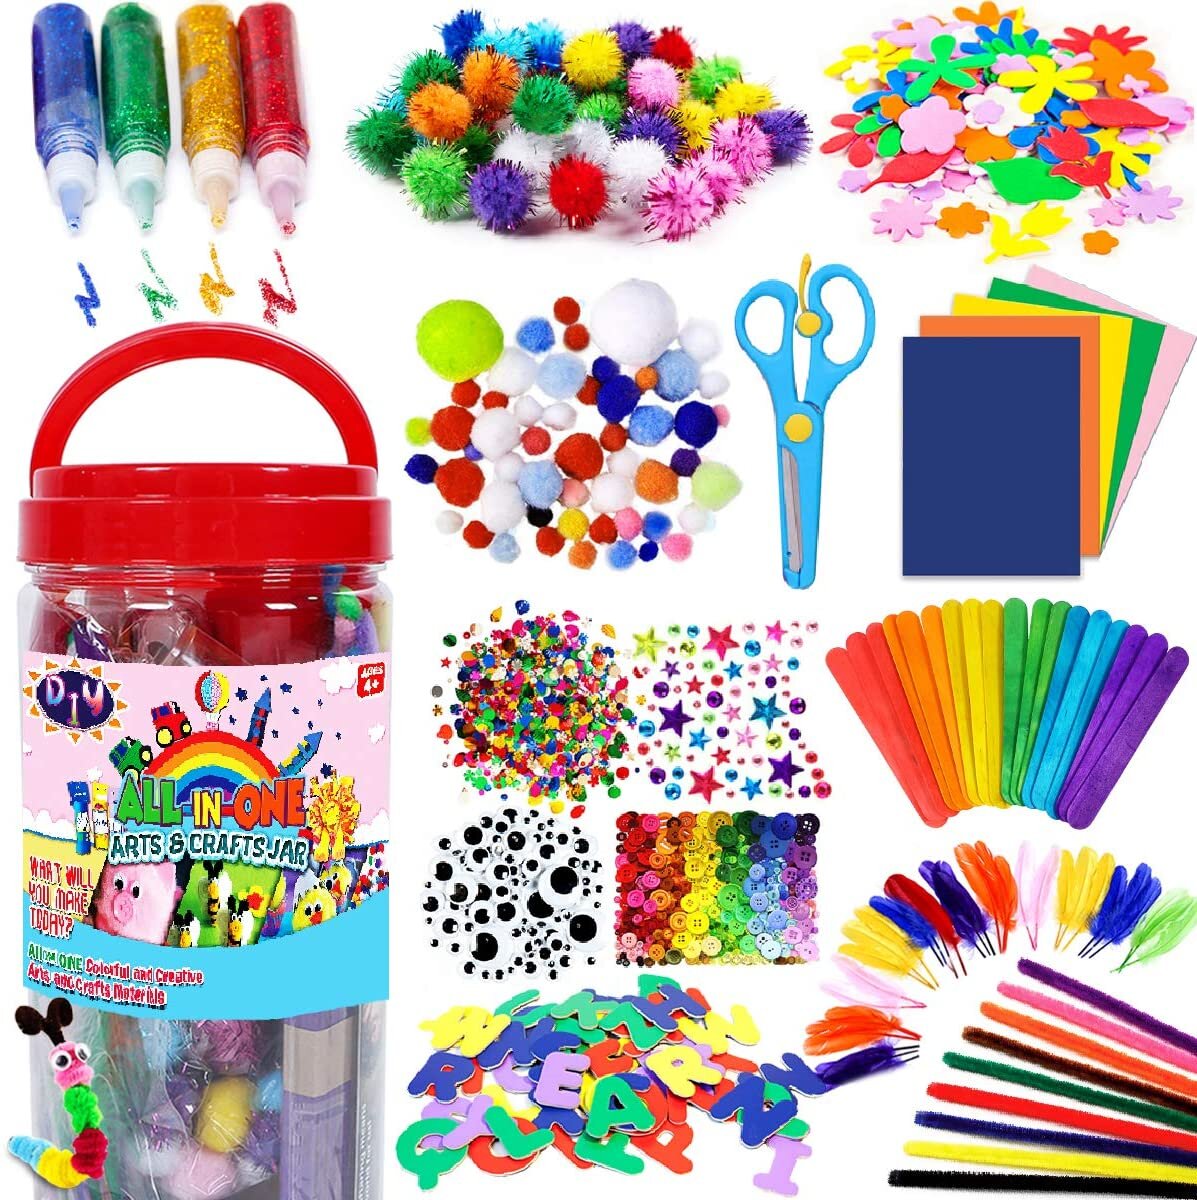
Craft Bin

Funzbo Craft Kit.jpg

A craft bin full of supplies is a sure way to entertain kids. With glue, scissors, pom poms, and tons of other pieces, they can go crazy making whatever they want. The Funzbo bin is a good option, with a regular and mega size, but there are a wide variety of craft bins to choose from, typically ranging from $12 to about $30. Recommended for ages 4 to 10.


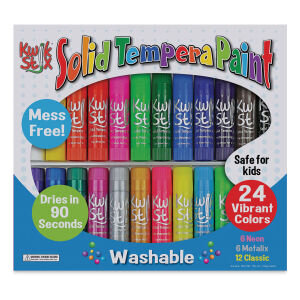
Tempera Paint Sticks

Kwik Stix.jpeg

Tempera paint sticks are sort of like markers, but with non-toxic, washable tempera paint. An easy way to paint with no need for water or brushes, these are great for when time is tight or clean up is a concern. Kwik Stix makes highly reviewed and recommended tempera paint sticks in a variety of colors and styles, including metallic, neon, and thinner sticks too.


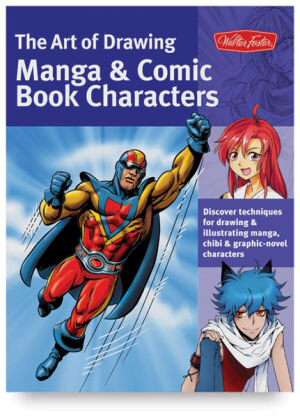
How to Draw Books

How to Draw Comic Book and Manga.jpeg

Kids often appreciate a guidebook for learning how to draw and there are a lot of books out there on learning how to draw animals, faces, or they might appreciate a book on comic book and manga drawing styles.

For budding comic book artists, check out our guide to making a booklet with a long-reach stapler. Kids love having their own little booklet to draw in, or a simple sketchbook to carry around.


Scratch Art .jpeg

Scratch-Art Boards

Scratch art is a cool way to make colorful images. Typically black over a colorful base, the color is revealed by scratching through the black with a metal or wooden stylus, stick, toothpick, or anything that can pull off the top material. Kids really love this and the scratch art paper is typically available in packs of 5, 10, 30 or more sheets. I haven’t really encountered a “bad” brand so order what seems best to you but the links here are to Scratch-Art Brand.


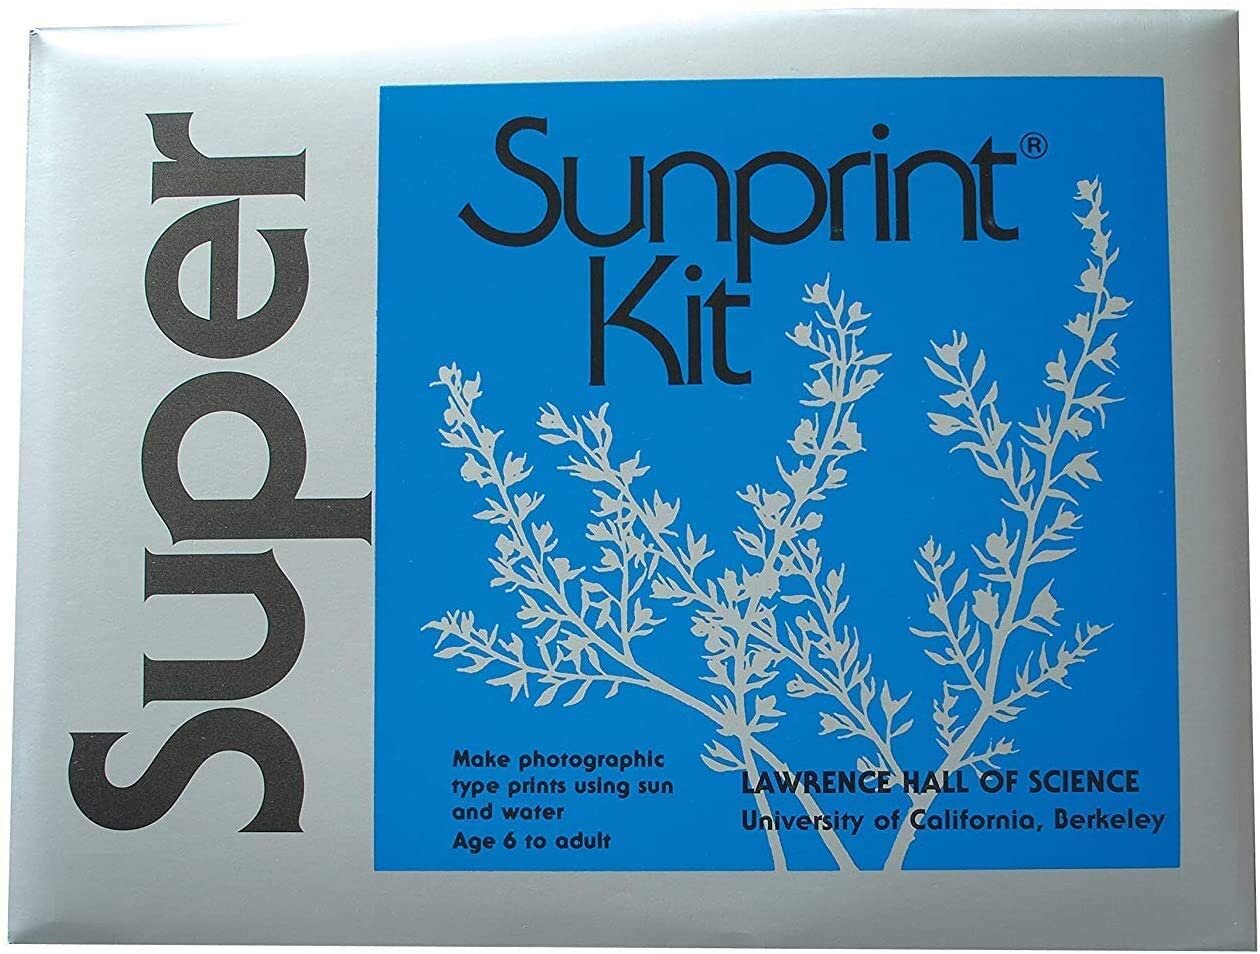
SunPrint Paper

Sunprint paper.jpg

Cyanotype is an early photographic process first discovered in 1842, and the SunPrint Paper is a great way to introduce this process to artists of all ages. To use, place flowers, objects, or anything on top of the paper and expose it to the sun where the exposed paper will turn blue. Then, rinse the paper in water to “fix” the image, although they may fade somewhat over time. A fun activity for all, this can get kids thinking about image making, materials, and the basic fundamentals of photography. Each pack comes with 15 sheets of 8.5 x 11” paper.

For larger sheets than SunPrint or raw materials to create your own cyanotype, shop Jacquard Cyanotype products at Blick.


Blick Studio Adjustable Activity Easel

Blick Studio Easel.jpeg

This easel is an affordable and flexible model that can be used on the floor or tabletop. It’s great for younger kids and it can be raised to a top height of 54”. The easel is 26 inches wide, and comes with a 25 foot roll of 18” paper. Typically priced around $90, this should provide years of use for painting and drawing.


The Year of Knots by Windy Chien

year of knots.jpg

Knots as art? Why not! (lol sorry). This book details Chien’s year long exploration of knots and while it is aimed at adults, older elementary school kids and up will appreciate it too. Beautiful illustrated with a ton of knots, plan to spend some money on rope to do these projects too. Knots and knot art touches on math, hand skills, macramé, craft, and so many other topics. It’s a fantastic jumping off point to explore more than just rope.


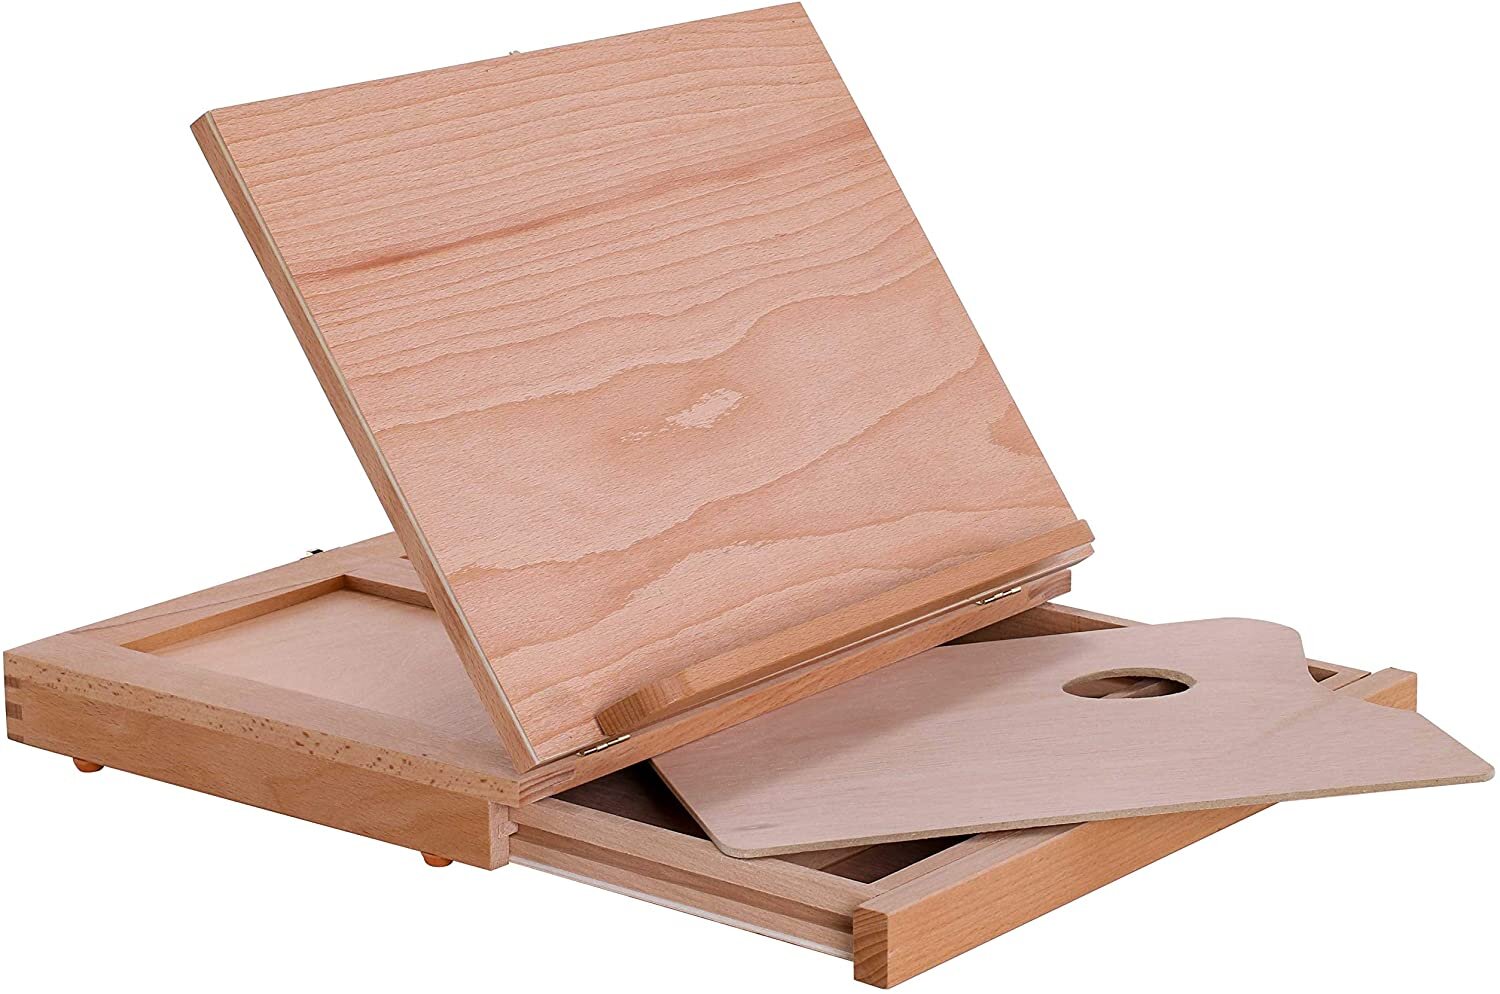
U.S. Art Supply Adjustable Portable Easel

US Art Supply Desktop Easel.jpg

This compact wooden easel has a drawer for supplies and can accommodate paper or canvas up to 11” x14”. It measures 13.25" wide, 10.25" deep, and 2" high, and includes a wooden painters palette. It also includes a handle for carrying. For $30, it’s a nice little unit that should see years of use if treated carefully. It’s also a great gift for a young painter—pair it with a watercolor or acrylic set and they are ready to get to work at home or outside.


Conclusion

Giving kids art supplies is a great idea as it sparks their creativity, introduces motor control skills, and gives them the freedom to make their decisions and follow their ideas. This gift guide has more than 35 recommendations of art supplies and kits. For the most part, these are supplies that can used in open-ended ways rather than a kit that can only do one thing.

What are your favorite ideas for kids art supplies? Let us know in the comments.


Handheld Clay Extruder Buyer's Guide

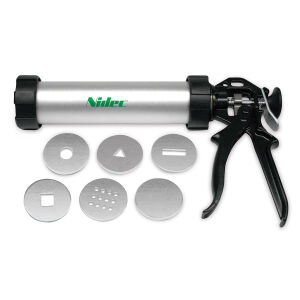
The Shimpo Nidec Handheld Extruder comes with 5 aluminum dies and one blank.

The Shimpo Nidec Handheld Extruder comes with 5 aluminum dies and one blank.

Handheld extruders or “clay guns” are useful tools for making small runs of handles, coils, and small hollow forms. If you are looking to make a repeatable shape in a quick, efficient way, then a handheld extruder is what you need.

These extruders work like a caulk gun: you fill the barrel with clay, screw the cap over the die form, and repeatedly squeeze the trigger to push clay through the die. It can be a bit of a wrist workout, so definitely use soft clay with these.

There are four options when choosing a handheld extruder: 2 sizes from Scott Creek, and one each from Shimpo and Kemper. There are also two miniature clay extruders such as the Kemper Klay Gun, for making extremely small shapes, which I’ll cover at the end of the post.

It’s really a coin toss as all four handheld extruders are well made, but for most studios and hand sizes, I would recommend the Shimpo Handheld Extruder. For about the same price, the Shimpo Handheld Extruder comes with a few more dies than the Scott Creek, and I prefer the circular handle at the back as opposed to the bar handle on the Scott Creek models. And as this is a handheld extruder, I prefer the shorter and wider barrel of the Shimpo because it is easier to squeeze out the clay.

A full review of handheld extruders follows, including the three options from Shimpo or Scott Creek, and two options for smaller decorative clay extruders. For larger extruders, check out our guide to wall-mounted extruders here.


Table of Contents

  1. Shimpo Handheld Extruder

  2. Scott Creek Super Duper Clay Gun and Clay Gun XL

  3. Kemper IKEG Klay Extruder

  4. Small Extruders: Kemper Klay Gun and Bailey Clay Gun
  5. Summary


Top Pick: Shimpo Handheld Extruder
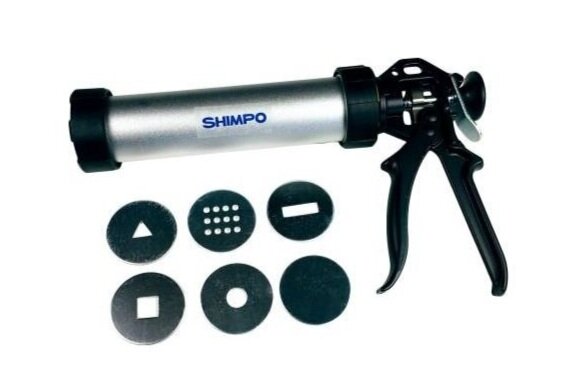
The Shimpo Handheld Extruder comes with 5 dies and one blank die.

The Shimpo Handheld Extruder comes with 5 dies and one blank die.

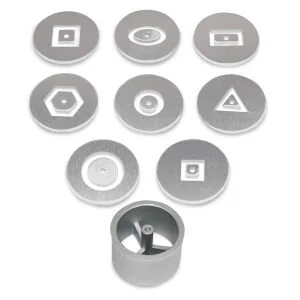
The Shimpo Hollow Die Kit has 8 shapes. The middle of each shape is screwed on to the larger piece at the bottom.

The Shimpo Hollow Die Kit has 8 shapes. The middle of each shape is screwed on to the larger piece at the bottom.

The Shimpo Handheld Extruder is a quality tool that lets you easily make shaped coils, small hollow forms, or handles. It’s basically a caulk gun with an aluminum barrel and dies. The threaded barrel is 2 1/4” wide and about 10 inches long. The entire model measures about 13 x 9 x 3 inches, weighs just a few pounds, and can easily be stored in a drawer. It can be entirely submerged in water for cleanup, but you may want to oil the hinges and moving metal parts as needed.

Shimpo 4-in-1 Die Kit has 8 shapes of varying sizes and an isolator die.

Shimpo 4-in-1 Die Kit has 8 shapes of varying sizes and an isolator die.

The Shimpo Extruder is the top pick because the kit comes with five dies and one blank, and I prefer the circular handle. I also find the the shorter barrel makes it easier to squeeze out the clay, even though that means more frequent refilling. But it’s really a coin toss if this is better than the Scott Creek Clay Gun and the choice really comes down to personal preference. In my studio, I use a Shimpo Handheld Extruder along with a mixture of dies from Shimpo and Scott Creek.

Shimpo has two die kits: one with a selection of eight hollow forms and another with eight “4-in-1” shapes of varying sizes. You can extrude all four sizes at once, or use the isolation die to select just one. The hollow forms are what most people go for, as those shapes would be extremely hard to make without a die, but both kits would really expand the options in your studio.

The Shimpo Handheld Extruder generally retails for around $60 and the die kits are about $40 each. You can find this tool at ceramic supply stores or online at Blick.


Scott Creek Super Duper Clay Extruder and Clay Extruder XL

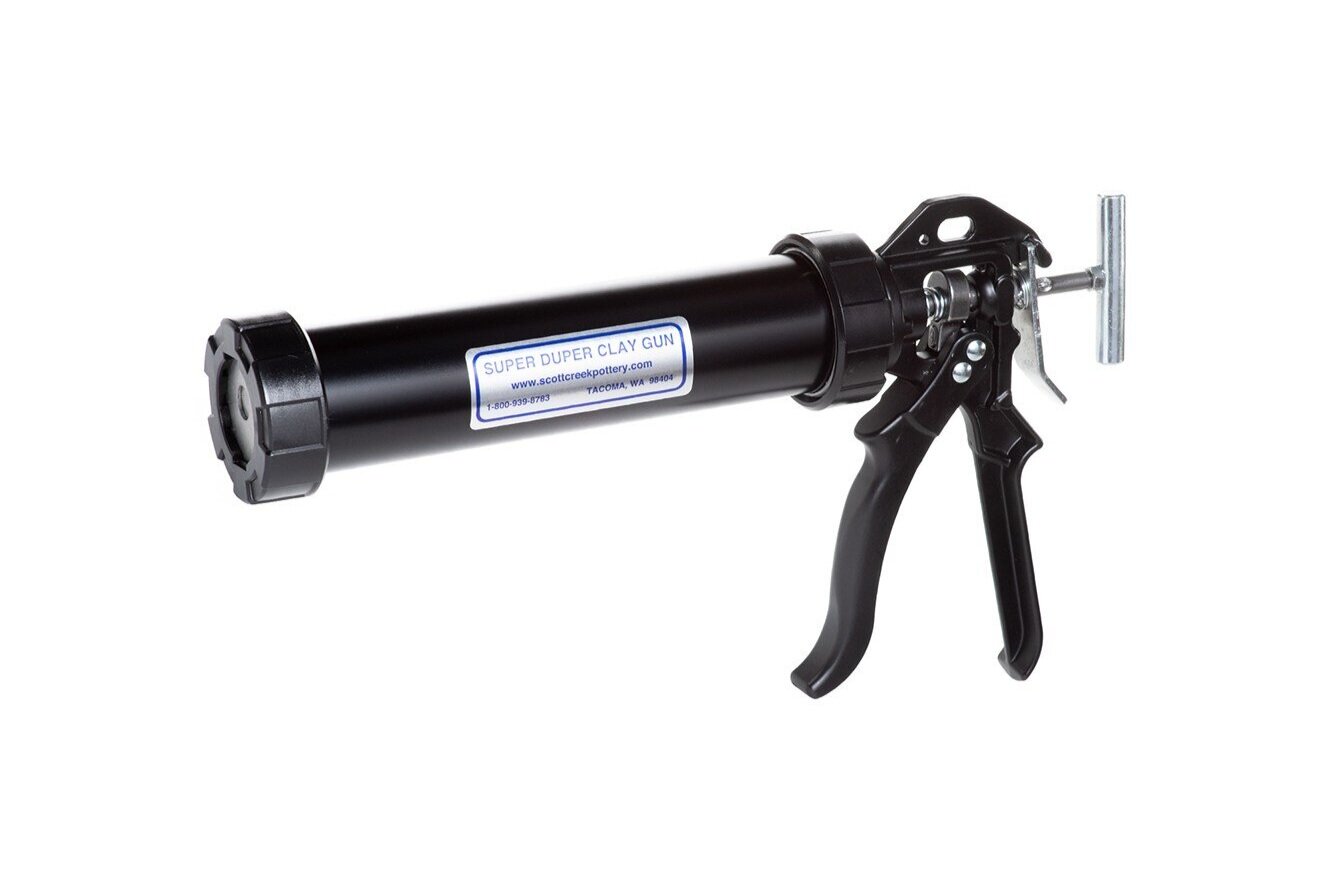
The Scott Creek Super Duper Clay Gun.

The Scott Creek Super Duper Clay Gun.

The Scott Creek XL Clay Gun has a 15” barrel.

The Scott Creek XL Clay Gun has a 15” barrel.

Scott Creek makes two handheld extruders and five die kits. The Super Duper Clay Gun has a 10 inch barrel while the XL has a 15 inch barrel. Both feature a bar handle at the rear as opposed to the circular handle on the Shimpo. The barrel is 2 inches wide, which is 1/4” smaller than the Shimpo. Note that the Scott Creek die kits will definitely fit the Shimpo Extruder, but the Shimpo dies may not work with the Scott Creek guns. Both Scott Creek extruders come with one coil die and two blank aluminum dies.

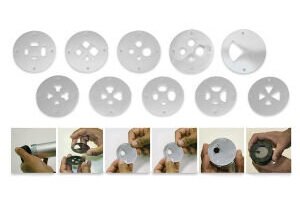
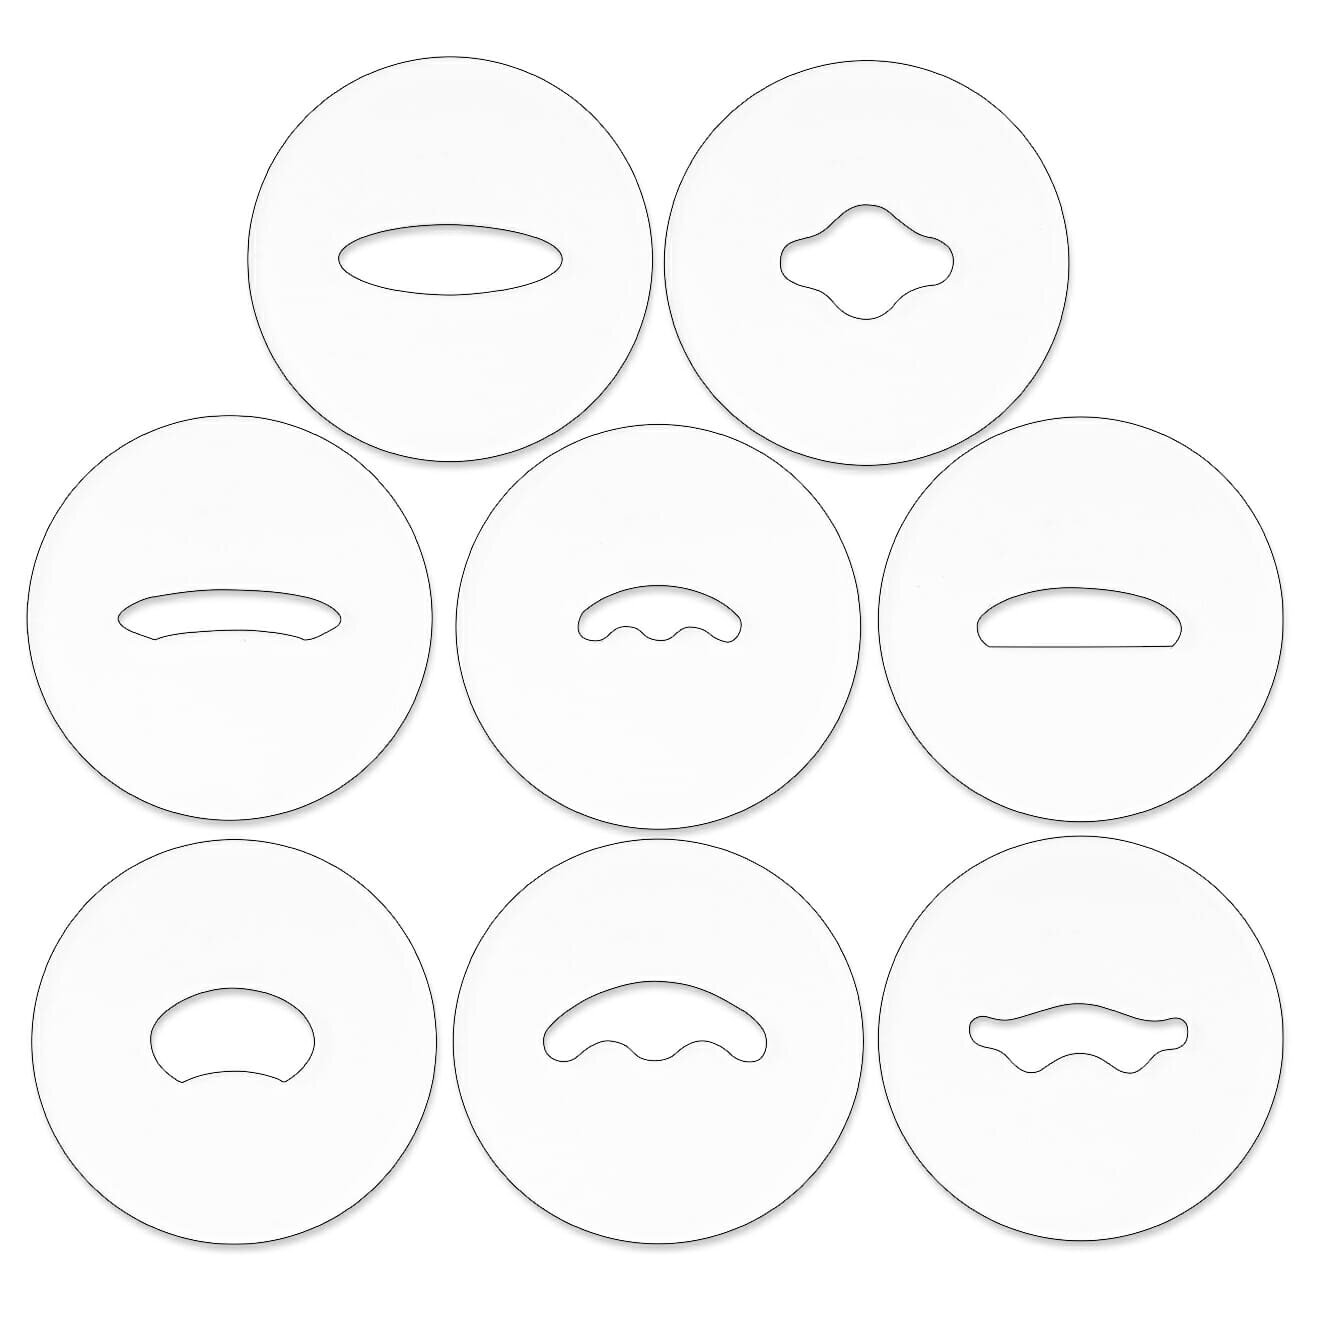
The Scott Creek Handle Die Kit features 8 shapes cut out of clear acrylic. The Scott Creek Dies are compatible with the Shimpo Extruder.

The Scott Creek Handle Die Kit features 8 shapes cut out of clear acrylic. The Scott Creek Dies are compatible with the Shimpo Extruder.

Scott Creek extruders are rugged, well built, and will get the job done. They are a bit harder to find in stores, but are readily available direct from the manufacturer. Scott Creek also makes a hollow aluminum die kit with the same shapes as Shimpo, along with an aluminum die kit of small forms. There are also three die sets made out of clear acrylic including a “shape and coil” kit, tile trim kit, and handle kit. The handle kit is my most used die kit and I would recommend that kit regardless of which extruder you purchase.

Although it might seem attractive to use the larger XL Extruder, keep in mind that the longer barrel may be harder to clean and store, and it is that much harder to squeeze clay out. (Any handheld extruder really relies on wrist strength.)

The Scott Creek Super Duper Clay Extruder usually retails for around $55-60, and the XL goes for around $70, and the die kits generally cost about $40 each.


Kemper IKEG Klay Extruder

The Kemper IKEG Klay Extruder

The Kemper IKEG Klay Extruder

The Kemper IKEG Klay Extruder is an interesting offering from the venerable clay tool manufacturer. It’s even longer than the Scott Creek XL, with a barrel measuring 20 inches in length by 2 inches wide. It comes with 3 aluminum coil dies, 1 blank die, and 2 plastic spouts.

As stated above, I feel that a shorter barrel is easier to use but if you decide to go with this option, you can always just fill the barrel with less clay to make it easier to use. Aside from that, the trigger of this gun is virtually identical to the Shimpo with a circular handle. Kemper has a limited offering of dies, but Scott Creek dies will work with this extruder.

The Kemper IKEG Klay Extruder typically retails for around $60 and can be found at ceramic suppliers such as Bailey.


Mini Extruders: Kemper K45 Klay Gun and Bailey Clay Gun

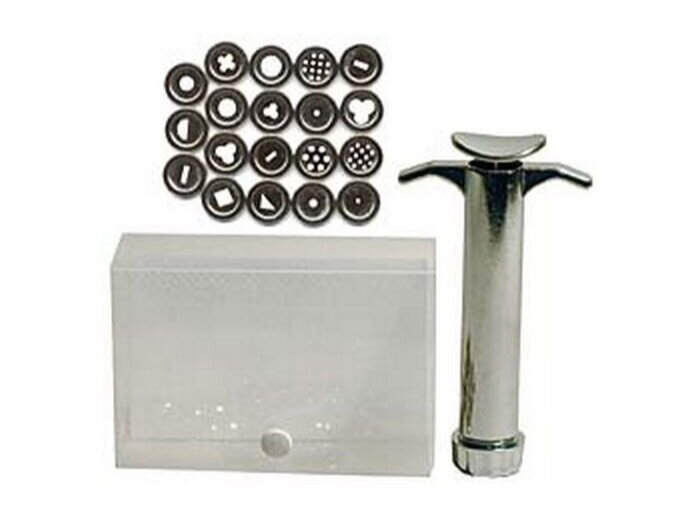
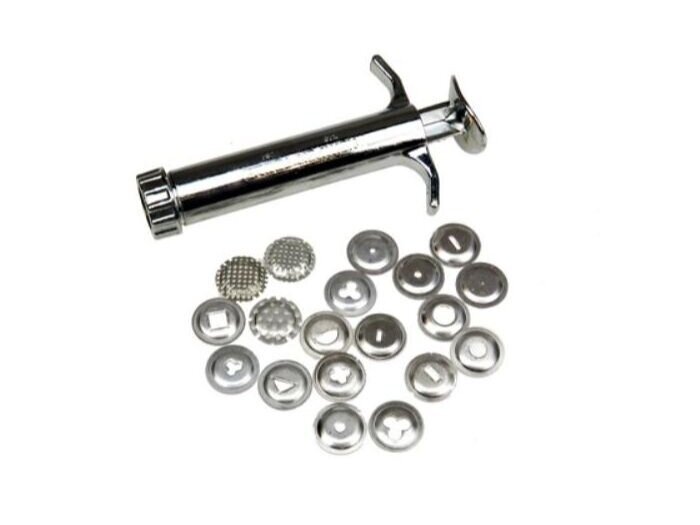
These miniature clay extruders are useful for making texture or super small coils, such as for hair. They also work with polymer clay, so if you are working in miniatures, this is the clay extruder for you. For typical clay studios, these mini guns often sit unused in studio drawers but if you need a really specific shape, they may work for you. They are virtually identical but the Bailey set also comes with a handy plastic carrying case.

The Bailey Clay Gun is a miniature extruder.

The Bailey Clay Gun is a miniature extruder.

Bailey Clay Gun

The Bailey Clay Gun has 19 dies and a carrying case. It typically costs around $13. Make sure that whatever you put in the barrel is very soft.

Shop at Bailey

 
kemper-k45-klay-gun.jpg

Kemper Klay Gun

The Kemper Klay Gun also has 19 dies and typically costs around $13. It may be exactly the same thing as the Bailey Clay Gun, but it doesn’t have a case.

Shop at Blick


Summary

Handheld extruders are a great way to make small batches of similar shapes, such as handles or hollow shapes. For a long time, I thought of them as an extraneous tool but once I started using them, I found that I really liked the look of extruded handles. Definitely don’t get one of these if it will simply sit unused in a drawer.

With only four models on the market, all are basically the same with just a few minor differences, so you can’t go wrong. For me, I prefer the slightly wider and shorter Shimpo barrel but my favorite dies are the handle kit from Scott Creek. You will find your own combination that works for you.


The Best Black Acrylic Gesso for Preparing Canvas

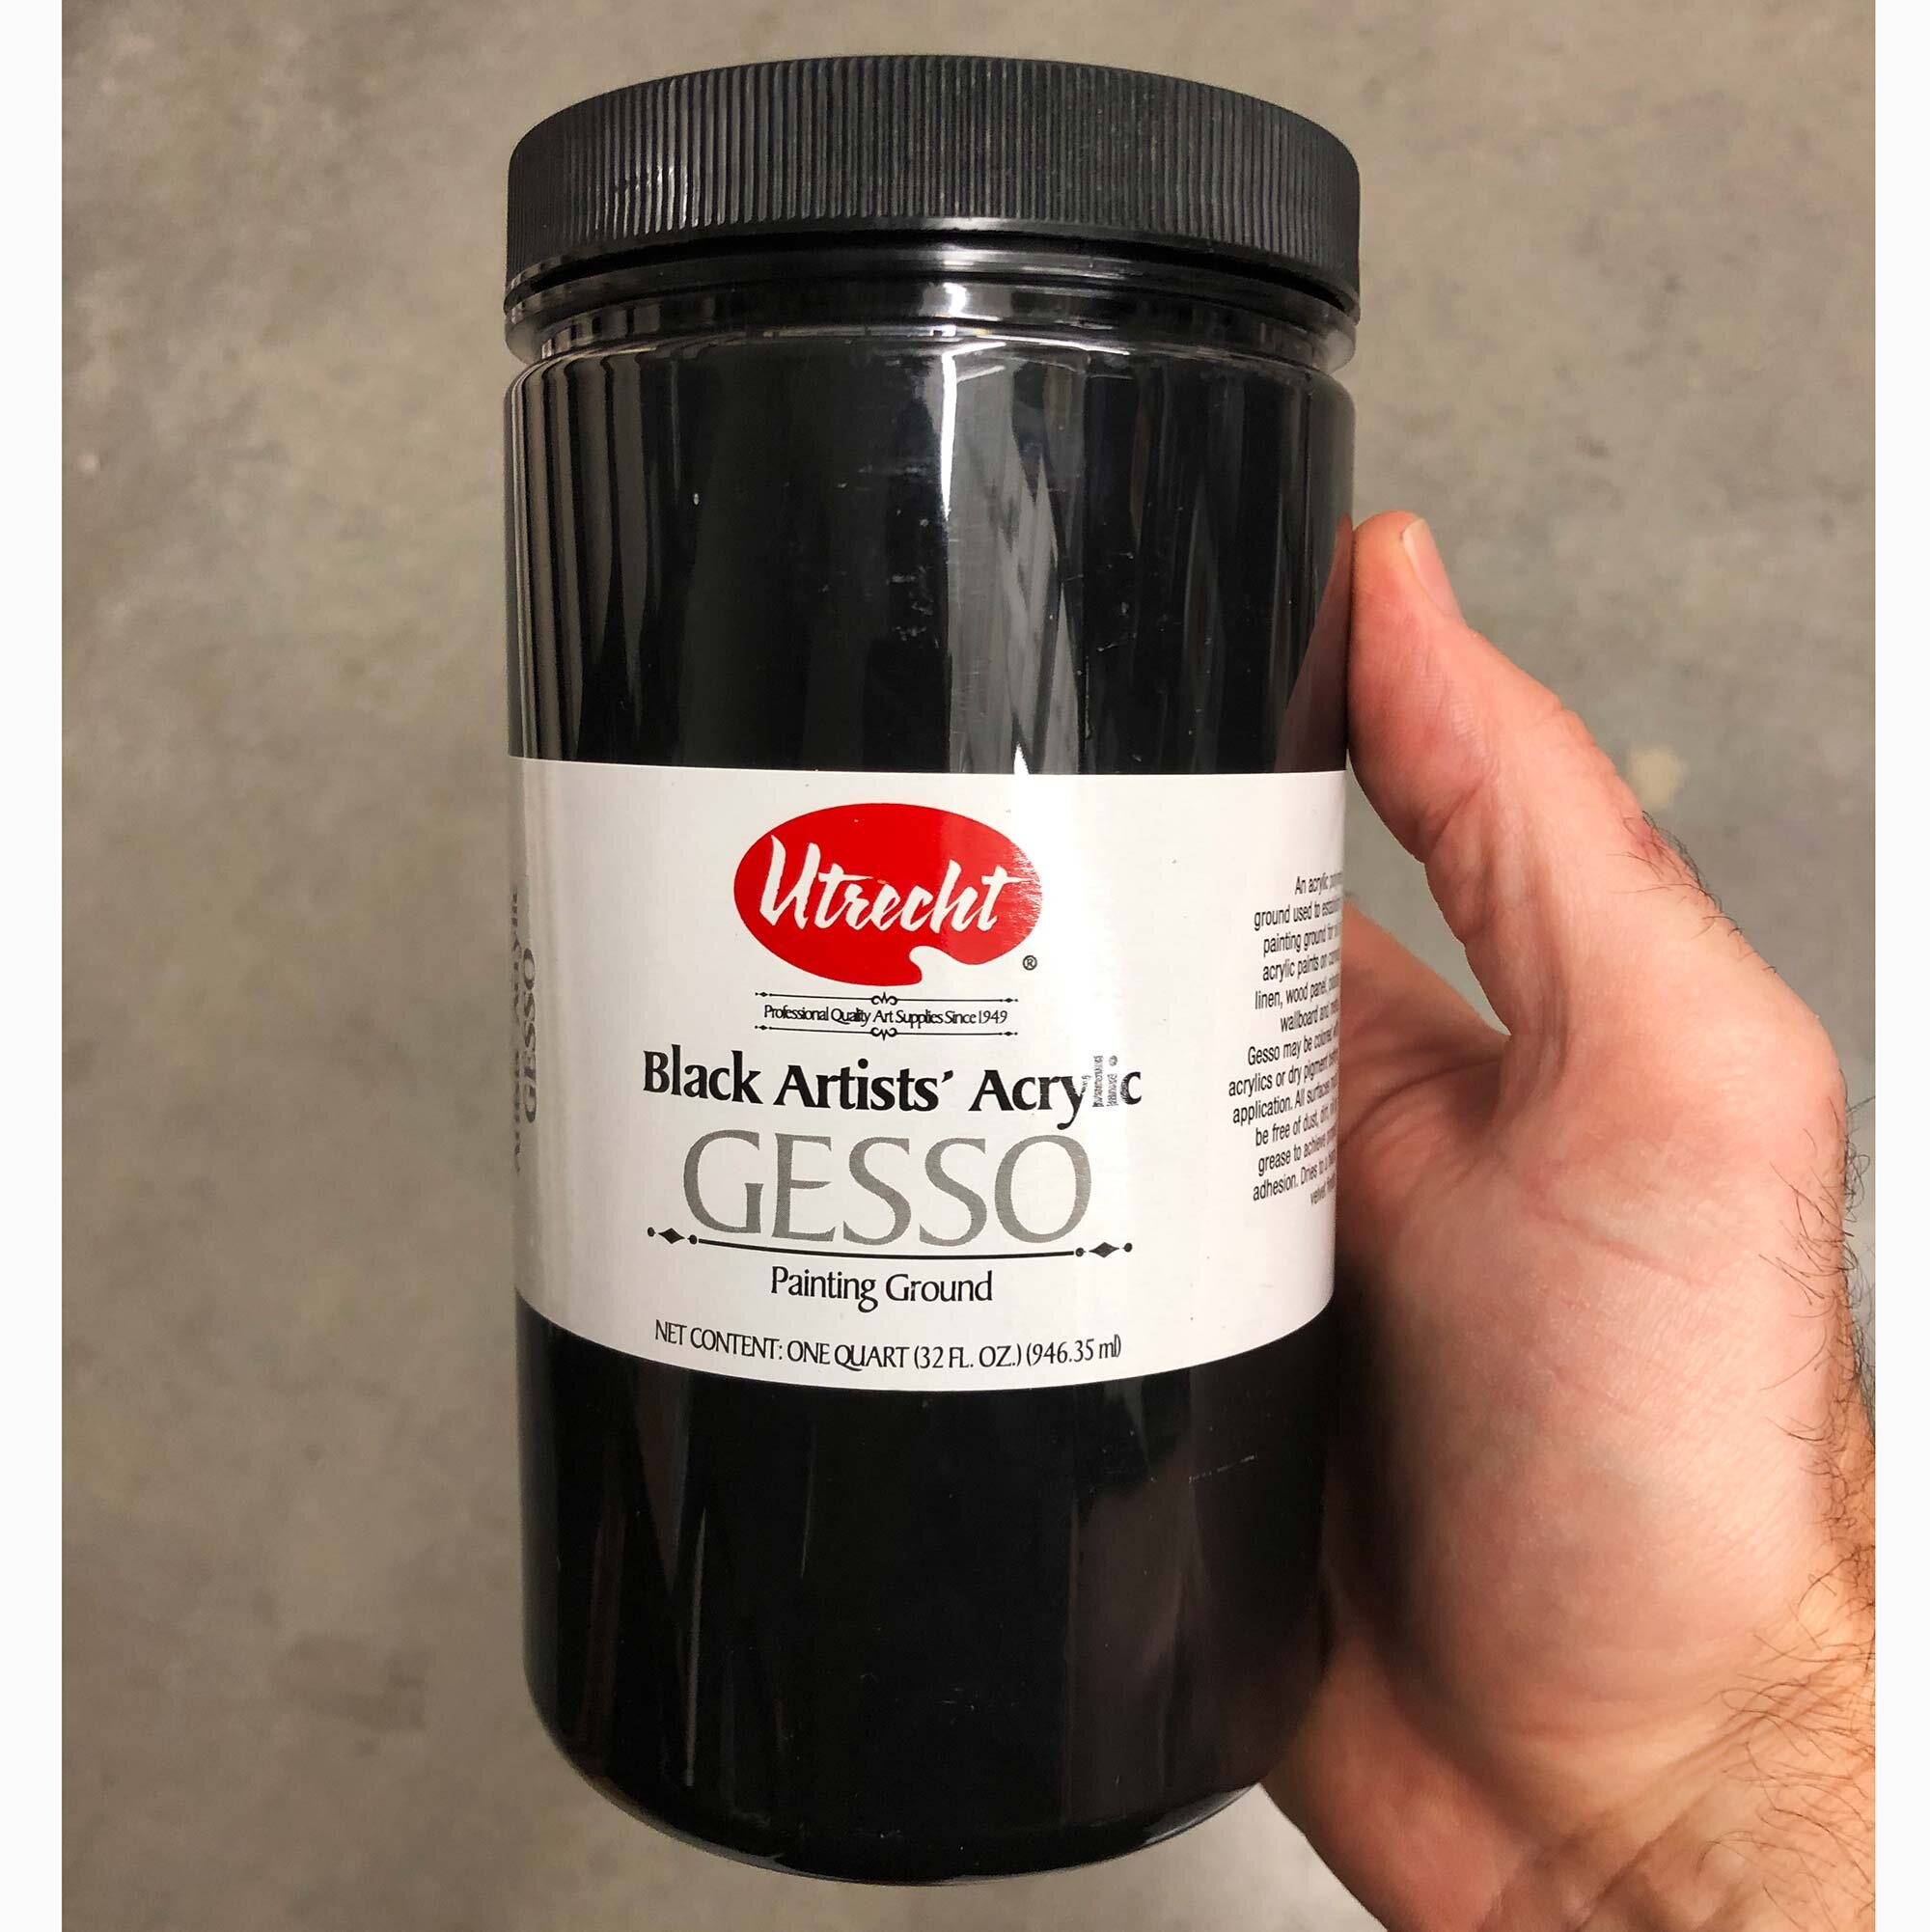
Utrecht Black Artists’ Acrylic Gesso is our top pick for its ultra-matte quality and affordable price.

Utrecht Black Artists’ Acrylic Gesso is our top pick for its ultra-matte quality and affordable price.

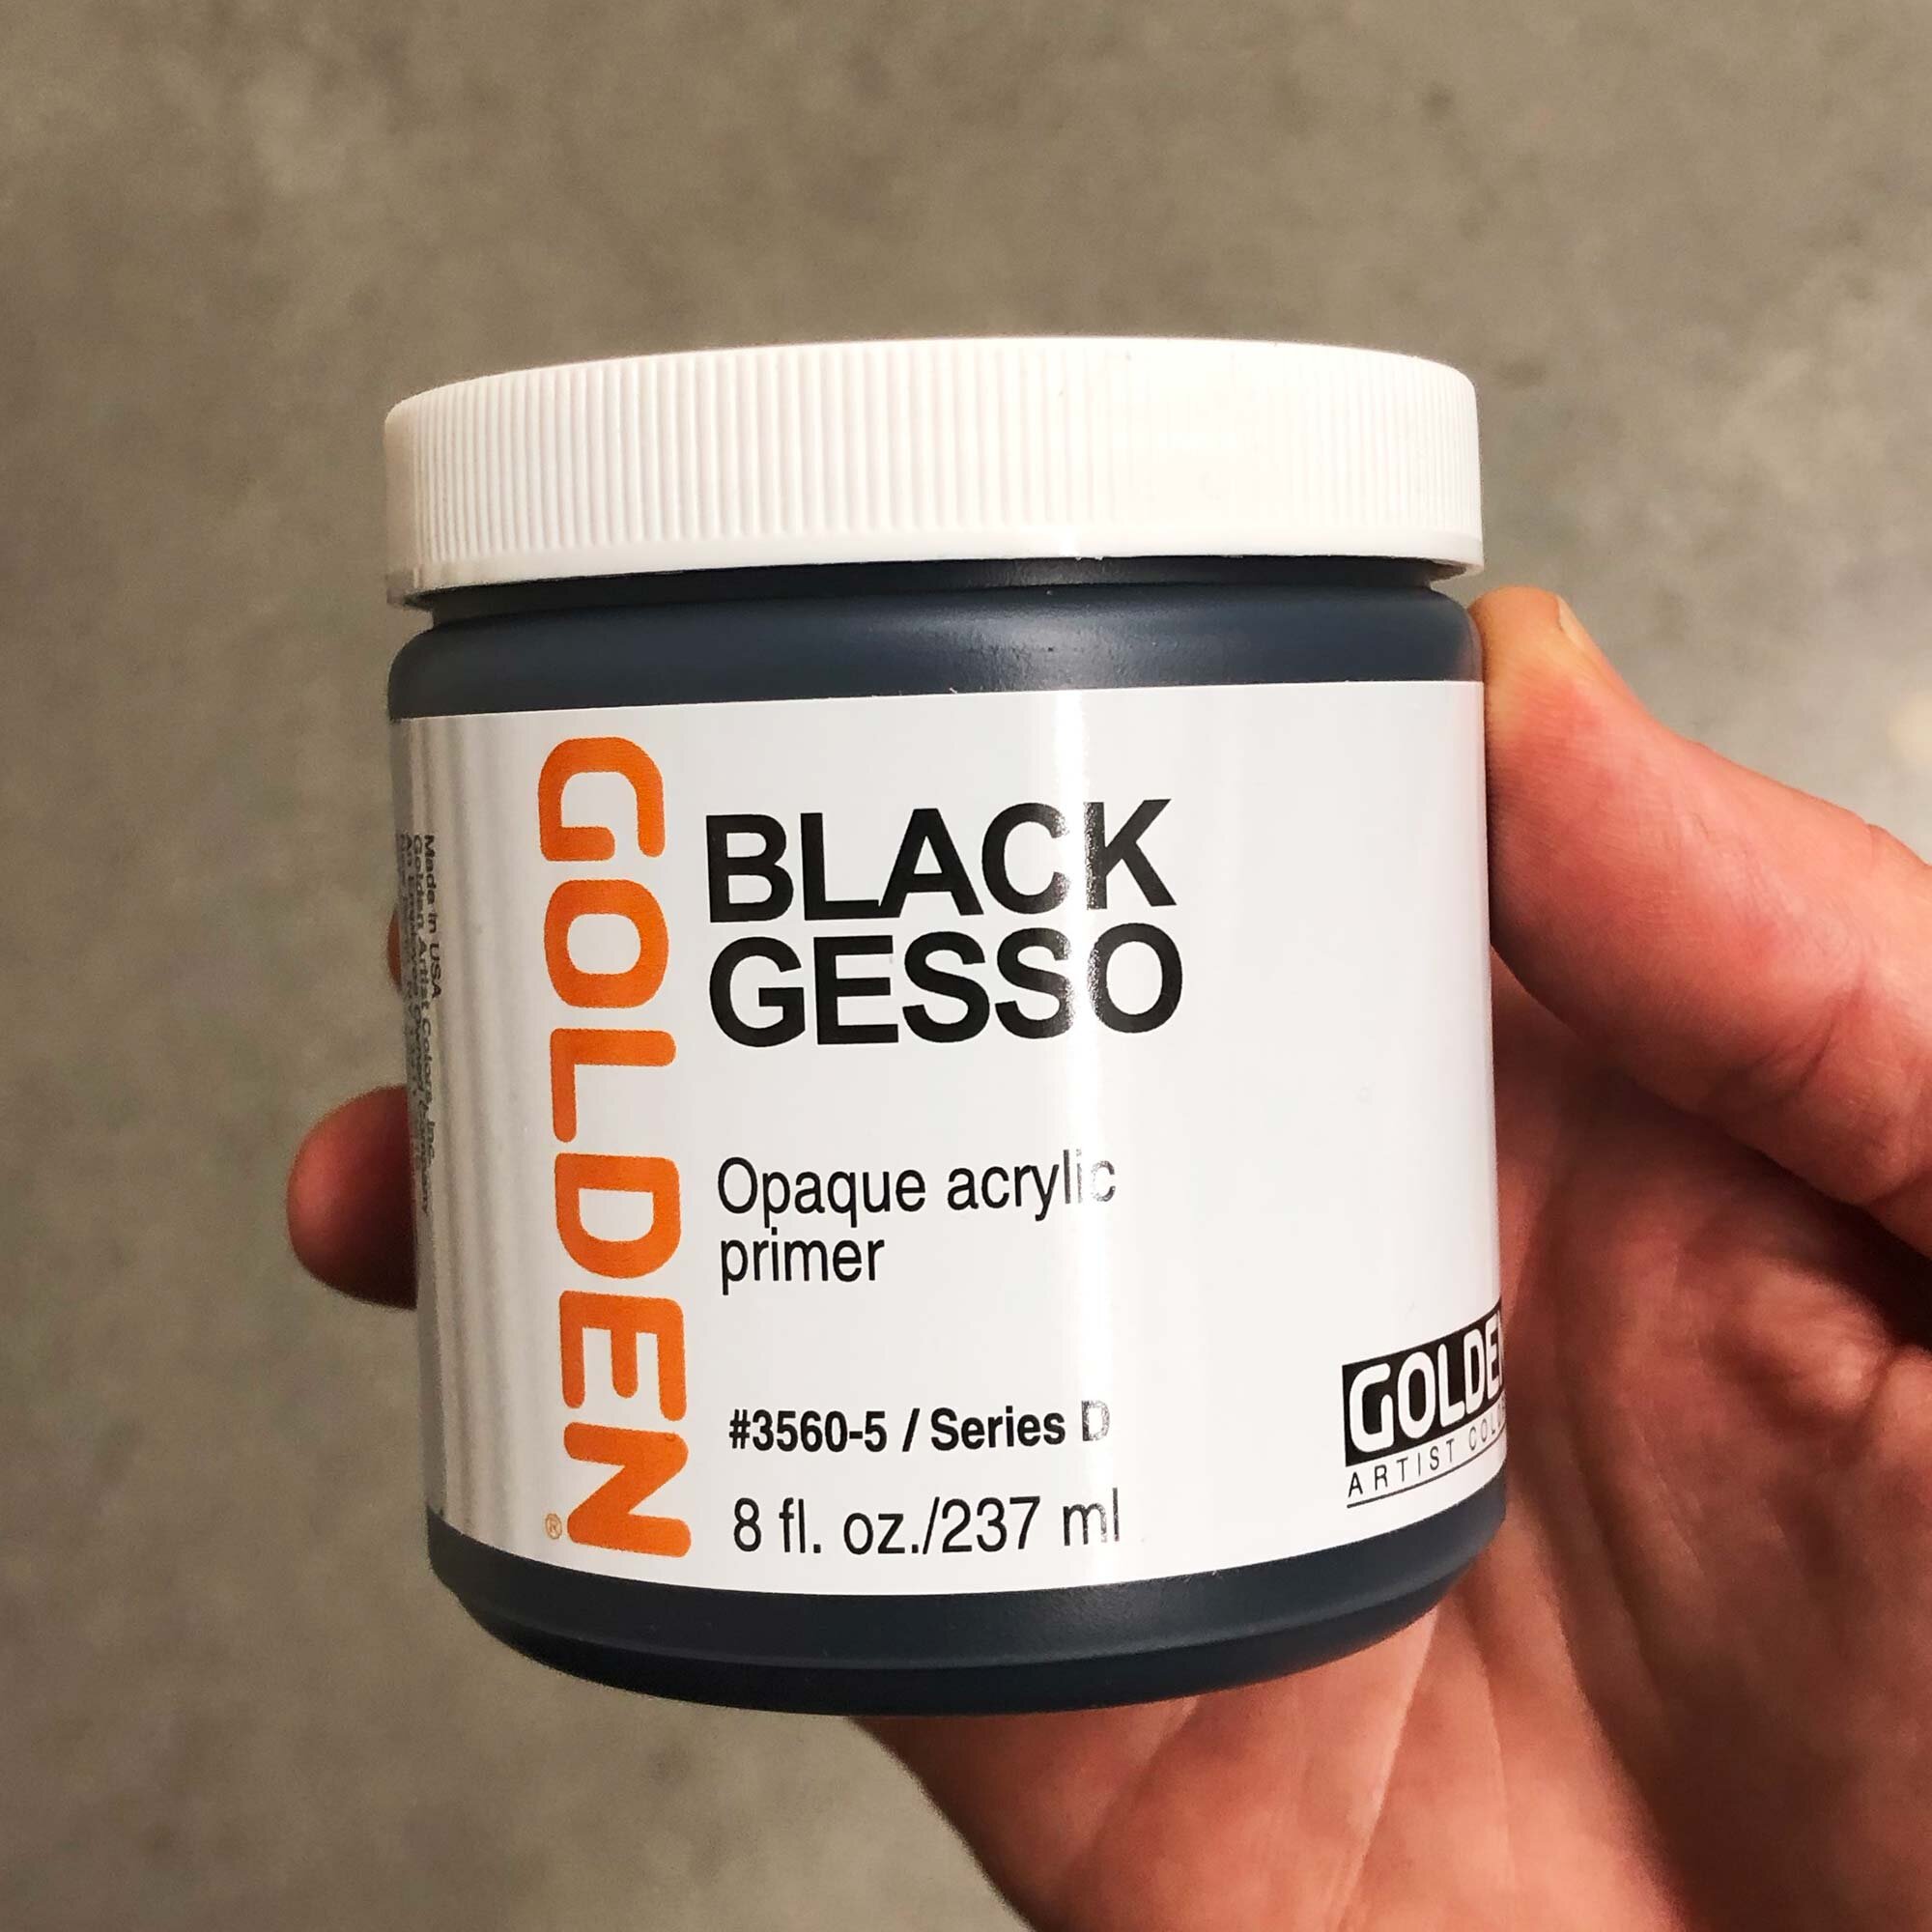
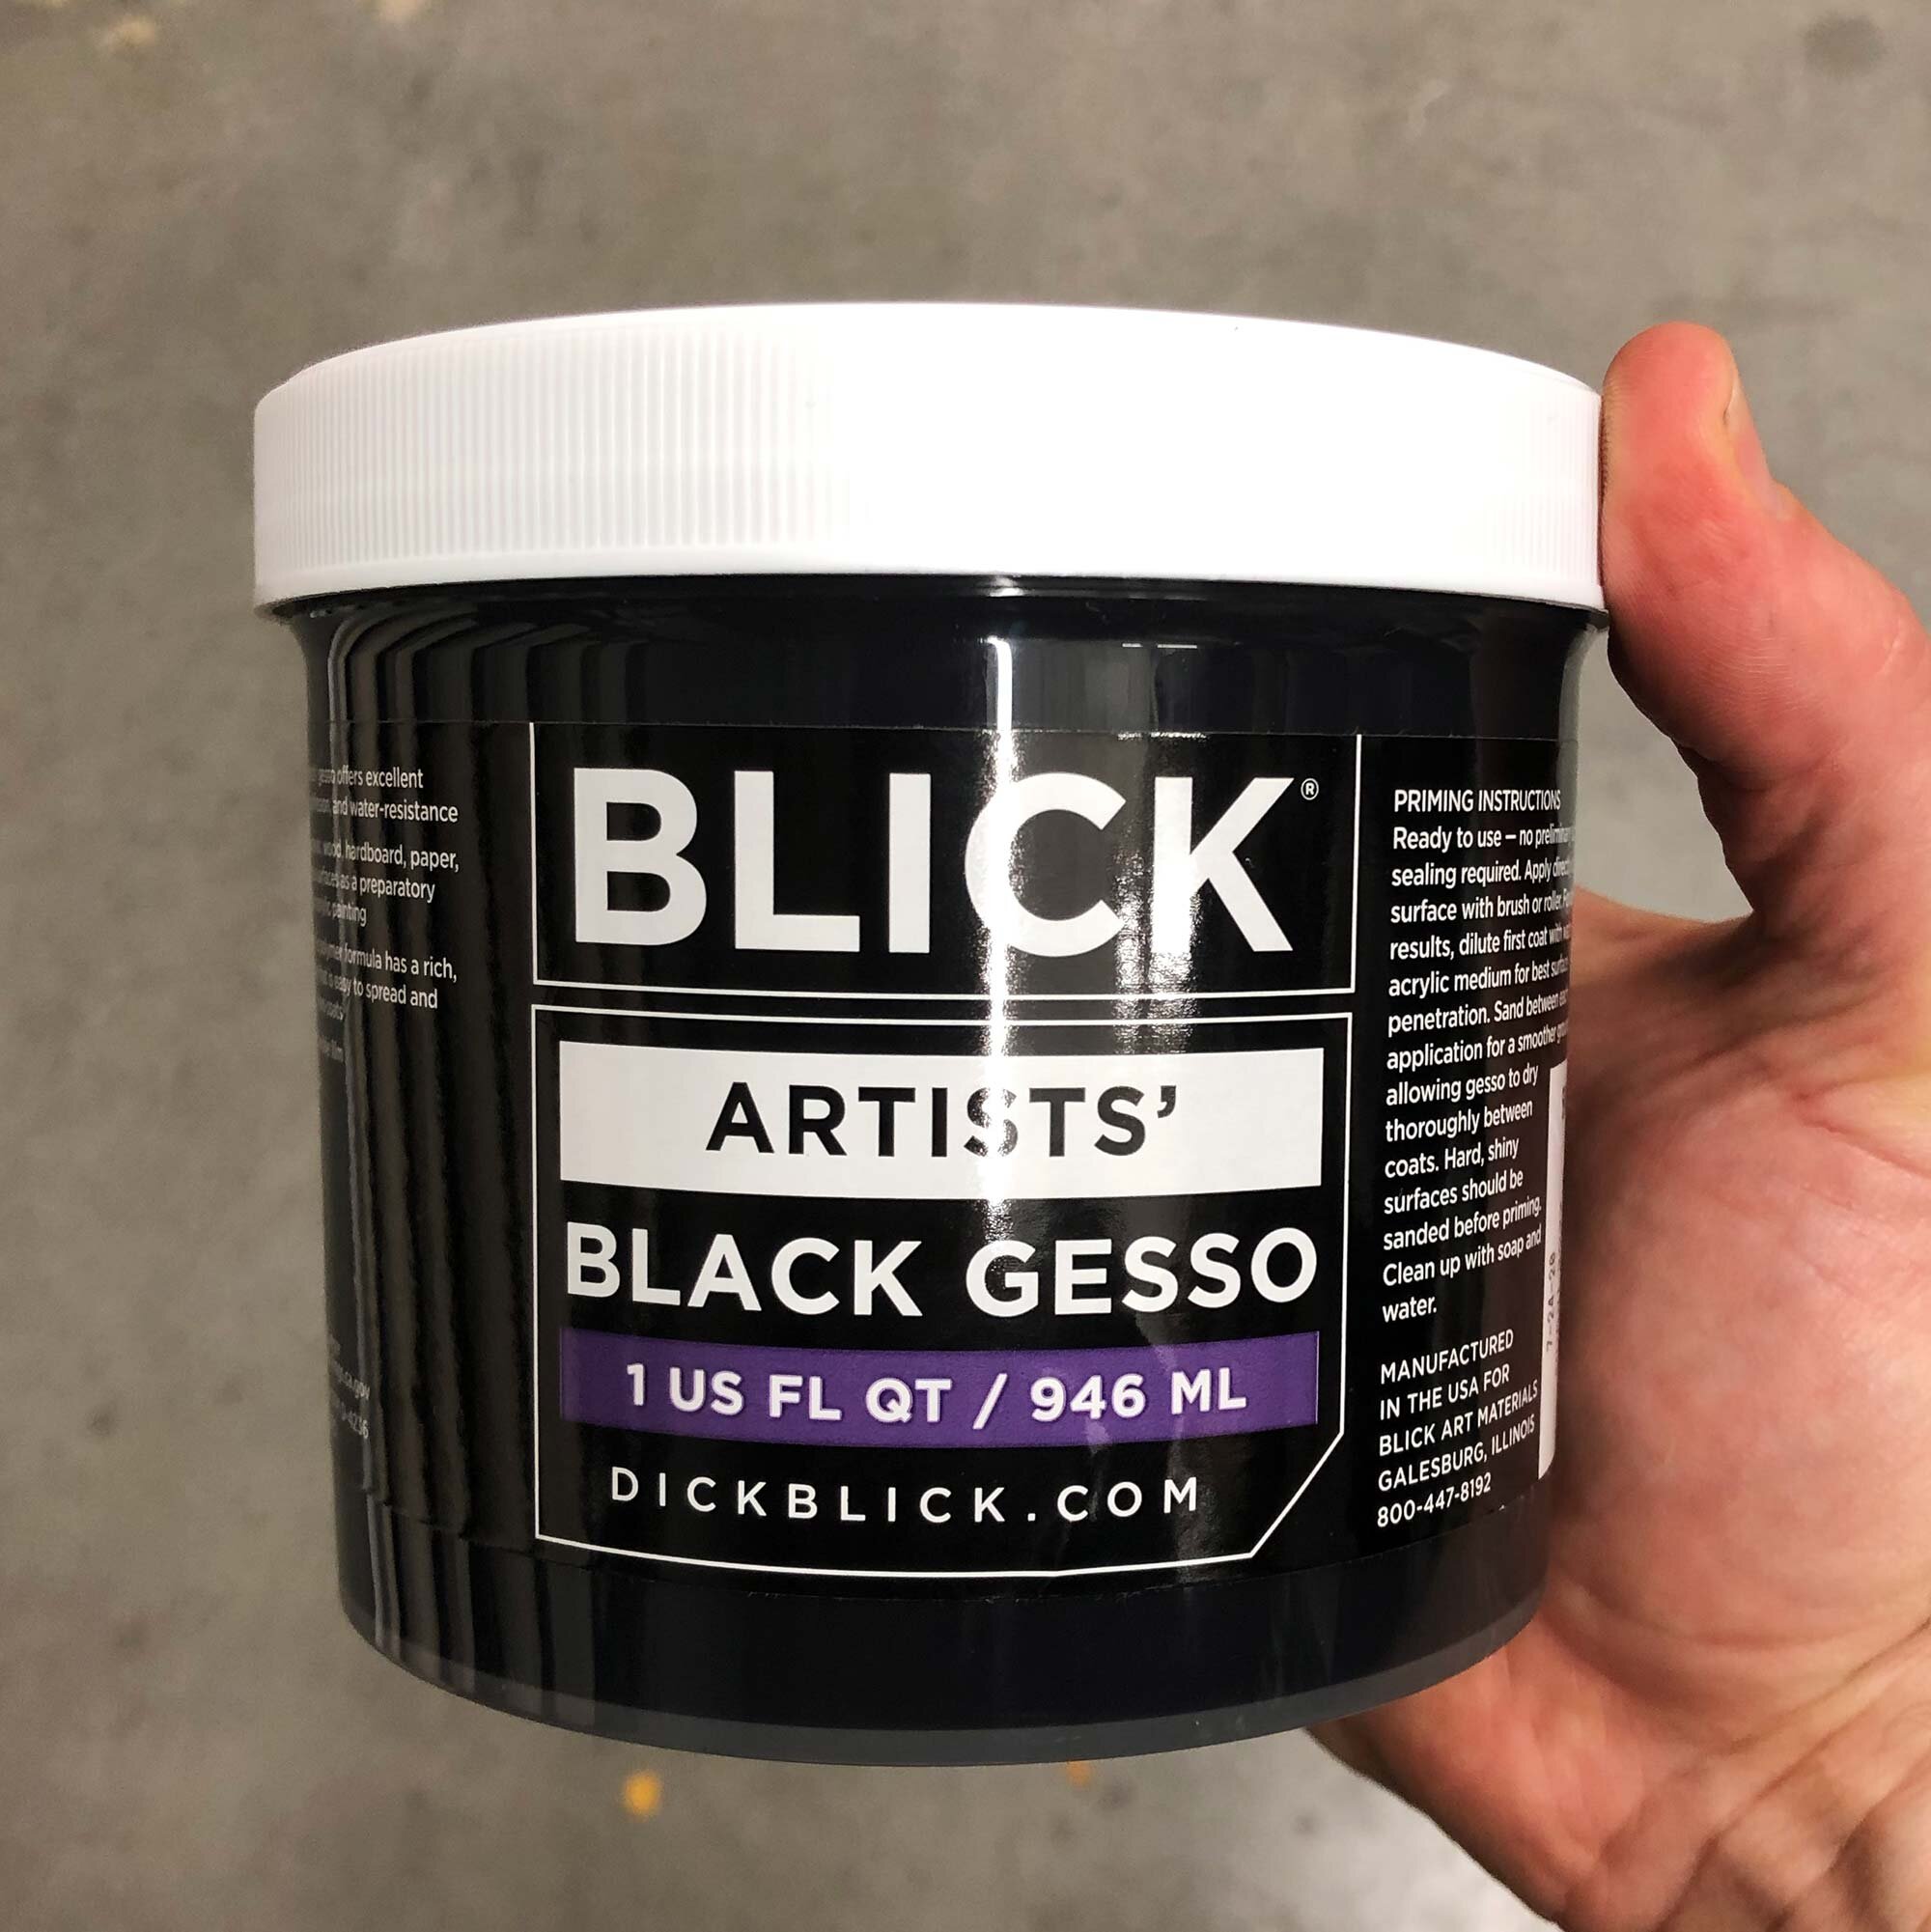
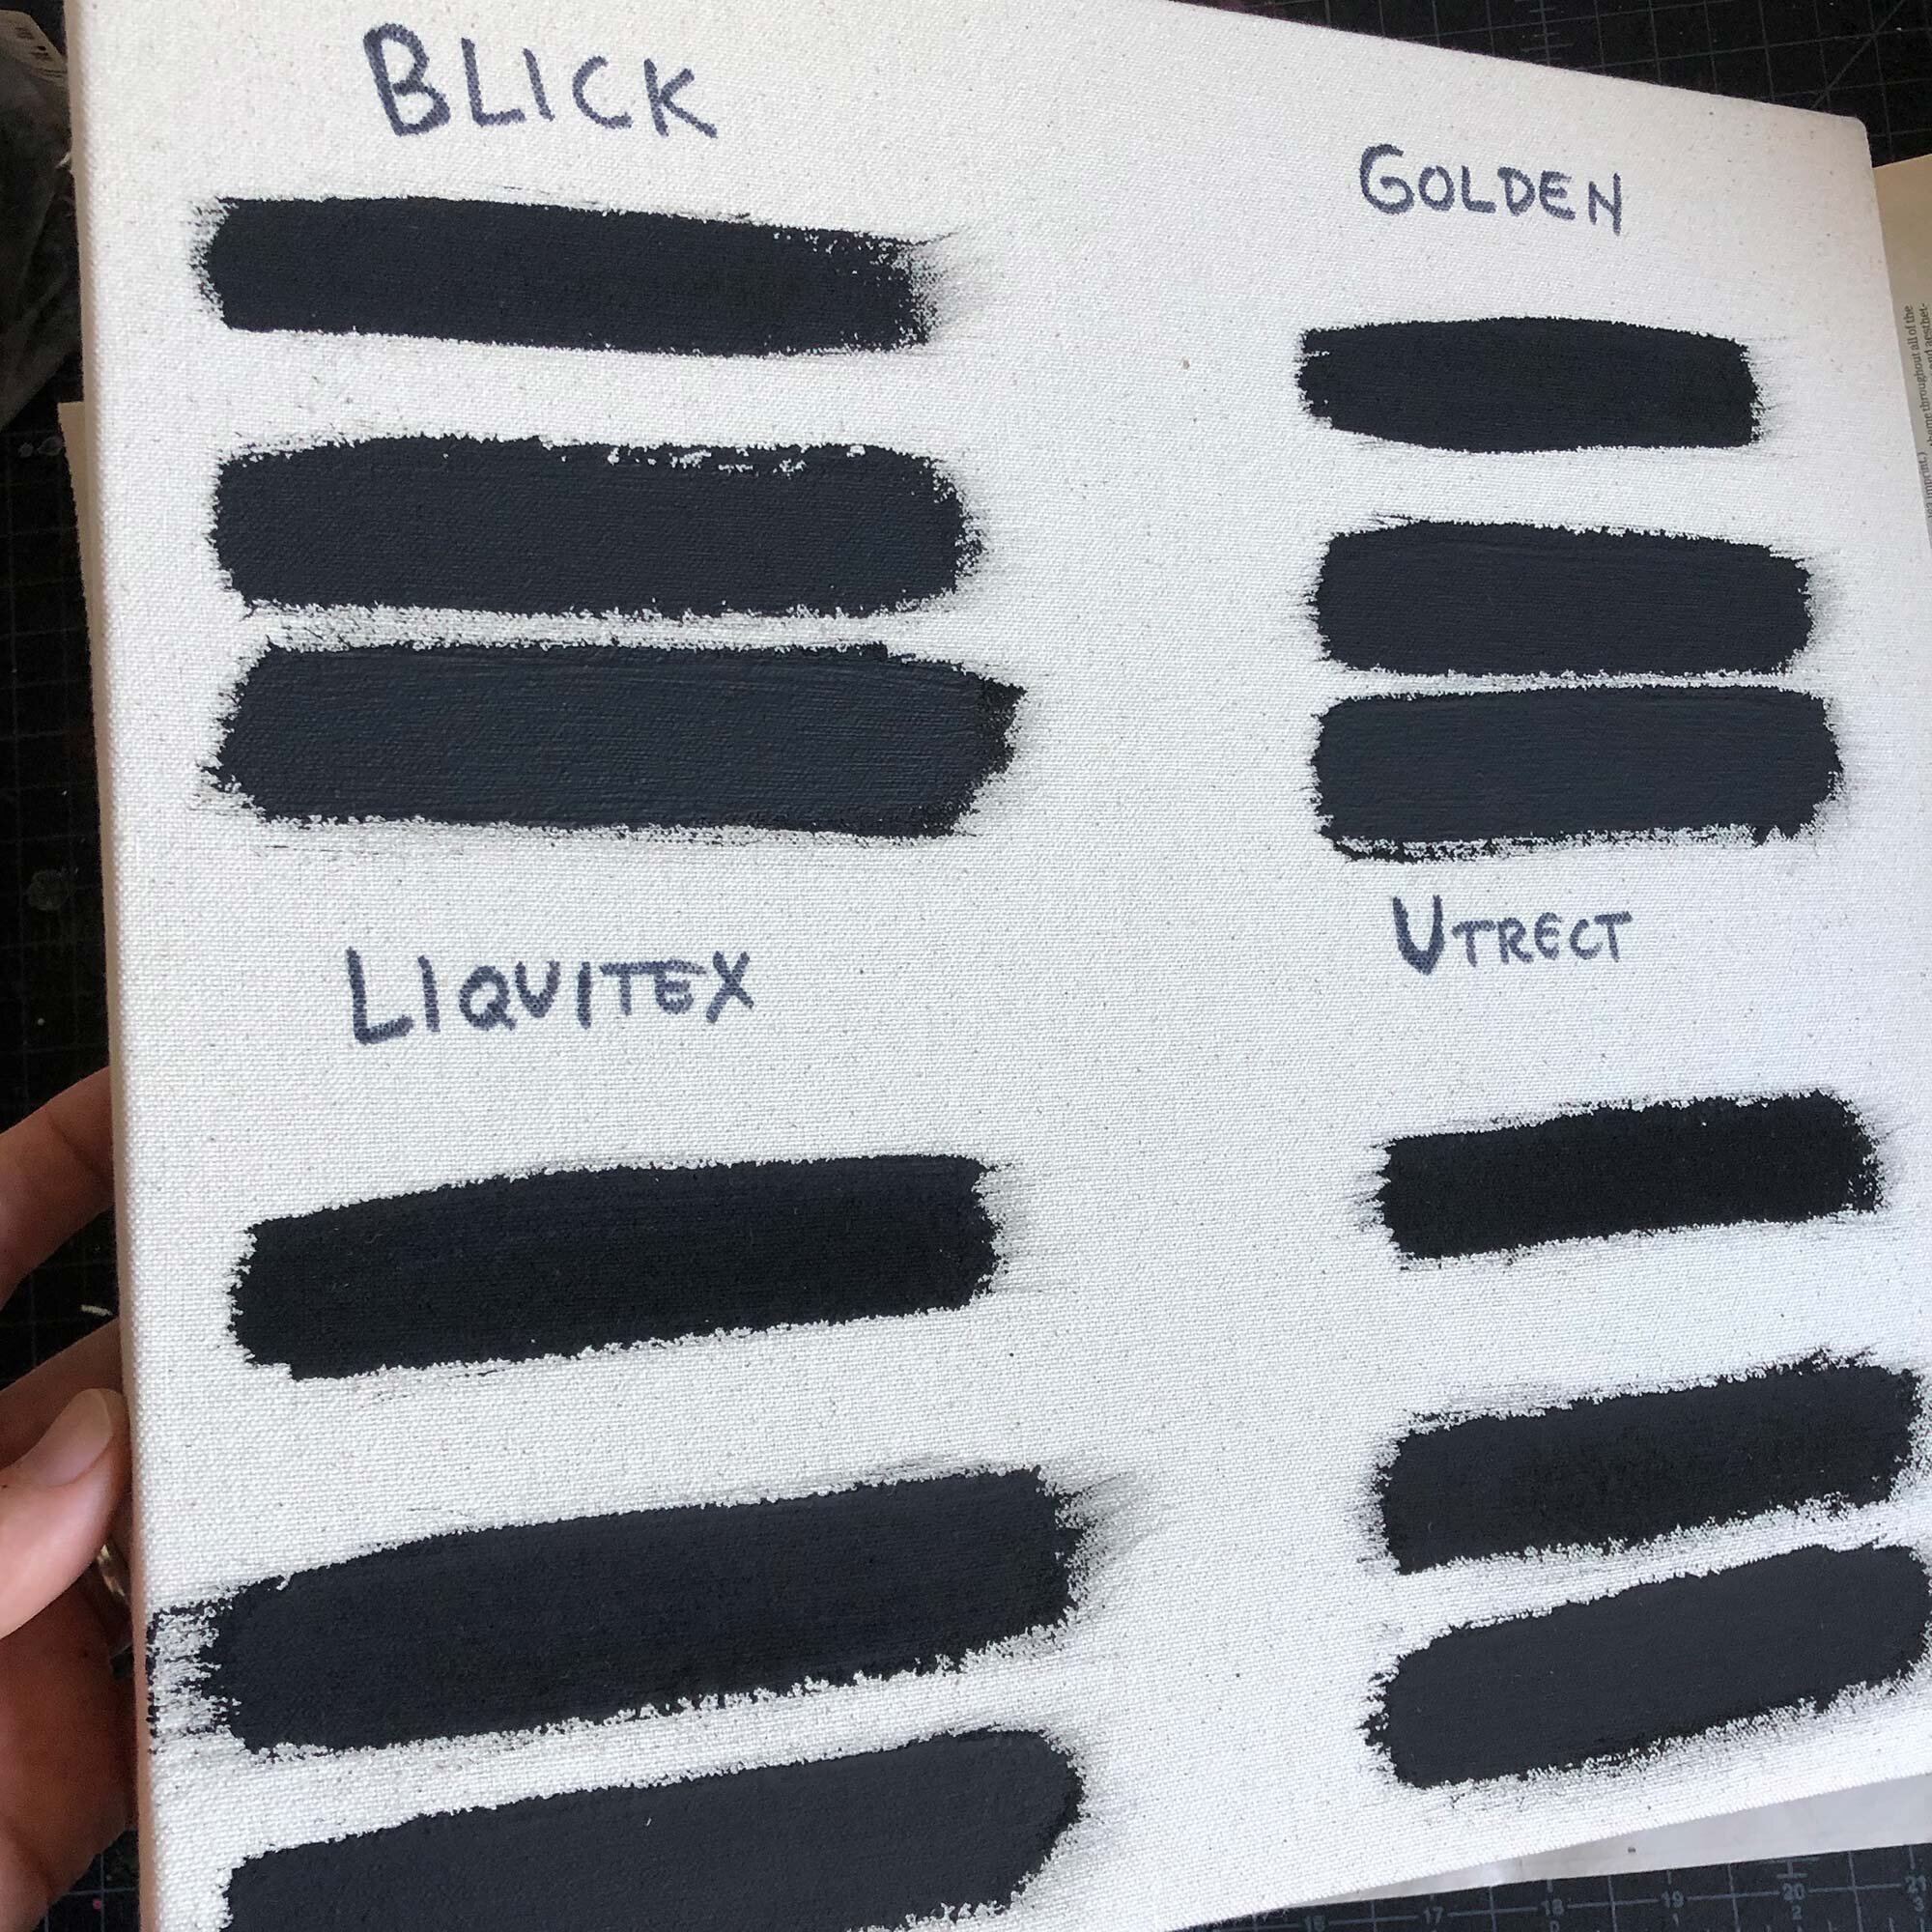
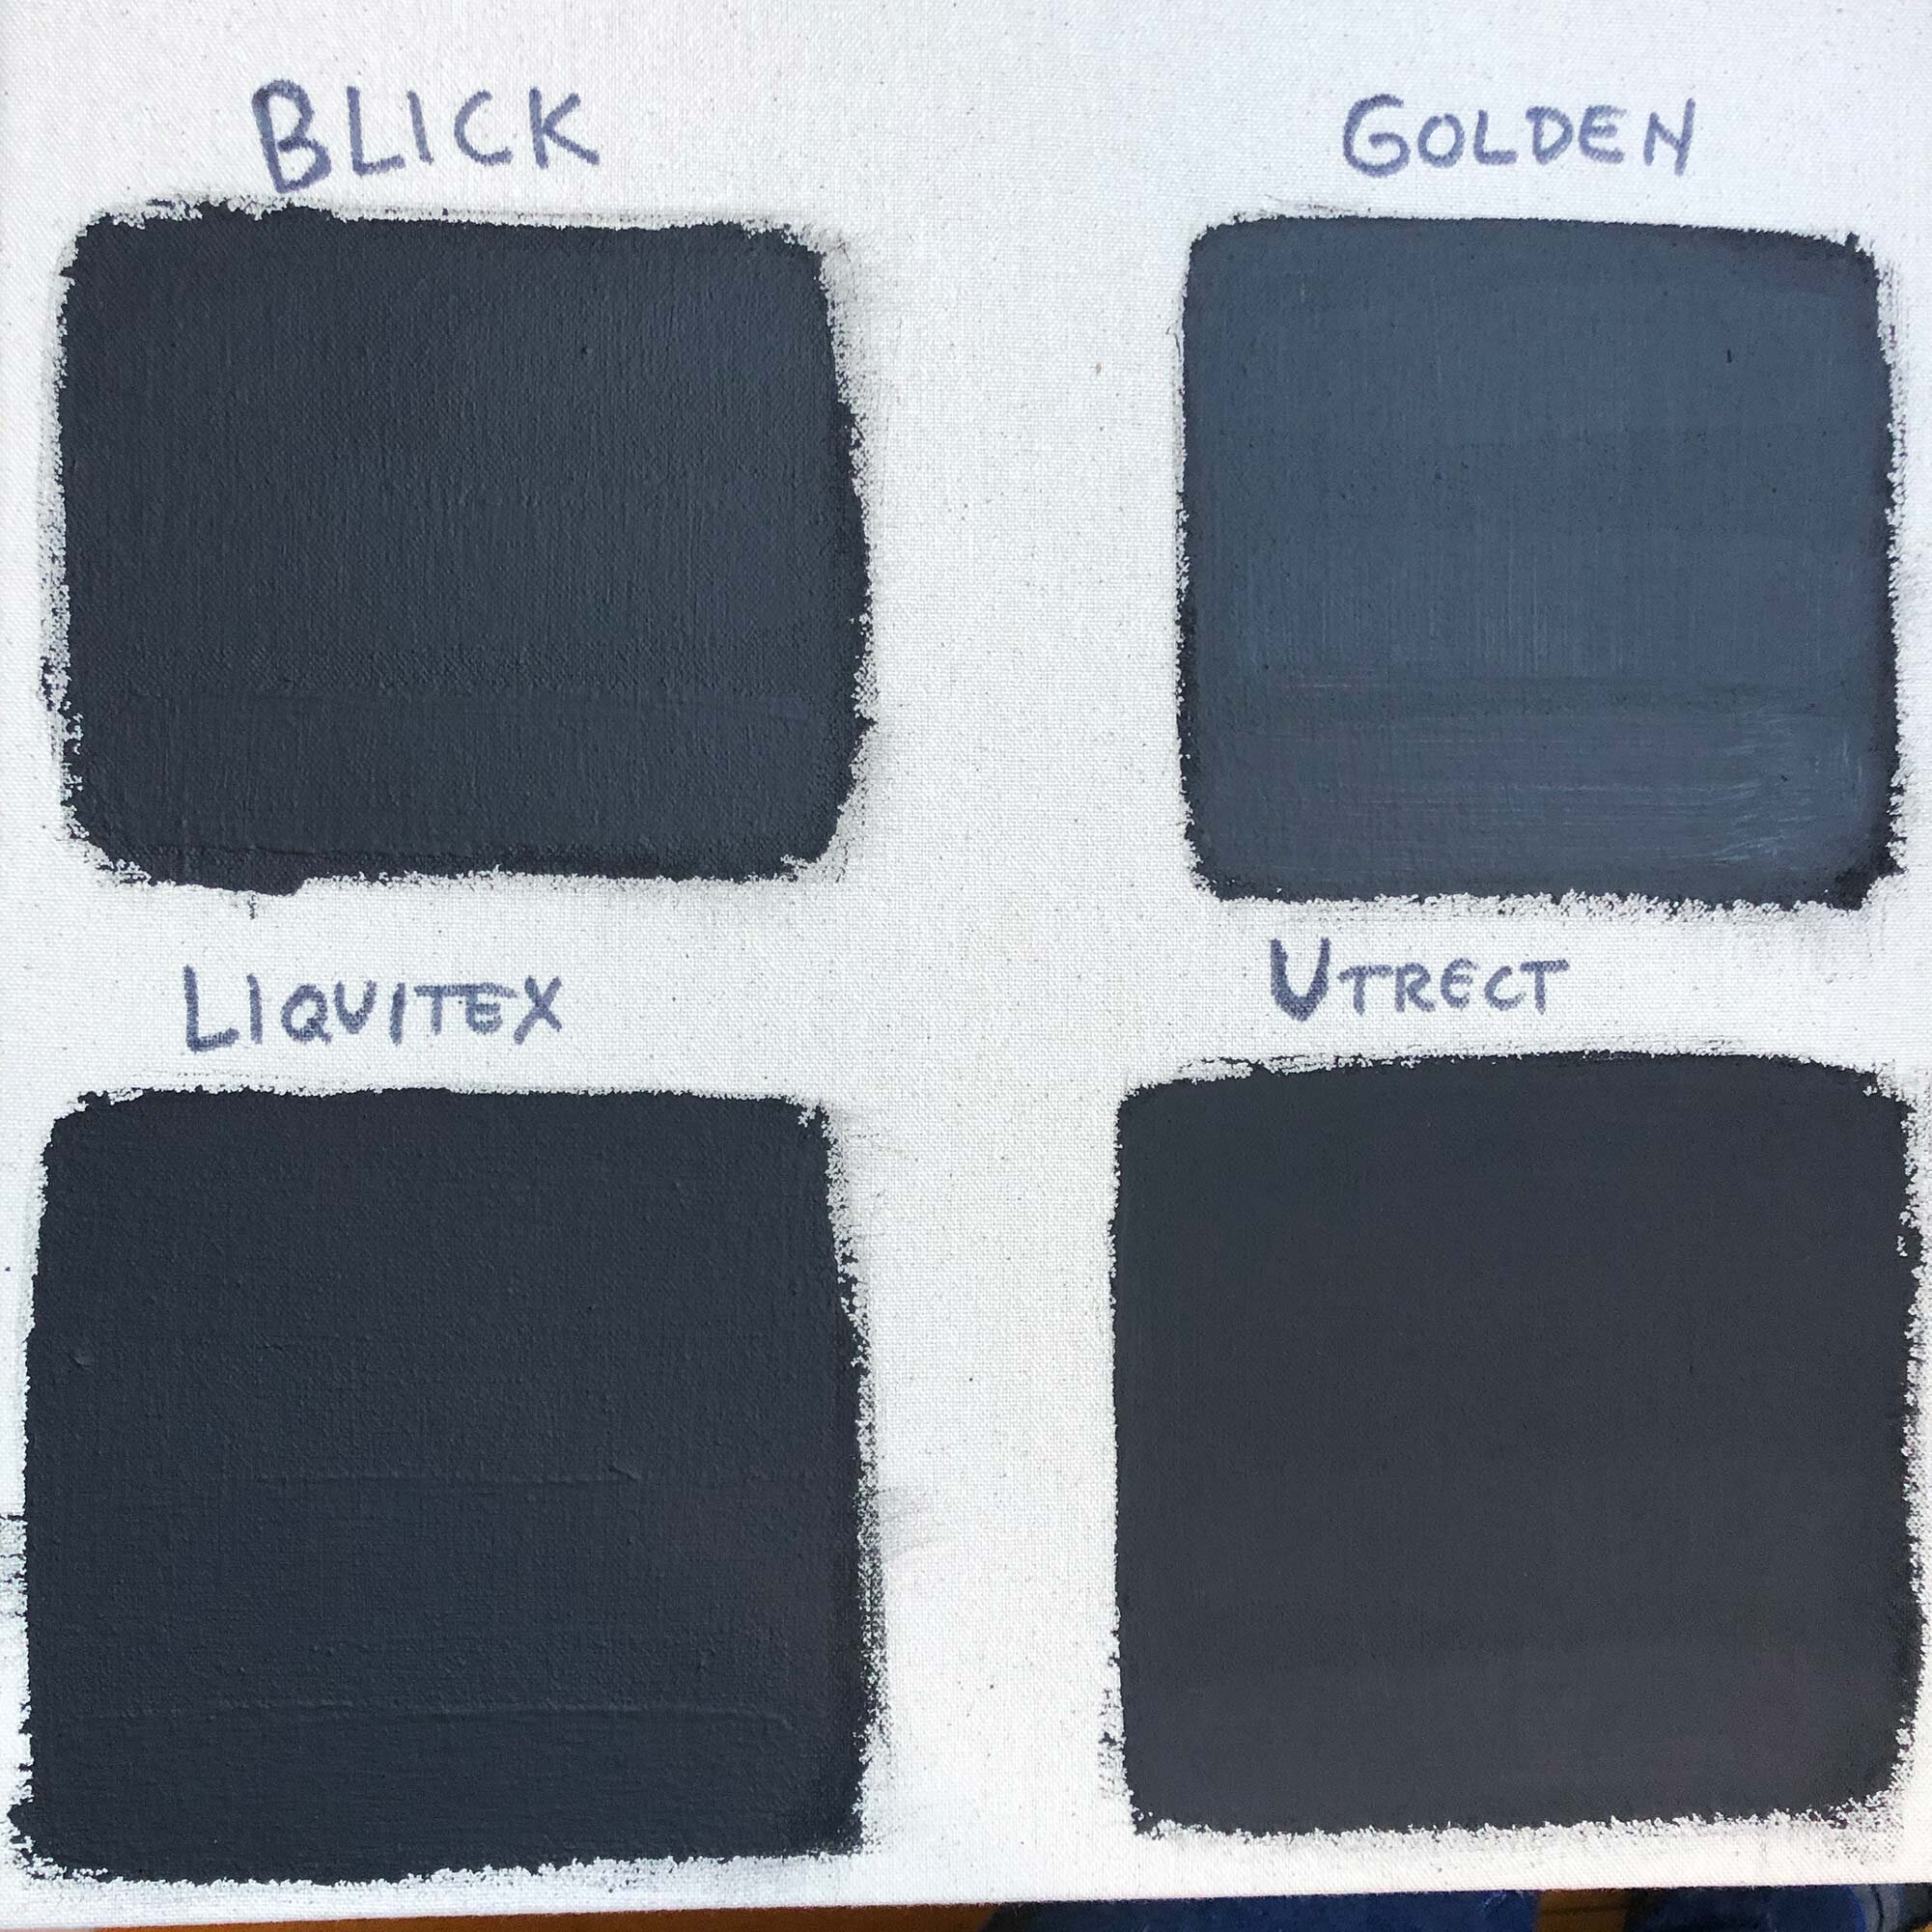
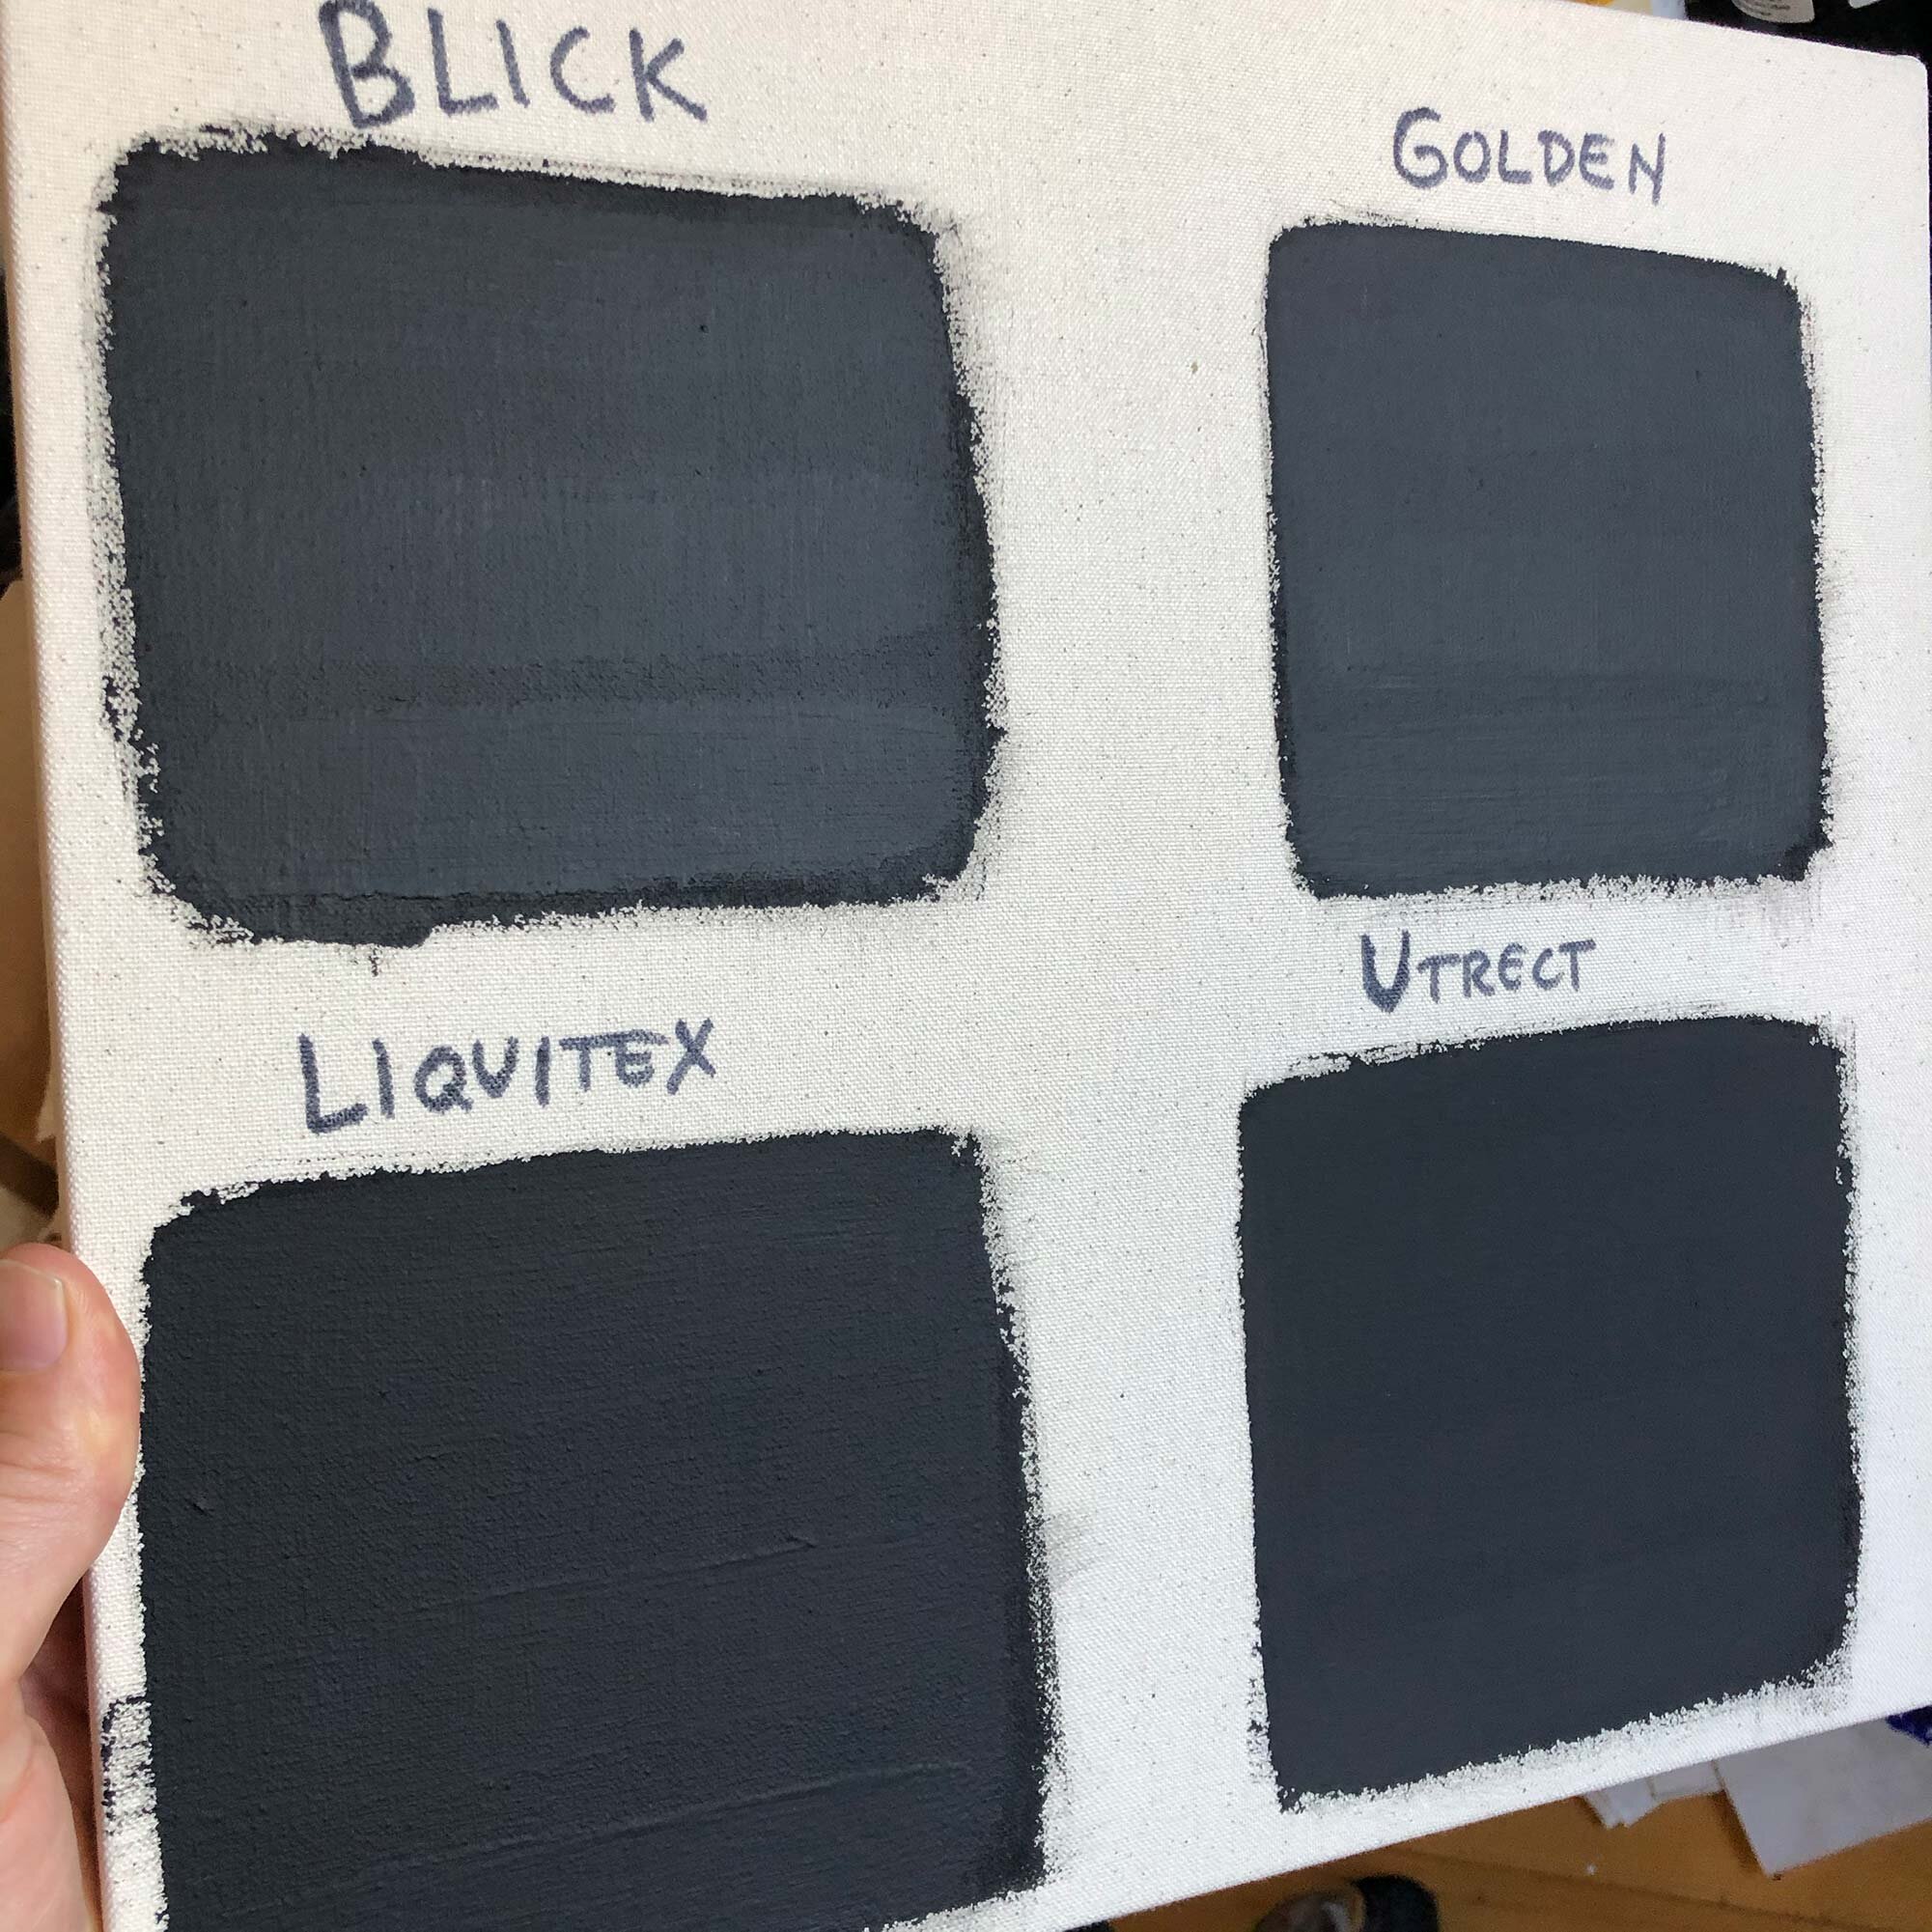
The four black gessos tested: Blick, Golden, Liquitex, and Utrecht.

The four black gessos tested: Blick, Golden, Liquitex, and Utrecht.

Black acrylic gesso provides a stable, flexible painting surface that is a complete contrast to a white gesso ground. Black gesso is also very opaque, allowing you to use it as a primer to cover up just about anything, and it will stick to a variety of surfaces including canvas, paper, wood, and more. Certain colors will change when painted on top of black gesso, especially transparent colors, but it also makes other colors really pop.

For this post, four black gessoes were tested and analyzed for ease of application, the matte or satin quality, and cost. All the gessoes were quite black, no questions there, but based on its ultra-matte quality and affordable price point, Utrecht Black Artists’ Acrylic Gesso was the top pick. This gesso was the most matte of the gessoes tested, which is a real plus.

The only drawback for the Utrecht Gesso was its gel-like nature (which can be fixed with a bit of water) but other gessoes each had their own features and attributes. A complete analysis and sample pictures follows, to help you choose the right black gesso for your studio.


Table of Contents

  • Top Pick: Utrecht Black Artists’ Acrylic Gesso

  • Golden Black Gesso

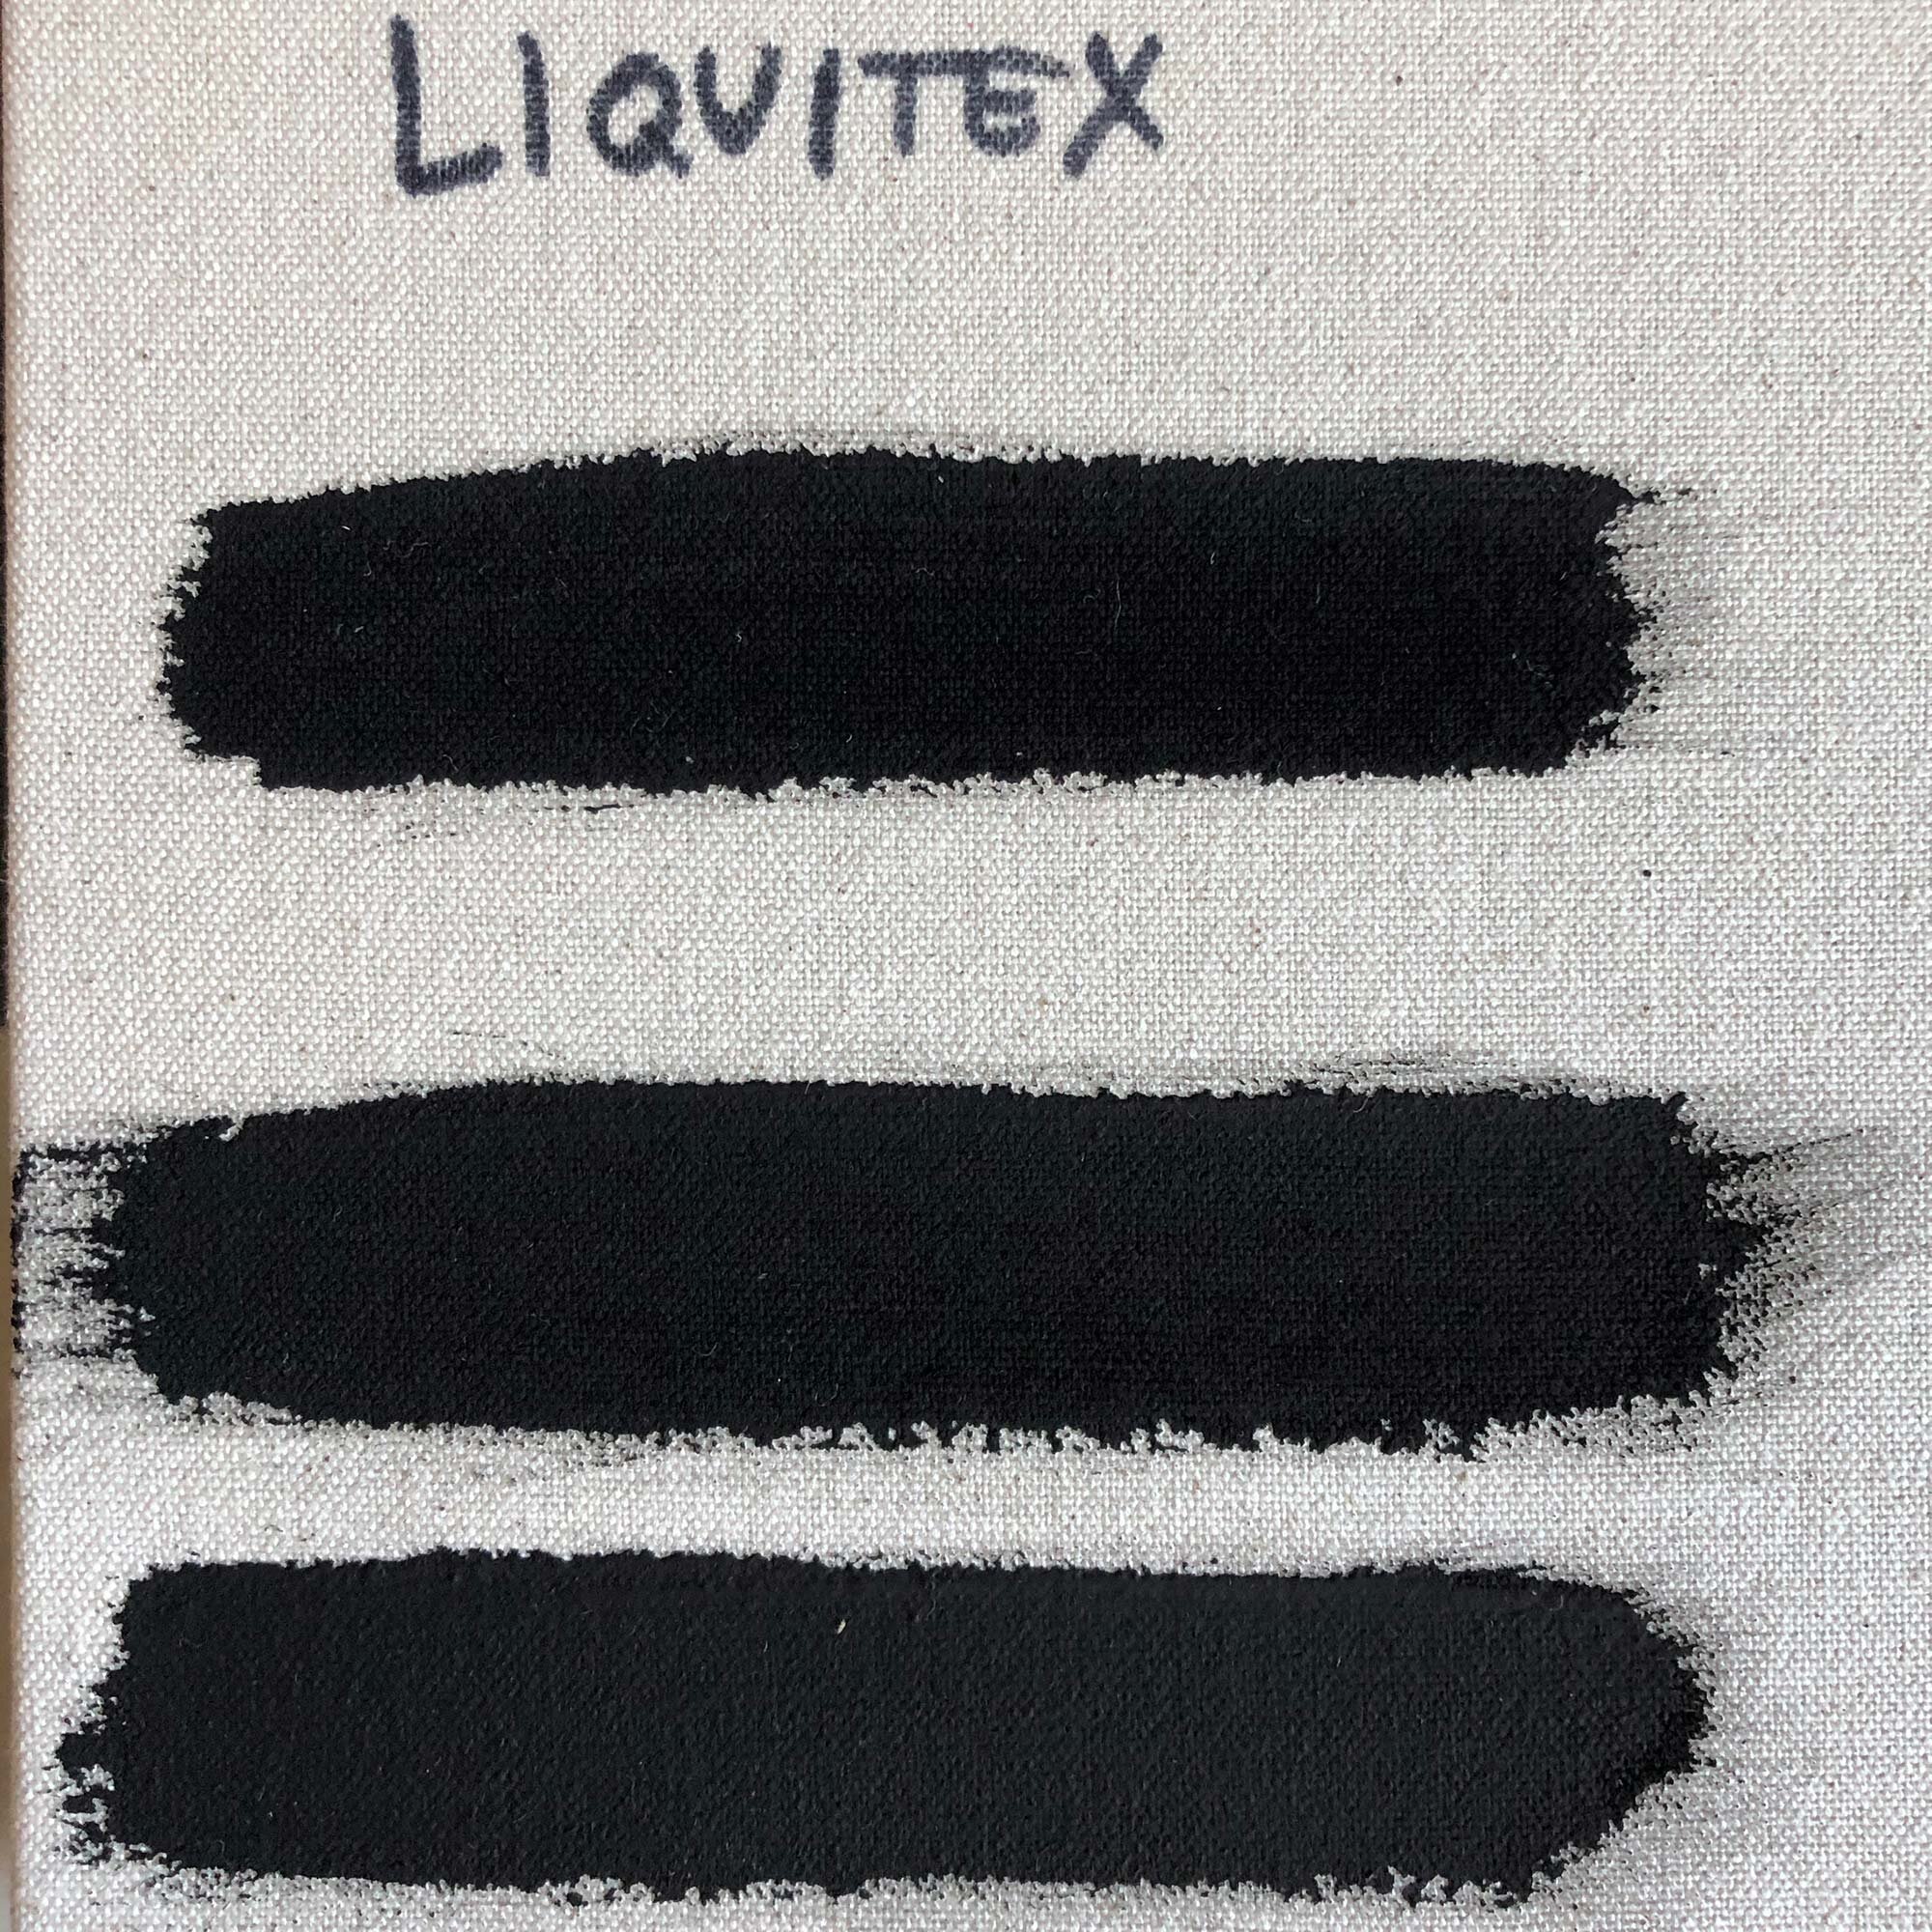
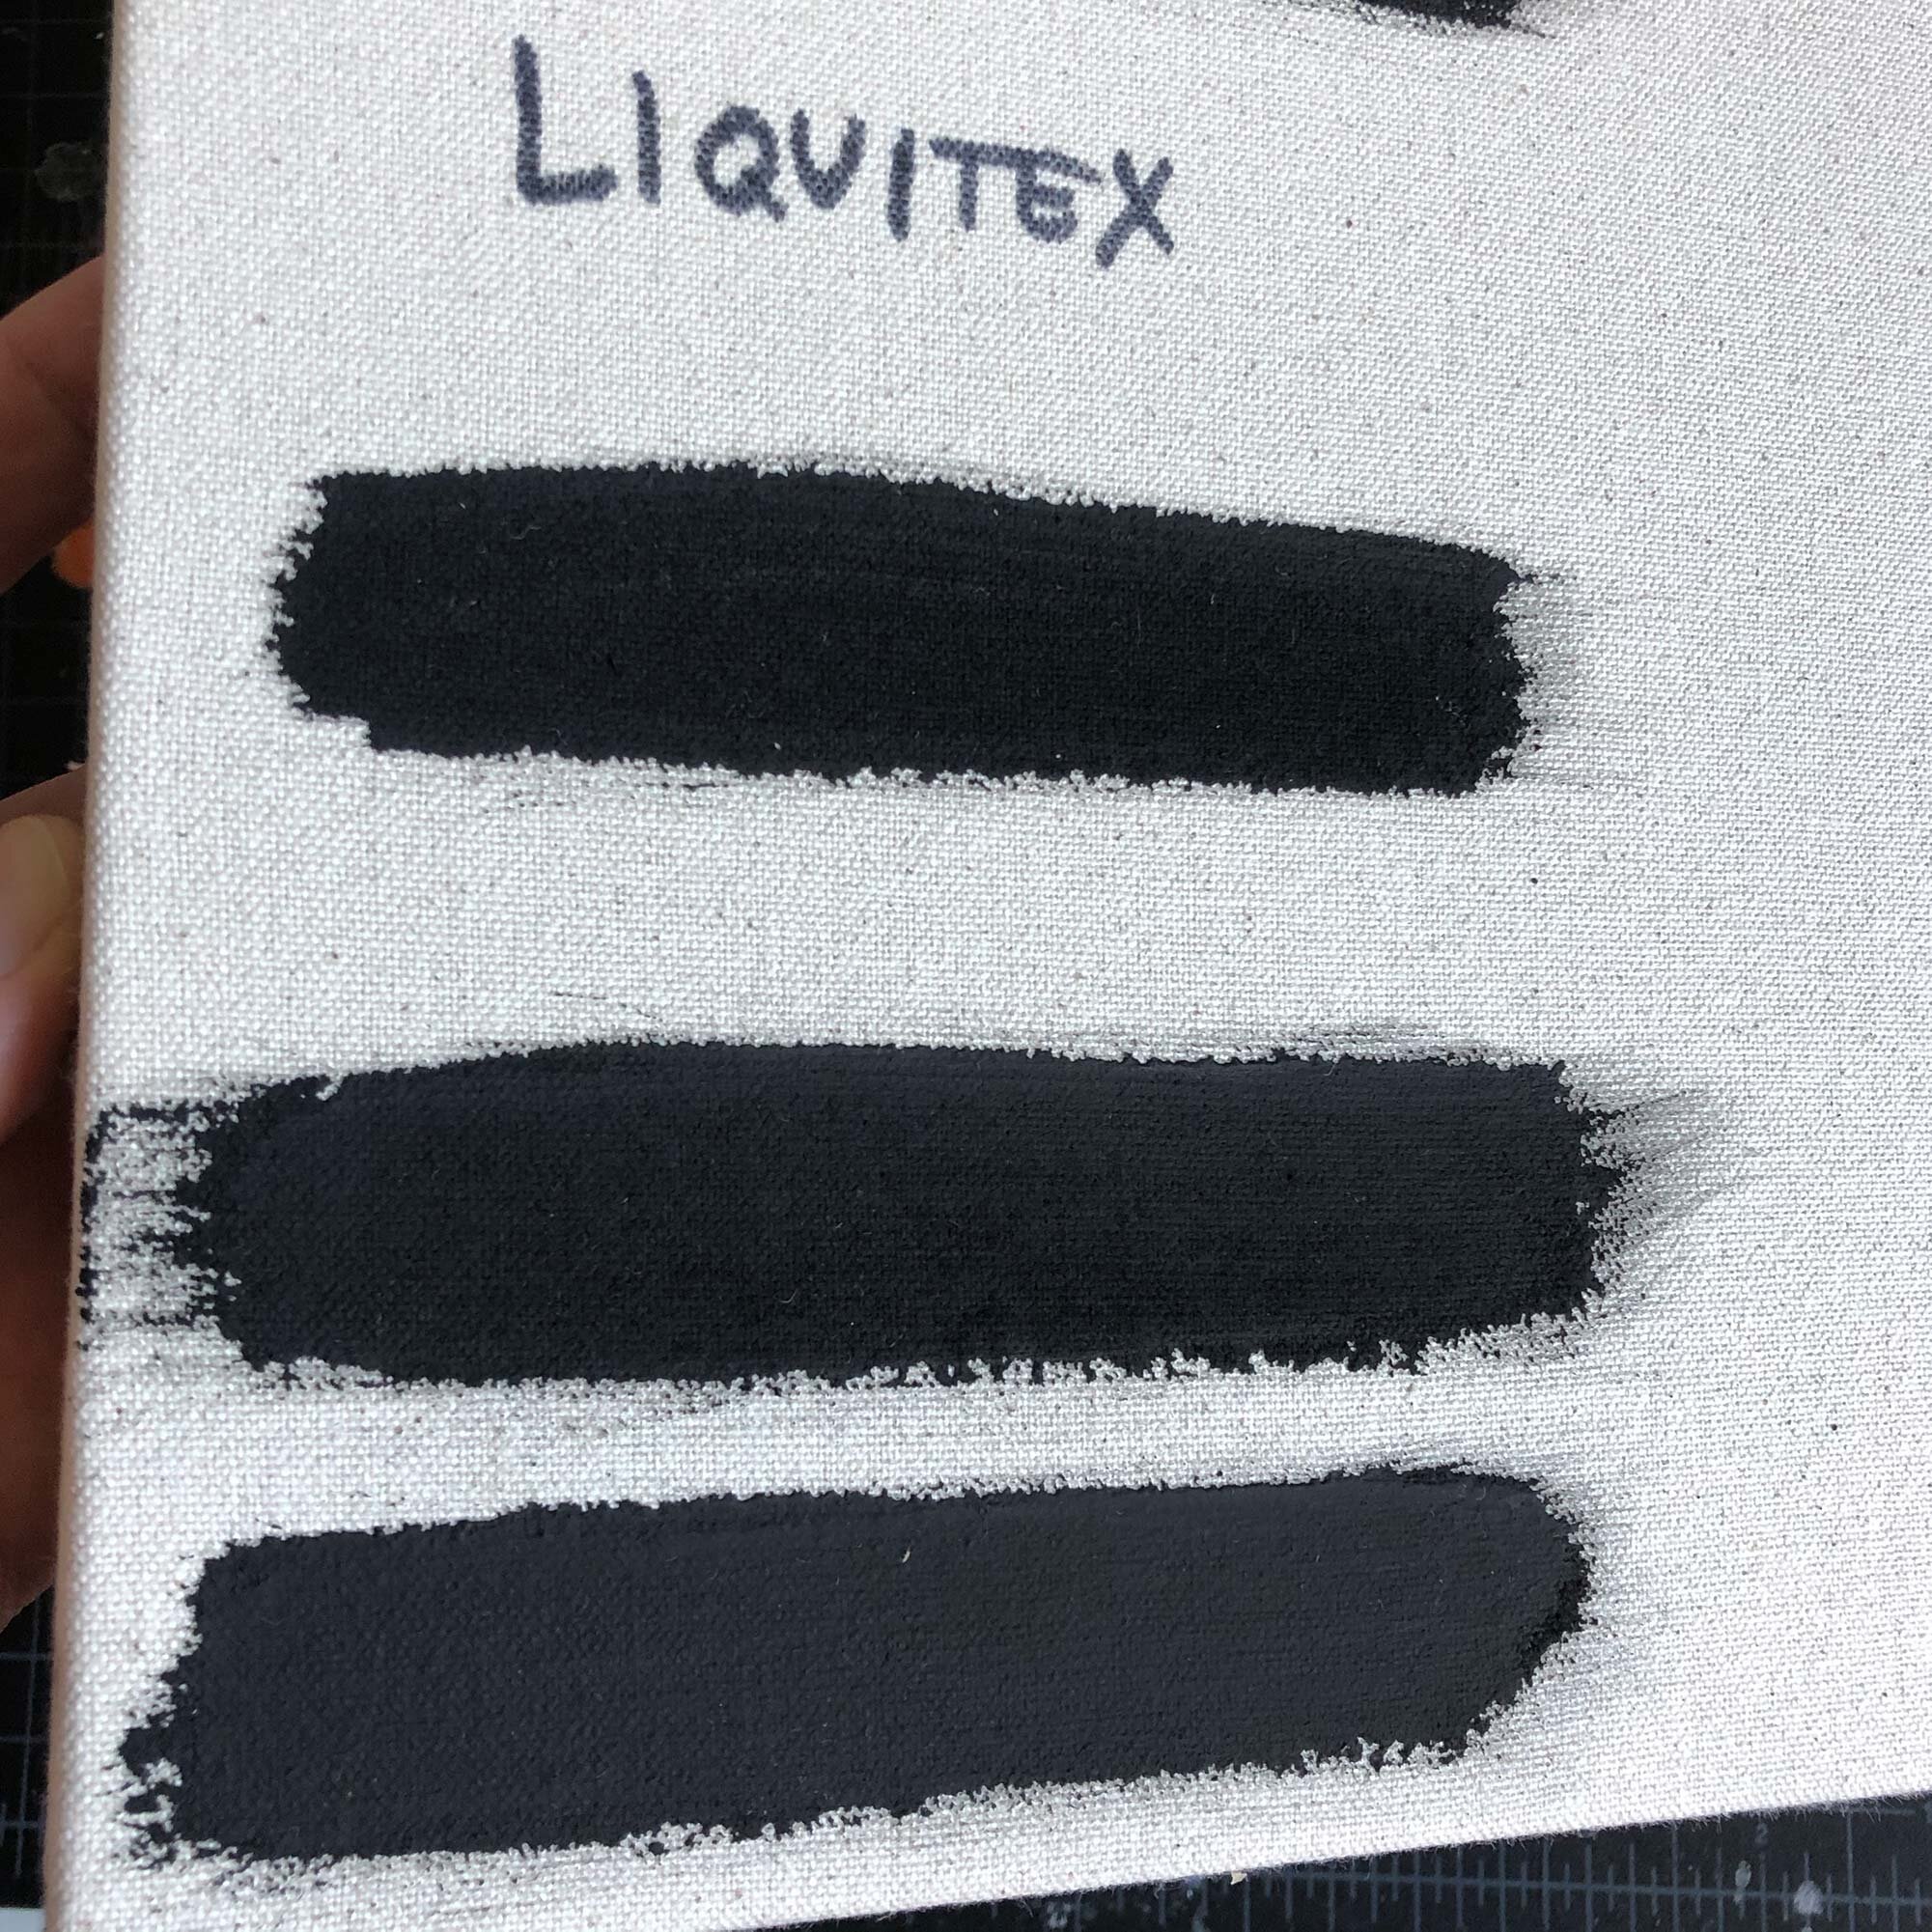
  • Liquitex Black Acylic Gesso

  • Blick Artists’ Acrylic Gesso

  • Testing Methodology and Images

  • Tips for Applying and Working With Black Gesso

  • Summary


Utrecht Black Artists’ Acrylic Gesso

Utrecht Black Gesso is available in 16 and 32 oz sizes.

Utrecht Black Gesso is available in 16 and 32 oz sizes.

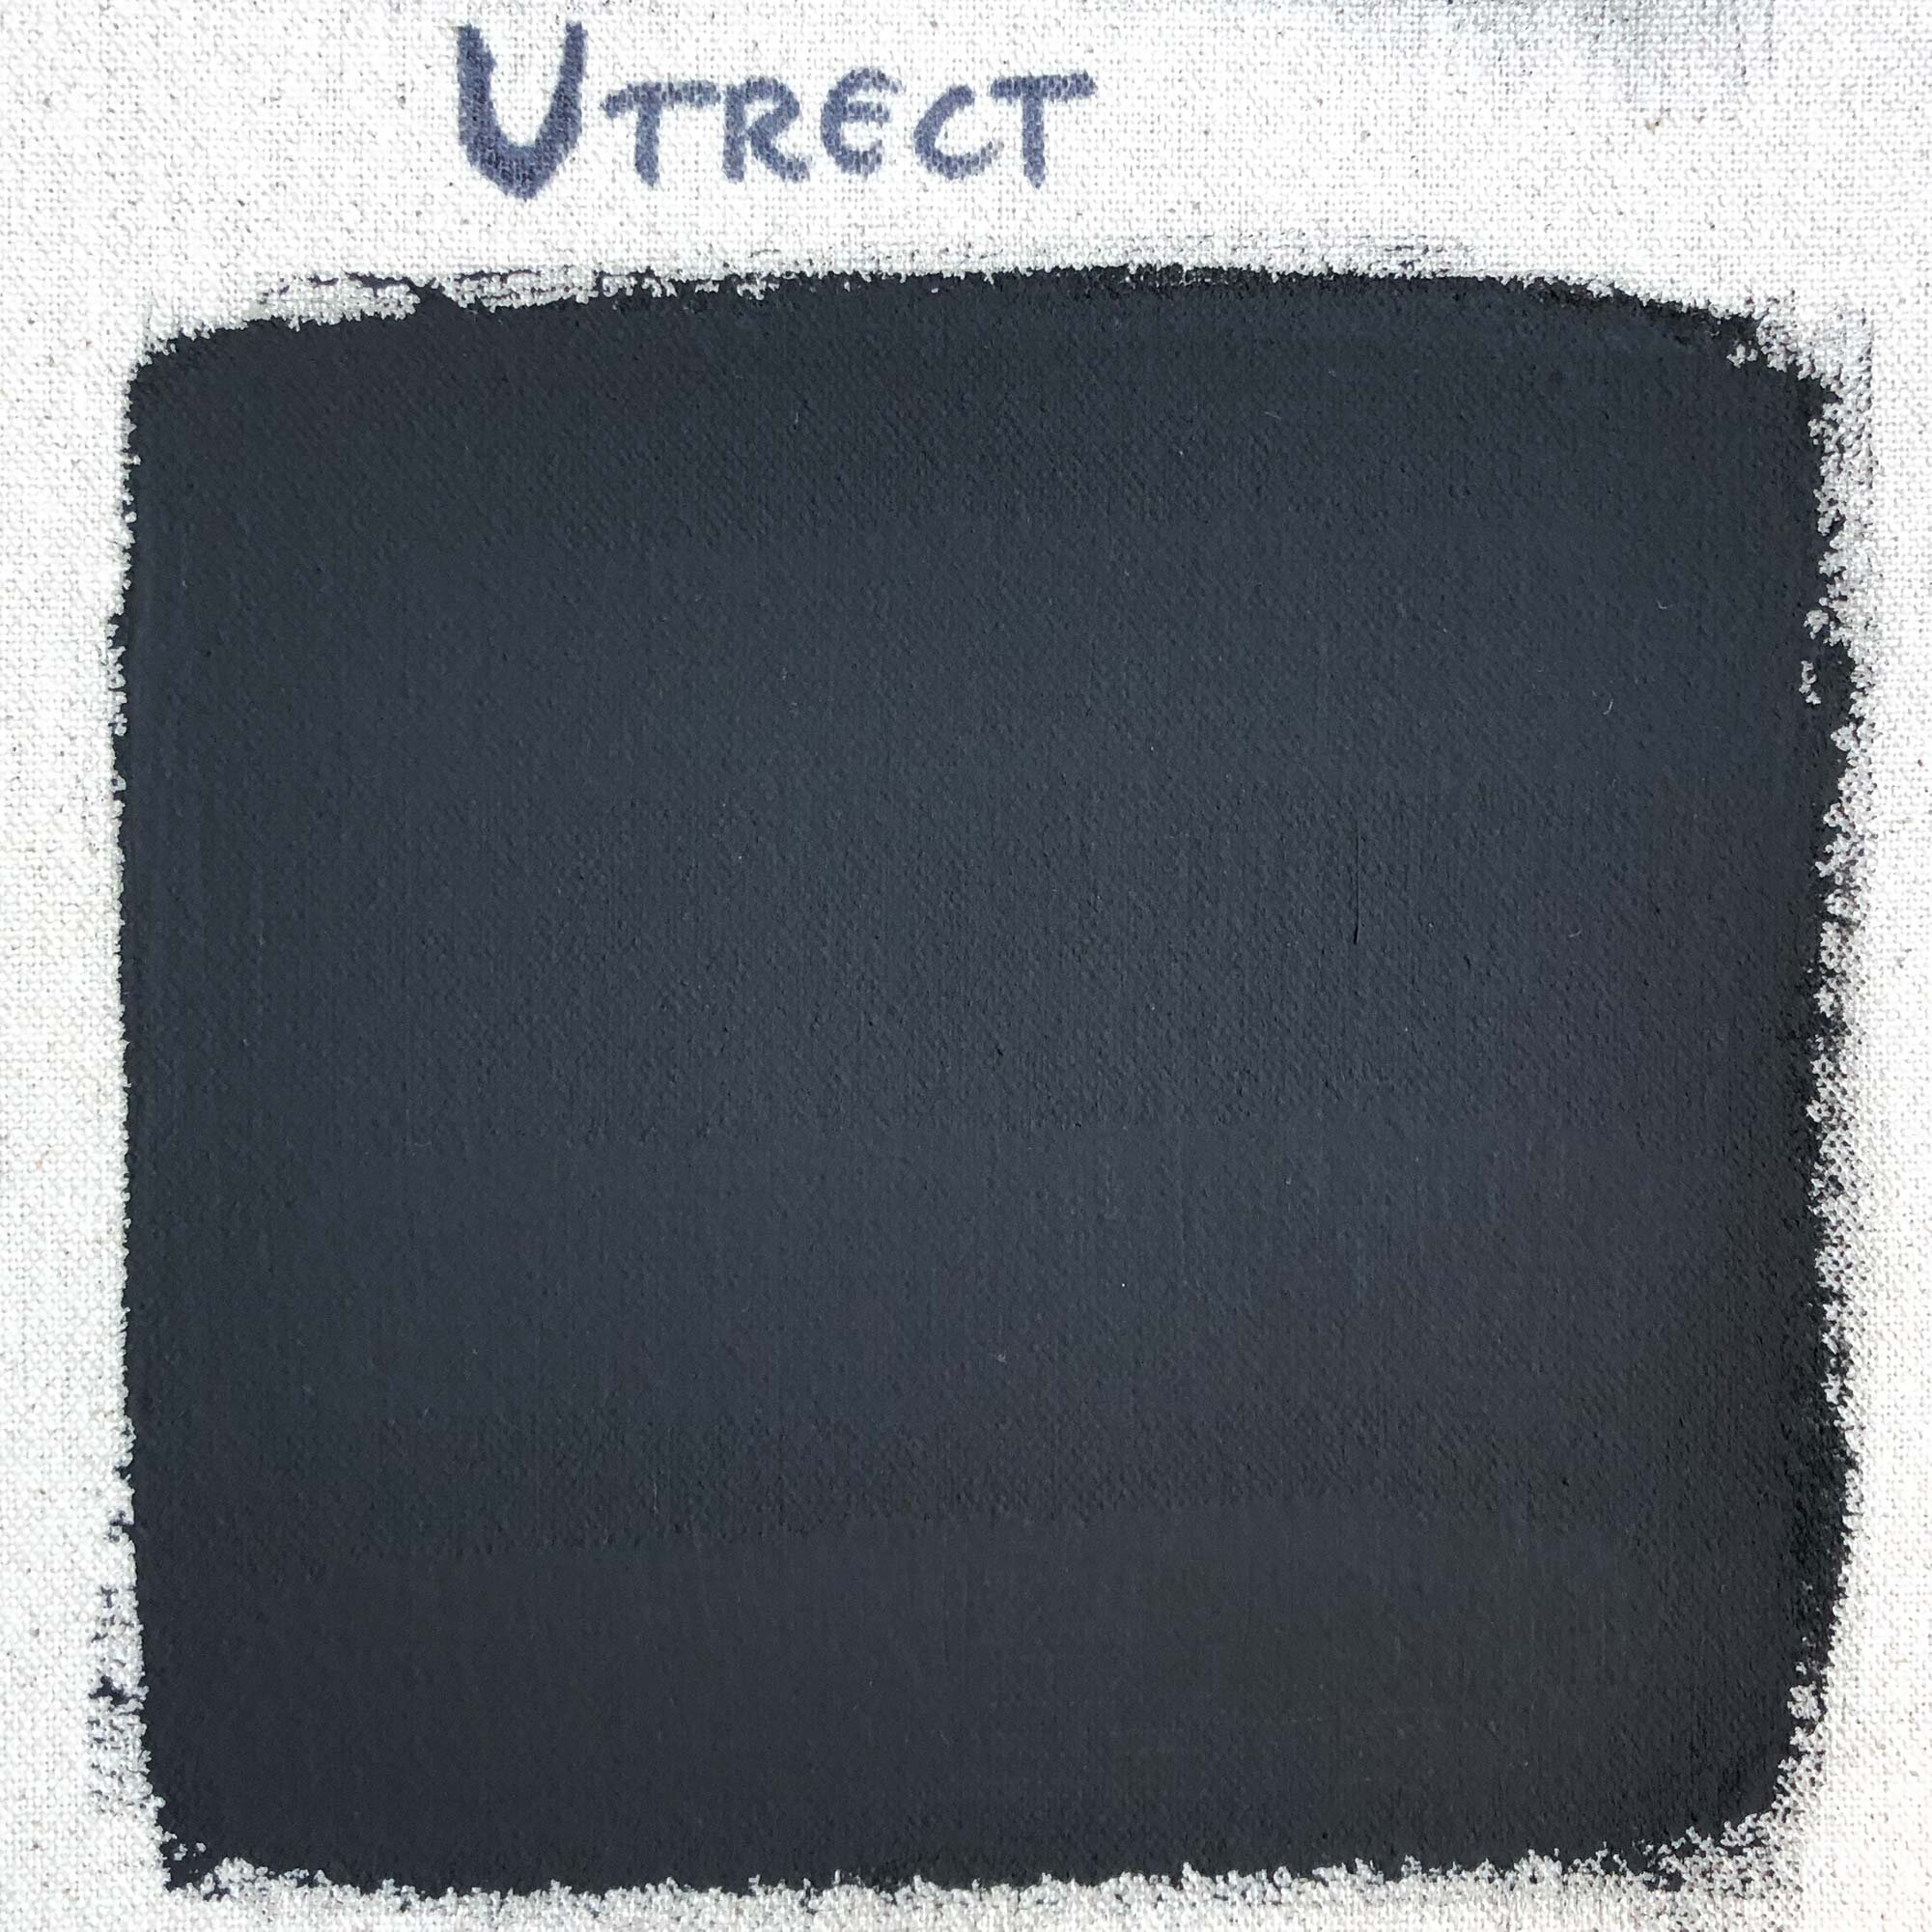
Utrecht Black Gesso is our top pick for a black acrylic gesso because of its ultra-matte quality and affordable price point. Of the gessoes tested, it was the most matte with a deep, flat-black surface that stayed completely matte even with 5 or 6 coats of gesso. And though this test did not include sanding in between coats, the gesso developed a relatively flat surface as layers built up.

Available in 16 or 32 oz jars, the gesso usually costs between $0.70 to $0.85 per ounce, making this the second cheapest black gesso tested. It’s a great deal for a top quality product.

There are two tradeoffs with this gesso: it’s gel-like quality and the limited availability of jar sizes. In multiple jars of this, I’ve always found it to have a gel-like quality right out of the jar that is a bit harder to use. Simply mix in a bit of water and you should be fine though. Regarding the jar size, the tall 32 oz jar is easy to store but it can be hard to get all the gesso out of the bottom. It would also be nice if it came in gallon buckets. But in reality, these are minor complaints because the ultra-matte results are what I’m looking for in a black gesso, and this is my go-to favorite.

About Utrecht: Founded in 1949 in Brooklyn, New York, Utrecht was one of the first manufacturers to develop acrylic gesso. Acquired by Blick in 2013, the products are still made in Brooklyn and are available online and at Blick stores in the U.S. They are not marketed this way, but I think of Utrecht as the premium “house brand” at Blick stores.

Utrecht Black Artists’ Acrylic Gesso sizes, typical price, and price per ounce:

  • 16 oz, $13.34, $0.83 per ounce

  • 32 oz, $22.06, $0.69 per ounce

Test images for Utrecht Black Acrylic Gesso:

In a simple test, Utrecht Black Gesso gave a ultra-matte, flat surface.

In a simple test, Utrecht Black Gesso gave a ultra-matte, flat surface.

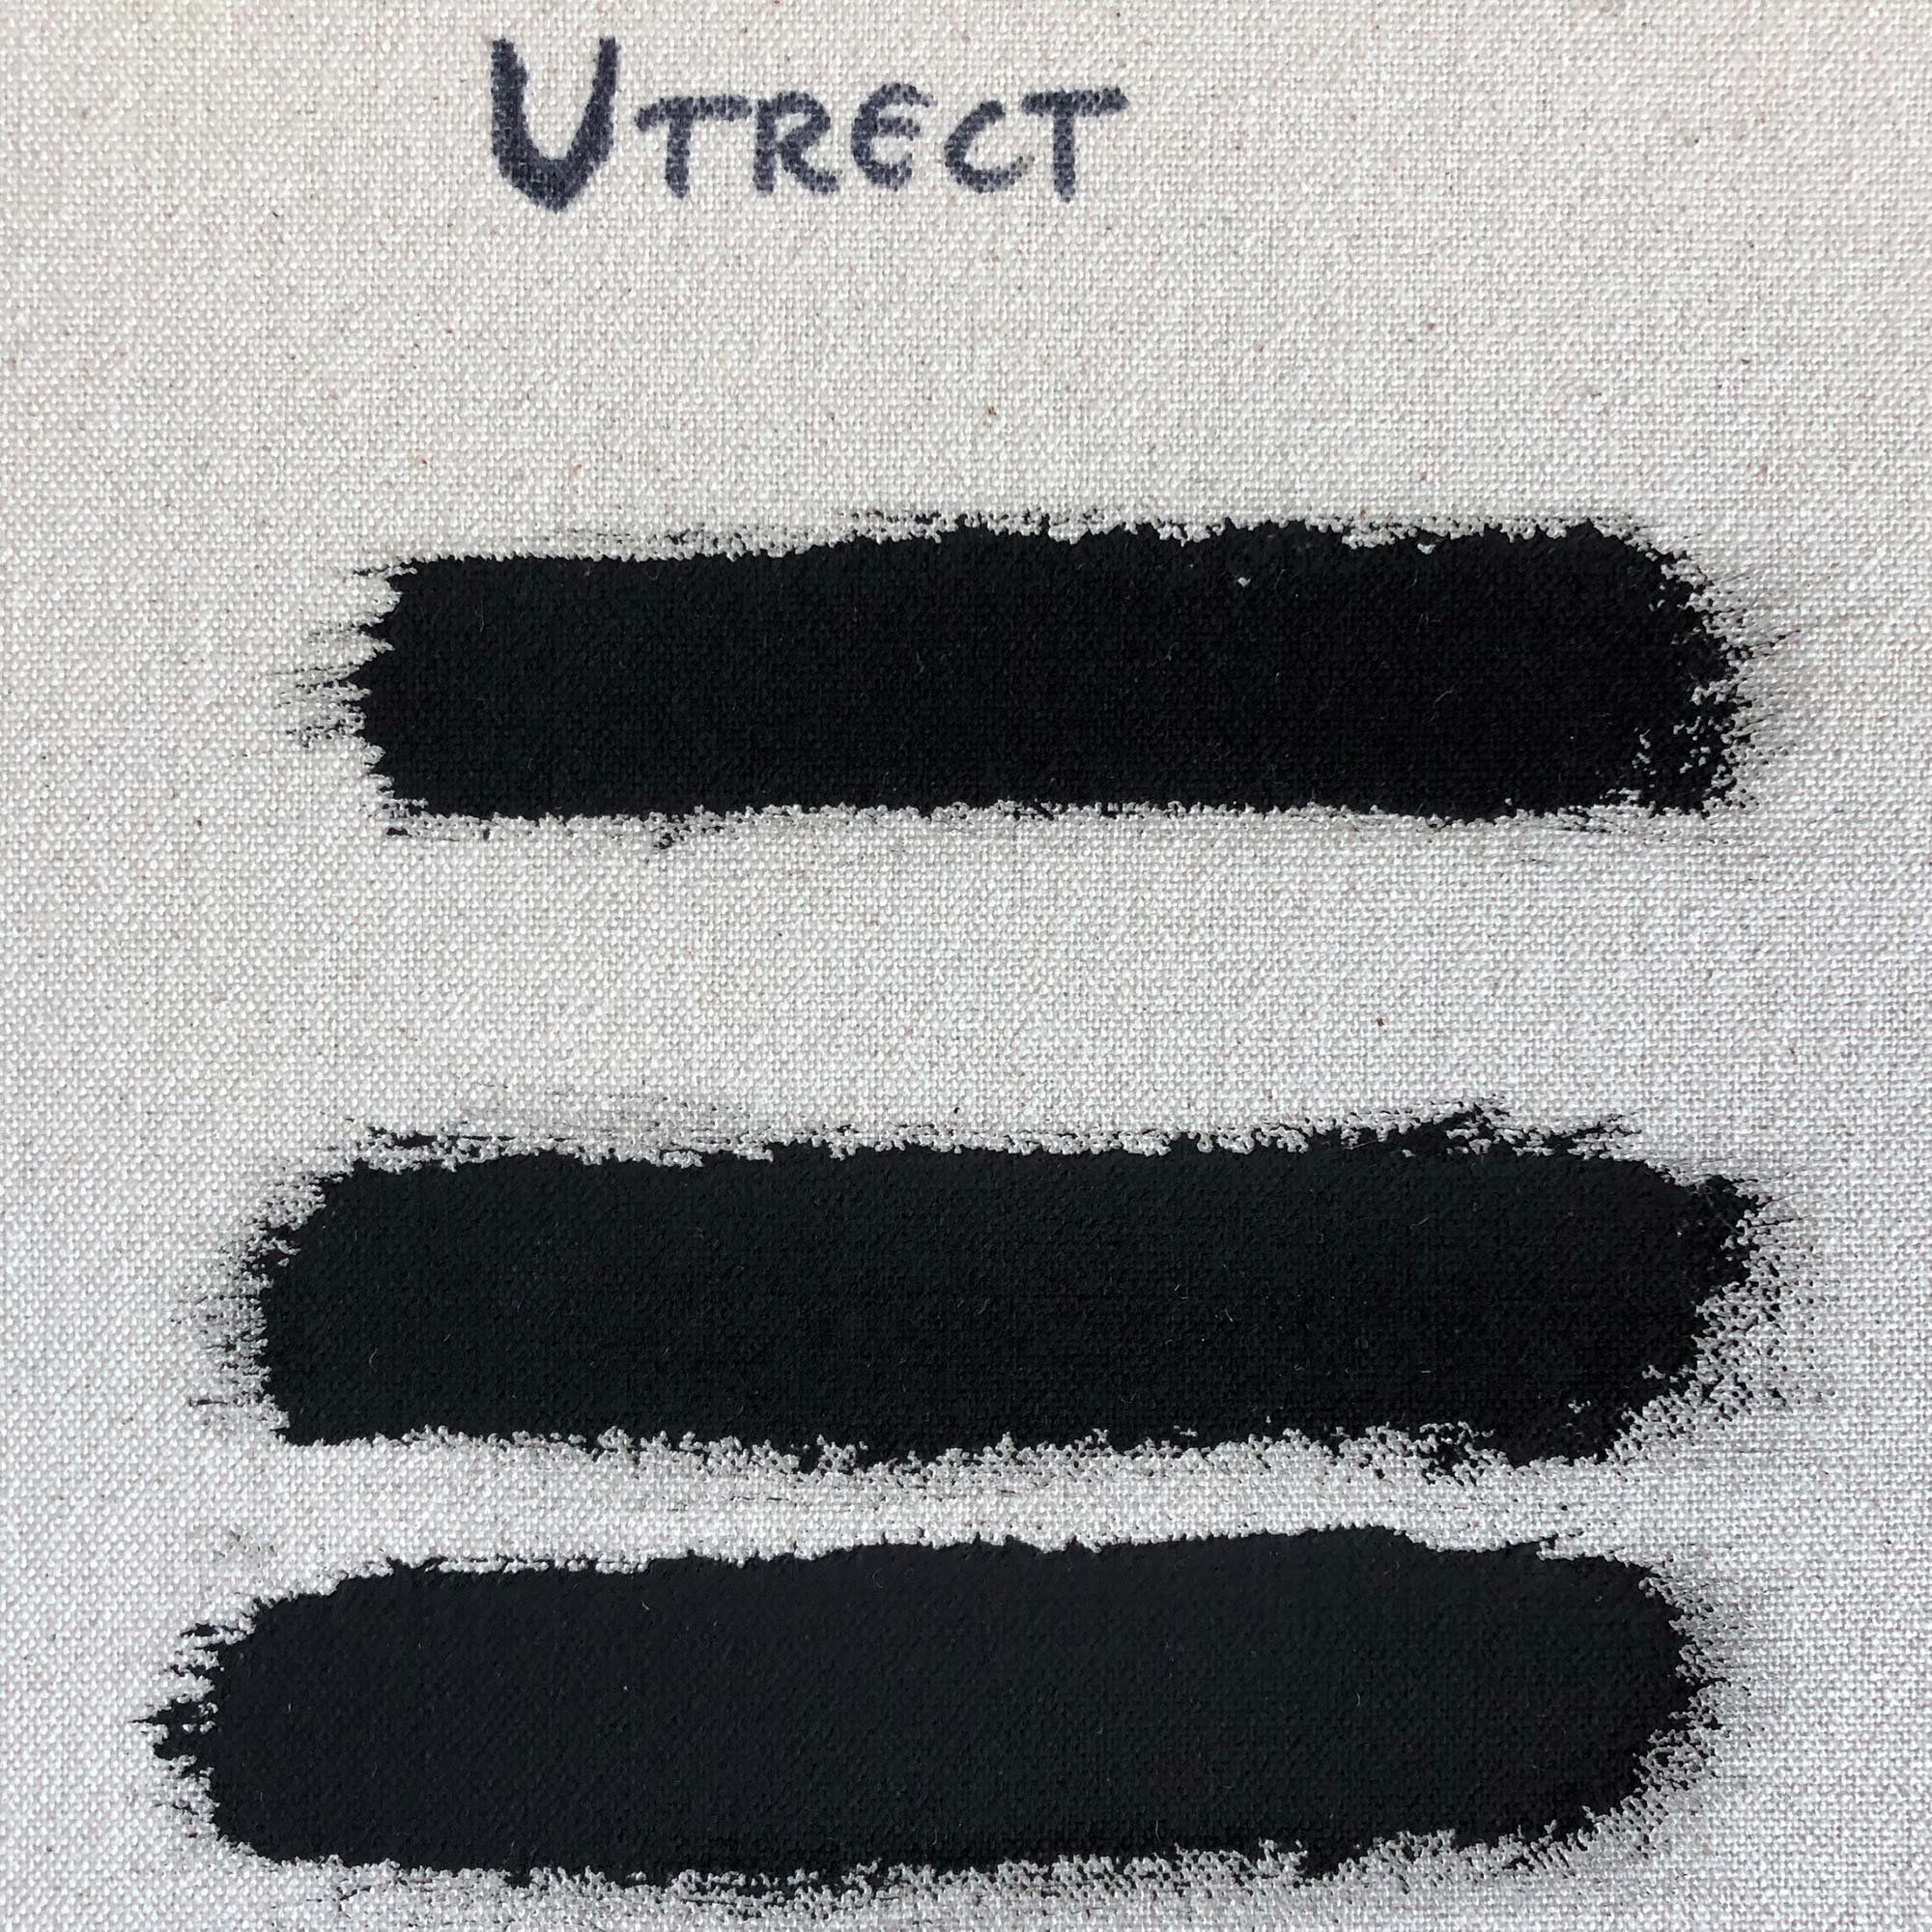
Stripe test from top: 1 coat, 2 coats, 3 coats. Utrecht Black Gesso stayed matte.

Stripe test from top: 1 coat, 2 coats, 3 coats. Utrecht Black Gesso stayed matte.

Angle view of the flat test.

Angle view of the flat test.

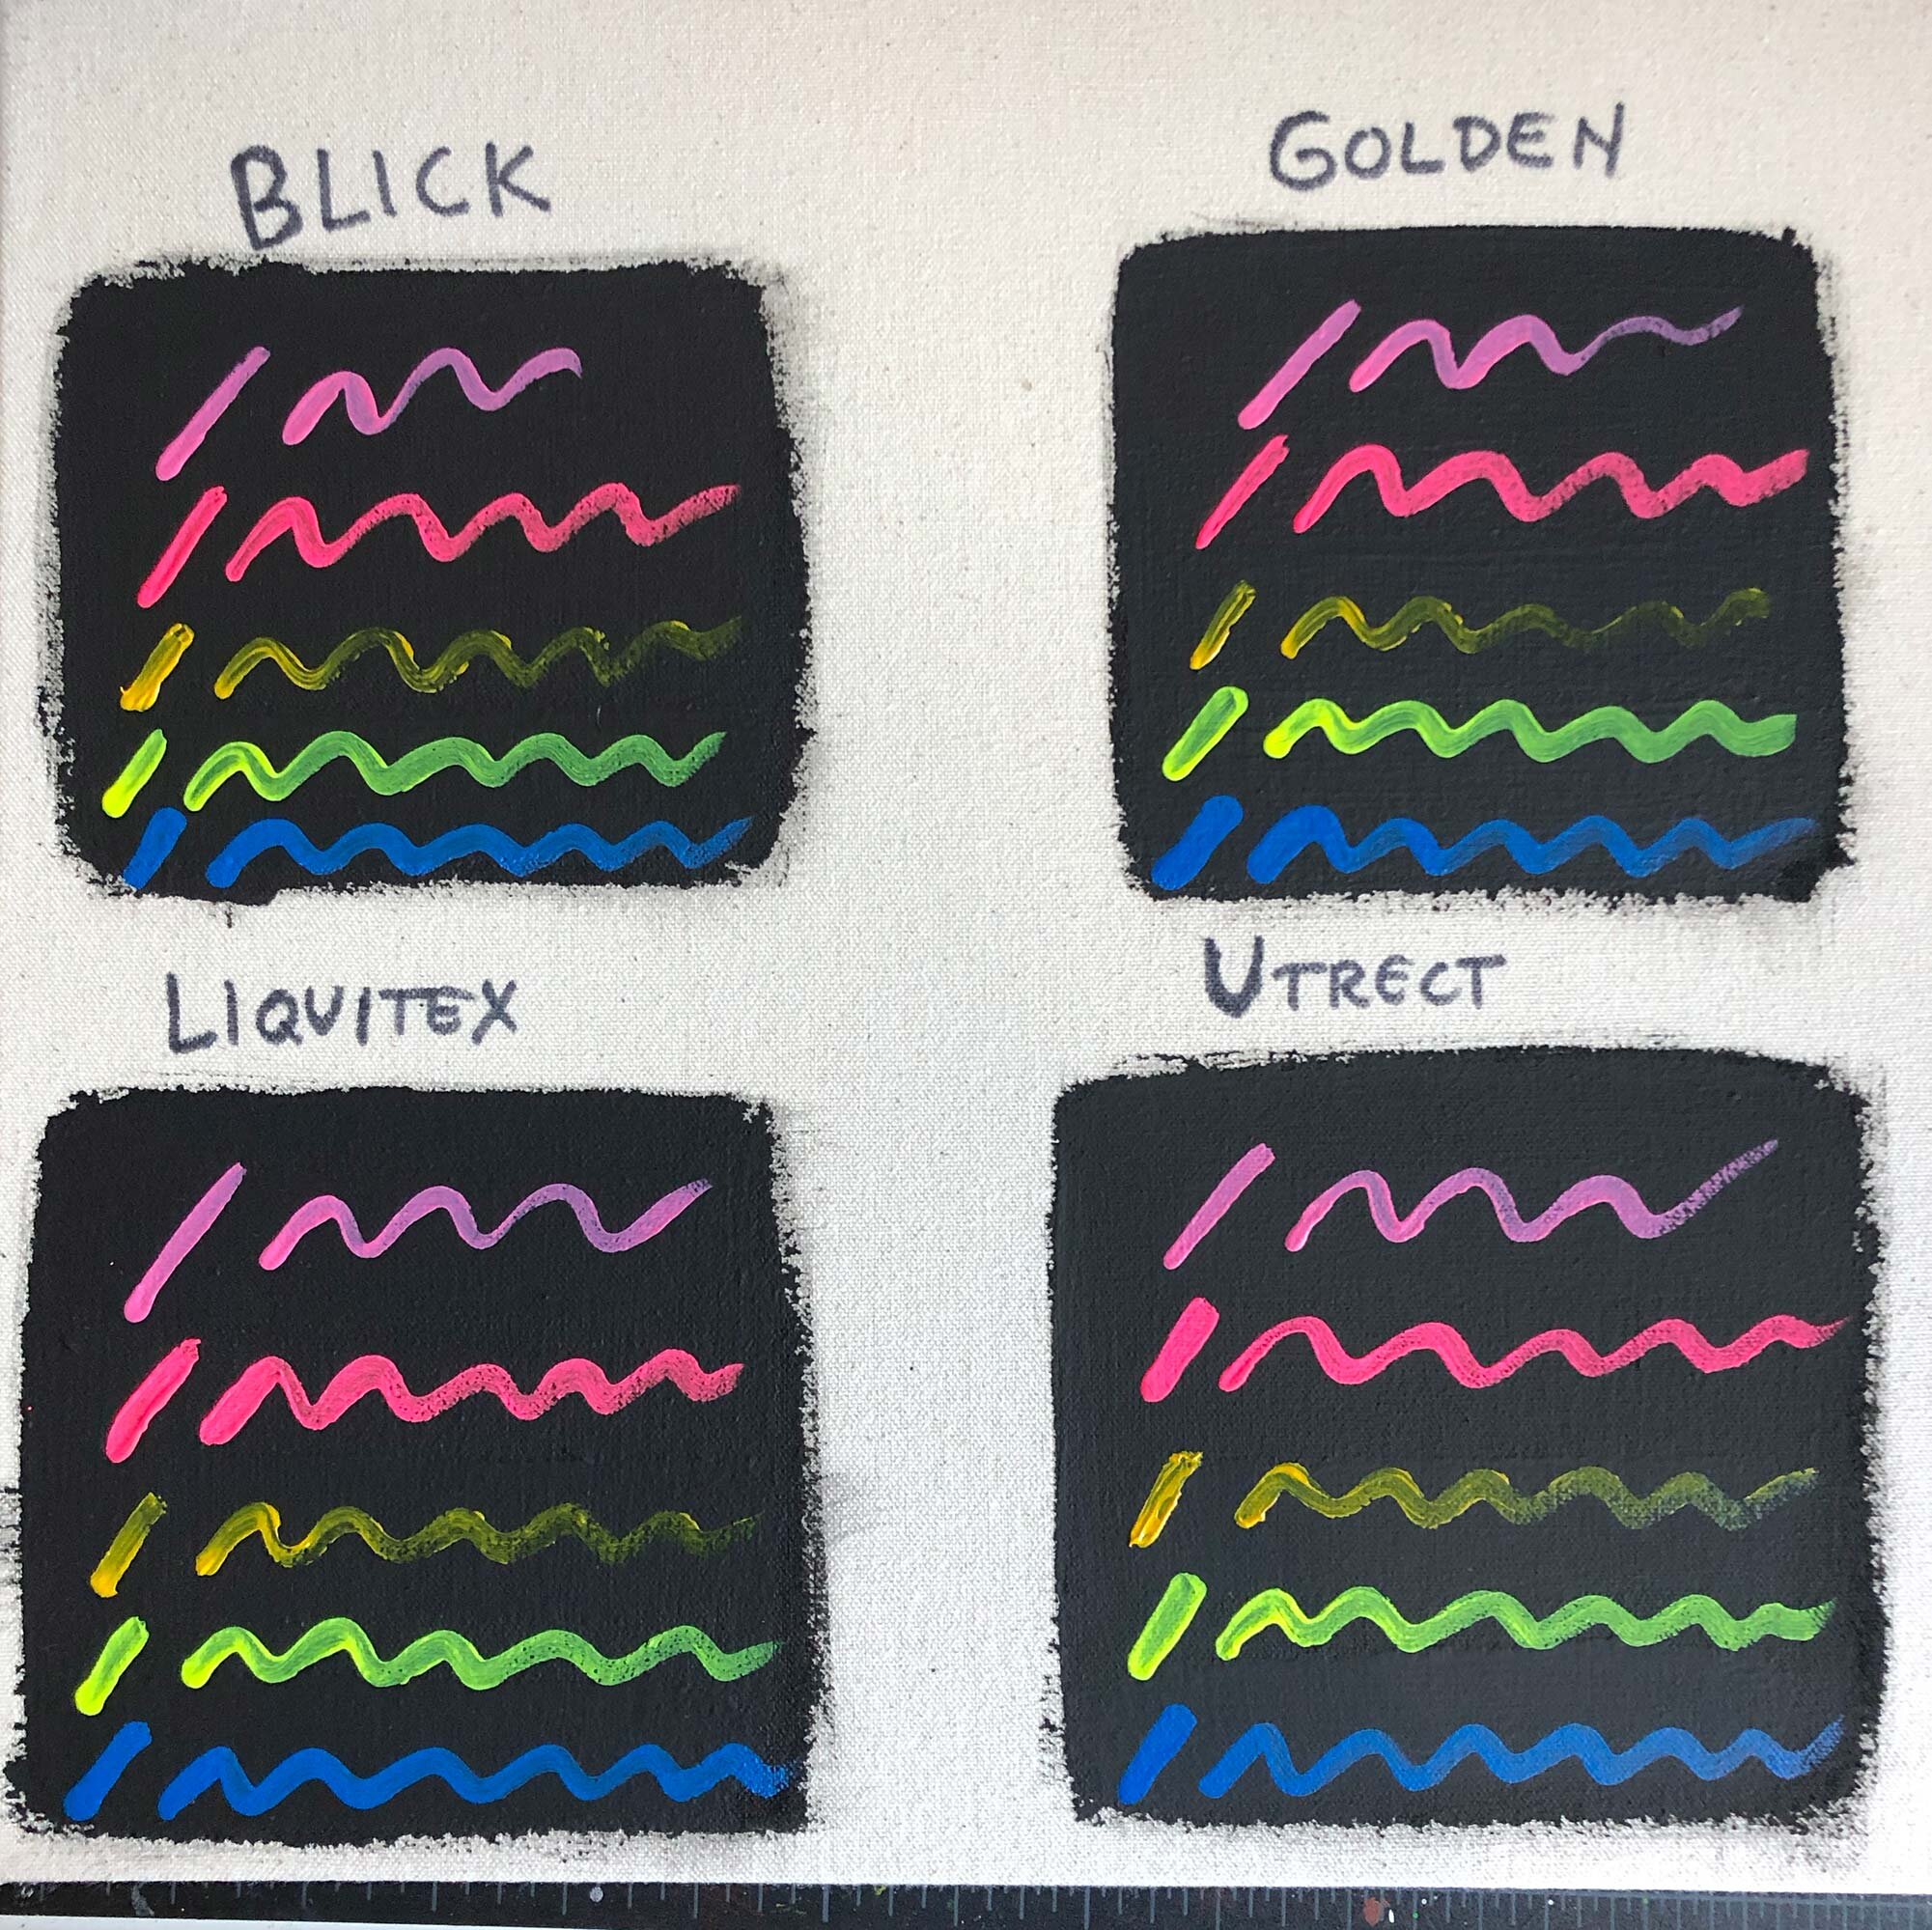
Various acrylic paints on top of Utrecht Black Gesso.

Various acrylic paints on top of Utrecht Black Gesso.


Golden Black Gesso

Golden Black Gesso is available in jars ranging from 8 to 128 ounces.

Golden Black Gesso is available in jars ranging from 8 to 128 ounces.

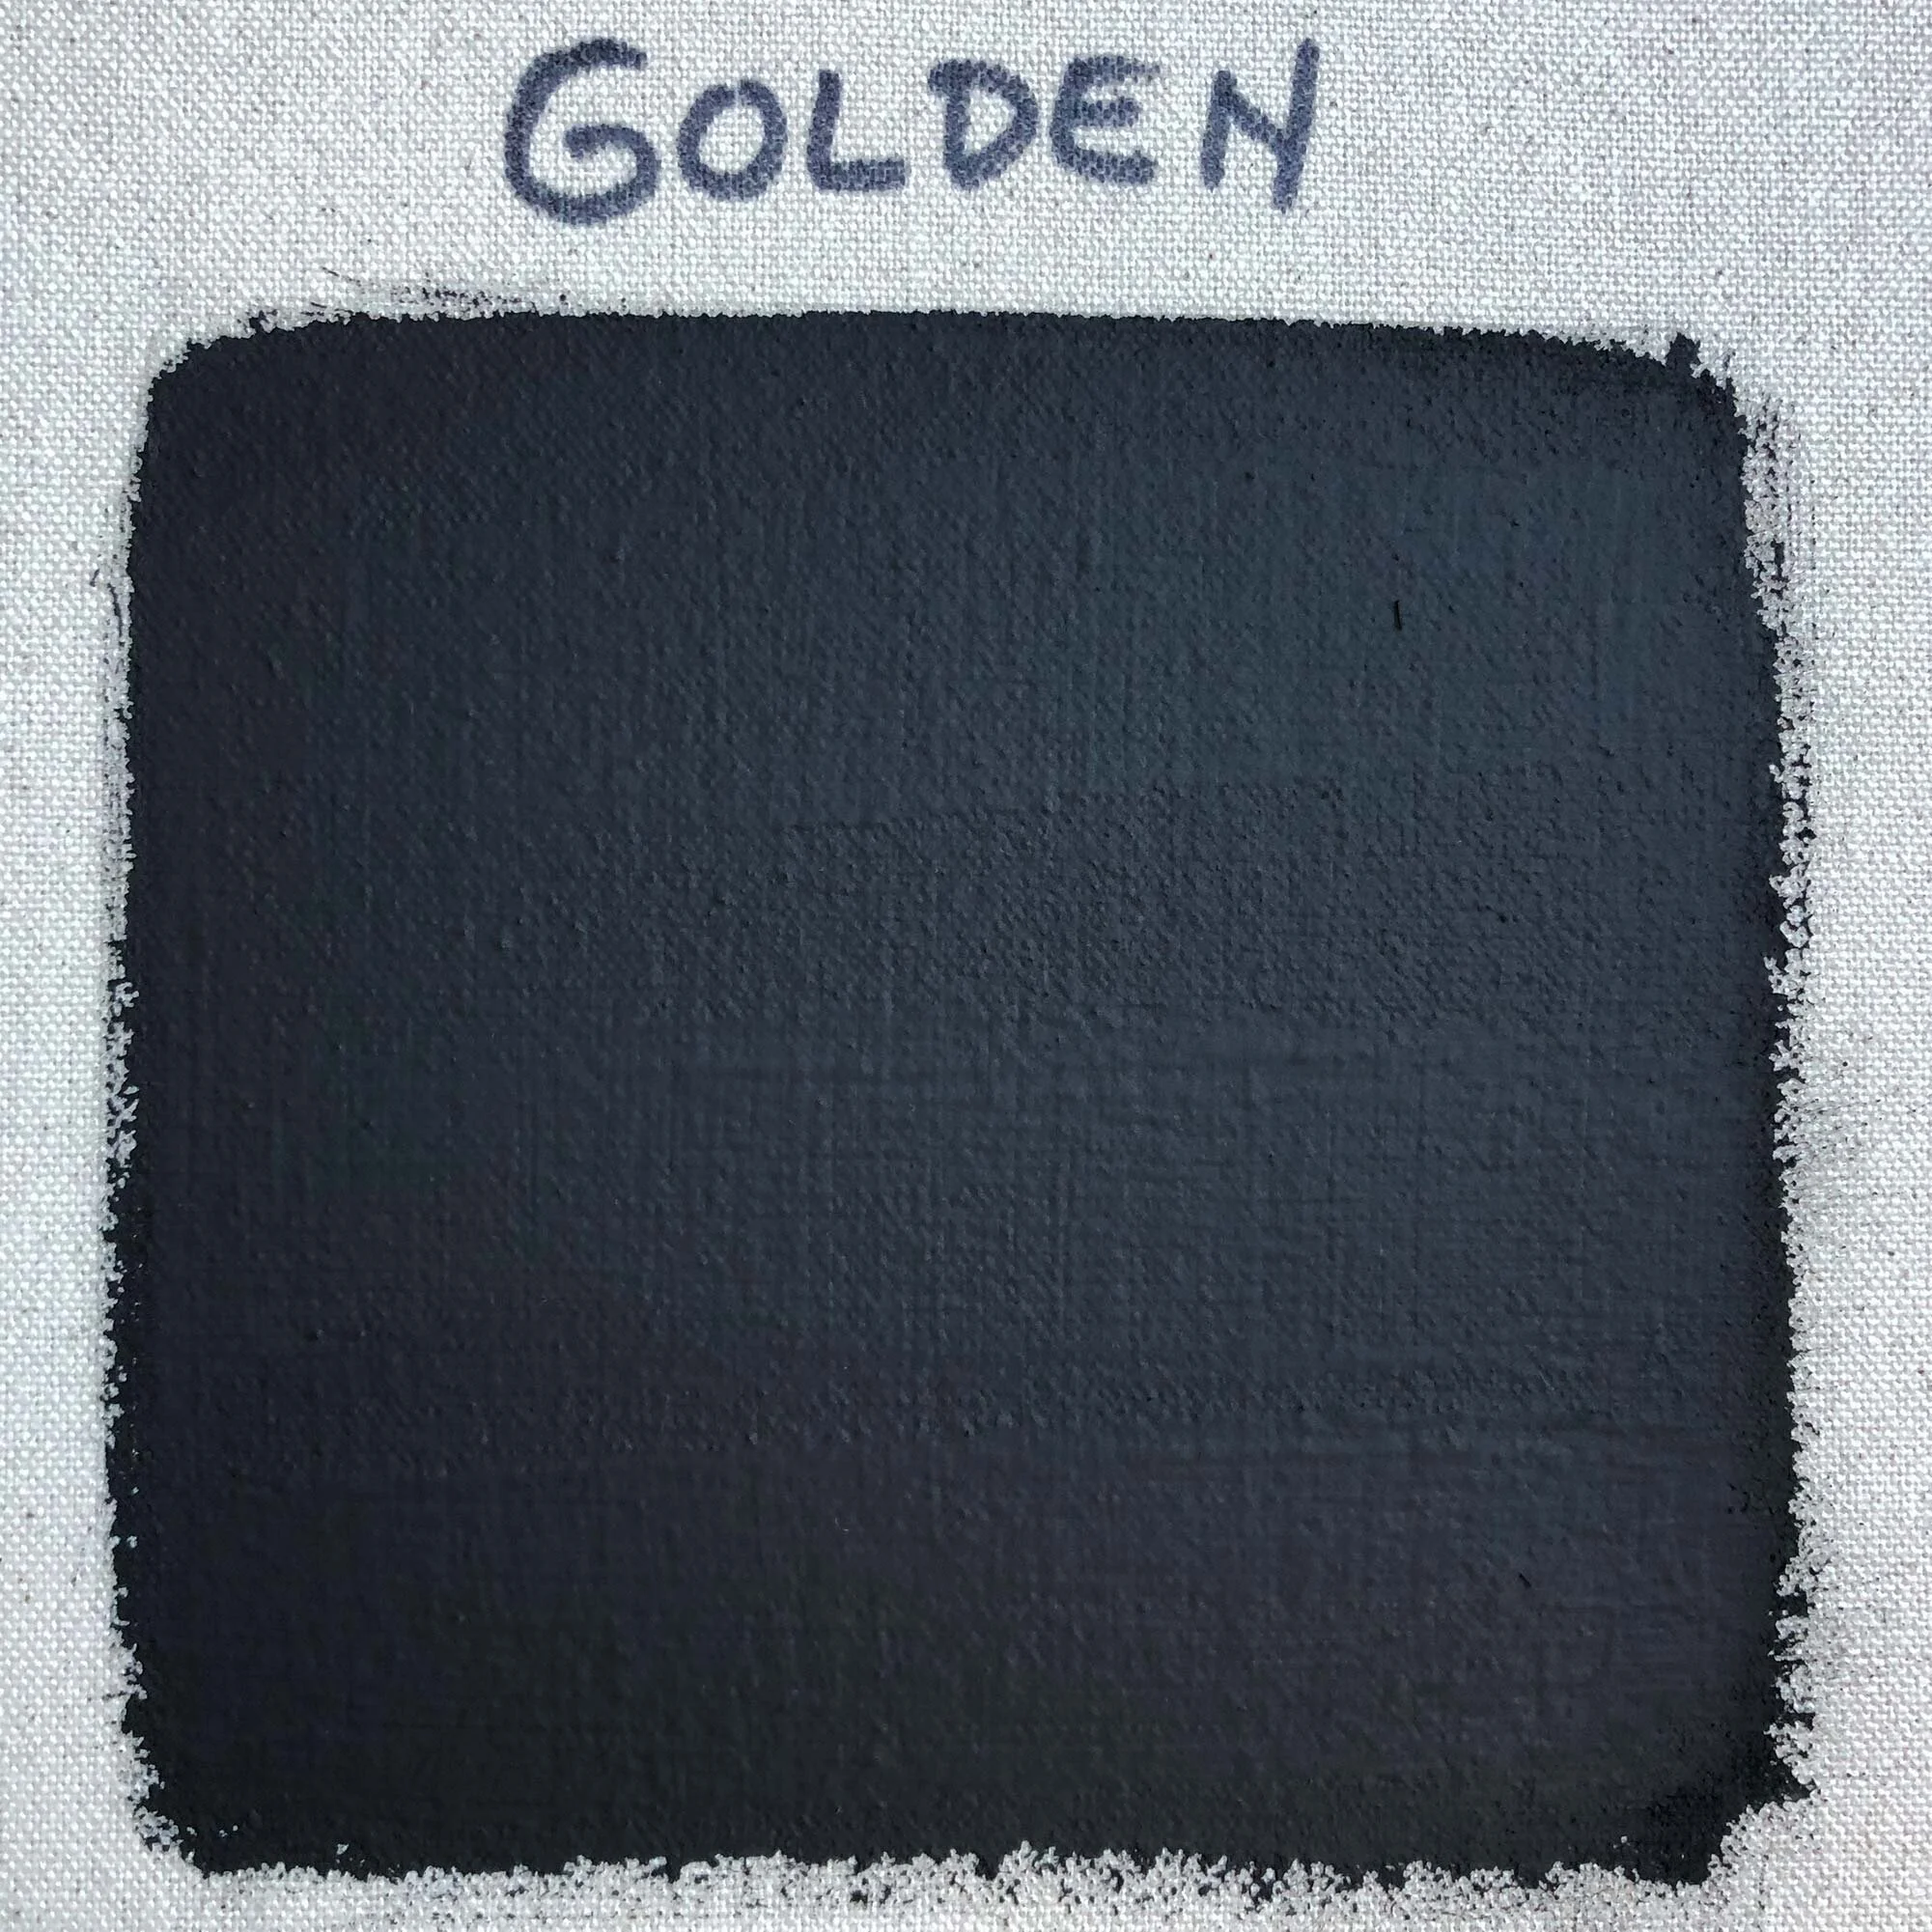
Golden Black Gesso was the second favorite gesso in the test. Available in jars ranging from 8 oz to 1 gallon, it’s a premium gesso that is easy to apply directly out of the jar and creates a slightly satin, deep-black surface. Although it is the most expensive option tested, Golden Black Gesso can be ordered in 1 gallon (128 oz) buckets that make it essentially the same price per ounce as the top pick.

The tradeoff with this gesso is that it is slightly satin. In testing, I found that both the Liquitex and Utrecht gessos were more matte than this gesso, especially the Utrecht. Some may find the slightly satin quality to be a drawback, but if you are planning to cover most or all of the gesso with paint, it won’t really matter much.

Available in 8 oz, 16 oz, 32 oz, and 128 oz (1 gallon), Golden Black Gesso ranges from $0.70 to $1.55 per ounce. The wide mouth jars are easy to use directly from the jar, or it can be poured out.

About Golden: Founded in 1980 but with a paint-making history that stretches back many more decades, Golden is known as one of the premier manufacturers of acrylic paint in the United States. Manufactured in upstate New York, the paints are widely available but for larger sizes you may need to order online.

Golden Black Gesso sizes, typical price, and price per ounce:

  • 8 oz, $12.38, $1.55 per ounce

  • 16 oz, $20.85, $1.30 per ounce

  • 32 oz, $31.98, $1.00 per ounce

  • 128 oz (1 Gallon), $90.01, $0.70 per ounce

Shop Golden Black Gesso at Amazon

Test images for Golden Black Gesso

In a simple test, Golden Black Gesso resulted in a slightly satin surface.

In a simple test, Golden Black Gesso resulted in a slightly satin surface.

Stripe test from top: 1 coat, 2 coats, 3 coats of gesso.

Stripe test from top: 1 coat, 2 coats, 3 coats of gesso.

Angle view of stripe test

Angle view of stripe test

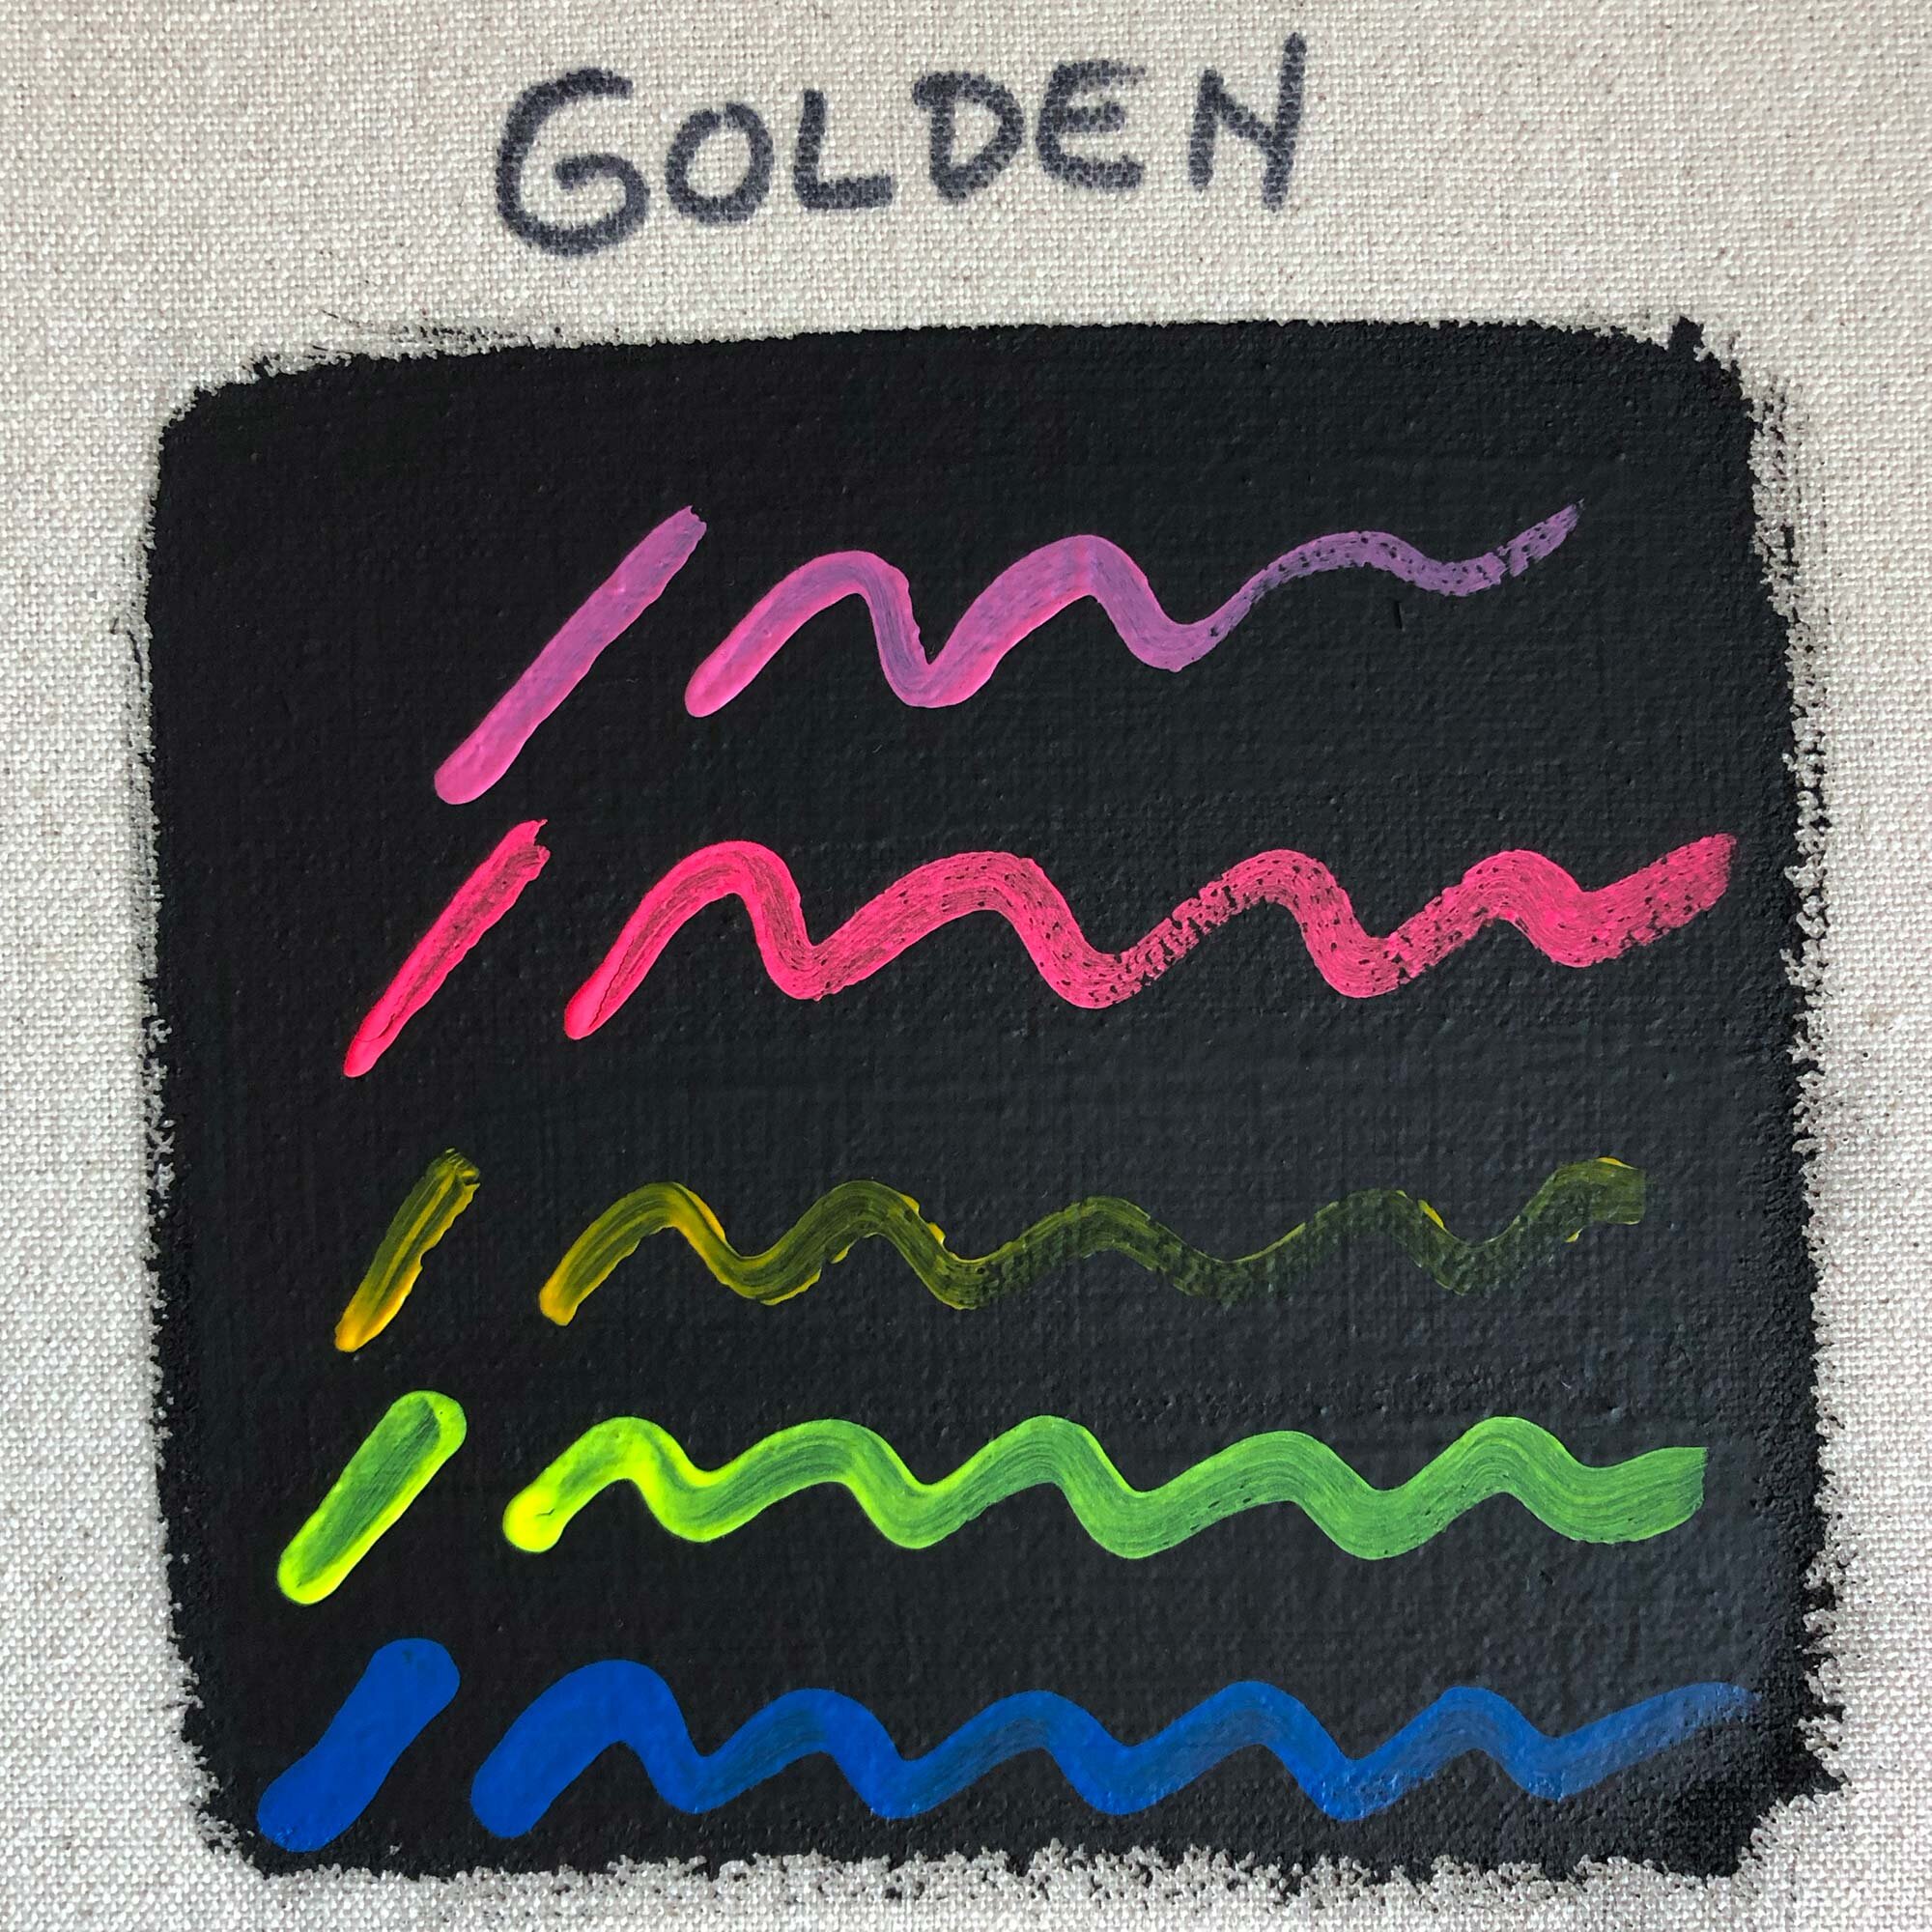
Various acrylic paints over Golden Black Gesso.

Various acrylic paints over Golden Black Gesso.


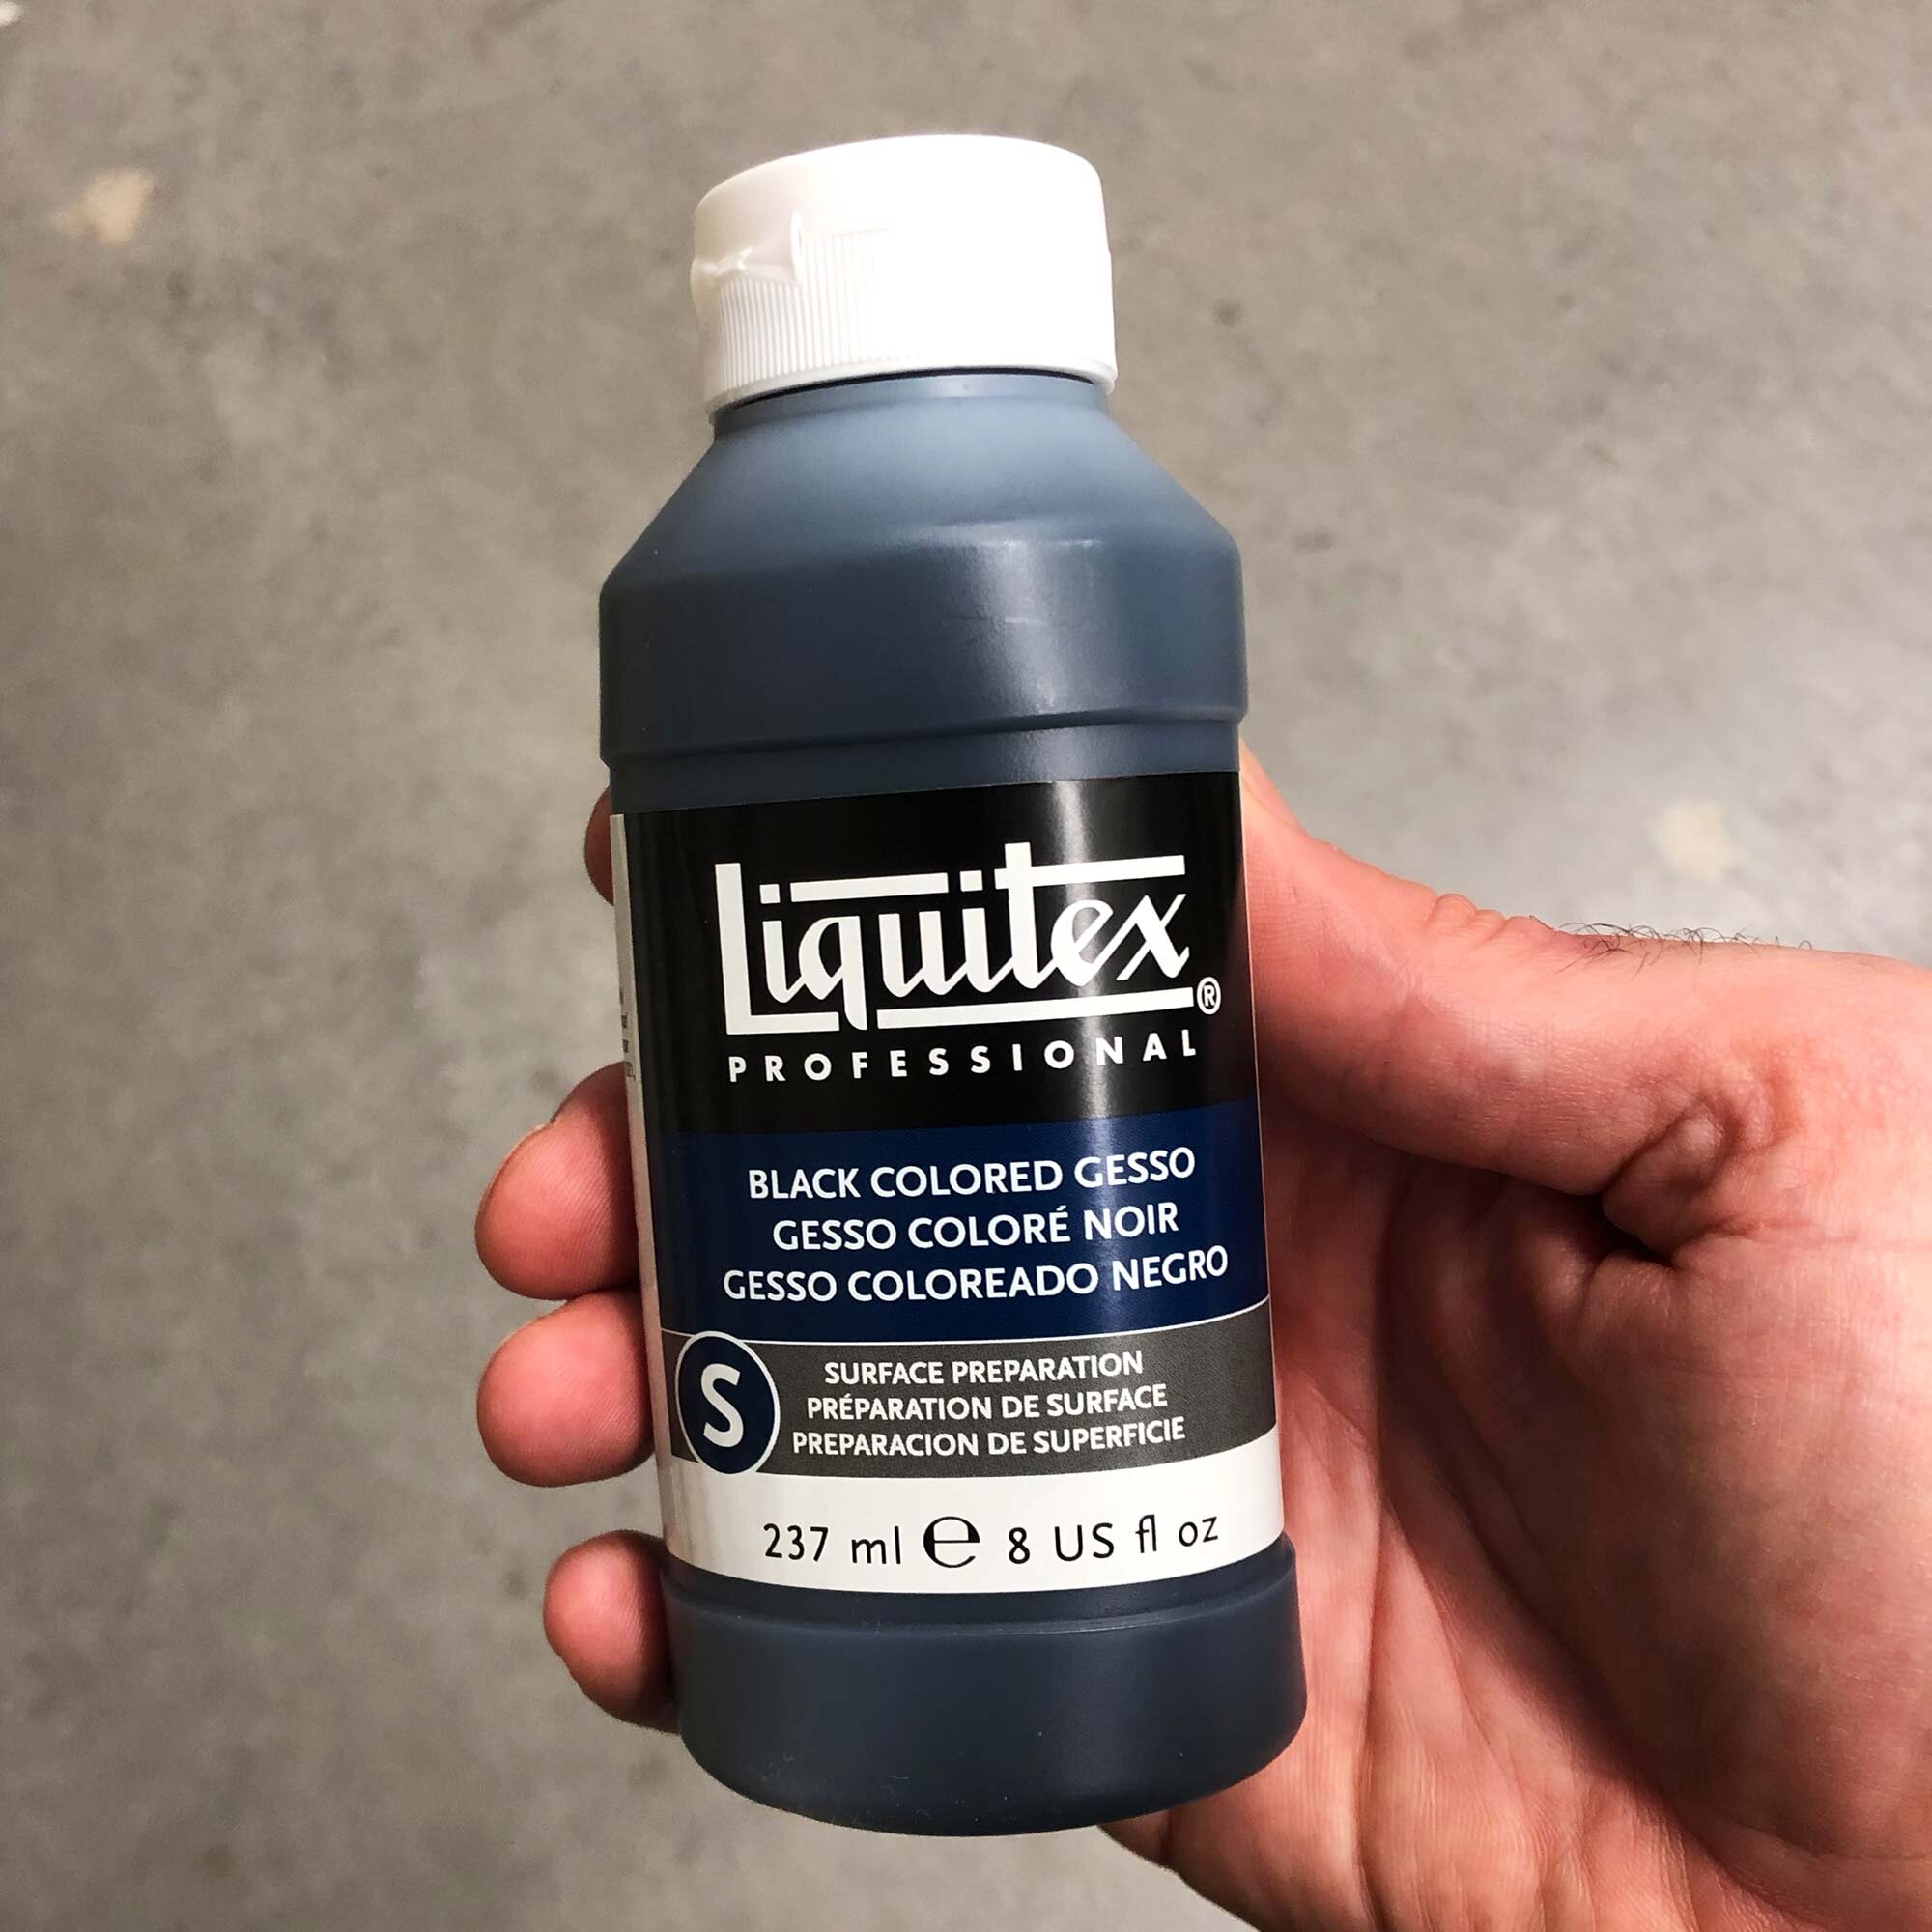
Liquitex Black Gesso

Liquitex Black Gesso in an 8 oz bottle.

Liquitex Black Gesso in an 8 oz bottle.

Liquitex Black Gesso is a smooth flowing, easy-to-apply gesso that in testing came out the second most matte. Of the gessoes tested, it was also the most likely to build up some texture. Be sure to apply it evenly or sand between coats. For a black gesso, I’m looking for a matte surface so this was almost the second pick after the Utrecht, but the lack of sizes available and relatively high price are drawbacks for using this product.

This gesso is only available in 8 oz bottles with a squeeze dispenser. It’s not designed for using straight out of the jar but the squeeze function makes it easy to dispense, which may be helpful if you apply gesso with a foam roller. If you squeeze out too much, unscrew the top and use a palette knife to add it back to the jar.

About Liquitex: Founded in the U.S. in 1955, Liquitex was one of the earliest manufacturers of acrylic paints and continues to be an industry leader. Now owned by London, UK-based art supplier conglomerate Colart, Liquitex is manufactured in the UK, France and China. The bottle of black gesso I used indicated it was made in France. Liquitex also makes clear and neutral gray gesso.

Liquitex Black Gesso sizes, typical price, and price per ounce:

  • 8 oz, $11.57, $1.45 per ounce

Shop Liquitex Black Gesso at Amazon

Test images for Liquitex Black Gesso

In a simple test, Liquitex Black Gesso resulted in a matte black surface.

In a simple test, Liquitex Black Gesso resulted in a matte black surface.

Stripe test from top: 1 coat, 2 coats, 3 coats

Stripe test from top: 1 coat, 2 coats, 3 coats

Stripe test angle view

Stripe test angle view

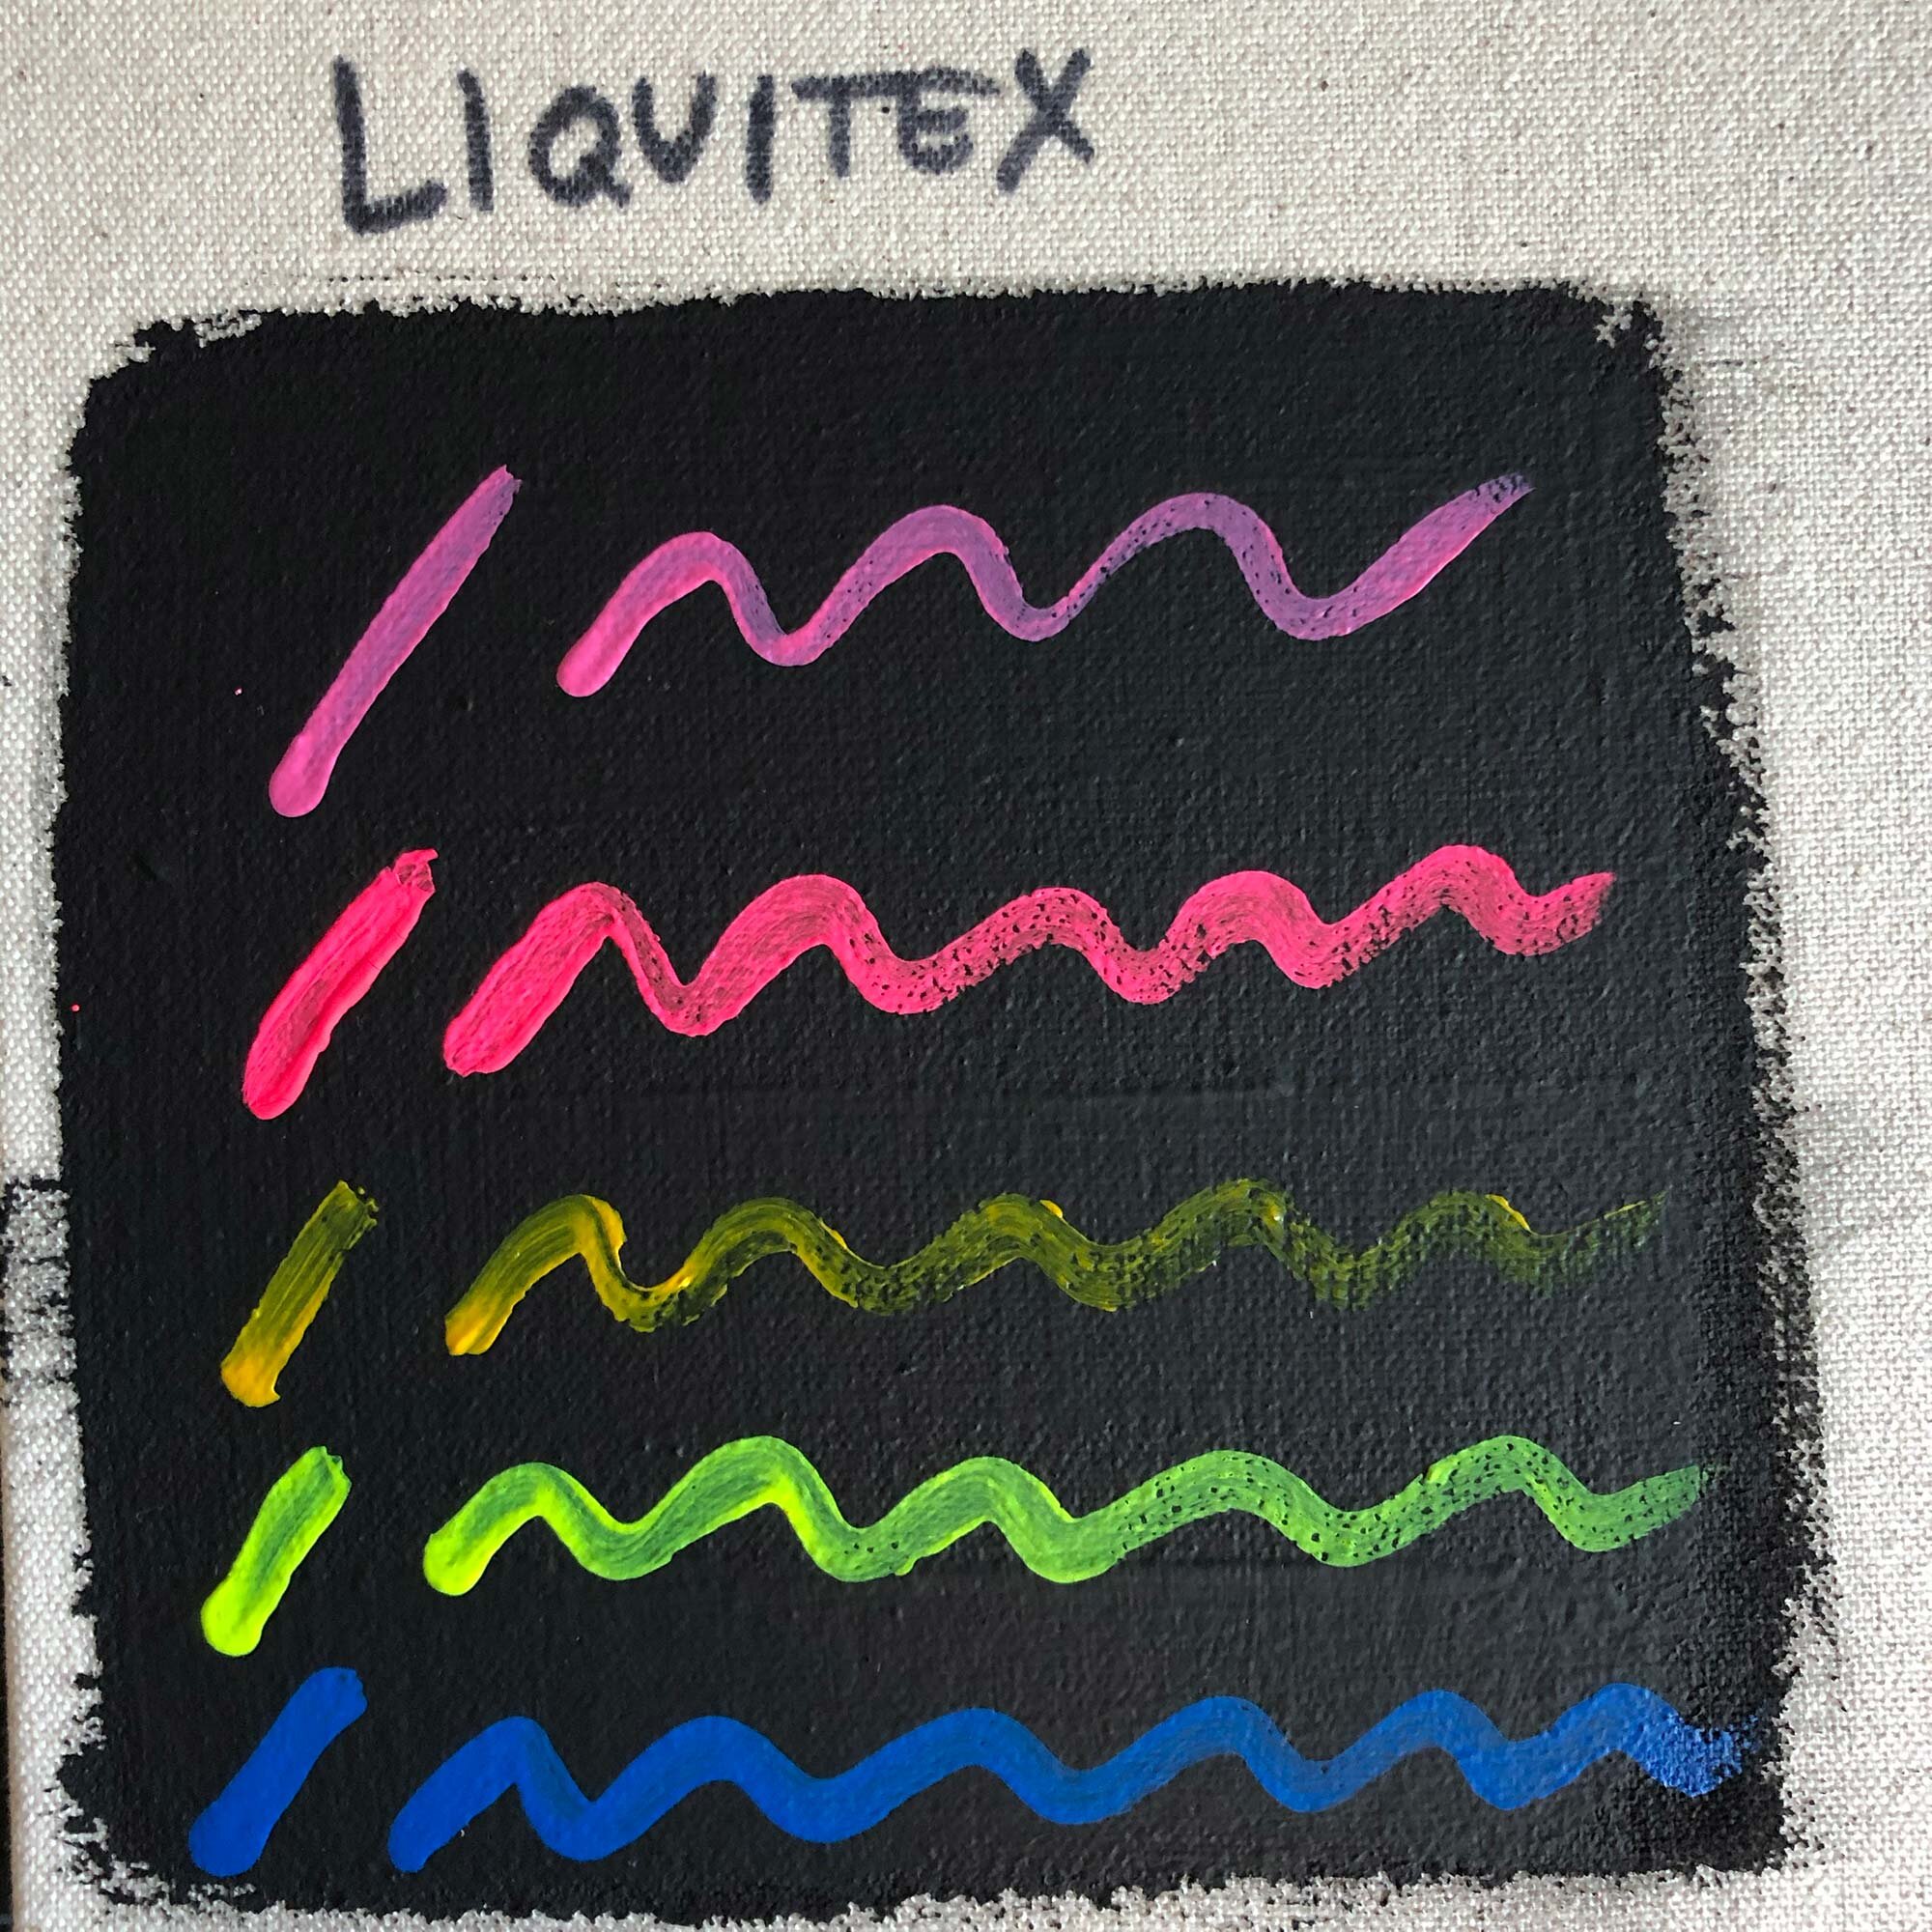
Various acrylic paints over Liquitex black gesso.

Various acrylic paints over Liquitex black gesso.


Blick Artists’ Black Gesso

Blick Artists’ Black Gesso is available in 32oz widemouth jars.

Blick Artists’ Black Gesso is available in 32oz widemouth jars.

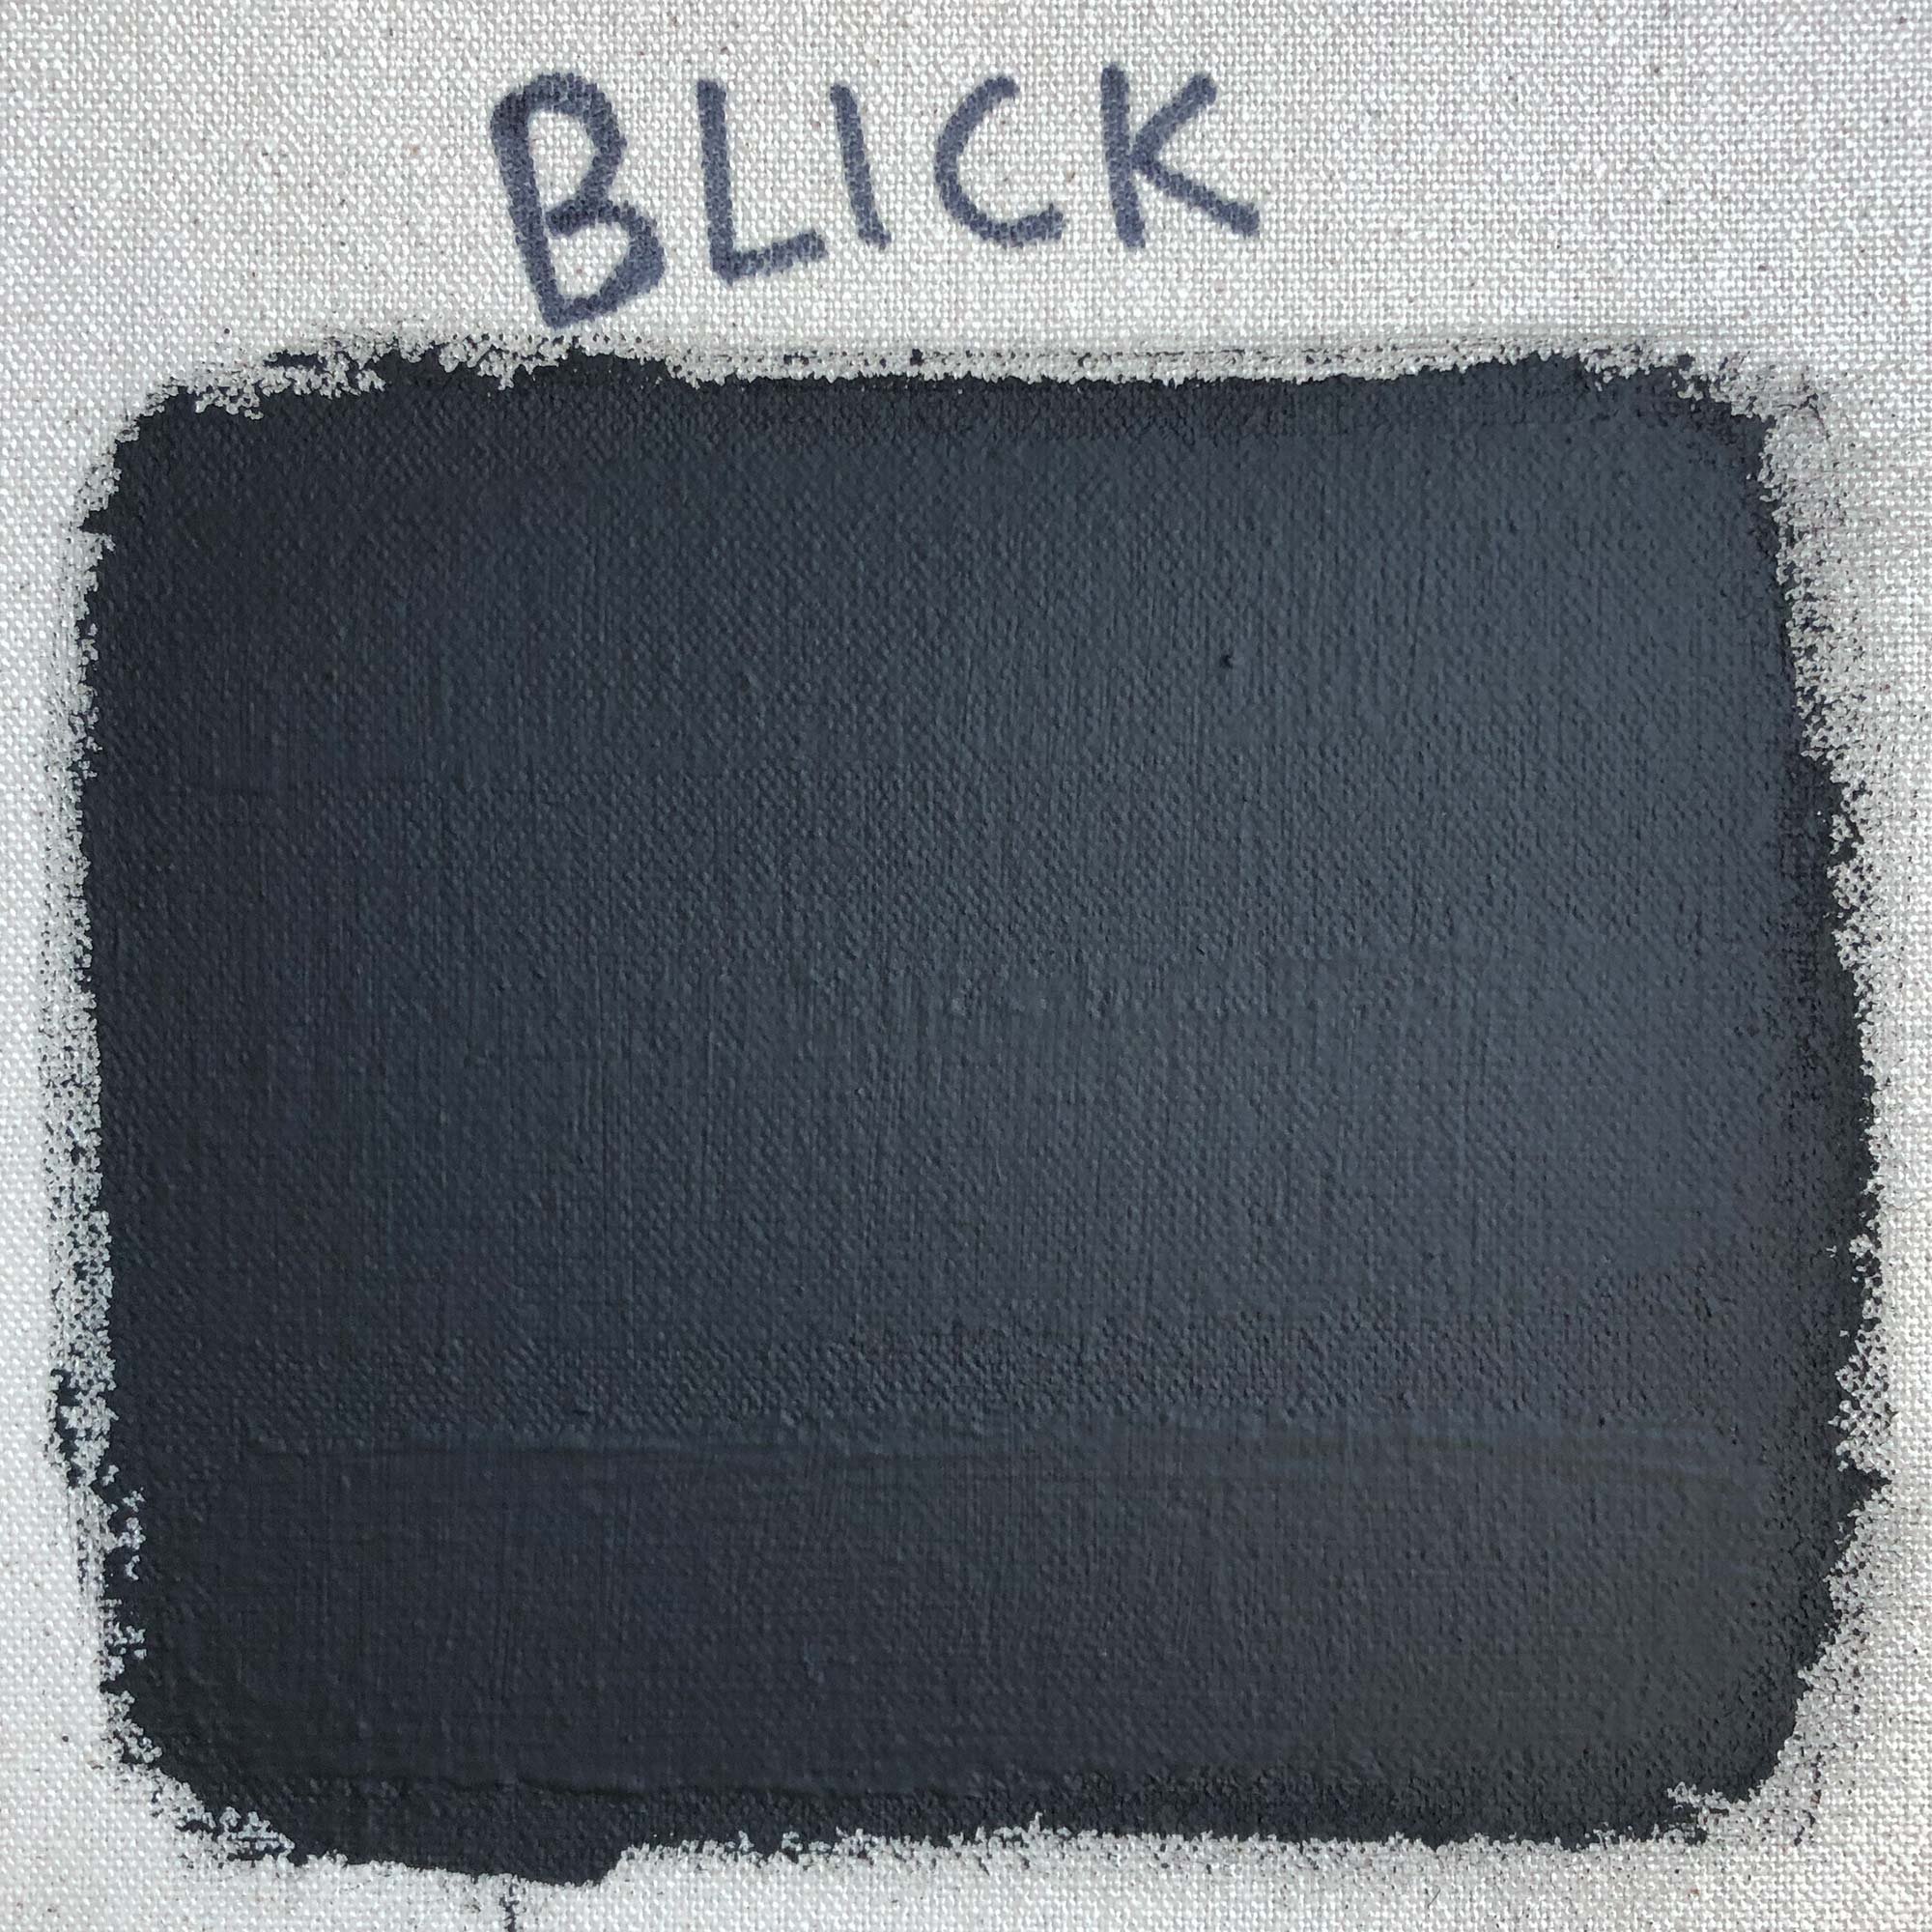
Blick Artists’ Black Gesso is a solid, dependable black gesso that is very economical and resulted in a satin surface. Although I prefer the ultra-matte surface of the Utrecht Black Gesso, especially where the gesso will be exposed, the Blick gesso is a good option too.

As can be expected from a house brand, it has a few tradeoffs: It is not as smooth and flowing as the Golden or Liquitex Gessos. You may find that you’ll need to add water to get this to brush or roll on. And as mentioned, it is more satin than the matte Utrecht gesso. This gesso is also available in just one size, an economical 32 oz wide-mouth jar that typically costs about $0.60 per ounce, making this the most affordable gesso tested.

I’ve used this gesso and to be honest, I don’t mind the satin quality for certain paintings but my taste is usually to go with the most matte gesso I can find. It’s hard to see in the pictures below and I hope this makes sense: but it’s on the less satin side of things. It’s still completely opaque and one coat will usually cover up anything below it.

About Blick: Founded in 1911, Blick is one of the largest art suppliers in the country. The house brand paints and materials are often of a high quality, although they have a bit of a confusing array of different levels of house brands. This is the only black gesso they make, however, and it is manufactured in the U.S.

Blick Artists’ Acrylic Black Gesso sizes, typical price, and price per ounce:

  • 32 oz, $19.14, $0.60 per ounce

Test Images for Blick Artists’ Black Gesso

In a simple test, the Blick Artists’ Black Gesso resulted in the most satin surface of gesso tested.

In a simple test, the Blick Artists’ Black Gesso resulted in the most satin surface of gesso tested.

Stripe test from top: 1 coat, 2 coats, 3 coats

Stripe test from top: 1 coat, 2 coats, 3 coats

Angle view of stripe test

Angle view of stripe test

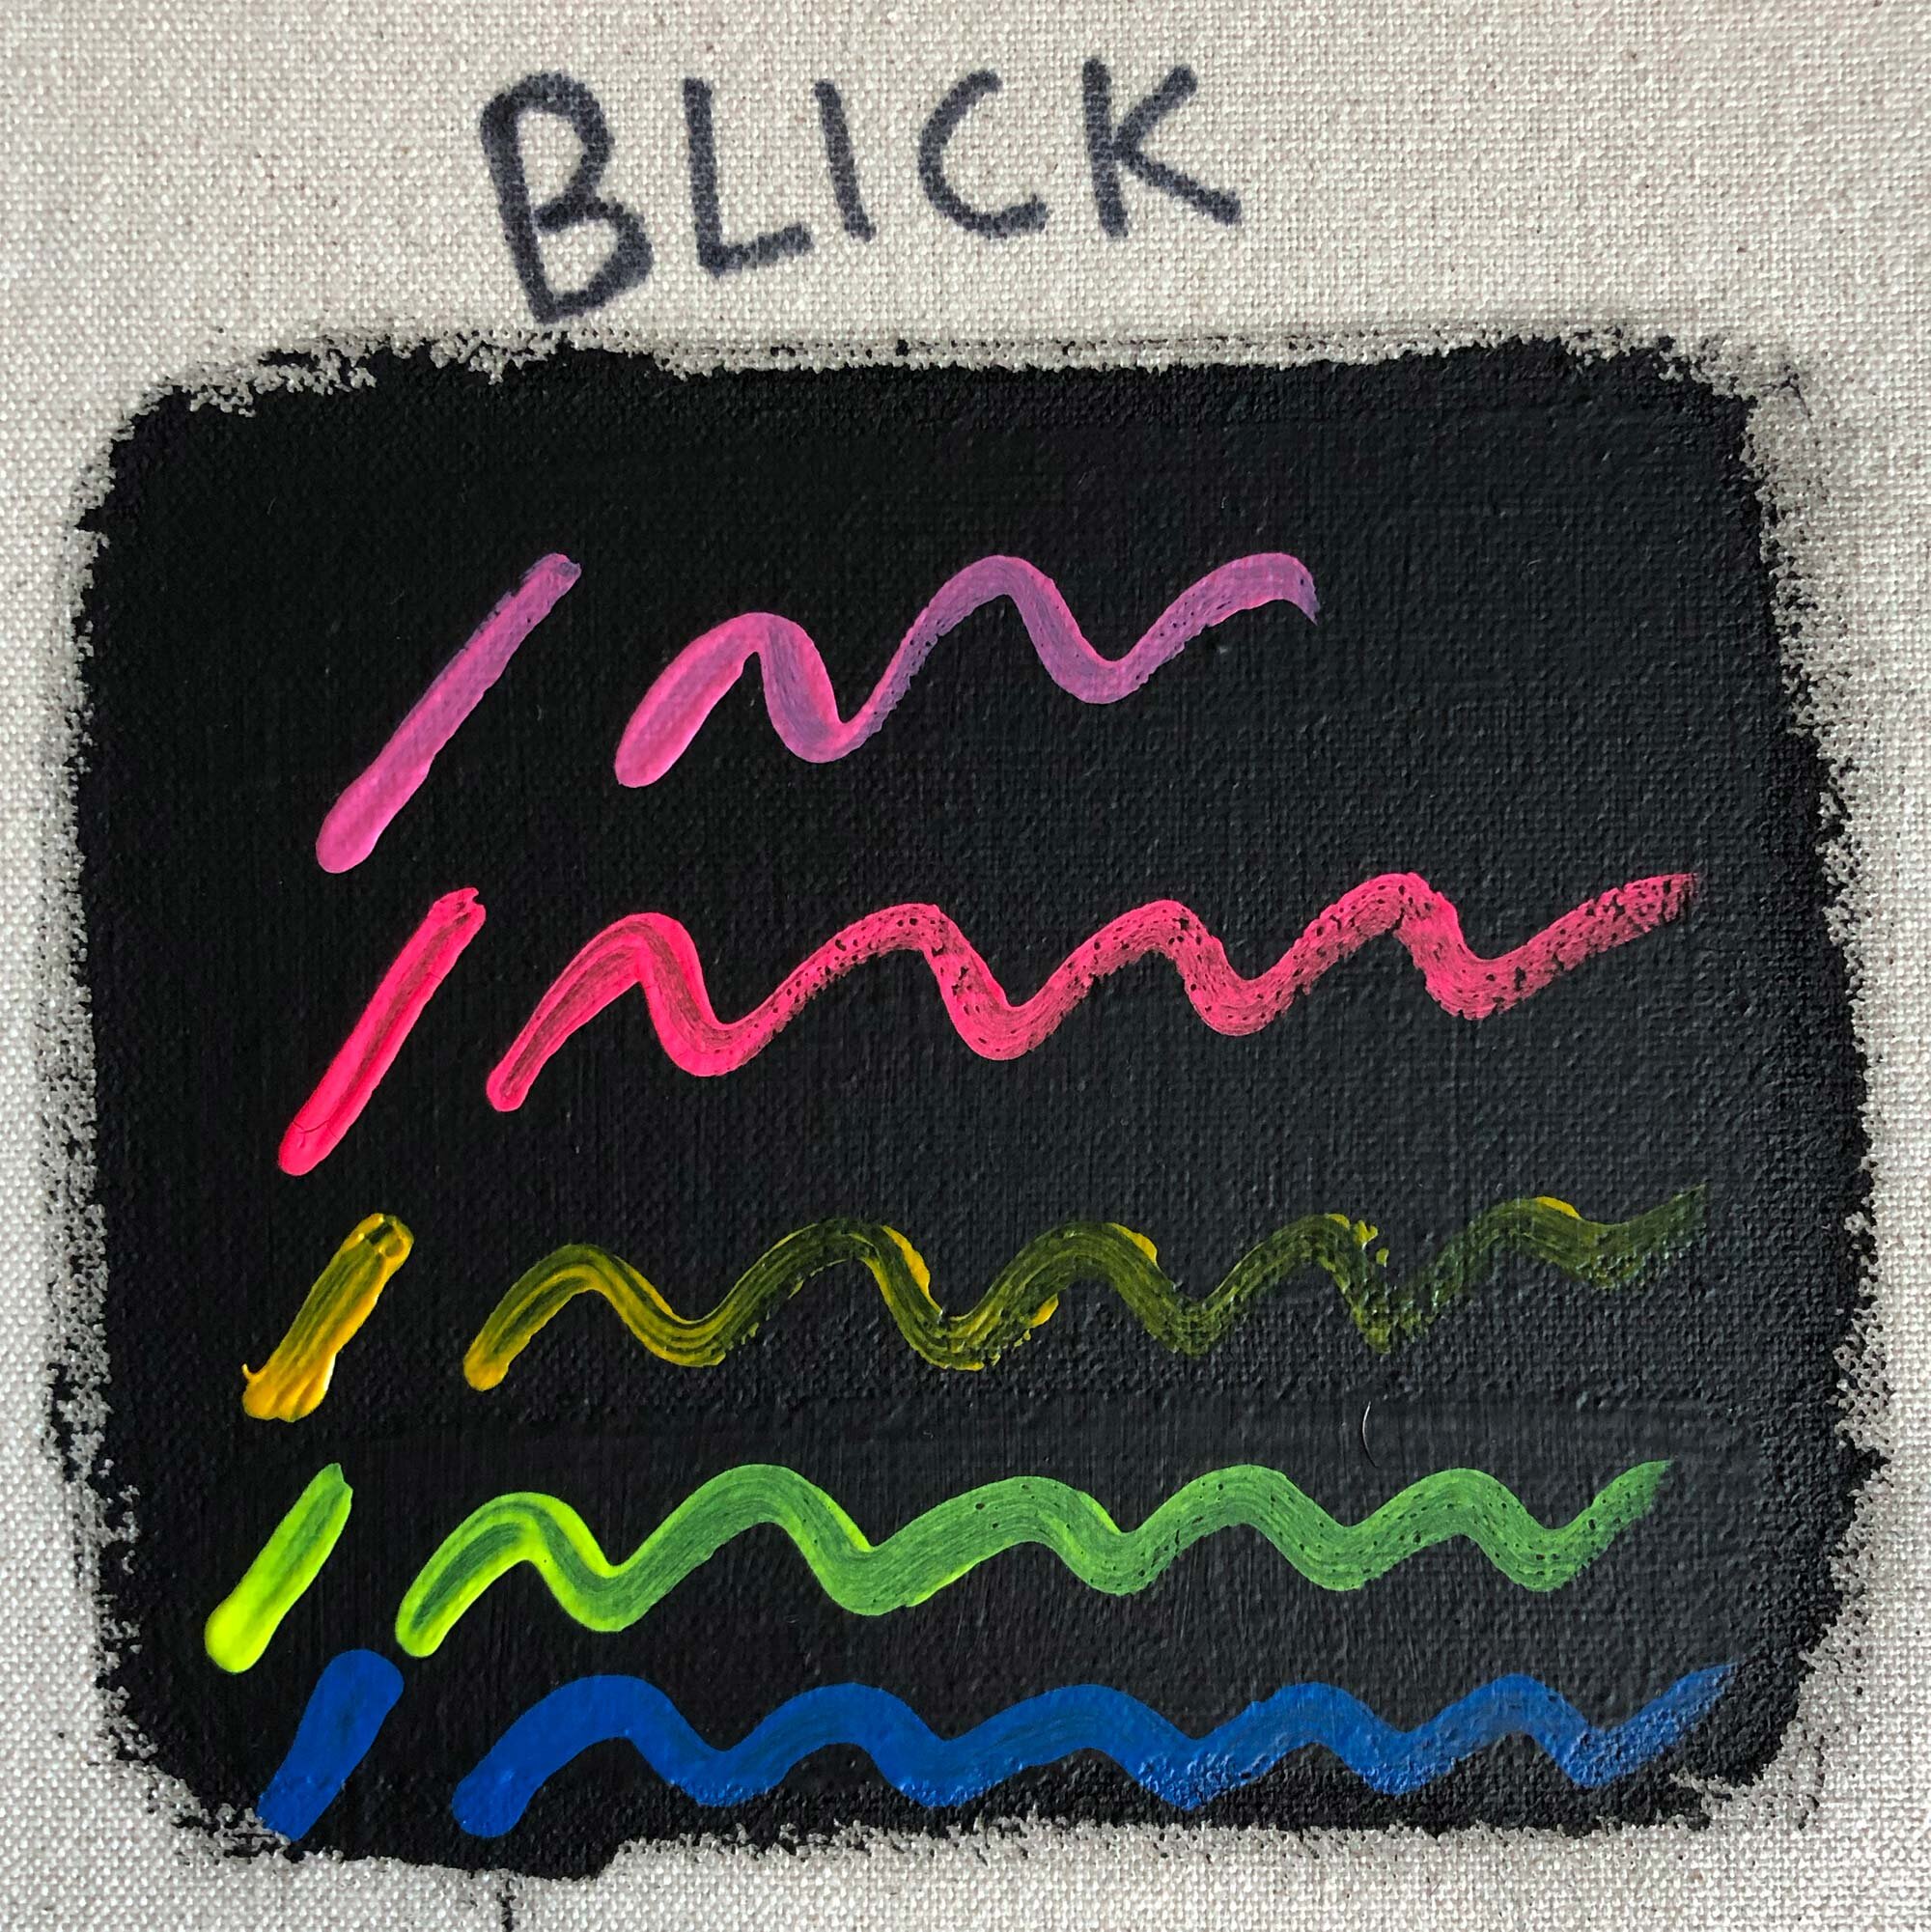
Various acrylic colors painted over the Blick Artists’ Black Gesso

Various acrylic colors painted over the Blick Artists’ Black Gesso


Testing Methodology and Images

1. Stripe / Coat Test

The first test involved painting one, two, and three coats of gesso on to stretched, unprimed, 12 oz cotton duck canvas. The gesso was used directly from the jar without mixing with water, and the coats were allowed to dry completely before another coat was applied. It may be more easy to see in the angled images, but Utrecht was the most matte, the Blick was the most satin, and Golden and Liquitex were in the middle of that range.

Click any image below to see larger images. The top line is a single coat of gesso, middle is two coats, and the bottom has three coats. Images are in alphabetical order by manufacturer

Stripe / coat test angle view. This may better show the differences in satin or matte qualities of the various gessos. Click to enlarge.

2. Flat Square Test

After the coat test, an additional three coats of gesso were applied to the same area of canvas. In between the previous stripes you will see areas of 3 coats, while the other areas now had 4, 5 or 6 coats of gesso. This is probably an extreme amount of gesso, but it was a further indicator of how the satin or matte qualities of the gesso would develop with more coats.

The most notable thing in this test was that the Liquitex stripes had built up a bit of texture where a bead built up from painting and it dried upraised, which was only exacerbated by more coats. While no sanding was used in this testing, a simple light sanding can fix any problems with texture, especially if you want an ultra-smooth surface. (My preference is for a flat surface with a bit of tooth, so I usually try to avoid having to sand.)

Click to enlarge:

3. Color Test

Finally, various acrylic paints were tested on top of each black gesso. There was not a big variation in the results here, although the Golden and Utrecht gessoes seemed to provide a more smooth surface for painting. But it was just a very slight difference.

From top to bottom, the tested paints included: NovaColor Hot Pink; Liquitex Neon Pink Acrylic Gouache, Utrecht Studio Series Medium Yellow, Blickrylic Neon Yellow, and Blick Matte Acrylic Dark Blue Light.

Click to enlarge.


Tips for Applying and Working with Black Gesso

Gesso is a primer or ground that both protects your painting substrate and creates a suitable painting surface. It must be used if you are working with oil paints, as those will eventually eat through and destroy unprimed canvas. If you are working with acrylics, you can paint directly on to canvas or other surfaces, but you may find that a gesso provides a matte, even surface that makes it easier to apply other layers. Here’s a few tips:

Water down your gesso

Although the test above did not employ this, it’s often a good idea to thin your first layer of gesso with water. This helps the gesso get into every nook and cranny of canvas and really begin to get a good seal. The second and third layers of gesso (and fourth if desired) will result in an even surface.

Brush or Roll — your choice

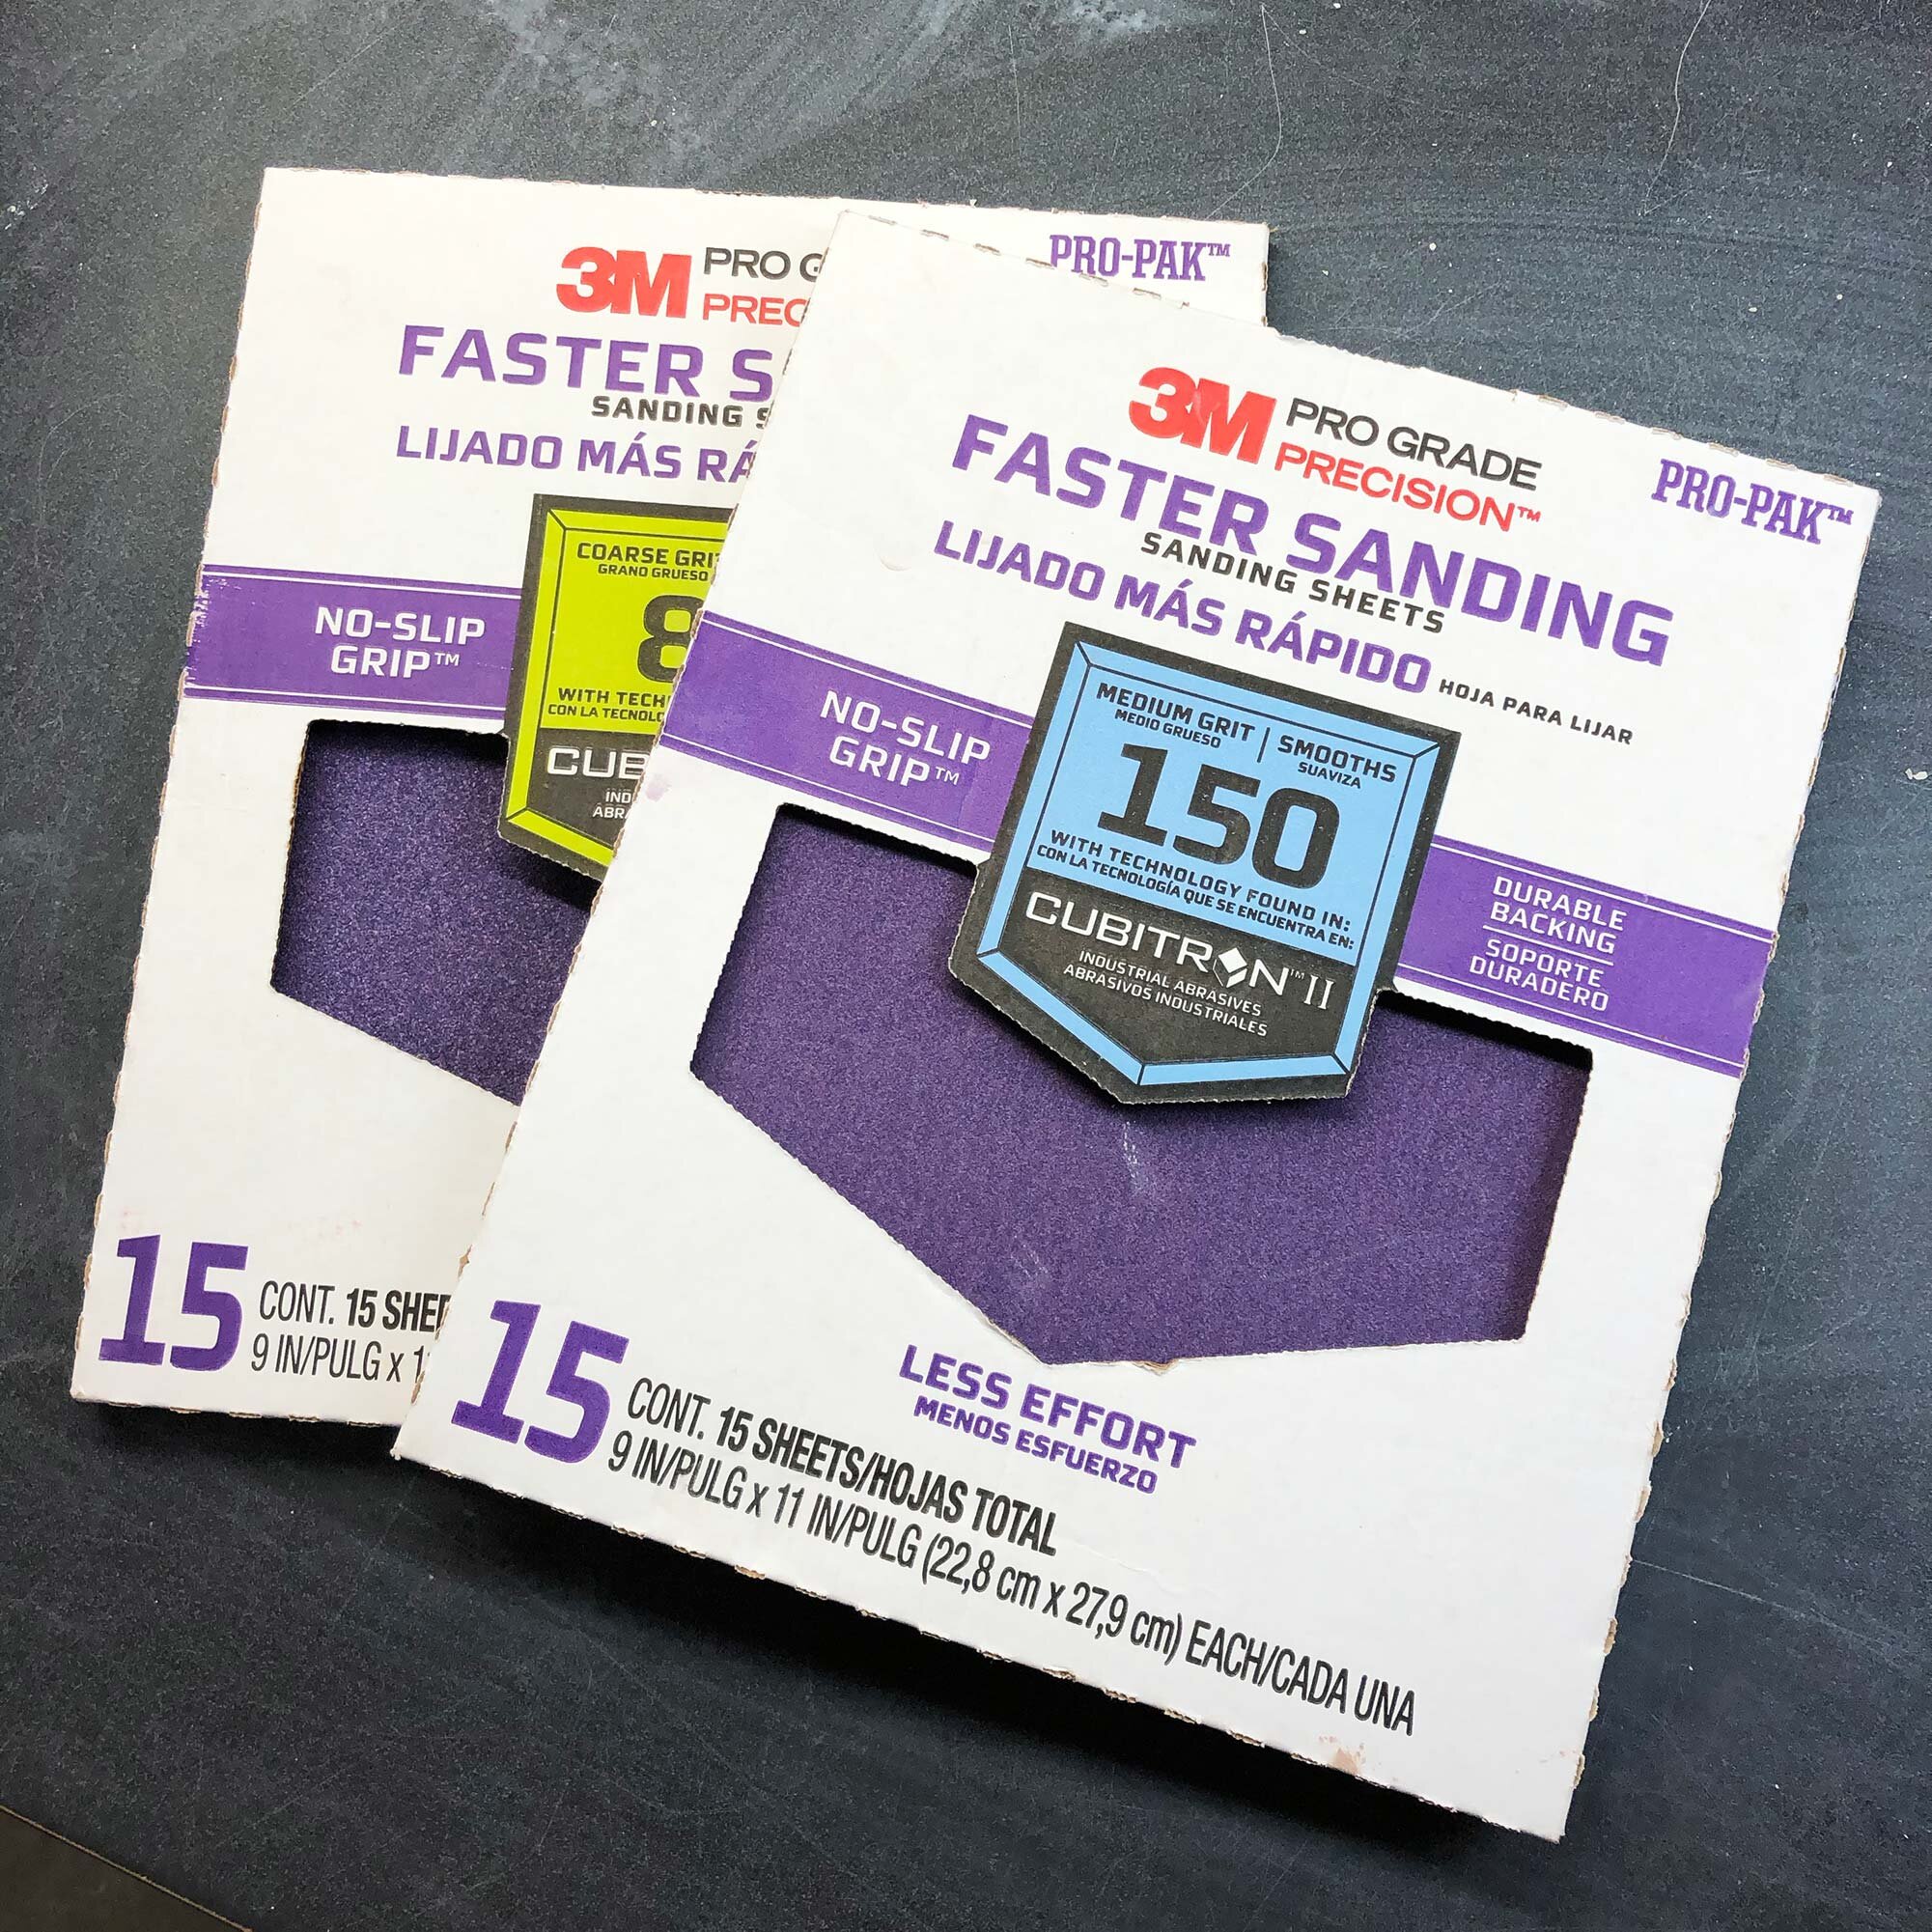
Some apply gesso with a foam roller, while other brush. It’s really up to you. Either way has its advantages and disadvantages. If you are worried about any texture building up, use a sanding block and medium grit sandpaper (around 150 or so) to sand each layer after it dries. If you want a really smooth surface, you can keep sanding and applying layers, and move towards using finer and finer sandpapers.

Cover up other paintings

Black gesso is especially effective at covering up anything below it, often with just one coat. Use it to cover other acrylic paintings so you can start fresh. But keep in mind, acrylic should not be used on top of oil paint as that will cause problems and degradation down the road.

Make colors pop

Certain paints, such as neons, yellows, and bright blues, can really pop when you put them on a black ground. Other colors, such as transparent colors, can really sink in and be hard to see. It’s best to test things out and see how your favorite colors change or not.


Summary

This post included a test of four different black gessoes, including Blick, Golden, Liquitex, and Utrecht. All the gessoes resulted in a deep black ground, and they are very opaque. The Golden and Liquitex gessoes were the most fluid and easy to apply; the Blick was the most economical and also the most satin; and the Utrecht was the top pick because of its ultra-matte, even surface and relatively affordable price.

Black gesso is an interesting option that can really mix things up in your studio. Do you have a favorite black gesso? Let us know in the comments.


Plato on the Role of Potters

Plato%27s+Republic.jpg

In Chapter 5 of Plato’s Republic, ‘The Guardians’ Life and Duties,’ the philosopher outlines the roles of three classes in society: guardians, auxiliaries, and workers. The workers are divided into castes and Plato believes there is little room for change in the castes. The goal, as Plato puts it, was to form “a community which is happy as a whole” without making just a few members of the community happy. Thus, everyone had a role to play but they had to stay in their role and place in society.

Here’s what he had to say about potters, from Robin Waterfield’s 1993 translation (419d-e, 421a). Bold text my own:


‘Suppose we were painting a statue and someone came up and criticized us for not using the most beautiful paint for the creature’s most beautiful features, because the eyes are the most beautiful part and they hadn’t been painted purple but black. It would be perfectly reasonable, in our opinion, for us to reply to this critic by saying, “My dear chap, you can’t expect us to paint beautiful eyes in a way which stops them looking like eyes, or to do that to the other parts of the body either. Don’t you think that if we treat every single part in an appropriate fashion we’re making the creature as a whole beautiful?

Likewise, in the present case, please don’t force us to graft the sort of happiness on to the guardians which will make them anything but guardians. You see, we know we could dress our farmers in soft clothes and golden jewelry and tell them to work the land only when they have a mind to, and we know we could have our potters lie basking in their kiln-fire’s warmth on a formal arrangement of couches, drinking and feasting with their wheel beside them as a table, and doing pottery only as much as they feel like, and we know we could make everyone else happy in this sort of way, and so have a community which was happy overall; but please don’t advise us to do so, because if we follow your recommendation, then our farmers won’t be farmers and our potters won’t be potters and no one else will retain that aspect of himself which is a constituent of a community.

Now, this isn’t so important where the rest of the community is concerned. I mean, if cobblers go to the bad and degenerate and pretend to be other than what they are, it’s not catastrophic for a community; but if the people who guard a community and its laws ignore their essence and start to pose, then obviously they’re utterly destroying the community, despite the fact that its good management and happiness are crucially in their hands and their hands alone.”

‘Now, if we’re creating genuine guardians, who can hardly harm their community, and the originator of that other idea is talking about a certain kind of farmer and people who are, as it were, happy to fill their stomachs on holiday, but aren’t members of a community, then he’s not talking about a community, but something else. What we have to consider is whether our intention in putting the guardians in place is to maximize their happiness, or whether we ought to make the happiness of the community as a whole our goal and should, by fair means and foul, convince these auxiliaries and guardians that their task is to ensure that they, and everyone else as well, are the best at their own jobs. Then, when the community as a whole is flourishing and rests on a fine foundation, we can take it for granted that every group within it will find happiness according to its nature.”

Hmmm, I would have to say that lounging on couches by the warmth of the kiln sounds pretty nice! But it doesn’t exactly match up with the role that Plato envisions for potters and other workers.

What do you think?

Republic by Plato, translation by Robin Waterfield, 1993

Click here to read more about books, podcasts, videos and other sources of inspiration in the studio.


Vintage films from the Mingei Film Archive

I love vintage pottery films so it was a pleasure to discover some newly digitized films that have been put online recently. These show famous Mingei potters Shoji Hamada and Bernard Leach at work.

The Art of the Potter is a 51 minute film from 1970. It was filmed by Sydney Reichman, produced by David Outerbridge, and was posted by Marty Gross on Vimeo.

A Visit to the Leach Pottery, 1973 is a recently digitized film that was shot by Kim Schuefftan and Toshio Sekiji, and includes John Bedding in Conversation with Marty Gross. It was posted by Marty Gross on Vimeo.

View more videos like this by clicking on Marty Gross’s Vimeo page here. Learn more about the Mingei Film Archive Project by clicking here.

If you’d like to learn more about the Japanese folk art movement known as Mingei , there are quite a few museum and exhibition catalogs, but a great place to start is with The Unknown Craftsman by Soetsu Yanagi with a forward by Bernard Leach. First translated into English in 1972, it is an enduring text on the handmade, the meaning of craft arts, and the power of beauty.

Shop The Unknown Craftsman at Amazon

Click here to see more posts in the Inspiration category.

Best Ceramic Textbooks and Guidebooks

Updated June 10, 2021

The Workshop Guide to Ceramics by Duncan Hooson and Anthony Quinn, our top pick for a ceramics textbook.

The Workshop Guide to Ceramics by Duncan Hooson and Anthony Quinn, our top pick for a ceramics textbook.

These days, there’s a ton of information, guides, and videos online that will help you learn about ceramics. But it can also be nice to have everything in well thought out and comprehensive book. This is especially the case when you are in the studio with dirty hands and it’s hard to use a device.

There are a lot of speciality books for ceramics, focusing on aspects such as wheel throwing or glazing, with more coming out every year. But the goal of this post is to review a few books that cover the whole spectrum of the ceramic process, not just one specialized area such as wheel throwing or hand building.

Many of these books are more than a decade old and out of print, but they still are good resources for a comprehensive overview of clay, pottery, and ceramics.

TOP PICK:

The Workshop Guide to Ceramics

By Duncan Hooson and Anthony Quinn, published 2012

The top pick for a complete guide to clay is The Workshop Guide to Ceramics by Duncan Hooson and Anthony Quinn. Published by Barrons in 2012, the hardcover book has 320 pages full of information, technique, and full-color images. Divided into eight parts, the text covers everything from a beginner’s guide, forming techniques, glazing and firing, to thoughts on how to have a professional practice. It’s a remarkable book, both for the breadth of information covered and how it is accessible and useful for beginners and professionals alike. It’s also full of images that illustrate technique and lots of finished work by accomplished artists.

Written by artists and educators (Quinn is a professor at Central Saint Martins College of Art and Design in London and Hooson is a teacher in London) the book is the best laid out and comprehensive textbook on ceramics that I have seen. Handbuilding, mold making, wheel throwing, glazing, surface decoration, lathe turning, you name it—this book has info on it. Flip through the images above to see some inside shots of the book, including the table of contents.

As of this writing, the book appears to be out of print (like almost every book covered in this post) but it’s available used. This book is worth it.

Shop Hardcover version:

Note: There is also a newer, paperback option by the same authors from 2017 that appears to be the same book but with a different title called Ceramics: The Indispensable Guide.


Other options:

The following guides and textbooks are all great options for your studio too. Most of these books are out of print, but that means you can often find a great deal used. And the books are often full of great examples of artwork by a wide variety of potters, artists, and ceramic specialists.

The cover of the third edition of Working With Clay by Susan and Jan Peterson.

The cover of the third edition of Working With Clay by Susan and Jan Peterson.

Working With Clay

By Susan and Jan Peterson, most recently published in 2009.

Working With Clay is full of color images throughout the book.

Working With Clay is full of color images throughout the book.

Working With Clay is a concise, illustrated guidebook of everything you need to know to work with clay and ceramic. It includes chapters on hand building, wheel throwing, glazing, firing, ceramic history, and a lot more. Written by ceramics legend Susan Peterson and her daughter Jan, it is illustrated throughout with many color photos. Although it is more than 10 years old, it contains all the main information you will need to get started with clay, and it has a lot more that makes it useful for advanced students and educators. Designed as a textbook, it’s still available used for around $30 at the time of this post. The color pictures in this text are great and the spiral binding makes it easy to leave open to the page you may need for reference.

Working With Clay by Susan and Jan Peterson, most recent edition is 2009 but any editions will be helpful reference books.


Although it’s almost 20 years old, Make It In Clay is still one of the best concise and comprehensive guidebooks to the ceramic process.

Although it’s almost 20 years old, Make It In Clay is still one of the best concise and comprehensive guidebooks to the ceramic process.

Make It In Clay: A Beginner’s Guide to Ceramics

By Charlotte F. Speight and John Toki, most recent edition is 2001

An interior page spread from Make It In Clay.

An interior page spread from Make It In Clay.

Almost 20 years old, this is still one of the best options for a comprehensive but concise overview to all aspects of ceramics. Similar to Working With Clay, it can be found in an easy-to-use spiral binding. This book covers every aspect of clay and ceramics, and includes a lot of suggestions for projects to get started. The book is illustrated with just black and white photos, making it less visually dynamic than our top pick. But it has great info and although it is almost 20 years old, this is still a worthy addition to your ceramic library. The information in the book is clearly presented, easy to follow, and covers all the basics. I’ve seen used copies online for between $20 and $40, which is a great deal for the amount of info packed into this book.

Make it in Clay, by Charlotte F. Speight and John Toki, 2001


The cover of the fourth edition (2003) of The Craft and Art of Clay, a ceramic textbook by Susan and Jan Peterson.

The cover of the fourth edition (2003) of The Craft and Art of Clay, a ceramic textbook by Susan and Jan Peterson.

The Craft and Art of Clay

By Susan and Jan Peterson, multiple editions but most recent is fifth edition, 2012

An interior spread from the 4th edition of The Craft and Art of Clay.

An interior spread from the 4th edition of The Craft and Art of Clay.

This is one of the most comprehensive guidebook / textbook covering ceramics. One Amazon reviewer describes it as the “end all, be all” of ceramic books. It has plenty of information for beginners, including step-by-step instructions. But it goes so much deeper than Working With Clay, which is by the same mother-daughter team, including a serious amount of ceramic history, profiles of contemporary artists, chart after chart of technical information. Written as a textbook for college classes, this is the book you’ll want if you are super serious about ceramics. I have owned the 3rd edition since I started working with clay, and after all these years I’ll flip it open and find new information or a deeper understanding of something I’m researching, such as glaze materials or firing info.

The book is illustrated with a combination of color and black and white photographs. The book is out of print and though any edition is probably fine, I would look for a used copy of either the fourth (2003) or fifth (2012) edition. At the time of this post, used prices for these editions were around $20 to $80 depending the the edition and condition of these books. The 3rd edition (1999) is often under $10 used and is great too, it’s just missing a bit of the updated information.

The Craft and Art of Clay, by Susan and Jan Peterson, various editions.


Hands in Clay 1.jpg

Hands in Clay

by Charlotte F. Speight and John Toki, multiple editions, most recent is 2003

Hands in Clay is the other option if you are looking for a big, comprehensive ceramics textbook. Continuously updated since the 1970s, this book has everything you need to get started in clay or if you are looking for one big book that is a ceramic reference. Full of how-tos, project ideas, and information on ceramic history, it’s a great option. The book is illustrated with a combination of color and black and white images. Of particular interest is the images and info detailing how to make large scale ceramic sculptures.

At the time of this post, used copies of the fifth edition ranged from $25 to $50, and the fourth edition was available for under $10. It’s a good deal for a large book!

Hands in Clay by Charlotte F. Speight and John Toki

An interior spread from the fifth edition of Hands in Clay, 2003

An interior spread from the fifth edition of Hands in Clay, 2003


The Potter’s Dictionary of Material and Techniques

By Frank and Janet Hamer, sixth edition, 2015

Continuously updated for more than 20 years, this Ceramics Dictionary is a great resource for intermediate to advanced students and ceramic professionals. Arranged alphabetically, this is a well-researched and comprehensive resource. But the drawback of a dictionary versus a textbook, is that you need to know where to start, so if you are a beginner it’s best to start with one of the books listed above. But, this can be a fun book to just flip through and read an entry or two that catch your eye. Many potters and ceramists swear by this book and it’s a great addition to any ceramic studio or library.

The Potter’s Dictionary of Materials and Techniques, by Frank and Janet Hamer

The Potter’s Dictionary, sixth edition


The Ceramic’s Process: a Manual and Source of Inspiration for Ceramic Art and Design

By Anton Reijnders and the European Ceramic Work Centre

This 2005 book is an impressive overview of techniques, recipes, and working processes used at the European Ceramic Workcentre in the Netherlands. The EKWC is an international center where ceramic specialists help artists, designers, and architects realize their projects in clay and ceramics. Reijnders worked there for many years, and the book contains recipes, how-to guides, and lots of pictures. The recipes use European ingredients, which makes it a bit hard for someone working in the United States, but if you read it carefully you can translate the materials into something available at your local clay supplier in any country. The recipes are also on the more general side, so expect to do some testing to get things to work in your studio.

Ceramic Process.jpg

The Ceramic Process by Anton Reijnders

The best part of this book is the color photographs throughout. The EKWC has been a place where countless artists and designers have realized their projects, and this book documents much of that work from 1990 to 2005. There is probably no better guide to this period of large-scale ceramic sculpture in Europe, and for that alone, the book is worth it. There is also information on paper clay, large-scale plaster sculptures, and other adventurous approaches to clay, making this a useful resource for ceramic sculptors and designers.

Out of print, this hardcover book is often listed at $200 to $500 used. If you see a copy available for $150 or less, it’s probably worth it. Or see if you can find a copy at your local library. The book was around $60-80 when it was in print. But it is a unique book that does cover every part of working with clay.

The Ceramic Process by Anton Reijnders, 2005


Summary

This post has covered a variety of ceramic guidebooks and textbooks. Although so much information is available online, it can still be useful to have a book where the information is laid out thematically or by alphabetically order. Due to changes in publishing, many of these books are out of print. However, the information is still good and a reference book can be a vital resource in the studio.

For more posts on books and ideas, click here.

Do you have any favorite ceramic guidebooks? Let us know in the comments.


How To Mix a Ceramic Glaze From Scratch

 
A red iron oxide glaze in the process of being run through a Talisman Glaze Sieve.

A red iron oxide glaze in the process of being run through a Talisman Glaze Sieve.


This post is an overview of how to mix a ceramic glaze from dry ingredients, including the tools, techniques and procedures to get you started.

Whether you buy a pre-mixed dry glaze or weigh each ingredient, there are a lot of advantages to mixing your own glaze:

  • Save money: Mixing glazes in your studio is always cheaper, sometimes as much as 80 to 90 percent cheaper than bottled glaze.

  • Customize: Learn how to modify slips and glazes to suit your kiln and clay bodies.

  • Learn glaze chemistry: Even a bit of info can help you get the results you want.

A variety of our favorite glaze recipes are posted here, and there are lots of websites and books with glaze recipes. There are endless amounts of glaze recipes, so if you are new to this, just start with one basic one such as a glossy clear. There are also pre-mixed, dry glazes which are effective and still save some money over buying bottled glazes.

Keep reading for the complete how to instructions.


Table of Contents

  • Glaze Mixing Tools and Accessories

  • How To Mix Glazes From Scratch

  • Testing and Storing Glazes

  • Summary


Glaze Mixing Tools and Accessories

Here’s what you need to mix glaze in your studio:


How To Mix Glazes From Scratch

  1. Review recipe.

    Check to make sure you have enough of each ingredient. It can be helpful to calculate and write out the amount of each material, to be used as a checklist.

  2. Prepare work area

    Put on a dust mask, clean your scale and work area. Get your materials, buckets, and scoops together.

  3. Zero scale

    Place your measuring pan or bowl on the scale and turn it on. If needed, press the tare button so that the scale is zeroed out.

  4. Weigh ingredients

    Weigh each ingredient (this is where your checklist is handy) and put them in a dry bowl or bucket. After measuring all the ingredients, mix the dry ingredients together. Some glaze ingredients, such as bentonite, are prone to clumping so it is important to mix everything dry first.

  5. Add to water and mix

    Add the mixed glaze materials to water and mix until it is thick cream or buttermilk consistency. An electric drill with a proper mixing blade greatly speeds up this process. A large plastic scraper will dislodge material from the side of the bucket. Once all the dry ingredients have been mixed with water, you can remove your mask if desired.

    Note: it’s best to add glaze materials to water. If you add water to a bucket of dry materials, it’s hard to get everything in the bottom corners mixed.

  6. Sieve and homogenize

    Prepare another clean bucket with a sieve, preferably a fine 80 mesh sieve. Run the glaze through the sieve this first time, to break up any clumps. A brush can help push material through the sieve, or a Talisman Glaze Sieve is a tool made specifically for mixing glaze into 5 or 10 gallon buckets.

    Then, clean the bucket where you will be storing the glaze. Run the glaze through the sieve a second time into this clean bucket.

  7. Test glaze consistency

    Glazes are typically mixed to a specific gravity, which measures the amount of dissolved solids in the water. Usually glazes are around 1.50, which means 50 parts dissolved solids to 100 parts water. Keep records and mix the glaze to a consistency that works for you.

    Specific gravity can be measured with a specialized (but fragile) hydrometer, or you can use a graduated cylinder on your scale. With your cylinder zeroed out on the scale, pour in 100ml of the mixed glaze and check the weight. Add water as needed, and mix.

  8. Label and store

    Glaze containers and lids should be labeled with the name, temperature, and any other information that will help you. Laminated, waterproof labels are best but packing tape can also protect a label for some time.


Testing and Storing Glazes

Testing Glaze

It is helping to make a test tile of a glaze, on each clay body you use. Vertical test tiles such as tubes from an extruder are best, as they show how a glaze will “move” with gravity. Dip your test tile with one and two dips to show how different thicknesses of glaze affect the color.

Some studios choose to make a test tile with each batch of glaze. But if you are careful to mix the glaze accurately to a similar specific gravity, and your firings are repeatable, you should get roughly the same glaze results each time. There are no guarantees with glaze though. It is important to keep records, both in a glaze book and a kiln log, in order to get standardized results. But, glaze materials do change over time so as necessary you can make new test tiles.

Storing glazes

Glazes can be stored in sealed containers or buckets almost indefinitely. Most glaze ingredients are inorganic and will not rot. But some ingredients, such as bone ash, can cause some rotting smells. To avoid this, make sure the glaze is mixed with some frequency. If the odor persists, you can add a trace amount of copper to any glaze (even white glazes!) without affecting the color. Copper is an anti-fungal and can cut down or eliminate odor. Read our post on that here.

Remixing glaze

As they are used, glazes do lose some moisture to evaporation and bisqueware can suck extra water out of the glaze mix. It can be helpful to mix and then do a quick visual check of the glaze. If necessary, you can re-check the specific gravity and add water. If a glaze seems thick or is glopping onto your pieces, it’s definitely time to check it and probably add water.

In addition, when I mix glaze, I will usually run all the old and new glaze through a sieve. Small bits of bisque and other contaminants can fall into a glaze bucket. When I’m using it, I want to know what I’ve got in that bucket. It does take extra work but having a double-sieved, homogenized glaze will result more even glaze application and hopefully, better results.


Summary

This post has covered a basic overview of mixing glazes from scratch. It covered the tools, techniques, and a few helpful hints to mix and store glazes. If you can follow a recipe, you can mix glaze. There is an overwhelming amount of glaze info out there, but if you start with just one basic recipe and grow from there, you will be a glaze master in no time and you will be able to customize and mix glazes to suit your own needs.

If you are looking for more info on mixing glazes, the glaze books by John Britt are some of the best resources.

The Complete Guide to Mid-Range Glazes

Buy at Bookshop.org

Buy at Amazon

The Complete Guide to High-Fire Glazes

Buy at Bookshop.org

Buy at Amazon

Questions or comments? Let us know in the comments.


Tools for Home and Studio

There are many tools that are equally valuable at home or in the studio. Sometimes, it seems like most tools that are useful in a kitchen can also be put to use in the studio.

This post includes reviews of a few favorites that will hopefully give you some ideas for new tools to use, either at home or in the studio. What do you use in both the kitchen and studio? Please share in the comments.


Swedish Notched Rolling Pin

This notched, diamond-pattern wooden rolling pin or kruskavel can be used in the studio to roll out textured clay slabs. It’s especially useful for making test tiles. Or put it to use at home making crackers. It’s designed to make Swedish knaackebrods but the simple pattern looks great on a variety of baked goods.

Uses:

At home: roll out dough crackers, flatbreads, Swedish knaackebrods, or add notches to baked goods
In the studio: add the diamond texture to clay slabs and test tiles

Linden Sweden Deep Notched Rolling Pin

Swedish Notched Rolling Pin

Swedish Notched Rolling Pin


Patterned Wooden Rolling Pins

clay roller 2.jpg

This set has 10 wooden rolling pins with a variety of patterns. It’s is probably more useful in the studio than at home, but it can be used on crackers and flatbreads just as easily as clay slabs. These roller are relatively small, ranging from 3.5 to about 5 inches wide.

Uses:

At home: patterned crackers
In the studio: textured slabs, roll patterns on to thrown pots, create textured slabs to add to other pieces.

10-pack of textured clay rollers

10-pack of textured clay rollers

Set of 10 Wooden Pattern Rollers
This set is listed twice on amazon. Find it here or try this link.


Wooden Meat Tenderizer Mallet

wooden mallet.jpg

An all-wood meat tenderizer mallet is another texture tool for the studio, or a useful addition to your kitchen. Wood is less likely to stick to clay than metal, so this all-wood option is the way to go.

Uses:

At home: tenderizing steaks, fish, poultry, etc. Great for making flattened chicken breasts.
In the studio: similar to the diamond-pattern of the Swedish rolling pin, this is also a great tool for making patterns on individual test tiles

Double Side Heavyweight Wooden Meat Tenderizer Mallet


Round Cutters in Graduated Sizes

This set of circular cutters is another tool that is equally at home in the kitchen or studio. Great for biscuits or other round baking needs, it’s also perfect for making circles out of clay slabs. The simple design makes it easy to clean, and the container helps organize the pieces for storage.

There are also fluted circular cutters, which can add some nice patterns to your work. It’s best to stick with firm metal cutters, the softer plastic options are often not strong enough for the kitchen or studio.

Uses:
At home:
cut biscuits, bread, English muffins, fondant decoration
In the studio: cut circular slabs, trace circles

Nesting Round Metal Cutters Set
There are name brand and many generic versions of this type of tool. Pictured is the Kayaso version, but there are other options such as this or this 6 piece option from Wilton.

For a fluted option, try this 11-piece set from Jokumo, or a 6-piece set from Wilton.


Wooden Thread Spiral Rolling Pin

wood thread rolling pin.jpg

Another simple but useful tool, this wooden rolling pin will add texture to your baking or clay projects. All wood is great because it’s less likely to stick to clay.

Uses:

At home: add texture to cookies, dumplings, pastas
In the studio: add texture to slabs. Great for adding texture and then stretching

Spiral Threaded Wooden Rolling Pin


Silicone Mats for baking or studio use

The Amazon Basics silicone mat

The Amazon Basics silicone mat

A non-stick work surface is vital if you are baking or working with clay. Products like Silpats or silicone baking mats give you that flexibility and are a tool for the home or studio. It’s handy to have these around for working on craft projects, or handbuilding with clay.

If you are looking for ceramic-specific work mats, the Ceramic Shop in Philadelphia has a variety of options. Those are nice options, but a silicone baking mat is often cheaper, almost as stiff, and can be used in a variety of ways.

Amazon Basics Silicone Baking Mat


Green Bell G-1008 Nail Clippers

The Green Bell G-1008 Nail Clipper

The Green Bell G-1008 Nail Clipper

If you are cooking or working in the studio, long nails can get in the way. Nail clippers may seem like the most mundane thing, but upgrading to a pair of Green Bell clippers shows how just about any other clippers is not as good.

I discovered the Green Bell Clippers years ago via this rhapsodic review, and they truly are the best nail clippers I’ve ever used. Made in Japan, these clippers effortlessly cut nails with a perfect tension. They also have a built-in nail file and are constructed with a weight, finish, and somewhat hefty quality that is just a step above any other nail clipper. Sure, they are now about $21 but you’ll most likely never need another clipper.

Green Bell Nail Clippers
I recommend the Green Bell G-1008 at amazon. For a smaller, narrower option, try the Green Bell G-1205


GorillaPod Phone Tripod

GorillaPod GripTight Pro

GorillaPod GripTight Pro

A flexible phone tripod is a handy tool to have anywhere these days, but especially at home or in the studio. Need to set up your phone to read a recipe? Trying to capture the perfect selfie? Or maybe you’re getting into timelapse recording of your work? This is the perfect tool for that.

GorillaPod Mini

GorillaPod Mini

There are numerous knockoff options, many that will do a fine job, but I have been very happy with the original version of this product, the Joby GorillaPod. I frequently use the phone option, and I have the larger 3K kit that can hold my big DSLR camera. They do cost a bit more, but Joby products stand the test of time.

Currently, there are two options for phone holder. The pro-grade phone stand that retails for almost $60, and a newer mini option that is $15 or less. The pro-grade model gives you longer legs that will allow the tripod to grip unusual objects, such as a stick or pole. The smaller option is good for a simple tripod or to stand on an uneven surface, but I wouldn’t expect it to grip too tightly.

GripTight GorilliaPod Phone Stand / Tripod

What are the essential tools that work in your home or studio? Please share in the comments.