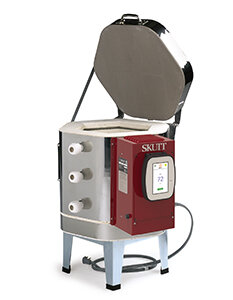
The Skutt KMT-614 Kiln Master Touchscreen Kiln, the top pick for a small at home electric kiln that can plug into a regular 120V outlet.
Originally published 2022. Last updated July 2026.
A small kiln or test kiln is a great addition to any studio. They allow you to quickly fire test tiles, small pieces, beads, jewelry, or doll parts. And the good news is that there are a variety of great options for test kilns that plug into a regular household 120V outlet on a 20 amp fuse, which means that you probably don’t need to rewire anything. (Although it is always recommended that you check with an electrician before installing an electric kiln.)
Test kilns are also a great addition to academic, teaching, or production studios because they fire hot and fast, allowing you to do tests or make small pieces without having to fill an entire large kiln. As with any kiln, safety is of utmost concern and test kilns should be kept in clean, fire-proof areas and be placed at least 12 inches from drywall, or anything flammable.
There are a lot of small kilns but most don’t go hotter than 2000 degrees, which is just enough for working with low-fire clay. This post will focus on kilns that can reach cone 6 or hotter, or around 2200 to 2350 F. The post includes kilns from Skutt, Olympic, Paragon, ConeArt, L&L and Cress that meet these specifications:
Fire on 120 V power with a 20 amp fuse (typically found in North America in households)
Can reach Cone 6 / 2250 F or hotter
Use a standard 3-prong household plug found in North America

The Skutt KM-614 is a supersized test kiln with an 11 x 11 x 13.5 inch tall kiln chamber, a standard Skutt controller, and can reach as high as cone 6.
TOP PICK: Skutt KM-614 or KMT-614
The Skutt KM-614 or KMT-614 models are more of a mini-kiln than just a test kiln, and either model is the top pick for a small test kiln because of it’s larger size and ability to reach cone 6.
The models are identical except the KM model has a push button controller and the KMT has a slightly more expensive touchscreen controller. This kiln runs on 115V and needs a 20 amp fuse (typically a standard fuse in a household breaker box), and measures 11 x 11 inches wide and 13.5 inches deep, for a 0.8 cubic foot kiln chamber. The kiln can fire to cone 6 or around 2250 F, and uses a standard plug. The kiln chamber is lined with three-inch-thick brick, and the outside dimensions are 29 x 28 inches by 28 inches high, with a weight of 88 pounds.
At 13.5 inches deep, this kiln really gives you a height option that is hard to find in a test kiln. The only drawback on this kiln is that it can’t go to cone 10, but otherwise it’s a great small kiln that will last for decades and comes with Skutt’s great reputation for build quality and support.
Skutt KM-614 pushbutton control
List Price: $2,250
Retail Price: Often available for around $2,000
Skutt KMT-614 touchscreen control
List Price: $2,740
Retail price: Often available for around $2,400
Runner Up: Paragon Caldera or Caldera XL

The Paragon Caldera is a square, top loading test kiln that can reach 2350 F.
The Paragon Caldera models are more of a standard small-size test kiln, but they are great for tests or small pieces. The Caldera measures 8 x 8 x 6.75 inches tall for a 0.25 cubic foot firing chamber, while the Caldera XL measures 7.5 x 7.5 x 9 inches tall for a 0.29 cubic foot firing chamber. The kilns fire on a standard 120 V plug and can reach cone 10 or 2350 F. These are great little kilns that just get the job done.
The Caldera is listed at $1,800 but can be found for about $1,650, and the Caldera XL is listed at $2,230 and can usually be found for around $2,00.
Table of Contents
Top Picks
Skutt tests kilns
Paragon test kilns
Olympic test kilns
Cress test kilns
L&L test kilns
ConeArt test kiln
Summary
If you are looking for more information on kilns, check out our guide to Skutt Pottery Kilns here.
Skutt Test Kilns

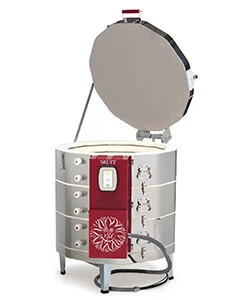
The Skutt FireBox 8x6 LT, a small test kiln rated to Cone 6 / 2250 F.
Skutt makes four kilns that plug into a standard 115/120V outlet, the two KM / KMT 614 models detailed above, the FireBox 8x6 LT, and the FireBox 8x4 LT. The FireBox models are 8 x 8 inches square and either 4.5 or 6.5 inches tall. The FireBox 8x6 is rated to Cone 6 / 2250 F, and the FireBox 8x4 is rated to Cone 10 / 2350. They also have an interesting model, the GlazeTech, that will most likely run on a household current, but you’ll need to double check your electricity and it uses a larger appliance NEMA 6-20 or 6-30 plug.
The FireBoxes are interesting kilns, but they are quite a bit smaller than the 614 model. With that in mind, I would go for the Skutt 614 unless a smaller kiln is all you have room for or need.
The Skutt 8x6 Firebox is listed at $1,490 and typically retails for around $1,275.

The Skutt KM-614 (detailed above) is the top pick for a small test kiln.
Paragon Test Kilns
Paragon makes numerous small and test kilns that plug into a regular 120 V outlet, but not all are suitable for temperatures above 2000 degrees. As detailed on the Paragon web site, only 4 of these small kilns are designed to fire to Cone 10 / 2350. Paragon also makes at least 6 kilns that will fire to low fire ceramic temperatures, or around Cone 1 / 2000 F. They also have a few small kilns that are a bit larger than a cubic foot, such as the Express 66-3 kiln, but these models require a different plug, breaker box, and power supply. As this review is focused on kilns that plug into a regular outlet, we’ll just cover the four kilns that meet that criteria and can reach Cone 6 or higher temperatures.

The Paragon Caldera test kiln.
The best Paragon option is the Caldera or Caldera XL. They fire hot—to cone 10 or 2350—and are 6.75 and 9 inches deep respectively, but they aren’t that wide, around 8 inches square. The Caldera measures just 0.25 and the taller XL is 0.29 cubic feet. But, if all you need is a small, dependable test kiln, they might be right for you.
Paragon also makes a cone 10 kilns that is smaller than the Caldera.

The Paragon Q11 is a small, front loading test kiln.
The Q11 is another interesting cone 10 model from Paragon. It is a front loader, with a chamber that measures 6 x 6 x 6.25 inches tall.
Listed at $1,500, you can typically find this kiln for around $1,350. Because it is quite small, it seems worth it to upgrade to the larger Caldera model or consider a kiln from a different manufacturer.
Olympic Test Kilns

The HotBox 89E is the largest of Olympic’s 120V test kilns that can reach cone 10, measuring 8 x 8 x 6.5 inches tall
Olympic makes 15 small kilns that plug into a 120V outlet.
> Seven of these kilns can reach cone 10 / 2350 F. These models range in size from a very small 0.11 cubic feet and top out at about 0.33 cubic feet. These include the five HotBox kilns, and the Doll E / Test E kiln and the 1214-120HE models.
> Four kilns can reach cone 6 / 2250 F and are a bit larger, ranging up to 0.58 cubic feet. These include the 129E, 129 FLE, and 139 FLE models that come as a top loader or a front “guillotine” door style.
> Two kilns can reach cone 4 / 2100 F. One is the 1214 Raku E and the other is the 1214-120E, which is most comparable in size to the top pick from Skutt, measuring 11.25 x 11.25 x 13.5 inches for a kiln chamber of 0.86 cubic feet, but this kiln is only rated to 2100 or cone 4, whereas the Skutt 614 is rated to Cone 6.
> One Olympic kiln is rated to Cone 04-03 / 2000 F, the interesting model called the Traveler 120 V.
For more info, visit the Olympic website.
Cress Test Kilns
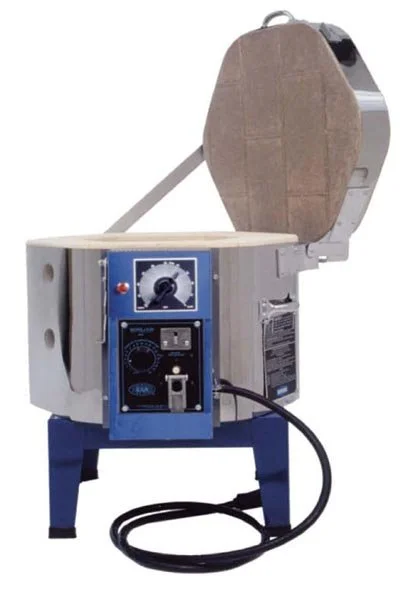
The Cress BT911T test kiln has an 11 inch diameter hexagonal chamber that is 9 inches deep, and is rated to cone 6 / 2250 F.
Cress makes a variety of kilns that are great build quality. Cress makes manual and digital/automatic kilns, but the only digital kiln that works with a standard 120V household plug is designed to top out at 2000 F.
For test kilns, there are six manual-fire options that reach at least cone 6. These manual kilns have a Dawson kiln sitter along with a limit timer, which allows you to safely fire the kiln with light supervision.
The three smallest models, the A4HKT, the A8HKT, and the BT511KT range in size from 0.11 cubic feet to 0.33 cubic feet, and will reach cone 10 / 2350 F. The largest of these volume wise is the A8HKT, which is 8 x 8 x 9 inches deep.

The Cress C11HT test kiln has an 11 x 11 x 11 kiln chamber, Dawson kiln sitter, and manual limit timer.
Cress also makes three slightly bigger models that will fire to cone 6 / 2250. These are the BT711H, the BT911T, and the C11HT. The BT711H and BT911T are 11” wide hexagons and are either 6.5 or 9 inches tall. The largest test kiln is the C11HT, which is an 11x11x11” cube that has a 0.77 cubic foot chamber.
For more info, visit the Cress website.
L&L Test Kilns
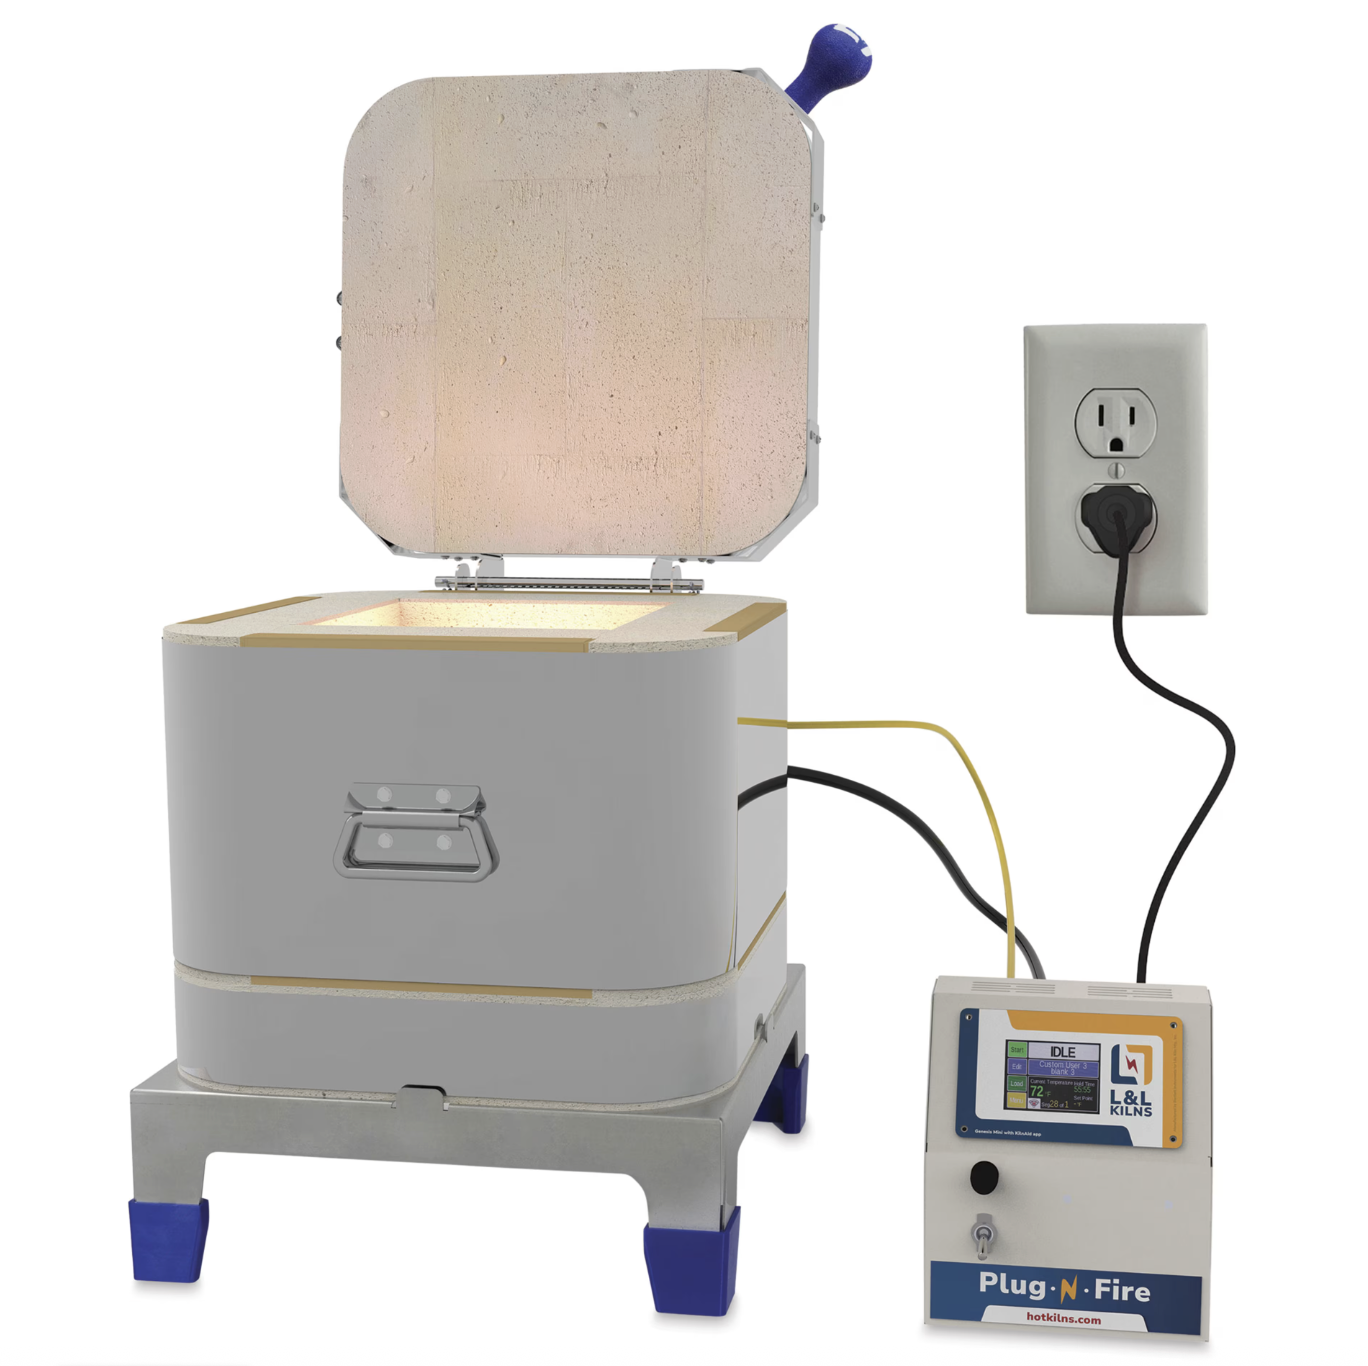
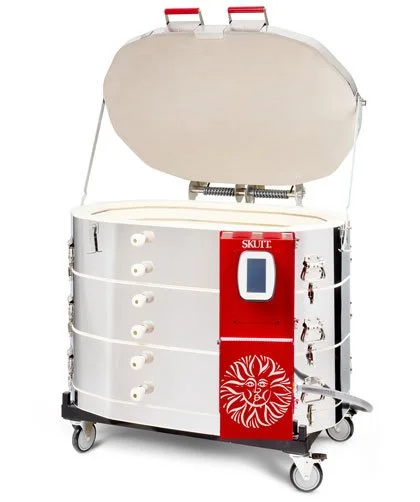
The L&L Plug-n-Fire Craft & Test Kiln uses a regular household plug and has an 8 x 8 x 9” kiln chamber.

The L&L Doll and Test kilns feature a hexagonal 0.5 cubic foot kiln chamber and a variety of power supplies to meet your needs.
L&L is loved by many for their kilns with hard ceramic element holders, protected thermocouple, and easy to access electrical panels and they bring all these features to the Plug-n-Fire Craft & Test Kiln and three DL11 Doll and Test Kiln models.
The Plug-n-Fire features and 8x8x9” kiln chamber, cone 10 temperature rating, and a uses a standard household plug. It is listed at $1,890.
These three DL11 models are the same, except for different electrical components. The kiln features a 0.5 cubic foot hexagonal chamber that is 11 inches wide by 9 inches deep, and each model is listed at $2,275.
> DL11-D is rated to cone 5 / 2170 F and uses a regular household plug on 120V.
> DLH11-D is rated to cone 6 / 2230 F and uses a regular household plug on 120V.
> DLH11-DX is rated to cone 10 / 2250 F but will need a 240 power supply and a socket for a NEMA 6-20 three prong plug. (Check with your electrician to see if this will work with your current box and fuses)
For more information on the DL Models, visit the L&L website.
Cone Art Test Kiln

The Tucker’s Cone Art doll / test kiln, pictured here with the Bartlett touchpad controller.
Tucker’s Cone Art makes four sizes of a small doll / test kiln, which are all rated to cone 10 or 2350 F. Like all Cone Art kilns, the kiln features 2 1/2” thick brick backed by 1” of insulation. Typically, this allows the Cone Art kilns to reach higher temperatures on a lower amperage. In the United States, Cone Art kilns are also sold as Bailey kilns, the main difference being the color of the electrical box. The smallest test kiln can be found at Baileys as the TC-119 Test Kiln.
The BX-119D Cone Art test kiln is available with a touchpad Bartlett controller, or with the upgraded Genesis touchscreen controller. Both models use as a standard 120V outlet. Although this kiln is smaller than the top pick from Skutt, the ability to fire hotter may make this the ideal kiln for your studio.
The other three Cone Art models, the BX 1813D, 1818D and 1822D, all use larger plugs than a regular household style, but might be ideal for your studio.
For more information, visit the Cone Art website or Baileys.
Summary
This post has covered a wide variety of small doll and test kilns that will work with a standard plug on 120V, and will fire to at least cone 6. The top pick is the KM-614 from Skutt for it’s ability to fire to cone 6 and larger size, especially the 13.5 inch height. But there are many other options to suit and studio.
Test kilns are ideal if you work small, such as dolls, beads, or small sculptures, or you need a kiln that you can fire without having to fill an entire large kiln, such as for tests. They make a great addition to any ceramic studio.
What is your favorite small kiln? Do you fire at home with a kiln like this? Let us know your experience in the comments.